Wednesday, October 7, 2015

Clean & Simple II

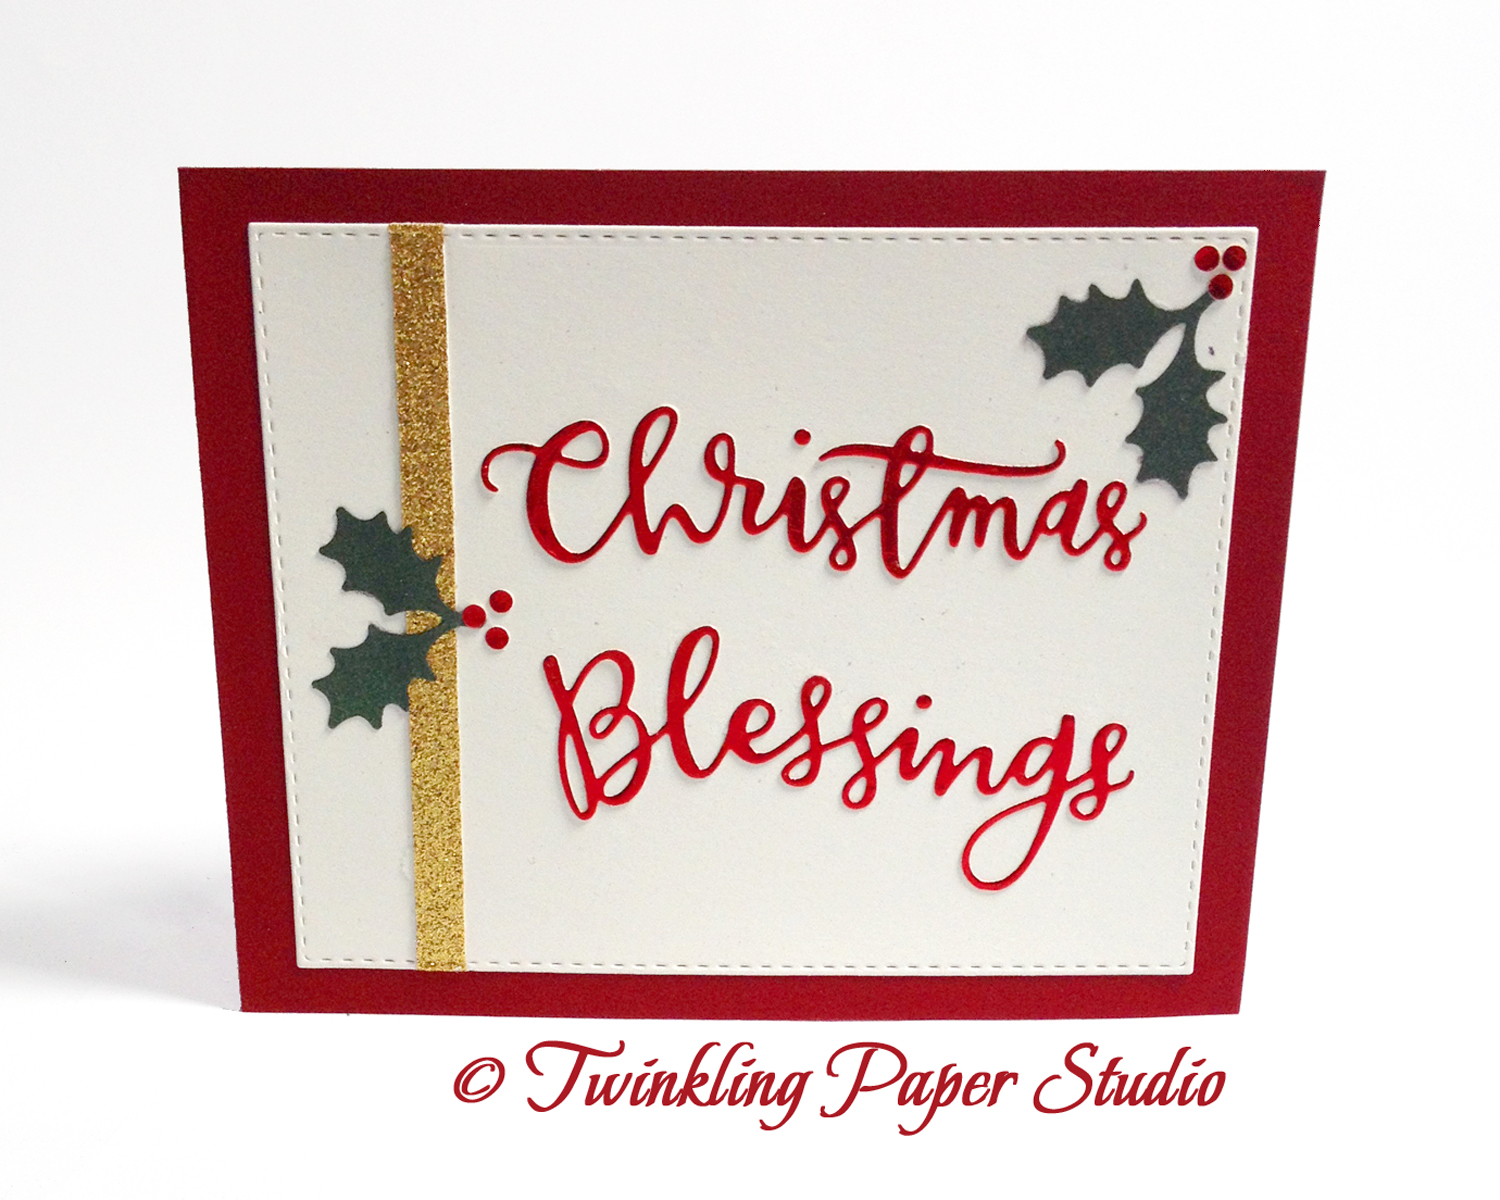
I don't normally enter more than one card in the Simon Says Stamp Weekly Challenges but I've been anxious to play with some of my Christmas Dies.  Since that is what the Wednesday Challenge is this week, it was a good afternoon to do a little work in my studio.

I'm still trying to figure out what design I am going to use for my Christmas cards this year.  It has to be pretty simple as I will need to mass produce them. Cards just don't get much simpler than this design.

For this card I started with a landscape, side folded Lipstick Red card base.  This is one of Simon Says Stamp's 100# card stocks.  They are thick and smooth and make beautiful cards.  I treated my card front with some Shimmer Spray made by Tsukineko and set it aside to dry while I designed the rest of it.  This spray gives your paper a sparkle but you can't get too heavy handed with it or it will warp your paper.  Two light coats is far better than one saturated coat.

Next I wanted just a bit of sparkle on my card so I attached a 1/4th inch strip of gold glittered card stock from a mat stack by Die Cuts With a View onto a piece of Bazzill Marshmallow 100# Card Stock.  After that I cut the panel with my ever faithful Simon Says Stamp Stitched Rectangle Die.  That extra little touch of stitching just adds that finishing touch to whatever project you are working on and I always prefer the finish of a die cut over a trimmer cut.


A new trimmer is on my wish list as the one I have no longer has replacement blades available.  I've also learned that if you buy titanium blades, they will last much longer than a regular trimmer blade.  I cut a lot of paper, so I'm totally going for that.  The one on my wish list is a Fiskars Wire Guide Premium Cut Line Trimmer and Simon's also has Titanium Blades available for purchase.

I cut the Christmas Blessings die cut in a Die Cuts With a View Red Foil Card Stock. The little dots on the I's are very tiny, so its important to keep track of them.  For the final element on my card panel, I cut some Holly & Berries with a Martha Stewart Punch that I've had for several years out of green shimmer card stock and red foil for the berries.  My goal was to accent the greeting without overwhelming it.  To me, nothing says "Christmas" quite like Holly & Berries does.

I assembled everything with Ranger Multi Medium Matte and attached the panel with Tombow Mono Permanent Adhesive.   I have two of these dispensers and several refills on hand.  This particular card would have been a good one for the ATG because I was not using watercolor card stock.  There are 36 yards of adhesive on one roll of that and the refills come in a 2-pack for $5.99 at Simon Says Stamp.  That is the most economical adhesive that I use but the size is pretty intimidating.

I have a few more works in progress on my desk so I'll have more cards for you soon. Thanks for stopping by and please feel free to leave me a comment.

A Couple of Clean and Simple Christmas Cards

This week's Simon Says Stamp Wednesday Challenge is Clean and Simple Christmas featuring Memory Box Products if you have any.  It so happens that I do.

In an effort to understand how each of my watercolor mediums move and work, I have lots of "experiments" laying on the table in my studio.  The one featured here used Eggplant and Night of Navy Stampin' Up Inks with some Tsukineko Shimmer Solution in it.  I was going for a night sky kind of look as far as color is concerned.  I actually wasn't too pleased with the colors initially. But in the interest of trying new techniques, I got out my Copic White Medium and spattered away with a few different sizes of Watercolor round brushes.  The largest one was a Size 6 Round and the smallest one was a Size 2 Script Brush. I'm pretty sure there are some Size 4 Round spatters as well.  I still didn't like what I had done, so I moved the pieces aside and went on with some other "experiments".  Eventually I moved on to other things in my home and came back the next day.  I immediately noticed that it had a snowy night sky look, so I've been saving these panels since this past spring to use on just such a card. Watercolor always looks different when it dries.

Using some American Crafts WOW Silver Glitter Paper, I cut this Memory Box Snowflake Love Pendant die.  I thought this would make such a nice holiday or winter-y card when I originally saw it.  For this card, I chose to let the snowflakes and the night sky conjure whatever images the recipient would associate with it and not use a greeting.  It could also be used in some reds for a Valentine's Day Card.  I have a water colored red and coral panel sitting on my work surface right now, waiting for me to get to it so I might have to give that suggestion a try sooner rather than later. *Grin*


I kept the rest of the card simple using my Simon Says Stamp Stitched Rectangles Dies for the background mat and the front panel.  I used three different Martha Stewart Snowflake Punches including the Arctic Snowflake.  I don't know what the names of the other two are.  I adhered everything (including the watercolor panel) using Ranger Multi Medium Matte.  Sometimes my tape runner will pop up after a bit and a liquid adhesive doesn't do that.  I chose not to use any dimensional adhesive so my card would stay nice and flat for mailing.  I added a few sequins in the purple and magenta colors for a fun little accent as well as a purple glitter paper heart for the die cut inlay.


My second card repeats all of the first card except that I used a Penny Black Tree of Joy Thin Metal Die cut in the same silver glitter paper.  I've left off any further embellishments for now but I'm thinking I will add a few sequins on there as well.

Both of my card bases are made from Bazzill Marshmallow Card Stock with a top fold.  The mats are cut from Stampin' Up Rich Razzleberry Card Stock.

The glitter paper is some that I've had for quite some time but one thing I would note is that this glitter paper has a kind of plastic or vinyl backing on it and it was not very well suited to die cuts that are this intricate.  I have others with a regular paper backing that have cut much better.  I had already cut it and didn't want to waste it, so I did not start over.  I did have to run the dies through several times back and forth to be able to pull the pieces without tearing it.  I really love the American Crafts Glitter Paper because it doesn't lose any of it's glitter all over my table top.  I just need to remember to use it on less fussy die cuts.

Comments are always appreciated so let me know what you think!

Monday, October 5, 2015

The Colors of Autumn

I'm so excited to get to do a fall card today for the Simon Says Stamp Monday Challenge.  Fall is by far my favorite season.   I love the vibrant colors against the crisp, cool temperatures that call for hot tea or hot chocolate.

For this card I started with a side folding ivory card base.  Next I took a piece of Canson 140# Watercolor Paper and did the background using the ink "smooshing" technique.  I inked up each color, one at a time on an acrylic block starting with yellow.  I don't think there is much yellow left visible, but I'm okay with that because I think the background is so beautiful.  After inking up my acrylic block, I gave it a spritz of Perfect Pearls Solution then turned the block over and "smooshed" it on to my watercolor paper.  Then I repeated the same process for coral and then my deepest red ink.  I walked away for a bit to let that dry so I could see what I had to work with or if I was going to use this background at all.  I always love the shimmer that a solution of Perfect Pearls gives to anything I am working on and this was no exception.


Next I used a stamp set called "Autumn Splendor" that I already had from Close To My Heart.  I selected four different leaf stamps and stamped them randomly one shape at a time over the color in Brilliance Archival Galaxy Gold Ink trying not to overlap too much.  This set of images has lots of detail in them, so they weren't suitable to watercolor but I love the veins that show all of the details in the gold ink against the vivid colors of the background.   I was surprised at how visible the leaves are!  

I set that aside for a little bit while I stamped the greeting and heat embossed it with Simon Says Stamp Embossing Powder in Ultra Fine Gold on Vellum.  This is another Close to My Heart Stamp Set called "Happy Autumn".  For the solid color background I used Calypso Coral cut with the Sunshine Layers Designer Die.  Next I cut the watercolor with a different die from the same set that has the rounded corners.  Since they are from the same set, the size is perfectly proportioned.


I wrapped the vellum around the smaller panel and adhered it to itself on the back side of that piece.  I punched a couple of maple leaves from the watercolor leftovers using a punch that I have had for a number of years and attached them with a foam square cut in half, corner to corner.


All in all, this was a pretty simple card and the background was very easy.  The hardest part for me was actually walking away to let the ink dry on the watercolor paper.  *Ü*

I was unable to get a good picture that really shows the shimmer in the paper.  I even treat my solid color paper so it has it too.  I always love to hear feedback on the cards I post so if you've got a minute, drop me a note here in the comment section. Thanks for looking!

Sunday, October 4, 2015

Fall is Here!

Today's card is one I've worked on for a few days.  It had to be just right for my oldest grandson who is getting married next weekend.  I really agonize over the cards I make for a particular occasion vs. just sending along a note card to someone.   I always want it to be just right for the person and the occasion.

For this card I started with a 5.5 x 8.5 card base scored and top folded at the 4.5 inches made from Bazzill Marshmallow which is a 100# card stock.  Next I stamped a Hero Arts Leafy Vines Stamp onto a panel of 4.25 x 5.5 inch Simon Says Stamp Audrey Blue with Versamark Ink and heat embossed it with Simon Says Stamp Ultra Fine Gold Detail Embossing Powder.  This is one of Simon Says Stamp's many exclusive 100# card stocks.  Being an Audrey Hepburn fan, I, of course, had to get this paper as well as a package of Surf Blue.  It was a bit tricky getting this image stamped and heat embossed but I did manage it on my first try which is always a good thing.  I put the cling stamp onto my largest acrylic block then flipped it over and took the paper to the stamp after I had inked it well. I like the Inkadinadoo Extra Large Block with the wavy sides to hold on to.   I was very careful not to move the paper but to press it down to make sure it was inked well. I carefully removed the paper from the stamp and put the embossing powder on it. Sometimes you can't tell how well you've done until you finish heat setting it. Next I cut that panel with the Simon Says Stamp Stitched Regtangles with the largest die in that set.


Next I used a sentiment from the Clearly Besotted Fairytale Ending Stamp Set for the greeting and heat embossed it in the same Simon Says Stamp Ultra Fine Gold Detail Embossing Powder.  I cut that with a smaller sized Stitched Rectangle then I cut a differently proportioned Memory Box Stitched Rectangle Die Set for the Gold Mat.  This gave me the look I was going for.  Once I had all of the components for the outside of the card done I started assembling it.  The largest panel was adhered using Tombow Mono Adhesive Permanent Tape Runner.   I used the same adhesive to attach the sentiment to the gold mat.  Next I used Foam Squares to pop that panel up just a bit on the card front.

One of the things I really like to do is to incorporate part of the invitation into the card I'm giving back.  In this case I cut the large heart from a part of the invitation that had their photo on it using the largest die from the Memory Box Stitched Hearts Die Set.  Next I used a stamp from the Simon Says Stamp Congratulations Set. This set was a part of the Simon Says Stamp May 2015 Card Kit.  I saw a card that one of my favorite Papercrafters, Debby Hughes of Lime Doodle Design, used way back when that card kit was announced and I loved the papers in that kit.  There's still a few of those kits left and the stamp set is also available separately.  I was glad I wasn't having to find something at the last minute.  I only had to figure out which part of those two stamp sets that I was using and where.

So for the inside of the card, I stamped the inside greeting in Versamark, and heat set using Simon's Gold Embossing Powder again.  Next I cut several hearts from the Simon Says Stamp Holiday Shapes - Hearts and Stars die and the Simon Says Stamp Large Holiday Shapes die set.  I like the variety of sizes offered in these two dies and I use them a lot!  If I have extras I just put them in my little container with the other bits of unused die cuts so they are ready if I need just a few when I'm working on cards.  I cut one set of the large die and three sets of the small die.  Those itty bitty little hearts are so cute!  I used Die Cuts with a View Glitzy Glitter Paper for the hearts and adhered them randomly using Ranger Multi Medium Matte.


This card was not difficult but I did give it a lot of thought as to how I wanted it to all come together.  I hope they appreciate the hand made card as much as I treasure the scrapbook that Lance made me when he was 7 years old.  It's always on display in our home.

I always appreciate it when my blog readers or lookers take time to comment, so thanks to those of you who have done it!

Wednesday, September 30, 2015

It's All About the Ombre

I worked on another Ombre card today in between my puppy girl, Holly, wanting to be on my lap for some snuggles and trying to get some of the mess off my desk.  I completely failed at the latter. Plus, I got some new white paper to photograph my cards on and it is much whiter than what I had before so that means fewer edits.  What I had before was from when I had a portrait studio and it was a much softer white to go with skin tones for high key photos. 

While this card front is ready, I haven't actually attached it to a card base yet. When I do, it'll likely be on Whisper White or Bazzill Card Shoppe Marshmallow.   Either of those work well with the not so stark white of my watercolor paper.  


I have a little trouble getting good pictures that accurately portray everything on the cards, but I did my best to get some closer shots and if I tell you what is there, you might just be able to see it. *Ü*


For this card, I started with a panel of Canson Water Color Paper.  When I was in class last week and the early part of this week, I played with some of my reinkers with some Perfect Pearls Solution mixed in.  I love the soft shimmer this gives to your paper, even with the water mixed in. My best guess is that the colors I used here are Bermuda Bay, Wild Wasabi and Tempting Turquoise.   You can make your Perfect Pearls Mist using a Mister Bottle with some Perfect Pearls Pigment Powder or you can just buy the ready made spray.  Another product you can use to achieve some sparkle and shimmer is Tsukineko Sheer Shimmer Spray.  These both use water in the spray, so you can't get too heavy handed with it.  It works best if you spray a light layer and then go back with another coat or two depending on your personal taste.   I love shimmer and sparkle so for me, it's usually three coats but it took me a while to go easier and in layers so my paper didn't warp too badly.  Next I embossed that using a We R Memory Keepers embossing folded in an arrow design.  I also used the Sheer Shimmer Spray after I cut this panel using the Simon Says Stamp Stitched Rectangles.  This size is the 2nd to largest frame.


The Scalloped Rectangle started as Soft Sky paper from Stampin' Up.  Using the Tim Holtz Mini Ink Blending Tool, I blended in SU! Bermuda Bay going in a circular motion and not paying too much attention to the center panel since I knew I was going to be covering it up.  I wanted the edges of this panel to be the dark part of the color.  The ink blending tool lets you do that without too heavy a concentration of whatever ink pad you are using.  It's a good idea to get a package of foam replacement pads and just have one for each color family of inks that you have.    There are so many blues that I have one for dark blues like navy, one for ocean blues and a 3rd one for light blues.  So far this is working for me.

Next I used Distress Marker in Peacock Feathers (with some Shabby Shutters for the leaves and stems) to watercolor my heat set Persian Motifs image.   Because my watercolor paper is not bright white, I use Simon Says Stamp Clear Embossing Powder.  You could also use any color you desire to be included in your final card front.  I haven't tried gold or silver yet, but it's on my to do list! Heat setting your image with embossing powder makes water coloring incredibly easy.  For the first layer of color on the flower, I used my water brush, but the 2nd and 3rd layers were blended using my Wink of Stella Clear Glitter Pen. That was another technique they used in my online card class.  Once I had the image colored in, I die cut it with the matching die.  This stamp set has three sizes and shapes of floral images and some separate leaves so you can build a scene if you like.

I like to attach the flowers with a small bit of foam adhesive in the center of the biggest part of the flower and then I used Ranger Multi-Medium Matte on all the other parts of the flower to stick them down. That makes it look a bit raised up/bigger in the center so it seems a little more realistic and dimensional.  If I don't have smaller squares on hand, I just cut a big one in half or in quarters.


This butterfly die is one made by Impression Obsession and is a two piece die set. None of the stores I am affiliated with carry this die.  It was purchased at this year's local CK Scrapbook Convention.  Mine has a 3-inch wing span if you want to compare the sizes. 

I cut the butterfly's body with some paper scraps and the wings from vellum. Bazzill makes a really nice 40# vellum.  I like to use an adhesive down just the center of the body to attach the vellum layer.  I used Ranger Multi Medium Matte and it dried clear with no traces of adhesive showing either through the vellum or oozing out from the sides of the body.  I tried a different liquid adhesive first and that one was not very successful.  Once I had that adhered, I used my Wink of Stella Clear Glitter Brush Pen on the vellum layer and the base layer where the cut outs are.  If you haven't tried that product, I highly recommend it.  It's made by Zig and has a real brush tip just like the Zig Clean Color Markers.  I also use a dimensional adhesive to attach the butterfly to the panel in just the front center of the body.  This gives it a bit of lift up front in a natural looking way.  Next I put a little bit of Multi Medium Matte on each end of the wing and at the "tail" of the body.  I never attach the wings all the way to the body because I want to make it seem as if it just landed on the flower.  Even though it goes down in the mail, it pops back up a bit when the recipient opens it so it keeps that effect.  


Now I confess, I had to put my ink pad carousel on the card for a few minutes to get the flower stuck down because watercolor paper is so thick and heavy that it kept wanting to pop off.  That did the trick for me.  It was the heaviest thing in my line of sight so I figured it would work.  I added just a few Peacock colored sequins from the Rhythm & Blues Collection for the final touch. 

I also want to say that the Ranger Multi Medium Matte is incredible stuff.  It really does dry to a matte finish and becomes virtually invisible.  I could not understand why everyone loved that stuff so much when I started making cards. I mean, its only glue after all (LOL).  Well I have used it on some difficult to adhere things with fantastic results but the clincher here for me was the way it disappeared under the vellum when it dried.  I'm totally sold.  Thankfully, I have a couple of bottles on hand since they are not very big.  I'm always surprised at how little it takes for great sticking power.  Its also great to use for sequins or other embellishments you might want to add to your projects.  You do need to give it a minute to dry.  After that, you are good to go.  Do yourself a favor though and get some Fineline Applicator Tips.  These caps will fit right on your Ranger Glossy Accents and Ranger Multi Medium Matte and have a built in Cap/Wire system to keep it from clogging.  I have the 18 gauge and the 20 gauge but I find the 20 gauge is too small for me.  

I hope you enjoyed this card.  I'll be back soon with another project.  

Tuesday, September 29, 2015

Simon Says Stamp - Monday Challenge

The Simon Says Monday Challenge for this week is Ombre.  Ombre is a french word for color with a shaded tonal value, such as from light to dark or dark to light.  Since I've been working with watercolors for the past week, I stayed with that medium for this challenge.

I started with a panel of watercolor card stock.  Using 2 reinkers in Wild Wasabi and Tempting Turquoise I put one drop of each on an acrylic block and mixed it with a solution of Perfect Pearls to get this color.  I decided to do my Ombre in a slightly different way than you usually see it.  I went from light to dark to light again going in layers of watercolor so that it would get darker just where I intended it to.


Once my paint was dry, I used a Jennifer McGuire trick and put Versamark all over the whole panel then heat set it using Judikins Iridescent Sparkle Embossing Powder then cut it with one of my favorites, the Stitched Rectangles from Simon Says Stamp.  This panel was cut with the second to the largest size.  I cut three of the Mama Elephant "thanks" dies and glued them one on top of the other for a thicker embellishment.  Again, I put Versamark over the whole die cut and heat set it using the same Iridescent Sparkle Embossing Powder.  This makes it very dimensional so I could go ahead and attach to the top panel using Ranger Multi Medium Matte.

Next I cut a piece of fun foam slightly smaller than the Ombre panel and adhered it using my ATG gun.  ATG is a super strong adhesive, but there is no room for error so it always makes me a bit nervous.  You cannot lift it up and move it the way you can other types of adhesive.  But you need a strong adhesive when working with Watercolor Card Stock because of the 140# weight and usually a little warping from the water.  After that, I cut the largest Stitched Rectangle in Simon Says Stamp Mint Green Cardstock and attached all of that onto the panel using foam tape. The layers of foam really make it thicker and more dimensional. I'm sure extra postage will be required.


I used one of the floral die cuts from the class I took last week from an Altenew Stamp and Coordinating Die Set, and adhered it using dimensional foam squares.  This particular flower was colored using Mermaid Lagoon Distress Marker with a water brush.  I used Shabby Shutters on the leaves and stem.  

That finishes up this card but I might be back later with another post.  I have a special wedding card to make if I can ever get my idea fully formed.

Monday, September 28, 2015

Comparing Mediums

I never, ever thought I would say that water coloring relaxes me.  Something about doing it just seems to soothe my soul.  I am so glad I took the Online Card Class - Watercolor for Card Makers, Exploring Mediums.  I mean, who knew? While I am not water coloring freehand, I am very happy with the looks I've been able to achieve.  The class I took is specifically for card makers and it was well worth it.

This little beauty is going out in the morning mail along with a couple of others I've made.  I used a 4 x 11 Whisper White Card Base with a top fold at 5.5 inches.  The largest blue panel is Simon Says Stamp Exclusive Card Stock in Island Blue. The center panel is SU! Tempting Turquoise. Then I stamped this flower on my 140# watercolor paper and heat set it using Simon Says Stamp Clear Embossing Powder.   Once the image had set, I could paint it with my Mermaid Lagoon and Shabby Shutters Distress Markers  I worked quickly with lots of water to get the background watercolored in a super soft & pleasing way. Once that was done, I could cut the top panel with the die I wanted to use and assemble my card.  


In order to be able to give a fair comparison of the different mediums, I stamped and heat embossed several of the same images on the same exact watercolor paper to see how they compared to each other.  The picture below isn't the best, but you get the idea.

So starting at the top left, the two watercolor backgrounds were achieved with Kuretake Gansai Tambi (traditional Japanese Watercolors).  It is very hard for me to be patient and let the water and color do their thing, but I did not speed that up by using a heat tool this time.  The blue/green background was achieved using #58 - Evergreen and #63 - Persian Blue.  This is at least 3 layers of color.  Maybe more, but I wasn't counting, lol.  For the pink/coral background, I used (surprisingly) #34 - Dark Pink with a whole lot of water and #31 - Scarlet Red also with lots of water.  I was able to determine what colors I would need because I swatched them.  The die cuts are just laying on top of these as I don't know when I will use them.  I keep a Ziploc baggie of things I have stamped, cut or colored for use later if I don't use them when I initially start to. Sometimes my color comes out differently than I think it will and I decide it doesn't match well enough.  So if it doesn't match at first, I just save it for another time.


The top left flower was colored using Tim Holtz Distress Marker in Mermaid Lagoon.  I love that color so much. The  top center flowers are colored in Worn Lipstick Distress Marker.

The top right flowers were colored using Water Color Crayon (a water soluble Oil Pastel *I think*) in some Regal Rose and Eggplant scribbled on to an acrylic block with some water mixed into it.  From there, you pick it up with your brush and move it to the "canvas".  The watercolor crayons were my least favorite type of water color, but I can use them for backgrounds pretty easily and they cover a lot of ground quickly.

The middle row blue floral was painted with Twinkling H2O's in Sky Blue and Forest Green with a water brush.  I have had my H20's for at least 10 years if not longer. It was a lot of fun to get them out and rediscover them today.  I have several very bright and bold colors as well as some iridescent colors.  I had forgotten how beautiful they are.  They already have that pearly shimmer, so I did not need to use Perfect Pearls.  Let's face it, if I made it, then it is probably going to have some shimmer in it somewhere!  The only thing I don't make that way is cards for guys.

The center row pinkish color flower is colored with Prima Watercolor Pencils. While these were much easier to use than I thought they would be, I still prefer the high translucence of  the distress markers over every other type or medium I have tried.  The Twinkling H20's come in a close second.  Simon Says Stamp has a great selection of these if you're interested in trying them.  The Watercolor Pencils do have an advantage in one way.  Once the "paint" is dry, it forms a sort of waxy finish over the top that helps to protect it somewhat from stray water drops or mist.

The bottom right and left flowers were colored with Kuretake Gansai Tambi Watercolors while I did use Tumbled Glass Distress Marker for the soft blue sky. The bottom center image was colored completely with Distress Markers.  I have noticed that I'm also getting significantly faster at that method as well. Practice helps for sure!

I used Canson 140# Cold Pressed Watercolor Paper for all of these flowers. I absolutely love how thick and crisp it makes the die cuts. This Altenew Persian Motifs is my first set of stamps and coordinating dies that I have purchased in that brand.  I will definitely buy again.  The quality is fantastic.

Isn't sending cards in the mail just the best feeling?  The recipients always love that you have made them a card.  Fun mail in the mailbox is not a very common thing and I know people really enjoy receiving a card.

I'll be back soon with more information and comparisons.  Class wraps up on Wednesday and I'm still on the hunt for the perfect Christmas Card too.  So I'll have lots more to show you in a day or two.

Saturday, September 26, 2015

Class Practice Continues

I'm doing a whole lot of watercolor practice right now before class wraps up next week.  Some projects I feel hugely successful with and others not so much. Ninety-Nine percent of my card recipients are female so flower images are always good for those.

This image was colored using traditional Kuretake Gansai Tambi Watercolor in #36 - Wine Red, and #58 - Evergreen with a Perfect Pearls Solution and some clean water.  I make my own solution with Perfect Pearls Pigment Powder and some water in a little sprayer bottle that came from Stampin' Up!.  You can buy Perfect Pearls Solution already made up and in a spray bottle.  I used the tiniest amount of #63 - Persian Blue, along with a VERY watered down bit of the Red Wine to achieve the super soft background.  One thing I have really learned this week is to walk away and let it dry.  The colors really come to life when they have a chance to dry.  Being a control freak, watercolor is very hard for me.  I have a hard time letting the water and the pigment do their thing.  This class has been so worth it to me for the the sheer amount of practice I'm getting.  I'm able to achieve the looks I desire for card making.  Even though I know people won't criticize a card they get in the mail, I still want my cards to be as nice as possible.


I love Altenew Stamps for the lined images they design.  They also have matching dies for many of their floral images.  This particular set is call Persian Motifs and I have the matching dies although I haven't used them yet.  The Henna Elements set is very nice as well as Peony Scrolls.  The images stamp super clean also with a thin line rather than a thicker one which is great for the "Emboss then Watercolor " technique.   Some people like bright white embossing powder for this technique but I like using Simon Says Stamp Clear Embossing Powder so that the embossing will be the same color as my watercolor paper.  In case I forgot to mention it before, the heat embossing helps the watercolor stay in the image and not go venturing outside of that line.

You all should be so proud of me because I got my Gansai Tambi Watercolors swatched!  I love this set so much now that I have had a chance to play with it following instruction.  Simon Says Stamp has this set available in 12, 18, 24 & 36 color sets.  Being Japanese Watercolors, they are extremely high quality.


I have about three different types of watercolor card stock at this time, but this one uses Canson Watercolor Paper.  It is 140# and cold pressed.  I haven't seen hot pressed paper at any of my local stores.  The difference is that hot pressed watercolor paper is very smooth.  I prefer to use the smooth side to my regular paper but you can also use the more textured side.  It just depends on the look you are going for.  Simon Says Stamp carries a wide variety of Professional Grade Arches Hot & Cold Pressed Watercolor Paper.  It's fancier than I need just for cards but I like to know where I can get it should I desire to experiment further, *wink*.

This card uses a white card base cut at 5.25 x 8.5 inches and top scored at 4.25 inches.   I used the WPLUS9 Sunshine Layers Die Set for the scalloped panel and the interior panel as well.  The burgundy is some Bazzill Mulberry which is a 100# weight.  I looked through my sentiment dies, but I didn't feel like any of them were a good fit on this card so I left it off this time.  I'm sending this card to my sweet Mother-In-Law who is at an assisted living facility.  She always loved cards when she was still able to be home so I think she enjoys the ones I make and send off to her.


Friday, September 25, 2015

Water Color for Card Makers - Day 3

Yesterday was Day #3 of my class.  We've done Watercolor Markers, Watercolor Pencils, Traditional Watercolor and Watercolor Crayons.  We'll have a wrap up day next week so I have time to practice techniques before then.


I did finish this super simple card from the Elephant I painted yesterday plus I have a few others assembled and will have more before Wrap Up day next week. This elephant was painted with traditional watercolor and I finished off the card with some "paint" spatters by mixing the color with a #2 Script Brush and tapping it off on to my background.  The script brush works really well for this because it has long bristles.  To keep it off the elephant, I used a mask cut from Post-It Tape.


I have a gorgeous card I am making out of this painted panel.  The stamp set is Persian Motifs from Altenew.  The photograph was taken before I did any work on the background.  Altenew has several sets of stamps that are line images for painting or coloring, so I have a few sets put on my wish list.  They also have the coordinating dies which is really nice.


This morning I sat down to try a couple of techniques from Wednesday's class which use Watercolor Pencils and a Wink of Stella Brush Pen.  This image was completed using Distress Markers in Spun Sugar for the cheek and ears with Pumice Stone for the Elephant's body.  I also have a floral image that I colored with Distress Markers and Perfect Pearls Solution and I hope to get a card made in a day or two.

For class on Day #3, I used my watercolor crayons to create a soft, striped wash of color, so I wanted to use that with Miss Ellie here.  That was a super quick way to create a background for a card and I'm pretty sure I will use it again and again. You simply color across the background in the color or colors of your choice and then apply water using a wide brush.  Mine is a traditional paint brush that has a chisel tip and is 3/4 inch wide.  There's a Tim Holtz Wide Water Brush available at Simon's or you can pick one up at a local arts and crafts store.  It took much longer for that background to dry than it did to create it.

Once my image was dry, I cut it in a circle using the Simon Says Stamp Stitched Circles Die.  Next came a layer of pink cut with Simon Says Stamp Stitched Squares and then I cut the striped panel with the next size up Stitched Square. My top folding card base is made from SU! Pink Pirouette.

I want to show you this card with the background painted in on the oval panel.  I used the same shade of pink and green that I used for the flower to do the soft background.  I love that it uses the same colors in softer tones.  This card is not quite finished as I need a greeting or sentiment on it.  But the hardest part is done.


For me, heat embossing the images with clear embossing powder is a total winner.  It helps you to "stay in the lines" to keep your image really clean.  I love that I learned how to make these beautiful watercolor backgrounds.

I'll be doing more practice with the techniques I learned this week but I wanted to go ahead and wrap up this post before it gets any longer.  *Wink*

Wednesday, September 23, 2015

Day 2 Results


Today I have Part II of a post about the Watercolor for Card Makers class I'm in this week.  There's a lot of "homework" so to speak with this class.  After all, you can't expect perfection if you don't practice.

So far, I have not found the traditional watercolors to be nearly as transparent as Distress Markers and Water Based Inks, but I haven't tried nearly all of them. I'm simply trying to learn to use what I already have on hand.  Since I am not doing Fine Art Paintings, I think the ones I currently have will be more than adequate. Again, these are my observations and opinions only.  Everyone needs to use what works for them.  I feel like traditional watercolors are just a bit milky and I prefer the transparent color of water based inks and distress markers.

I think Sakura Koi Tube Watercolors might be a good option to try, but I don't have any plans to purchase those.  I'm fine with the options I already have.  A method not explored so far in this class is using water based re-inkers to paint with.  I have a few of these around in some of my more used colors like bright pink, some sea blues, a leafy green, a purple and a coral.  To use these, just touch the dropper from a re-inker to your acrylic block and add a mist or some drops of water to dilute it to the strength of color you want.   These are completely transparent.  You can also use a solution of perfect pearls to add water and shimmer to the color and or to your card stock.  I've also found that by using my reinkers, the color is in a shade I already like vs. a traditional pallet where I have to mix my own color or I have several colors that haven't been used at all.  Since I don't come from an art background, mixing colors isn't as easy as it might seem.  I seldom get the color I was going for, but watercolor is very inexpensive, so I haven't lost more than a penny or two.

Today's class used more traditional water colors and some that I was only made aware of fairly recently.  I have a traditional watercolor set like the ones we used in grade school that is made by Loew Cornell.  There are 36 different little cakes of color and you can always mix your own colors if you're in to that sort of thing. I am not, but I did mix some greens today. This set contained a purple, so that is what I went for today!  I haven't swatched my watercolors yet, but I may consider doing this once class is completed.

Peerless Watercolors are completely new to me in the past month or two.  These look a lot like paint chips but there's only one color to a small sheet.  Most people swatch these and cut a 1 x 1 inch square of that color with the swatch for reference. When they run out of that color, they just cut another 1 inch square and put it in their swatch book.   The color is extremely highly concentrated and activates instantaneously with a touch of a damp brush or a water brush.  Just touching your damp brush to the "paint chip", you can take it directly to your watercolor paper and begin painting.  You might want to consider a more permanent paint pallet for tube watercolors so you can mix your own colors.  I use the same thing Kristina Werner does which is a laminated sheet of white card stock.  Mine is about 5 x 8 inches which is good for the number of colors I normally use and you can get a really accurate picture of the color when it's on the white background.  Mine has really thick lamination on it so I can run it under water to clean it off.   If you could see how messy my studio is right now, you would know that I need sturdy because I have a tendency to push things aside when I am in the middle of a project.

There are things like watercolor cube trays with lids for anyone working on large scale items who need the same paint color through a work of art or who need to store or transport watercolor without it dripping everywhere. I seriously had no idea all of these accouterments existed!  My grandmother taught herself to watercolor with the 99¢ crayola variety watercolors several (15 or 20) years ago. They didn't have much money, so that's what she used. Her grandmother was a semi-famous artist from Tulsa and it was something she wanted to learn so she did.


I have traditional watercolors in two different kinds (found here and here), Distress Markers, Watercolor Pencils and SU! Watercolor Wonder Crayons which aren't even available anymore.  Simon Says Stamp has a set of 15 available here that includes a brush.  As always, you can also use a Water Brush.

I have a few traditional brushes (Size 3, 4, 6 & 9 round) that mostly came in this set from Ranger that are fine quality for the things I am doing.  I have just a couple of others including a size 2 script brush and one that is 3/4 of an inch wide for simple color stripes or washes.   I tried both and for me, I think the Water Brush was easier with less drying time.

It's been so much fun this week to get to use supplies that I already have but didn't necessarily know how to use. I've learned so many techniques.  I also learned that water color is far more about the impression of light, shadow and texture than about actually being able to draw well. For me, this class is a total winner.  

I wanted to take a photo mid-process so that you could see my board that I tape watercolor paper onto, and how truly small an amount of color it takes for watercolor.  Dawn Woleslagle, owner of WPLUS9, did a vintage storybook painting with the Unforgettable set that she designed and I have wanted to imitate it since then. I used traditional Kuretake Gansai Tambi watercolors for this.  For the gray of the elephant and the ground around him, I used #20-Black with a whole lot of water. For the pink of the cheeks and inside the ears I used #32-Red.  For the balloon I mixed the #50-Pale Aqua with a hint of #63-Persian Blue.  Just four colors in total.  The nice thing about this set is that you can remove the little pans of color to keep only what you are using near you.  The rest of them can stay out of the way.  The colors are highly concentrated pigments so I'm pretty sure I have enough paint here to last for the rest of my life and then some!


For this card, I stamped my images in SU! Smoky Slate and heat embossed in Simon Says Stamp Clear Embossing Powder.  You have to work very quickly to be able to get any embossing powder on the super fast drying ink, but I did manage.  That process makes watercolor simple for anyone, not just me.  It helps keep the water where it should be and doesn't let it creep beyond the outline of the image.  For me and watercolor to get along, this is a must do step!  It also helps to choose an image that will be simple to paint or color.  I have never really appreciated line images before now and I can't wait to check my stash to see other stamps that I can use.

I haven't completed a card yet, but I did use my Wink of Stella Glitter Brush Pen on the balloon. Today's class used Watercolor Pencils with Wink of Stella to color the images. I haven't tried that yet, but it's on my list to try this week.


There are still several mediums that haven't been explored in this class such as Brushos, Color Crystals, Dr. Ph. Martins Liquid Watercolors and I'm sure there are others that I've never heard of yet. If I haven't talked about it or mentioned it here, then I am not aware of it yet.  I'm a card maker rather than an artist so I don't really need more options.

I had another class today so I'll be back with more insights and observations in my next blog post.

Tuesday, September 22, 2015

Online Card Class - Watercolor for Card Makers

This is going to be a multi-part post! I'm not sure yet how many parts it's going to be.  When I started, I was planning to do only one post but it's too long and detailed for that.  Hopefully the others won't be quite as long.

More than a month ago, I signed up to take on Online Card Class which would be exploring watercolor mediums.  This class is taught by a few of my favorite papercrafters in the industry, including my absolute favorite, Jennifer McGuire.   I never knew there were so many ways and supplies to watercolor!  I'm going to get into a few of them with today's post.

These observations are from my practice after the classes.  By now, I have completed two of them.  Let me preface everything by saying that I do not have any kind of art background.  In fact, I never took art classes in school because I was never considered to be artistic in the very least.  So these thoughts come from a true novice.

There are so many mediums for watercolor that I never even knew or thought about.  Yesterday's class used Water Based Markers.  Who knew there were so many watercolor markers out there?  Not me although in the last 6 months, I had discovered Distress Markers which are quickly becoming my favorite because of their transparent color and ease of use.  A couple other types that were explored are ZIG Clean Color Real Brush Markers which actually have a real brush tip, Spectrum Aqua  and Tombow Markers.  The ZIG Clean Color Brushes are available in multi-packs of up to 60 as well as individually.  There are about 80 colors in all but so far they don't have a complete set available.  The same is true of Distress Markers. The Tombow and Spectrum Aqua Markers are sold in groups of colors.  The were no requirements to purchase anything for the class and we were encouraged to use what we already had on hand.  For me, that was Tim Holtz Distress Markers.  Any water based markers work for this technique although Tim Holtz Distress Inks seem to work particularly well. They are made to activate and reactivate with water so they are a great choice for watercolor. Copic Markers are alcohol based and do not work for this technique.

Earlier this summer, I purchased a set of 12 Tim Holtz Distress Markers using a coupon at an area Arts & Crafts kind of store.  I wasn't sure I would like them, so I didn't want to get too many or invest too much money to begin with.  I'm fairly certain the group I purchased were a "Vintage" collection rather than "Brights". This would be pretty consistent with my style.

I had originally purchased (several years ago) some 90# watercolor paper.  For how much water these techniques use, that paper is not heavy enough and it does pill after a kind of medium amount of brushwork.  It would be fine for simple color washes with no detailing.  I was, of course, initially trying to save money and really didn't understand why hot or cold pressed and why heavier might be better.  Part of my class was a video about the different types of paper and why you would choose one over the other so I had already gotten some 140# watercolor card stock.  For practice and simple color washes, the 90# is okay. There are other differences as well including how white or bright the watercolor paper is.  A lot of people seem to like Ranger because it is a fairly bright white.  I haven't tried very many, so you'll have to select what you personally like. Another thing to think about is the texture of the paper.  I thought I would like the rough side of watercolor paper for the texture it gives, but it turns out that I much prefer the smooth side for the techniques I use.

I want to talk a little about Distress Inks here.  These inks are formulated to work with water just like any other water based inks or markers. That makes them particularly well suited to use for watercolor methods and techniques.   I've done other posts where I talk about a few of the techniques.  I'm sure there will be many in my future as well.  Overall, I think Distress Inks tend to be a more "watered down" or "faded" color so it takes less time to get to a proper dilution of the color you were looking for than a traditional watercolor marker. You might have the ink pads and not the markers or vice-versa.  In my case, I have 5 of the ink pads from a class I did years ago and 15 or so markers.  If you only have the ink pads, you can "stamp" some color directly onto an acrylic block or your craft mat, then add water to get a soft color wash.  You can apply that using a traditional paint brush or a water brush.  I actually tried both ways during yesterday's class but ultimately went with the regular paint brush so that  I could control the amount of water.  A water brush will release a very slow but steady stream of water for you.  Go ahead and spend a little extra for a good brush that has a valve in it so it doesn't suck dirty water into itself; you'll be glad you did!

One of the things I like best about this class is the fact that I can produce consistent results.  Previously, it was a trial and error process to find what worked and then I had to actually remember what I had tried so I could replicate it.  This class teaches specific techniques to use with each type of medium.  A big factor in being successful is working on a very small area at a time.  I'm not going to go into a detailed description of each thing I did to make my cards. There are lots of "how to" videos already out there.  I'm just going to share whichever technique and medium I used and leave you to try what you want or what works for you.  We're all better when we do that versus someone saying it must be done "this way only".   Part of the reason that I liked this particular class is that I already had some form of each medium we will be using for the class and I wasn't required to purchase anything new.  That's always a winner for me.

For my card, I stamped my image in Versamark Ink and heat it set using Simon Says Stamp Clear Extra Fine Embossing Powder.  I could have used White or any other color of embossing powder, but clear makes it the exact color of my paper which can be different from brand to brand.  You can do whichever you like.  After that, I taped my stamped image to a small acrylic cutting board that has a handle so it can be easily moved between layers of color or drying time.   Next I gave my watercolor paper an all over mist with plain water and a wide paint brush to work it into the paper. This Water Brush from Tim Holtz is a nice one.  I feel that this helps keep the color from being too deep of a "stain" when you are first starting.  It's a matter of personal preference, not a requirement. Probably when I get more comfortable with watercolor, I won't feel quite so scared of it.  But for now, this is what I'm doing.

I took my distress marker and started coloring each petal of the flower with just a stroke or two of color.  I just put some color at the base of the petal where it would naturally be the deepest color because of shadows and highlights and then worked the color outward with a damp brush for each petal.  I did each petal in the soft color before adding my first color to my leaves and then added each color layer one at a time.  For my flowers I used "Worn Lipstick".   You absolutely have to use a piece of scratch paper to check the ink color for any marker you might choose.  It is seldom what the cap color indicates so always check to see that it's at least in the color family you were wanting.  Some colors may be more blue based while others may be more yellow based, which is the main difference between a cool color and a warm color.   As a former photographer, I am a color maniac.  Some other day I will explain what I mean by that, but not today - LOL!  Watercolor is all about interpretation so it's all preference from this point on.

Line images (images with little or no detail) make the best choice for watercoloring.   The WPLUS9 Design Studio "Unforgettable" Set is one I've used before and will be trying again with watercolor instead of Copic Markers later today.  In fact, I fell in love with it after seeing a video that Dawn Woleslagle watercolored using this set.  Altenew also has some great images and I am sure there are many other companies as well.  I'm just thinking off the top of my head here. The one I am using in this case is from Stampin Up and it's actually the first time I have used it.  It sure makes me wonder what else I have that can be used for watercolor sitting in the bottom of my studio closet to check out sometime.  For the leaves I started with Bundled Sage.  After my first layer of color dried, I mixed some Crushed Olive and Shabby Shutters on an acrylic block to get a less bright, more realistic green.  

For the background, I just put a couple of short strokes of  Tumbled Glass marker at a time directly to the paper and worked it outward with a lot of water. I've tried to get this effect previously but after my first class yesterday is the first time I've been successful.  I was surprised at how easy watercolor has been to achieve with just a bit of instruction.  Go Me!  When the color was completely dry, I misted it all over with a solution of perfect pearls to give it some shimmer and let the whole thing dry before removing it from my cutting board.

Once that dried, I cut the watercolor panel using a My Favorite Things Stitched Oval in the largest size. Next I cut the Stitched & Scalloped Rectangle Die from the Sunshine Layers set.   In keeping with the "painted" style, I used the Simon Exclusive Painted Hello die on some white shimmer paper.  I cut the word three times and glued them in a stack for added dimension.  I used Bazzill Card Shoppe Marshmallow for my card base.  This card stock is a 100# weight and makes beautiful cards.


I didn't take too many photos of this card as I have several in progress right now. I'll be back soon with more observations from my Online Card Class.

Sunday, September 20, 2015

Sending Thanks

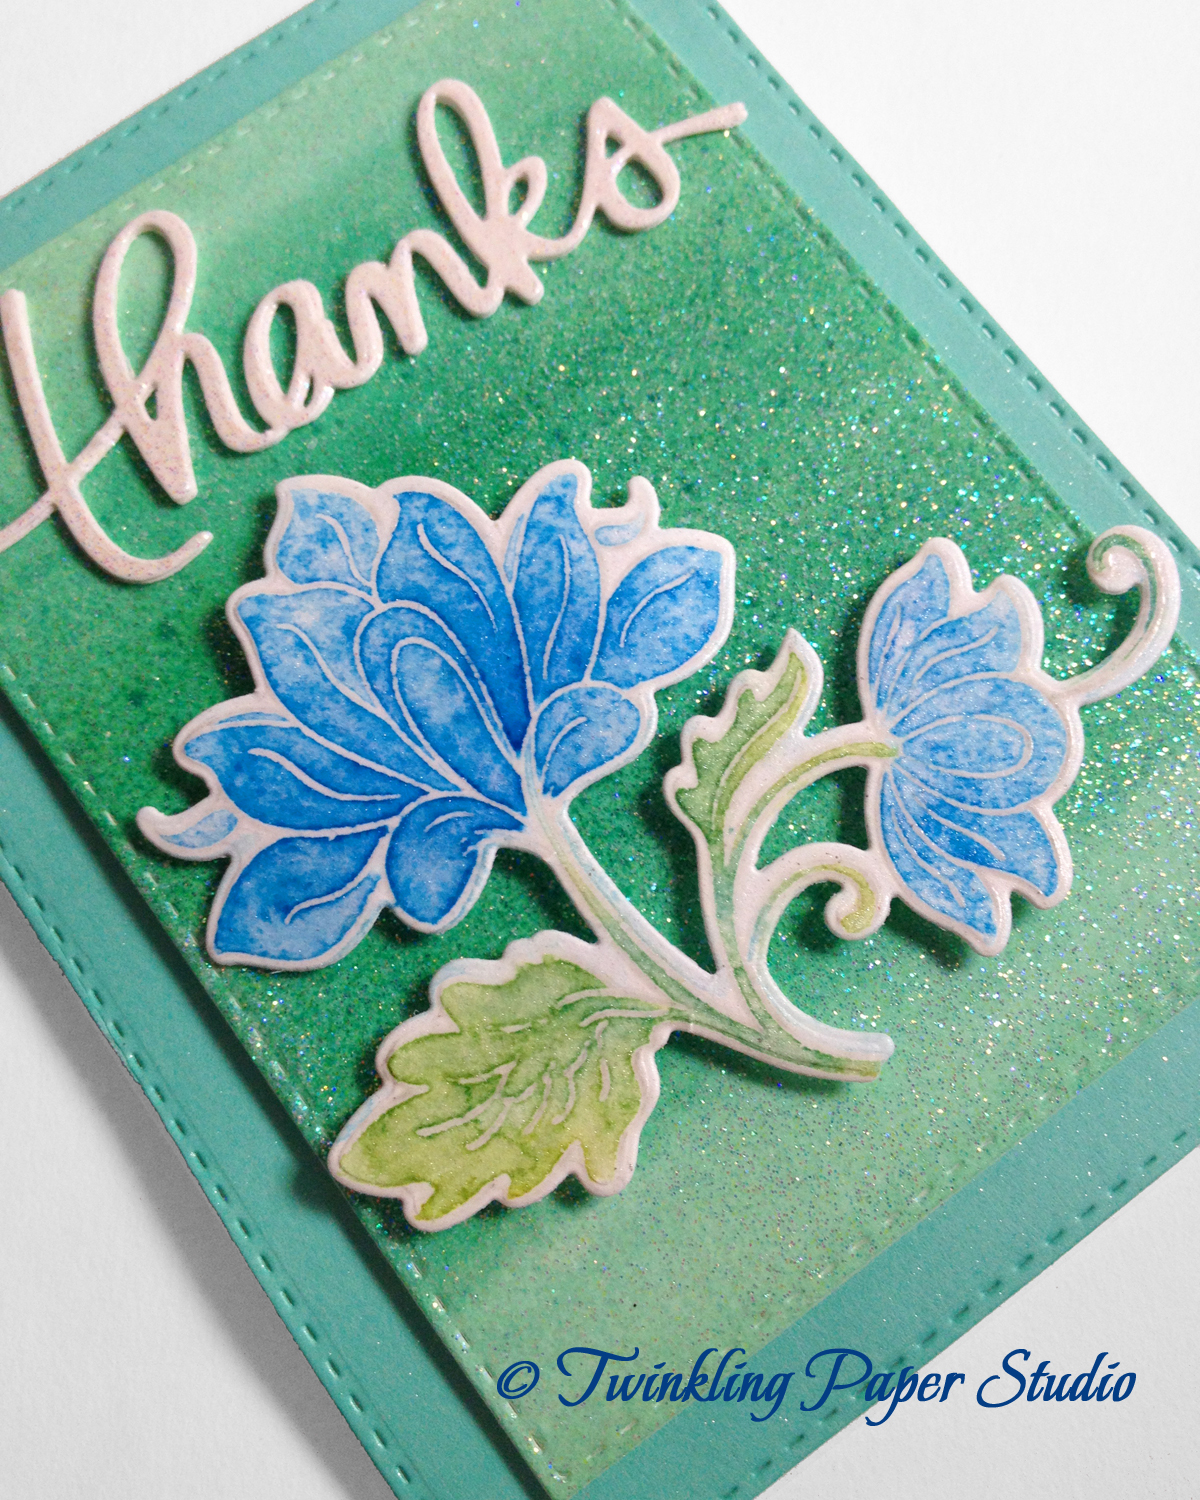
Today's card is a simple thank you card using a couple different dies.  It gives a really fun look to be able to mix fonts and these two work particularly well. The Sending Die is a Simon Says Stamp Exclusive and the Thanks Die you've seen before as one of my favorites from Mama Elephant, also available from Simon Says Stamp.  


I used a few techniques today that I always love and I'm always happy with the results.  I started with a Canson Watercolor Card Stock Panel.  I try to keep several of these ready to go and I pre-cut larger sheets into approximately 3.75 x 6 inch panels.  I put some Tim Holtz Distress Marker in Peacock Feathers on an acrylic block, touched the very tip of my Aqua Brush into my Perfect Pearls Pigment Powder and mixed it all together with a mist of water.  Then I applied it to the watercolor panel for a soft wash of color.  When you add the Perfect Pearls, it adds a lovely shimmer to the water when then goes to the paper.  There are a variety of Perfect Pearls Pigment Powders in gorgeous colors and as a girl who likes sparkle and shimmer, I love using them.  A little goes a very long way and I feel it gives you a lot of subtle bang for your buck!   I planned to die cut this panel so I wasn't really trying to do any specific thing with the wash; just something lovely and soft.

Once I had the color wash applied to my satisfaction, I put more Peacock Feathers Distress Marker Ink on my acrylic block.  I have several acrylic blocks but my favorites are the wavy edged ones that have the finger grips on the sides for easy handling and maneuvering.   They also have a grid on them to help line up your stamps which is very handy as well!  I put just a drop of water on my block by squeezing my Aqua Brush until one drop of water came out.  I wanted a higher color concentration so that I could put spatters on my panel in a darker shade of the same color.  I use a #2 Script Watercolor brush for this.  It is similar to this brush found at Simon Says Stamp.  I already had this one.  If I wanted bigger drops, I could use a larger brush, but I was going for a speckled look rather than larger spots of water.  I just spattered the color mixture until I was happy with the results.


Once I had finished my speckling, I cut my panel using Memory Box Stitched Rectangles in the 2nd largest size.  It is important to note that you need to keep within the same set/brand of dies to keep the sizes proportionate to each other.  For instance, I can't use the Simon Says Stamp Stitched Rectangles Set which has the stitching on both sides of the cut line in combination with the Memory Box Stitched Rectangles because the sizes are not proportionate to each other.  So it does require a bit of pre-planning.   Next, I cut my largest rectangle using the same set of Memory Box Rectangle Dies.  For the outside mat, I cut a panel out of American Crafts POW Glitter Paper in Silver.  All of the hearts are from the same Silver Glitter card stock and are attached with Ranger Multi Medium Matte. My white card base is a top folding 120# 4.25 x 5.5 inch card. Simon Says Stamp has top scored or side scored card bases in this weight available for purchase as well as single sheets available in a 12 pack which can also be used with Copic Markers. 

Whenever I use watercolor paper, I have a bit of trouble with the watercolor panel warping a bit because I always rush it by using my heat tool to dry it.  I hear that if you let it dry naturally while it's taped to a flat surface that it doesn't do this, *Ü*.  So *I* have to use a super strong adhesive for my cards so the panels don't lift up.  That means I am using either a liquid adhesive like Ranger Multi Medium Matte or I'm using my ATG (Advanced Tape Glider).  The thing about the ATG is that you had better have your panel lined up when it touches your card base because there is NO repositioning it.   Coming from a scrapbooking background I was used to being able to reposition things until I pressed it down.  This is definitely not the case with the ATG.  But the biggest perk to it is how long I can go between adhesive refills.  With other adhesives, I go through quite a few of them, so I was trying to find a more economical adhesive.  I think it is, but it's also a little hard to get used to and handle.  


I had to edit this post to tell you that I used Wink of Stella Clear Glitter Brush Pen on the words (just in case you didn't notice)!

I wasn't trying to achieve any particular look with this card.  I only want the recipient to open it and think "FUN"!  I have to dash off and write a note, but I hope you enjoyed today's post.   Happy Sunday!

Saturday, September 19, 2015

Stamptember Continues!

Simon Says Stamp is currently hosting "Stamptember" which is an event held by them annually in September to inspire, educate, create and unveil lots of new products and tutorials.  It's a month long celebration which has been just awesome so far and we still have 10 days left for unveiling other new products. Everyone likes to get in on the act and even Tim Holtz has designed new products exclusively for Simon Says Stamptember.  I can't tell you how much fun all of the tutorials have been.  

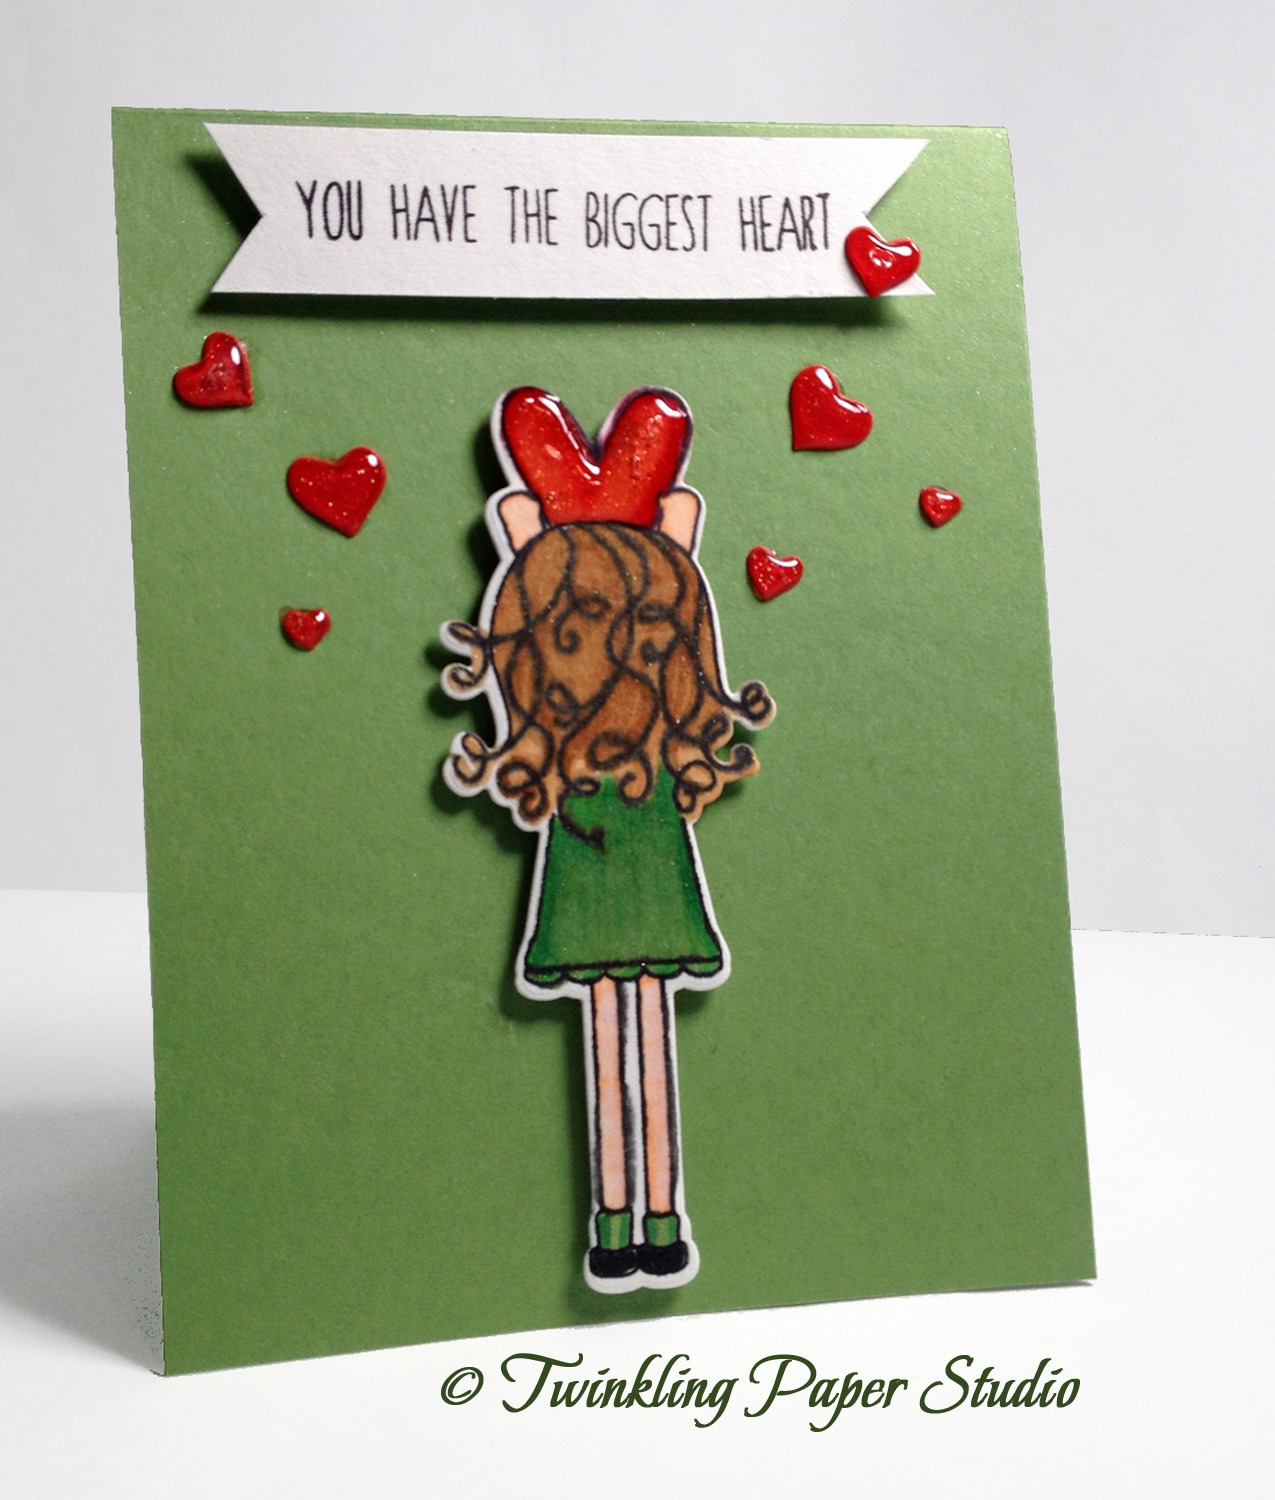
I wanted to work on a card today for a friend of mine.  I'm using a new Simon Says Stamp Exclusive Set called, "Lila's Heart".   This set was designed by Shari Carroll with Jennifer McGuire's daughter, Lila, in mind.  There's a coordinating die set as well called, "Hearts for Lila".  I love this set for girly stuff and I know I will use it a lot since I have four granddaughters.  At Simon Says Stamp, nearly every new release seems to have coordinating dies these days.  This is a somewhat new thing, particularly in the last several months.  I've noticed this trend with other companies lately as well; Altenew, WPLUS9, Lawn Fawn and many, many others.  I remember the days when you only got matching die cuts a few times a year with only a very few stamp sets and wishing that someone would get busy making matching die sets for every stamp set!   While I was busy dealing with other things in the last 5 years, that actually happened.  It's a trend I love and hope will continue for as long as I am paper crafting.

One of the things I most appreciate about Jennifer McGuire is that she makes the seemingly impossible become possible.  I've had Copic Markers for about 7 or 8 years, but really, I hadn't used them except to take a few classes way back whenever I got them.  Jennifer makes them seem so easy and for the first time in my paper crafting journey, I feel successful using them.  There's lots of Certified Copic Instructors out there who make you feel like if you don't do it exactly as they teach it, then it is wrong.  Not with Jennifer. She makes it so simple and easy to duplicate a similar look.  Mostly, she just encourages everyone to do whatever works for them.

On today's card, I used the "Lila's Heart" set and coordinating dies.  This is a simple, straight forward design and technique.  I stamped "Lila" on the smooth side of a piece of 140# Canson Watercolor Card Stock using Versafine in Onyx Black Ink and waited for it to dry before coloring with my Copic Ciao Markers. I'm still in the process of trying different types of watercolor paper, but I think this might be my winner!  I buy the large sized pad and cut each sheet down into the size panels I need, several sheets at a time.


I cut a half inch wide strip of Simon Says Stamp Lipstick Red 100# Card Stock and ran Wink of Stella Clear Glitter Pen over it.  After letting that dry, I used my Simon Says Stamp Holiday Shapes Hearts and Stars to cut about 8 of the hearts. This made the perfect little accents.  I adhered "Lila" to my SU! Wild Wasabi, A2 top folding card using 3-D Foam Squares.   Then I stamped the greeting from the Lila's Heart set with part of the leftover watercolor card stock and snipped it so it has swallowtail ends for the banner.  I mounted this with 3-D Foam Squares as well.  I wanted it to feel like the hearts were overflowing and falling out of the banner so I attached them with Ranger Multi Medium Matte.  Once I had everything placed on my card panel I put glossy accents on the tops of the hearts for the "puffy" appearance.  I got a small acrylic cutting board with a handle so that I had a way to pick up and move the whole thing to an area for safety while drying.  I felt like I was forever getting "gunk" in my Glossy Accents so I hope this method works out for me!


I stamped a few "Lila's" to practice on, but I was pleased with how this first one turned out.

This was a super simple card, but it conveys everything I want to say to my friend in such a cute way!

About 99% of the time, I treat my paper to give it a sparkle or shimmer and this one was no exception.  You can use a variety of methods from Glimmer Mist to Perfect Pearls Spray to Shimmer Sprays.  You can make your own spray using a touch of Perfect Pearls Pigment Powder with some water and a few drops of reinker.  Simon Says Stamp has a great selection of these types of products, so just use whatever you like.  Some people may not like the shimmer and in fact, I would never use it on a man's card.  But I don't make too many of those, and my friends know that I am all about the bling, so I think I'm okay.   Use the products you love and feel comfortable with and you'll have a winner every time!  

Happy Saturday, everyone!