Showing posts with label Congratulations. Show all posts

Monday, September 19, 2016

Make It Monday #261


This week over at Papertrey Ink Blog, Betsy Veldman gave us some tips for using our floral stamps to create a masculine card in her Make It Monday #261 Video.  For the card I created, I used Friendly Flowers Stamp Set in addition to a sentiment from Mums the Word, some of the stamps, stencils and die cuts from the Color Pop: Autumn Kit and even the acorns from the Give Thanks Stamp Set.

I selected a piece of patterned paper in a stripe from some of the samples that have been sent to me in cards from Papertrey Forum Members. I don't have any wood grain paper like Betsy used so I had to find a substitute and felt the colors would work great for my project.  I should probably tell you up front that I did try to use cream cardstock for my stamped and die cut pieces but the one I have is not from Papertrey Ink and I felt that it was too yellow to work here so I opted to go for the white.  I cut about a third of the striped paper off so that I would have an area that naturally drew the eye.  I attached the striped paper to a top folding card base made from Ocean Tides Card Stock.

I started by die cutting the different elements I was planning to use.  I cut the two largest leaves from the Color Pop Autumn Kit and then I used the stencils from the kit to sponge on color in Melon Berry and Ocean Tides.  The detail layer was stamped on the die cuts in Americana and Pine Feather Inks.  I really love the way these colors worked with the sponged color.


Next, I cut several circles with the My Favorite Things Stitched Circles Stax Dies and stamped them with one of the flower stamps from Friendly Flowers. Since I used a circle instead of the flower shaped die cut, they just look like spokes and not really like flowers at all.  It's just another way to stretch your your stamps. The colors I used for this are Dark Chocolate and Ocean Tides. I tried several colors such as Kraft, Cocoa Bean and Fine Linen but I felt the Dark Chocolate looked the best with my other color choices.

For the last two elements, I stamped the acorns from the Give Thanks Stamp Set, also in Dark Chocolate, and the greeting from Mums the Word in Pine Feather Ink.  I used an acrylic block for all of the stamping except the sentiment and I did that in the MISTI so that I could double stamp it for extra crispness with no problems lining it up. I love having the option to use either but for things that don't need to be exact I still like using an acrylic block. I used the Number the Stars Banner Die to cut the sentiment out. I attached both of these elements with Foam Squares.

I really like the font from the Mums the Word Stamp Set.  The more scroll-y or flourish-y looking fonts just don't look as masculine as this classic one. I used one of these sentiments for my brother's birthday card and was happy with that result as well.

Thanks so much for coming by to check out my project.  I hope you enjoy my take on the challenge and will be inspired to create something of your own.

Sunday, October 4, 2015

Fall is Here!

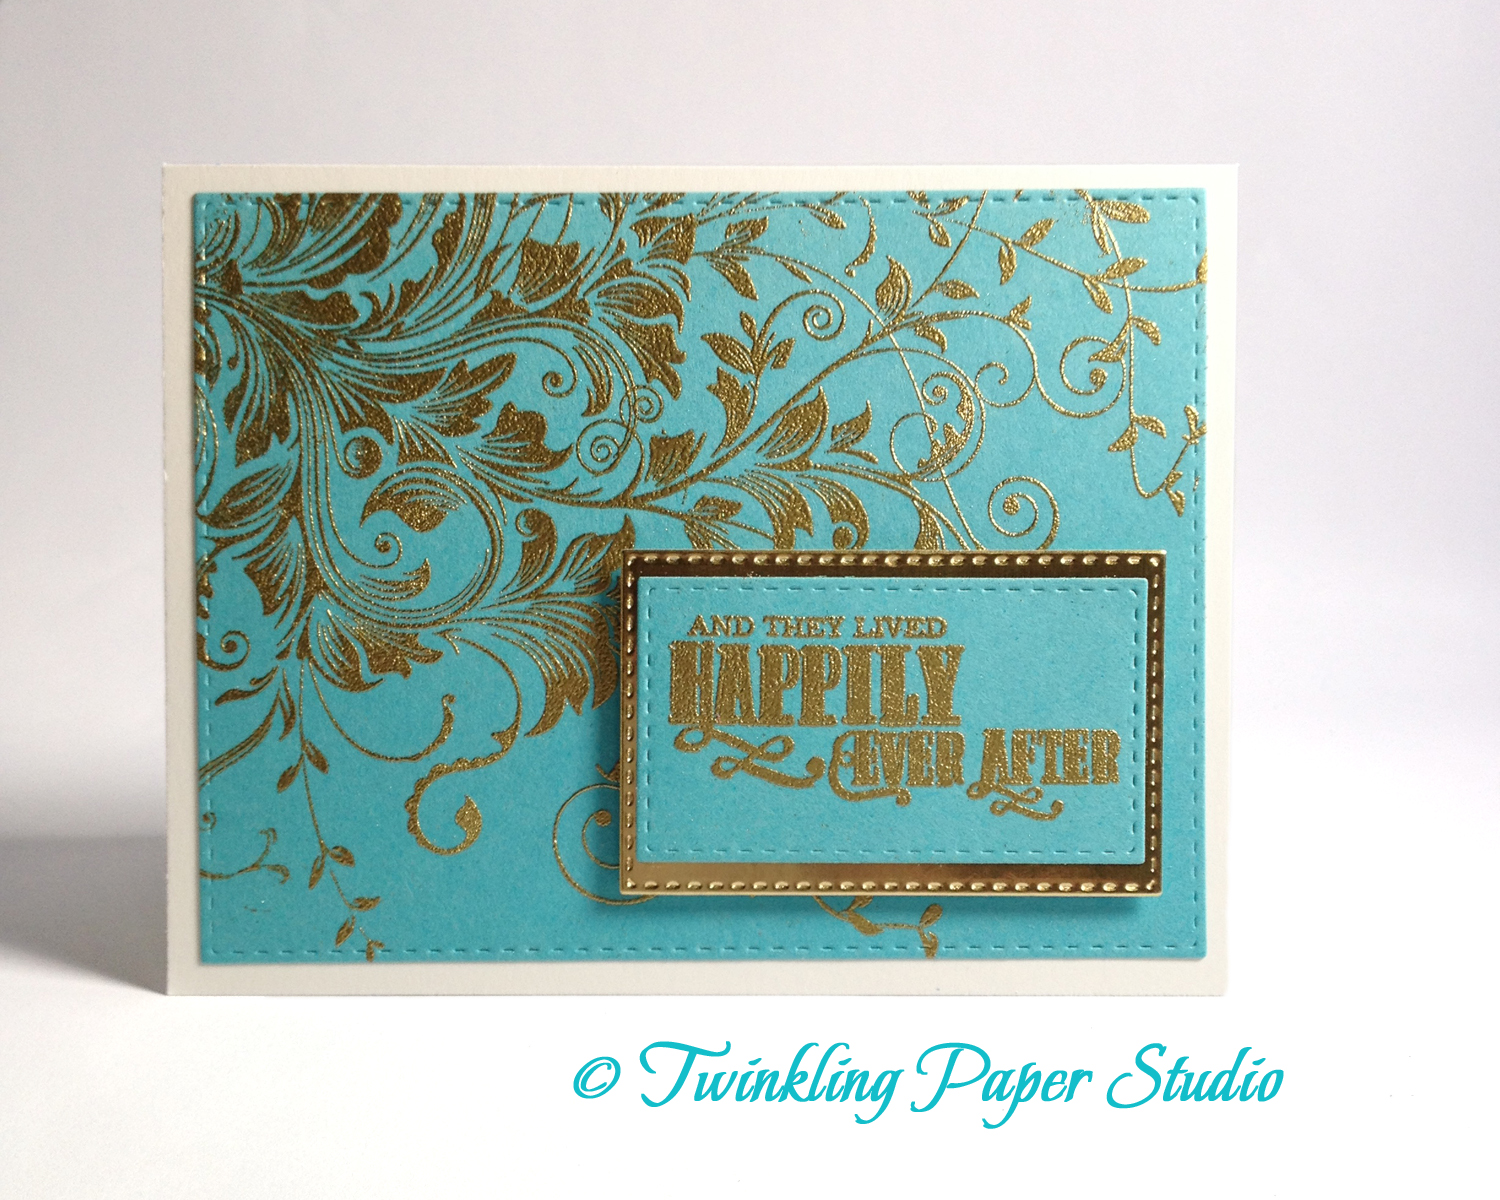
Today's card is one I've worked on for a few days.  It had to be just right for my oldest grandson who is getting married next weekend.  I really agonize over the cards I make for a particular occasion vs. just sending along a note card to someone.   I always want it to be just right for the person and the occasion.

For this card I started with a 5.5 x 8.5 card base scored and top folded at the 4.5 inches made from Bazzill Marshmallow which is a 100# card stock.  Next I stamped a Hero Arts Leafy Vines Stamp onto a panel of 4.25 x 5.5 inch Simon Says Stamp Audrey Blue with Versamark Ink and heat embossed it with Simon Says Stamp Ultra Fine Gold Detail Embossing Powder.  This is one of Simon Says Stamp's many exclusive 100# card stocks.  Being an Audrey Hepburn fan, I, of course, had to get this paper as well as a package of Surf Blue.  It was a bit tricky getting this image stamped and heat embossed but I did manage it on my first try which is always a good thing.  I put the cling stamp onto my largest acrylic block then flipped it over and took the paper to the stamp after I had inked it well. I like the Inkadinadoo Extra Large Block with the wavy sides to hold on to.   I was very careful not to move the paper but to press it down to make sure it was inked well. I carefully removed the paper from the stamp and put the embossing powder on it. Sometimes you can't tell how well you've done until you finish heat setting it. Next I cut that panel with the Simon Says Stamp Stitched Regtangles with the largest die in that set.


Next I used a sentiment from the Clearly Besotted Fairytale Ending Stamp Set for the greeting and heat embossed it in the same Simon Says Stamp Ultra Fine Gold Detail Embossing Powder.  I cut that with a smaller sized Stitched Rectangle then I cut a differently proportioned Memory Box Stitched Rectangle Die Set for the Gold Mat.  This gave me the look I was going for.  Once I had all of the components for the outside of the card done I started assembling it.  The largest panel was adhered using Tombow Mono Adhesive Permanent Tape Runner.   I used the same adhesive to attach the sentiment to the gold mat.  Next I used Foam Squares to pop that panel up just a bit on the card front.

One of the things I really like to do is to incorporate part of the invitation into the card I'm giving back.  In this case I cut the large heart from a part of the invitation that had their photo on it using the largest die from the Memory Box Stitched Hearts Die Set.  Next I used a stamp from the Simon Says Stamp Congratulations Set. This set was a part of the Simon Says Stamp May 2015 Card Kit.  I saw a card that one of my favorite Papercrafters, Debby Hughes of Lime Doodle Design, used way back when that card kit was announced and I loved the papers in that kit.  There's still a few of those kits left and the stamp set is also available separately.  I was glad I wasn't having to find something at the last minute.  I only had to figure out which part of those two stamp sets that I was using and where.

So for the inside of the card, I stamped the inside greeting in Versamark, and heat set using Simon's Gold Embossing Powder again.  Next I cut several hearts from the Simon Says Stamp Holiday Shapes - Hearts and Stars die and the Simon Says Stamp Large Holiday Shapes die set.  I like the variety of sizes offered in these two dies and I use them a lot!  If I have extras I just put them in my little container with the other bits of unused die cuts so they are ready if I need just a few when I'm working on cards.  I cut one set of the large die and three sets of the small die.  Those itty bitty little hearts are so cute!  I used Die Cuts with a View Glitzy Glitter Paper for the hearts and adhered them randomly using Ranger Multi Medium Matte.


This card was not difficult but I did give it a lot of thought as to how I wanted it to all come together.  I hope they appreciate the hand made card as much as I treasure the scrapbook that Lance made me when he was 7 years old.  It's always on display in our home.

I always appreciate it when my blog readers or lookers take time to comment, so thanks to those of you who have done it!