Showing posts with label Papertrey Ink. Show all posts

Wednesday, September 4, 2019

Laurie's Fabulous Favorites and Kelly's Design Team Tips featuring Ink To Paper

Today I am featuring a couple of new items from Ink to Paper for the Laurie's Fabulous Favorites Challenge this week.  As I get back into my cardmaking work groove, I took time this morning to check out the most recent posts at the Ink to Paper Blog.  I was bowled over by last Friday's Design Team Tips Post at Ink to Paper from my friend, Kelly Lunceford.  I chose to make a card using Kelly's "Rainbow" idea for Laurie's Challenge. 

The Challenge from Laurie is to use some of your Fall favorites to create a card.  If you missed either post, you can find them over at the Ink to Paper Blog

©Kelly Lunceford - Kelly's gorgeous card!  
Rainbow is so On-Trend right now, but I confess, normally it's not in my wheelhouse of things to consider first.  Kelly's card and her thoughts about doing rainbow differently, just kind of blew my mind.  Maybe it's because I'm out of the groove and haven't had a whole lot of time to even look at blogs lately, but to me, her idea is totally inspired and is such a great new twist on an older technique. 

Now if you know me, you know that I like to incorporate a bit of gold wherever possible in my cards, so I immediately knew what I would do here. 

Starting with a piece of Cougar Super Smooth Digital White Cardstock, I ink blended all the way around in rainbow order, with a twist.  I used my favorite blending brushes from Taylored Expressions and used the following Papertrey Ink/Ink to Paper inks in this order:  Lovely Lady, Hibiscus Burst, Berry Sorbet, Summer Sunrise, Vintage Jadeite, Hawaiian Shores, and Winter Wisteria.  I absolutely love how this panel turned out.  I find that when I use the Cougar Super Smooth Digital White, the ink blending looks more seamless than on any other cardstock with the exceptions of Gina K's White and Neenah Solar White.  Having all three of these papers, I would consider them to be equal in this regard.  I particularly choose the Cougar because it is Bright White rather than soft white and the super smooth surface makes blending easier in my personal experience.  Use whatever you have that works for you. 


Once my ink blending was finished, I hit the panel with a good amount of shimmer mist and set it aside to dry while I stamped and die cut the leaves from the new Ink to Paper Lovely Leaves Stamp and Die Sets.  For all of my leaves, I stamped in a lighter color and then sponged on an additional color all around the outside edges. 

I hope you enjoyed today's post!  I'll be back soon with a new project to share with you!  If you'd like to purchase any of the products I've used, please shop through my affiliate links which supports my blog here:  Ink To Paper

Monday, July 1, 2019

Laurie's Fabulous Favorites with Ink to Paper - Two for One

I have been crazy busy lately but I have been wanting to participate in some of the Laurie's Fabulous Favorites Challenges at Papertrey Ink and the new Ink To Paper.  I am going to share two cards with you today - one from last weeks challenge, and one from this week's Challenge.

Last week's challenge was to recreate something inspired by all the new projects that happened during release week this month.  I needed a special wedding card for a cousin who is a guy so I didn't want it too frilly so I used the On the Border, Dazzling Deco Die to create my card.  It was a great way to frame out my sentiment as Laurie had done with her card.  I absolutely LOVE Art Deco and I think guys can always appreciate the clean graphic lines of that style.  But I also wanted to include his new bride and so I chose some other elements in Rose Gold for her enjoyment!

My background paper is some that I had from another wedding project a couple of years ago and I had a large enough piece to go behind the Deco Die.  It is a dark grey with Rose Gold Foil Leaf designs on it.  This was actually really easy to pull together.  I die cut the Dazzling Deco die again using True Black Cardstock so that I could pop up the center panel with Black Foam Tape.  I die cut the Spellbinders Romantic Vines from the same rose gold cardstock.  I used the Color Pop Butterflies Mini Kit from Papertrey Ink along with one of the dies that came with that kit.  The "So Happy" is a die from that kit as is the "For You" stamp.  I am super happy with how this turned out.  It's elegant and was fairly easy to put together.  I also love how the scrolling vines from Team Spellbinders matched the sentiment so well!  Of course, when I went to link the product, it seems they are no longer available, but if you type "Romantic Vines" in the search feature, it gives you tons of choices that would work equally as well.

Last Week's Card included with This Week's Blog Post

I love the Spellbinders dies that both cut and emboss in one pass, and I actually picked my set up at Hobby Lobby about 2 years ago.  I couldn't even find this set on Amazon, so you'll have to get a different style but, there are tons to choose from!

Now on to this week's card and challenge.  This week's Favorites is all about summer flowers.  My current favorites are the Delicates Dies from Papertrey Ink that remind me of Dahlia's when I layer a few of them up for lots of petals.

Starting with a previously made Alcohol Ink Background, I trimmed the panel down to 4⅛ x 5⅜ so that it was slightly smaller than the On the Border: Dazzling Deco cover die. The colors in the background panel are gold (of course) with deep pinks and middle toned pinks and a few bits of lighter pink tones.  You never know what you are going to get when you play with Alcohol Inks and I love the kind of marble or granite look that I get with many of mine.


I am crazy for all things Art Deco and I can see lots of ways to use this frame styled die.  My best friend, Gloria and I, have spent several weekends over the last few months sewing cotton dresses for her to wear when she goes to Puerto Rico next month.  They are just simple sheath dresses but we've had so much fun doing it together.  We just finished up the last one last evening and she leaves on the 17th.


I had actually been saving a card in my stash for her, but I pulled it out by accident on Saturday and she saw it, so I had to make a new card for her.  I think this next 6 weeks will be the longest we will go without seeing each other since our move back to Texas last year.  When she gets home, I will be leaving for a short vacation, so it's going to be a while.  We are closer than any family member ever could be.  She is my sister in every sense of the word except biologically. So I will send her this card just before she gets home so that she will know I missed her while she was gone.  I used Boutique Borders: Friends for the sentiment on this card.  I love the ultra feminine and elegant look of this simple card.  The bold graphic feel of the Deco Styled Cover Die is clean and crisp.  Sometimes I want to do more time-consuming techniques, but I don't always have that much time and need to be able to pull something together quickly.  This was super quick since the background was already made.  Only the Sentiment required stamping and heat embossing. 

I have so many projects on my desk for the next few weeks, so I'm off to try and get a couple of others done.  I have new stamps that are begging to be inked up, but I'm making myself wait until I get all of the "work" projects done.

Compensated Affiliate Links Used Whenever Possible

I2P - On the Border: Dazzling Deco
Shop at:
PTI/I2P
Kokuyo Long Dot Runner Adhesive
Shop at:
SSS
Kokuyo Long Dot Runner Adhesive Refill
Shop at:
SSS
PaperPapers.com - Cougar Super Smooth Digital White - #110, 200 pack
Shop at:
PPC
PTI Delicates Dies
PTI Delicates Dies
Shop at:
PTI/I2P
PTI Stitching Garden Dies
Shop at:
PTI/I2P
PTI True Black Cardstock
Shop at:
PTI/I2P
Ranger Multi Medium Matte
Shop at:
SSS
Scotch 3M Foam Tape
Scotch 3M Foam Tape
Shop at:
SSS
Teflon Bone Folder
Teflon Bone Folder
Shop at:
SSS
Tim Holtz Ranger Alcohol Pearls - Set of 12
Shop at:
SSS
Tim Holtz Tonic Paper Trimmer
Shop at:
SSS
Tim Holtz/Ranger Alcohol Ink Blending Solution
Shop at:
SSS
Tim Holtz/Ranger Alcohol Inks (Various)
Shop at:
SSS
Versamark Ink
Versamark Ink
Shop at:
SSS
Wagner Heat Tool
Wagner Heat Tool
Shop at:
SSS

Tuesday, June 25, 2019

June 2019 Keeping Christmas Blog Hop

Hello everyone!  I am back this month now that all of the graduations and birthdays are over.  We had three grand-kids graduating from High School this year, several nephews and our great-grandbaby's 1st birthday party just in our immediate family.  We were so busy last month but we had so much fun seeing everyone and traveling a little bit.  I am always happy to back on my own home.

I've also been helping my best friend in making several cotton dresses for her July trip to Puerto Rico but I finally claimed this week for myself to get some cards done and some blogging done as well.  I have four Blog Hops coming up so I definitely have projects to work on.

For this month's Keeping Christmas Blog Hop projects, I have some tags and some cards.  One of my all time favorite dies was released last year by Papertrey Ink, now known as Ink To Paper.  Bold Borders: Yuletide is a Christmas Greens type of frame and I just love it in a variety of ways so I opted to show you some simple and some more time-consuming ideas.

If you want something super fast and easy, grab a couple of your favorite cardstock colors, and die cut the frame from gold or silver foil paper and it's easy to whip several cards together in very short order.  I've found that the easiest way to do this is to run my cardstock through the Xyron first and then die cut it.  When I remove the release paper, I do it so the die cut is laying face down.  Then I cut about 1/8th inch off each side of my background panel and lay it carefully over the adhesive.  Then I attach that to a card base and embellish as much or as little as I want.


In both of these examples, I used Little Things from Lucy's Cards Glossy Porcelain Mix to add as white berries to the golden foliage.  It is a little bit time- consuming to glue all of the berries down, but worth the effort for the final result.


While it is very difficult to capture in photos, both of these cards use a satin finish metallic cardstock from PaperPapers.com for the background.  Red Satin and Blue Satin.  The names are simple and easy to remember.  Lots of the other cardstocks have more complex names but not the Satin Finish ones.

My next card uses an unusual (for me anyway) color pairing.  I die cut the frame from Moss Shimmer Cardstock and paired it up with Aquamarine Metallic Cardstock.  For this card, I layered a white glitter "Joy" die-cut over a gold one,  to make it appear as a golden shadow for the front die-cut word. 


I put Tonic Aqua Shimmer Pen all over the center area to make it really sparkle as well as the Glossy Porcelain Pearls.  You can really see the sparkle on this card!

As always, when I begin to run low on background panels, I sit down with either watercolors or alcohol inks and make some backgrounds until I have to quit and move on to other more pressing things such as dinner. For my last two cards, I used Alcohol Inked Backgrounds in two different ways.


For the first card, I die cut the frame from the background panel.  The panel had lots of emeralds, blues, and teals with gold, so I thought it would be pretty for the frame.  More of Lucy's Pearls, this time in Glossy Eggshell, were added for the berries.  I used some Teal Foil Cardstock for the die cut word.  I should probably mention that the word die is from a different Bold Borders die, Bold Borders: Flurries.  But I think it is universal and can be used for pretty much anyone around the holidays.  You might notice that the teal foil picks up all of the various colors in the frame and has that same kind of marble look to it.


For my last card, I did the reverse of the previous card.  This time I die cut the frame from gold foil cardstock and left the alcohol inked background panel intact.   I went all out here and added red sequins first and a little gem inside each one for the finishing touch.


I did this side view so you could get an idea of all the shimmer and shine there is on this card.  This particular background panel was done with orange, pink, red, and gold alcohol inks.

These are really very quick and easy to put together if you have a lot of cards to make.  Substitute a foiled designer paper for the background for instant elegance!

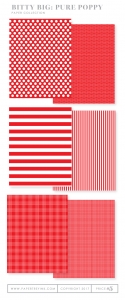
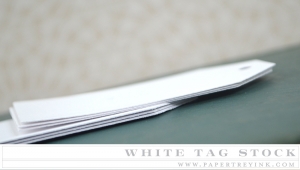
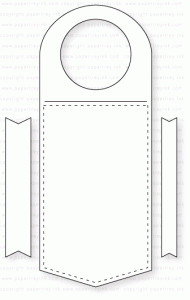
For the tags, I wanted to make some festive ones to put on a bottle of sparkling cider or wine so I just stamped and heat embossed several panels of the PTI What The Doodle: Snowflakes, and the center sentiment, then die-cut all the of the other elements.  I mixed and matched as I went along with just a few variations.  All of the wine bottle tags were die cut from Papertrey Ink Tag Stock which is extra thick and sturdy at #160.  Then I also added a layer of either patterned, shimmer or glitter cardstock on top of that.  This gives additional sturdiness.  The first tag has Pure Poppy Bitty Big Stripe on it.  The two middle tags have white glitter paper, while the last one has white shimmer cardstock.


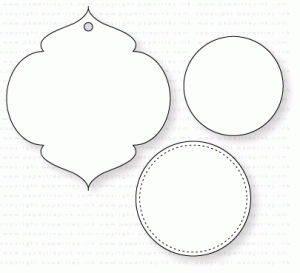
The Tag Sale: #12 was cut from Red Satin Cardstock for all of the ornament looking tags.  Then I die cut a Gina K Designs stitched circle from Gold Foiled cardstock for the outer circle.  Next, I heat embossed the center circle on 3 of the tags, with Versamark and Ranger Gold Tinsel Embossing Powder using one of the images from an older PTI set called "Holiday Photo Finishers". As you can see, I combined that with the snowflakes to add to 3 of the wine bottle tags.  On the last tag, I wanted something that felt festive, but more generic for the holiday season for those folks who think more scientifically than spiritually.  I put one of the large snowflakes in the center of that with the small circle of glitter paper behind it, then the gold foil circle.  I used foam tape for most of the layers combined with a bit of Ranger Multi Medium Matte for some of the die cut elements.


My favorite of the group is the one with Pure Poppy Bitty Big Paper on it as there is something so fun about that vertical stripe.

Be sure to stop at all of the blogs along the hop to see everyone's projects!

Broni Holcombe (Off This Month)
Claire Broadwater (Off This Month)
Vicki Finger (You Are Here)

Thank you so much for stopping by my blog today.  Be sure to check back next month on the 25th for the next edition of "Keeping Christmas".  I have several upcoming projects for other blog hops as well, so check back often.


Affiliate Links Used Whenever Possible
Cuttlebug Die Cutting Machine
Shop at:
SSS
Kokuyo Long Dot Runner Adhesive
Shop at:
SSS
Little Things from Lucy's - Glossy Eggshell Mix
Shop at:
SSS
Little Things from Lucy's - Glossy Porcelain Mix
Shop at:
SSS
Marvy Jewel Picker
Marvy Jewel Picker
Shop at:
SSS
MSP Original MISTI Stamping Tool
Shop at:
SSS
PaperPapers.com - Cougar Super Smooth Digital White - #110, 200 pack
Shop at:
PP.com
PaperPapers.com - Curious Metallic Aquamarine
Shop at:
PP.com
PaperPapers.com Shine Blue Satin
Shop at:
PP.com
PaperPapers.com Shine Moss Green
Shop at:
PP.com
PaperPapers.com Shine Red Satin
Shop at:
PP.com
PTI Bitty Big: Pure Poppy
Shop at:
PTI
PTI Bold Borders: Flurries
Shop at:
PTI
PTI Bold Borders: Yuletide
Shop at:
PTI
PTI Tag Sale #12
PTI Tag Sale #12
Shop at:
PTI
PTI White Tag Stock #160
Shop at:
PTI
PTI Wine Bottle Tag II
Shop at:
PTI
Ranger Multi Medium Matte
Shop at:
SSS
Ranger Non-Stick Craft Sheet
Shop at:
SSS
Scor-Pal Scoring Board
Shop at:
SSS
Scotch 3M Foam Tape
Scotch 3M Foam Tape
Shop at:
SSS
Teflon Bone Folder
Teflon Bone Folder
Shop at:
SSS
Tim Holtz Ranger Alcohol Pearls - Set of 12
Shop at:
SSS
Tim Holtz/Ranger Alcohol Ink Blending Solution
Shop at:
SSS
Tonic 6 Inch Personal Trimmer
Shop at:
SSS
Tonic Aqua Shimmer Pen
Shop at:
SSS
Wagner Heat Tool
Wagner Heat Tool
Shop at:
SSS