Monday, December 31, 2018

Altenew December 2018 Inspiration Challenge - Year in Review

Hello there!  I am here today with a post that will be just getting in under the wire for the Altenew December 2018 Inspiration Challenge.  I think I have until Midnight Eastern time to get this uploaded to their gallery.  As you might know, I've been working to get my Altenew Educator Certification Programs completed and so I wanted to end the year with a card made from Altenew products using several of the techniques that I've focused on during the classes.

When I started working on this card today, I selected a completely different stamp set that I was planning to use - Floral Flurries stamps and dies with some leaves from Beautiful Heart and Frosted Garden thrown in there too.  I had everything stamped and die cut ready for my card, so I wanted to add some texture and color to my background panel.  I also wanted to create a larger 5 x 7 card with lots of gentle spring colors as I've been working on Christmas Cards pretty much non-stop except for my Altenew class projects this past month.

One of the things I most like about Altenew is that you can mix elements from other sets to get a truly unique look.  It was with this thought in mind that I had stamped my original elements.  I also wanted to add some interest to the background so I used a larger embossing folder that I had in my supplies but had never used.  I tried to find the name of this one, but I couldn't find it and I'm thinking it might have come as a freebie with my Gemini Die Cutting Machine.  Using a piece of 5 x 7 Neenah Solar White cardstock, I ran it through my Cuttlebug to emboss the paper.  It took a little figuring out because this embossing folder is a bit thicker than most so you just have to figure out what works for your machine.  Once I embossed it, I wanted to add some soft colors to the background along with some gold watercolor splatter.  To do this, I grabbed a piece of scratch paper and some soft stenciling brushes and went around the outside edges with Frosty Pink and then some Harvest Gold (PTI) on the center and kind of blended it out.  The supplies I used today are all nearly all from Altenew except for that little touch of Harvest Gold Ink, the adhesives and the Finetec Gold Watercolor on the background. I didn't feel like I had a good choice in my Altenew inks, as I only have one set of the Yellow color family cubes and none of them worked very well with the Frosty Pink. 

I really loved how this turned out, so I went ahead and grabbed my Finetec Mica Gold Watercolors and spritzed the Inca Gold with a little water.  I used a #2 script brush to create the spatter which has longer fibers than other brushes and makes a very fine splatter.  I'm not very patient, so I used my heat tool to assist in drying the splatter from the back side.

Thinking I was finished with this background and ready to assemble my card, I grabbed all the elements and started arranging them on my background panel.  I realized immediately, that my stamped elements were all wrong for this background.  I loved the way the background looked so much, that I grabbed a different stamp set and started my bouquet all over again.  This time I chose Perfectly Perfect and heat embossed the images with Altnew's Rose Gold Embossing Powder onto Canson Bristol Cardstock.  I used a wet on wet technique for the flowers with Frosty Pink and Coral Berry Re-inkers.  I have one of the little flower shaped porcelain dishes that I add a spritz of water to with a drop of color from the reinker to get a light wash of color.  I used a lot of water not being particularly careful to stay in the lines although it seems like I did okay.  For the leaves, I used Forest Glades Re-inker.

Once everything was completely dry, I die cut everything.  I always stamp and cut extras of the leaves as that's what I seem to need more of.  In addition to the elements from Perfectly Perfect, I stamped and Rose Gold Heat Embossed one of the elements from Wings of Hope that I could use as a sprig of something to use as a filler in my arrangement.

When I started laying out my arrangement, I chose a sentiment from the Sentiments & Quotes Stamp set that I love.  I used a combination of Ranger Multi Medium Matte, Scotch 3-D Foam Tape, Scrapbook adhesives 3-D Foam Squares, and Thin 3-D Foam Squares.  I mounted the background panel on Scotch 3-D Foam Tape but it probably would have been easier to use a piece of fun foam.  I just didn't want to stop what I was doing to go get a piece.


I love how this card turned out and I wish I had time to make cards like this every single day.  This is so very much my personal style and I love it.  I hope the Altenew Team enjoys it as well as it is one of my all time favorites!

Wednesday, December 26, 2018

Papertrey Ink December 2018 Blog Hop

It's time for the Monthly Papertrey Ink Blog Hop and I am excited that I have time to participate this month!  It's been a busy year and I haven't gotten to participate every month as I did before our move so I'm excited to get to participate for the last one this year.

The image on the left is our inspiration photo.  I really wanted to do some embroidery, but I haven't been unable to unpack those boxes yet and I'm not certain that I kept any fabric that would have been suitable.  So I did the next best thing and tried to replicate the feeling using stamps.

I immediately thought of the branches in the Stitched Sentiments Stamp Set for this card.  While they are not in the shape of a heart, I could bend and curve them enough to make it seem like they are which is what I did.  I tested out my design on some plain printer paper beforehand to make sure that it looked right.  My heart is squattier than the one in the image, but it's not supposed to be a replica, just the inspiration.  I stamped that in New Leaf Ink.  Then I added in some roses with Lovely Lady Ink using one of the stamps from Grand Finale Stamp Set and a few dots from Nuvo Gloss Drops in Carnation Pink to add some interest and texture to an otherwise clean and simple card.


I added a sentiment from "Penned Elegance" using Versamark with Antique Gold Embossing Powder.

No long boring details for you today.  Just a quick and easy card that took me less than a half hour to make.  Thanks for stopping by today.  I have to go back into the city today for some medical stuff, but I'll link up my project at the Papertrey Blog as soon as I can!

Saturday, December 15, 2018

Altenew Educator Certification Program - Holiday Envelopes

Hello!  I'm here today with a project for my next class for my Level III Class, "Holiday Envelopes" which is all about creative ways to dress up your envelopes when you send out your Holiday Cards.  Since I made a particularly special card yesterday and I knew this Class was next in my lineup, I planned to create a matching envelope for that card.  Just as a little reminder of that card, here is that card that I made to put in with my daughter's Christmas Presents.  We normally get a Movie Gift Card for the family, but this year since we are closer, and are spending more time with them, we wanted to forgo the Movie Gift card and get a gift for each of them.  We have something special for our daughter this year and I wanted to make a special card to go with it.
No photograph could possibly capture the absolute elegance of this card but I still wanted to make an envelope to go with it.  The card is an unusual size (4 x 7) so it would need a special envelope to go with it to accommodate the size and thickness of the card.

I have an envelope punch board, but I prefer to make a different style so I learned a long time ago how to make my own.  I took photos along the way to show you how I do it.
Start with an 8.5 x 11-inch sheet of whatever paper you want to make your envelope from.  My primary choice is a Shimmer Vellum that is lightweight, but works really well for envelopes because it is not as heavy as even text weight paper.  Because most of my specialty cards are for Weddings, I have silver and a few different shades of gold.  This particular one is Antique Gold Metallic.  My mom picked up a bunch of these for me a few years ago at Hobby Lobby when they were on sale for .25 cents per sheet.  Placing the paper in your Scor-Pal horizontally, figure out where you want your first score line to be; somewhere between 3.5 - 4 inches is standard.  It will be different for a larger card, but for my card that is 4 x 7 inches, I chose 3.75 inches.  I have an older Scor-Pal and mine does not have a score line at the measurement, for that so I scooted my paper over ¼ inch and then score at the 4-inch line.  I wanted 4¾ inches in between the score lines to accommodate the thickness of the card.  You'll need to choose a width that will work for your card.  For instance, if you have a pretty flat 5 x 7 card, you will want to allow 5¼ inches between the score lines.  Score at whatever measurement you need.  You'll have something that looks similar to this image.

I have the card in a plastic sleeve so that it won't get messed up or dirty while I'm working on the envelope.  I put all of my cards in these little sleeves with envelopes that you can get lots of different places.  My last batch of these I got from Amazon here, but you can buy them by the case if needed at places like U-Line.  I put a lot of time and effort into my cards, so I don't want them dirtied up before I give them away or use them.  If you want to sell your cards, you really need to do this as well.  You can get various sizes so I usually order A7 and A2.  I only use A7 occasionally, so I only buy one pack of those at a time.  I make around 250— 300 cards a year, so I buy 3 or 4 packages of bags at a time.  Storage space for a case of bags would take way too much room so I like the option of the smaller 100 packs.  It's not as cost effective to buy them that way, but I'm okay with that.

Next, you want to rotate your paper 90 degrees to put it in a portrait orientation and score at the ½ inch mark on each side of the paper like the image on the left.  I usually rotate my paper 180 degrees to do the other side, but you can just as easily score it at 10.5 inches. Then crease all of your score lines firmly and open it back up.  Your paper should look like the image on the right-hand side.  
Next, you want to trim off the excess paper from the ½ inch score lines.  This is pretty much the only time I get out my Fiskars trimmer that has a wire guide but you can use scissors if that is what you have. When I first started making cards, I only had a smaller little guillotine trimmer, so I used Scissors to make envelopes back then. 

I start with my blade at the bottom of the paper and cut up to the horizontal score line.  Then I lift my blade, skipping the next section and place it back down at the top horizontal line, repeating the same process on the other side.  When you are finished, it should look like this.

I just snip those pieces off with a pair of scissors so that you have something that looks like this:


Next, you want to fold the side flaps behind the center section and round the 4 corners of the center section.  Then fold them back in the normal way and do the other four corners.  This just makes for a cleaner presentation. 


Now you ready to put the envelope together.  Rotate the paper so that the bottom flap is closest to you.  

If you put double sided tape on the flaps that are sticking out, you'll have adhesive where you don't want it.  You can use any type of dry adhesive for this like a tape runner.  Liquid adhesive is a bit messy so I don't recommend that.  Remove the release paper and fold the bottom section up onto the flaps.  
As you can see from this image, my measurements accommodated the additional layers and dimension and it slips right into the envelope very easily.  
Normally, you would also want to put a strip of adhesive along the top line as well, but since I am putting this in a box with her present, I'm going to use a small bit of temporary adhesive so she doesn't have to tear up the envelope to get to it.  Since I decorated the envelope to go with the card for my class project, I don't want her to have to tear it up.  But now you are ready to decorate your envelope.

I wanted to use the same stencil that I used for her card, so I carefully positioned the stencil and masked off the rest of the area to make sure it stayed clean.  Using the same Decofoil Transfer Gel, I carefully applied a layer, putting any excess back into the jar.  Since this is much thinner than cardstock, I should have used a thinner coat so don't get too heavy-handed.  It took quite a while for mine to dry.  Here's a photo of what it looks like when you apply the transfer gel.  It goes on white but dries clear.
Once it is completely clear, you are ready to run it through your laminator or Minc Machine with the foil.  I wanted to use the same Emerald Watercolor Decofoil, so I did.  Here is my finished Holiday Envelope that matches my card.

Thank you so much for stopping back by to see my 'Holiday Envelopes" class project.  You can use stamps, dies, stencils, shimmer sprays, and a whole host of other options.  We spend so much time making a special card and we should consider spending a little time for the much prettier presentation by embellishing the envelopes on special cards.  It might just be a simple stamp on the back of the flap that says "Snail Mail" or any other sentiment we want to use.  Give it a try and just think of how the recipient will smile before they even open the envelope.    

Friday, December 14, 2018

Altenew Educator - Let It Shine - Holiday Edition

I am here today with another project for my Altenew Educator Level III Certification.  The class is "Let It Shine —  Holiday Edition".  This class was kind of a no-brainer as a choice, because, as you know, Shiny and Sparkly are my two favorite colors! 

Carissa Wiley taught this class and you know she loves some glitter or shine as well.  I still needed to make one card to go with my daughter's Christmas gift and I want to pull out the big guns (a.k.a. the Minc Machine) for this card.  I'm getting excited because Christmas is just 11 days away!  She doesn't read my blog or look at Facebook or Instagram and even if she did, I would still share this card here because no photo could really match the WOW Factor of this card.  It was a labor of love for me this morning.  I woke up early and couldn't fall back asleep, so I started working on it very early.  To get every little detail absolutely perfect, was a lot of trial and error and it took me about 6 hours to complete the whole card.  Anyhow, let's get to it so you can recreate one if you wish. 

I started with a stencil from Tim Holtz called "Festive" and grabbed my Minc Machine and a watercolor foil that I have been wanting to try but hadn't found the time to do so yet.  I also grabbed my spatula and some of the fantastic Thermoweb Decofoil Transfer Gel.  I planned to make a wider than usual horizontal card because the stencil is about 4 inches wide and the area for the design is just under 3.5 inches by just under 7 inches so I decided to make my card 4 x 7 inches.  I can make my own envelope to put that in.  I'm holding off right now, because "Holiday Envelopes" is next in my class line-up, so I'm planning to tackle that over the weekend.  I will most likely use this same technique to add decor to that envelope. 

On a piece of Cougar Super Smooth Digital White #110 cardstock, I used frog tape to hold my stencil in place and applied a smooth layer of the transfer gel over the top of the stencil.  I made sure I had even coverage, and then carefully removed the stencil from the cardstock, setting it aside to dry.  Transfer Gel is White when you put it on, but dries clear and is then ready to take the foil. Immediately take your stencil to the sink and wash the transfer gel off.  If you let it dry, it will be very hard, if not impossible, to get off.  The particular foil I was using is called Emerald Watercolor and I must get more of it soon!  There's also Amber, Amethyst, Lapis, and Summer Rainbow.  I have all but the Summer Rainbow and I am anxious to get that one soon. 

While I was waiting for the transfer gel to dry so I could foil it, I worked on my cardbase.  I wanted to use the glitter with the Scor-Tape like in my previous card here but this time I used some Elizabeth Craft Silk Microfine Glitter in Solar Gold. When you burnish this into the adhesive, it feels like velvet and doesn't come off at all.  Most of the glitter I have is pretty fine, but I have a few (3) of the Elizabeth Craft Silk Microfine Glitters and they are my favorites.  I got them when a Scrapbooking store in my area was closing.  They are easily the nicest glitters I have used and with Scor-Tape, it is super easy.  Just make sure you have a Swiffer dusting cloth there for the "after party" clean-up!  I think of have gotten glitter in every room of my house in the past week as I was working on a few other projects as well.  It's time for Ruby (my Roomba) to go through the house.  I put .25 inch Scor-Tape along the top and bottom of the panel and then burnished it in.  Once I had that done, I ran my cardstock piece with the transfer gel through my Minc Machine and even I was blown away with the results.  This is my second time using the transfer gel for one of my Altenew classes and I am every bit as smitten as I was in the beginning.   


The photo above is a pretty straight-on shot of this card and you can already see the dimension of the foiling but just wait until I turn this card into the light!  I tried several different things to go with this card from gold mirror cardstock to everything in-between.  In the end, I chose to use a piece of the black toner sheets that are available from Thermoweb and ran that through the Minc with some of the same watercolor foil.  I only had a small piece of the toner paper left, but for future reference, you should adhere the foiled piece of toner paper to a piece of white heavyweight cardstock so that the elements are a bit thicker.  The toner paper is so thin that it wouldn't emboss the detail in the holly leaves, but I didn't have any left to repeat the process, so I went ahead and used the small pieces I had already die cut.  You can see the vague impression of where I tried to emboss them, but that's it.

For me, a large part of this card challenge was figuring out how to enhance what was on the cardstock without covering up that beautiful watercolor foil!  Check out the beautiful color you can see when I tipped it toward the light from my window. 


I stacked 3 of the "Merry Christmas" white die cuts for a thicker embellishment and then put gold on the top.  That really didn't add anything so I checked my mirrored cardstock and found this teal colored one so I die cut another and added that to the top.  This looks way better than the gold did and I think it really helps to bring out the green and teal shades of the foil.  Here's a closer view of the dimension when you lay the card flat. 


I used a smaller stitched rectangle to cut a piece of vellum for the greeting so that you could still see the color behind it.  I tucked slivers of foam tape behind the sentiment on the back of the vellum so that it would be slightly more dimensional.  Then I added the holly leaves which are a Spellbinders Jolly Holly Die and did my usual grouping of three little berries using iridescent teal sequins with a gem in each one plus a couple more on the card panel to get that visual triangle.  I like to add gems to my sequins most of the time which added yet another element of sparkle and shine.


I made a lot of Christmas card this year, but this one is my favorite by far!  Isn't it just lush and rich and dreamy?  It is perfect for my mermaid-loving daughter. 

I used several of the techniques Carissa talked about in the class such as foiling, using Scoretape with Glitter and adding foam tape behind the letters on the vellum panel.  I do heat embossing all the time with Gold Embossing Powder or glitter embossing powder so I wanted to really kick my card up a notch and I think this might be my best project yet!  In fact, there is zero stamping on this card but it is so beautiful.  Even my husband loves this one although he doesn't pay a whole lot of attention to what I'm doing.  But I took a quick picture with my phone and sent him the photo.  He really loves this one and I can't wait for him to see it in person tonight.  Heck, if he plays his cards right, I might make one using the Amber Watercolor foil to put in with his gift. 

I hope you enjoyed today's project and be sure to check back to see my next project for the Holiday Envelopes class at Altenew.  I feel it's worth mentioning that classes at Altenew Academy run about $9.00 US Currency.  I have found them to be well worth the time and you always have access to the classes you take so you can revisit the lessons anytime if you want a refresher.  Thanks so much for stopping by to check out my project. 

Wednesday, December 12, 2018

Altenew Educator - Last Minute Holiday Cards

Hello everyone!  I am back today with a few cards from my most recent class at Altenew - "Last Minute Holiday Cards" taught by Julia Alterman.  I have three different cards for you today!

One of the things Julia talked about the first day is how to go from very simple to very elegant by just making a few changes in your card.  She also talked about using Holiday images from your stamp sets to make other types of cards, thereby stretching your stamping dollars for more than just a single occasion.  I have a Christmas Card, a Thank You card and a more fun and festive card for you to send to a friend today.  The first two were from Day 1 of class and the last one happened to be from the bonus day of class.  I was enchanted with the way Julia used a Holiday Stamp for another type of card and knew that I wanted to try this.  All three of my cards use the Altenew Majestic Mistletoe Stamp Set.

As you probably know, I really enjoy cards with a lot of "white" space for the most part.  That also makes for quicker cards if you keep it very simple.  Majestic Mistletoe happens to be one of my favorites for Holiday Cards and is now one that I will reach for to create other occasion cards as well, like those Thank You notes for all the Holiday gifts you received?  I used just four  Altenew Crisp Inks for the first two cards of this post.  I chose the Green Meadows collection and I have to say I really love how vibrant these colors are.  The only color I did not use from this collection was Minty Mint but I brought in a cardstock that was a good color match it to use for a part of my background panel.  The colors I did use are Sweet Leaf, Just Green and Hunter Green.  I actually stamped 6 panels since I had everything lined up in my MISTI and a small stack of A2 Panels sitting right there.  For this, I used my Original MISTI and set the first layer up on the far bottom left corner, then set the next layer up using the far right bottom corner.  For the first panel, after I stamped the first two layers, I rotated my cardstock 180 degrees and did it again.  That way I could cut the piece on the diagonal to create two different cards.

I wanted to dress them up a little so I stamped the third layer of the greenery and then stamped the berries in Ruby Red Ink.  I could have gone ahead and stamped in the detail layers for the berries, but I knew that I wanted to use some Nuvo Drops for the berries, so stamping in the color was just a guide for where to place the Nuvo Drops.  I used Tonic Jewel Drops in the color Rosewater.  I let that dry overnight and then added just a touch of white to the top of each berry for a highlight.

Next, I took the panel and cut it diagonally then attached it to a piece of Mint Cardstock. I wanted to add a strip of glitter, so using Scor-Tape, I adhered that along the diagonal line. Once it was adhered, I die cut it with a stitched rectangle die.  This one happens to be a die that has been discontinued but it is 4 1/8th by 5 3/8th inches which leaves a very narrow border all the way around your front panel. I did this for both of the pieces.


After die cutting, I removed the release paper from the Scor-Tape and sprinkled gold glitter all along that diagonal line, then burnished it in with my bone folder.  This created instant elegance on my card.  Then because I wanted to create a card for two different occasions, I die cut a large word from Gold Cardstock - "believe" and "Thanks".  For the Believe card, I also added a smaller sentiment along the bottom of where that die cut would go.  It's important to do the heat embossing before you apply the die cut to eliminate the possibility of damage to your die cut.  The cardstock I used on these has a light layer of plastic film on the top to protect it.  This works great if you get a dab of glue where you don't want it because a tiny bit of alcohol on a Q-Tip will remove it.  But not so well if you melt the plastic coating during the heat embossing process.  Go ahead, ask me how I know this. *Ãœ*


Simply add the die cut word to your card front, attach that to a card base and voila, you have a clean and elegant single layer card that's easy to mail. I''m not sure if I have ever mentioned it before, but working on an A2 panel serves two purposes; 1) if you mess up during the stamping then you only destroyed a panel rather than a whole card, and 2) for some reason this makes the card stand up easier.  I like to do top folding Tent cards so they can be displayed if desired.  This is an important concept if you happen to be a card maker.

My third card for today used the Sea Shore Mini Ink Cube Collection although I only used three of the colors; Volcano Lake, Lagoon and Emerald.  If you look carefully, you can see that the stamp I used for this was the same all the way around and is also from the Majestic Mistletoe Stamp Set.  It is the top detail layer stamped all the way around using a mask to protect the center of the card.    Since I was planning to cover my circle area with the Teal Cardstock, I didn't have to use a mask, but if I had wanted to pop the circles up on foam tape, it would have been important to me for it to look cleanly stamped all the way around.


Julia did this card in a rainbow for the Bonus Lesson of this class and I just love it.  I'm planning to make a few larger cards for some upcoming birthdays that I will mail in a 5x7 envelope.  I learned a lot about looking at other ways to use a single stamp set in this class and really enjoyed it very much.

The sentiment for this last card is from the Gina K Designs All About You Stamp Set.  I stamped it with Versamark and heat set it with Antique Gold Embossing Powder.  The little hearts are from an older die from Simon Says Stamp called Mini Hearts.  There are three different hearts in three sizes each on this die and it's one I used to use a lot and will again now that it is back on my desk.

Thank you so much for stopping by today to see my projects.  I always appreciate it when you do.  I have just a few more classes now so I'll be back in a day or two with my next project for my next class.  Be sure to stop back by and check it out!


ETA:  I just had to try this last technique on a larger format card and share it with you as well!


And one more for your viewing pleasure.  Love these! 

Monday, December 10, 2018

Altenew Educator Level III - One Layer Wonders

Hello!  Now that I have been certified for my Altenew Level I and II Classes, it is time to move on to Level III Classes, which means I am nearly finished.  Just a few more classes and then I will complete my final challenge and be fully certified as an Altenew Educator.

Today's project is all about One Layer Wonders which was taught by Kelly Latevola.  For my project, I chose a technique from Day 5 of class, which was to create a "quick" background using multiple stamps and minimal masking.  As you probably know by now, I'm not a lover of masks because fussing cutting is difficult for me due to having Rheumatoid Arthritis, but I liked the look and style of Kelly's project for today and I wanted to try to come as close as possible to the feel of her project.

© Kelly Latevola
It also required a lot of Copic coloring to get the feel I wanted for my card.  I love the large floral bouquets that she creates, so I took my own spin on her technique to create my card which is pretty but doesn't look the same as hers.  This is really okay.  For me, the classes I've been taking for my certification have all taught me new and different ways to look at my stamps.

Last week one day, as I was reading the Altenew Blog, I saw that there was a big sale on a few stamp sets and one of them has been on my wishlist for quite a while. Frosted Garden Bundle is a set I love, but at $72.00 regular retail price, it's not one that I would normally purchase.  When I saw it for 40% off, I knew it was now or never, so I snatched it right up.  Happily, it arrived on Saturday and when I finished watching the last two videos for this class on Sunday, I knew this would be my choice for my class project.  Even though I didn't use the dies for my card,  I will be quite happy to have them in the future.  My cards are typically pretty clean but lightly layered in style, so making a single layered panel is definitely a challenge for me.   Copic Coloring is also not one of the things that I am great at, so this was an additional challenge.  Again, because of the Rheumatoid Arthritis, I have to do my coloring in multiple sessions.  This was also my very first time using Copic Markers to completely fill in a background.  This is some scary stuff for me, due to inexperience with Copic Markers.  Kelly's card is bold and dramatic!  While mine is nice, I don't think you could call it dramatic.  I guess Dramatic is not really in my wheelhouse, but as Kelly pointed out, that's okay.  We each have our own style and that's one of the best things about this industry.

When I started working on the layout of my card, I stamped on some Neenah Solar White because I have precut panels lying on my desk.  I wish I would have used X-Press It Blending Cardstock because it takes a whole lot less ink than Neenah but once I started, I wasn't turning back.

Stamped with Fine Linen Distress Ink
Using my MISTI Creative Corners, I arranged my stamps onto my panel and then stamped them down.  At first, I thought I wanted to use Distress Inks for a no-line look, but when I stamped the first panel, I felt the ink was too dark.  So I stamped another panel using Simon Says Stamp's Barely Beige Ink.  I was planning to color in everything, so I just needed a light colored ink to act as my outline for the coloring.

Please keep in mind, that I am just a novice with Copics, but I am happy with my resulting card.  Since I give cards to my Sisters-In-Law each year during the Annual Finger Christmas Gathering, my stash is basically gone, so now it's time to replenish my supply of the cards I use most which are Thinking of You, Birthday and those that I send to let someone know I am thinking about them.  I sent a lot of heavily embellished cards for Christmas, so I wanted something that would be fairly flat for my card.  I used Ranger Liquid Pearls to add centers to my blooms.

The sentiment I used is from Altenew Build A Flower: Sakura Blossom Stamp and Die Set.  There are several very nice sentiments in that set. I double heat embossed this particular card as I didn't get a very good impression the first time around.  That's the beauty of the MISTI - saved again!  I could never match it by hand.


Thank you so much for coming by to see my project today.  I enjoy sharing my thought processes with you and hopefully, that helps you to learn that different is okay.  We each have our own sense of style and it's okay not to exactly duplicate someone else's style.  Our style is what makes the same stamp look so vastly different; that special touch that you want to use will be different from what I want to use, which is why there are so many versions of cards from the same set.  Each of us has our own thoughts and inspiration that we take away from seeing what others do.  I love how light and airy this card turned out and I hope you do too!

Wednesday, November 28, 2018

Altenew Educator Certification Program - Level II Final Challenge

Hello there!  I am back today with my assignment for my Final Challenge for the Altenew Educator Level II classes.  My assignment was to create a Home Decor project with a matching Card or Gift Tag in any theme. Being the Christmas Season, I wanted to make another of the angels like I did for the November 2018 Keeping Christmas Blog Hop.  That project was a silver angel and with this project, I made a gold angel.

So while I was looking through Pinterest, trying to decide what I wanted to do for my project, I came across these sweet little Angels made from books and I knew I wanted to try one.

Projects from the November 2018 Keeping Christmas Blog Hop © Vicki Finger
While I was at it, I picked up a few more books from my Dollar Tree Store to make a couple more angels for my best friend and also one for myself.  The folding process is the same for all of them so I will add a few pictures here for you and tell you what I did differently from the first one that I made.  Practice makes perfect as they say.

The techniques I used are:

  • Layered Stamping
  • Watercolor Brushstroke Backgrounds
  • Heat Embossing
  • Creating my own Patterned Paper
  • Adding Sparkle and Shine
  • Using Scoring to Add Dimension
  • Creating a Home Decor Project from Stamping Supplies
  • Using Inks in Non-Traditional Ways
  • Using Shimmer Sprays to add Texture and Dimension
  • Sponging

Depending on the type of book you use, you may want to remove the front and back cover.  I ended up doing that for all of mine.  This made it a bit easier to work with.  A few things that I learned during this process are that older books are harder to work with because the pages become brittle and often break off on the corners.  Most of the projects I saw used 150 pages, but I felt I could make the angels easier keeping to between 75 - 100 pages.  It's still a lot of folding, but it goes pretty fast, especially if you use your Teflon bone folder.


First, you want to fold the page in as shown in the first two photos above so that you end up with this conical shape.  Because I wanted my bottom to be completely flat, I also turned up the bottom corner so that the base would be flat.  Do the same thing to each page until you have 75 pages which will be 150 sides.  You can use more pages if you want a fuller "skirt". Because I was making an angel, I opted to do the additional fold as pictured in the third photo where you also fold up the bottom corner, making it completely flat on the bottom.  This also helps to thicken up that area which is especially important if you are using an older book that has brittle pages.  For today's project, I used a new book that I got at Dollar Tree so it was easier to fold and the pages were not brittle and falling apart.

Now you are ready to spray paint your Angel.  This can also become a Christmas Tree if you would prefer that or want something a little simpler to do.  It would definitely require more pages than the angel does because you want that fullness all the way around.  The angels' backs lay open to attach the wings, so it takes fewer pages.


I wanted to show you the paint and how it looks once it's dry so here are two more that are waiting to be finished.  The one on the left is done in Silver Spray Paint (I like Krylon) and Glitter Dust Spray while the one on the right is done in Gold Spray Paint with Glitter Dust Spray.  For the one on the right, I am planning to remove the wings to replace with the folded paper ones, or I am going to use an Edger's Style die to draw a scalloped line across the top and cut them freehand.  I don't normally use flash in my photos but it's 5 a.m. and I really wanted you to see how beautiful and sparkly these are with the glitter dust added.


Now you are ready to score and accordion fold your 12 x 12 paper for the wings.  I scored every ½ inch and then bending in the center, put the two sides together with Scor-Tape to form the wings.

Next, you want to prepare your angels head and halo.  While I was at the Dollar Tree store, I found some much thicker wire for my halo that I knew would work better for the size of books I was planning so I picked up some in gold.  Just because it is gold doesn't mean it will be the same gold as everything else you are using, so I planned to spray paint mine with the same paint that I used for the angel.

The easiest way I've found to create my Halo is to snip off a length of the wire (using the same snips as you do to cut dies apart).  Put an upside-down bottle of Embossing Powder on your work surface and pull the two ends around like this.  If you have a smaller book and smaller head, use one of the WOW! smaller embossing powder jars.

Once that part is nice and secure, keep wrapping the wire around itself.  You want a pretty good length on the "stem" as you will be tucking that in between the angel's head/body and the wings.

I have some small, very inexpensive glittery ornaments that I am using for the heads.  Styrofoam ones actually work best if you can find some.  I got some a few years ago from Hobby Lobby for a small Fiber Optic Christmas Tree that we had and I've been pilfering them from that.  I also got some small ones at Walmart the other day but they are plastic and don't work as well.  The particular one that I am using for today's is plastic and you can't cut those in half with any tools that I have, so Styrofoam is easier.  Plus, our electric carving knife cuts right through those.  Even in the rest of the house, I love finding additional purposes for a tool.  It's one of the things that we crafters do best!


Tuck the ornament into the center spine area with a little hot glue and the hanger side down to make the head.  Tie a length of ribbon around the neck to hide where the gluing might show. Then, using some hot glue, position your halo and hold it in place while it dries.  It has to have enough height to be over the head rather than resting on top of the head.  The back side of your Angel should look something like this.

The front of your angel should be something along these lines.  I wish I could capture the sparkly goodness of her!  She is so pretty!

I also wanted to show that you could make some simpler versions if you want to make an ornament using similar methods.  I took a 6 x 12 sheet of iridescent vellum and cut it in half to have two 6 x 6 pieces.  I sprayed it with some gold shimmer mist and let it dry.  Then I scored each piece with half inch score lines and creased them well with my bone folder.  You should have something that looks like this when you are finished.  Of course, mine is made from Vellum, so it isn't the same paper but you get the idea.  On the longer edge, put a ¼ inch piece of score tap all the way down and adhere the two pieces together for the "skirt".  Then on the underside of the wings, place another piece of Scor-Tape on each side where the arrows are pointing.  Then press those against the skirt to form wings.


I took my ornament one step further by also attaching at the top to form a different kind of halo.  I drew a little face making the "0" with its mouth so it looks like it's singing.  I got that idea from back in the day when Paper Dolls were popular in scrapbooking.  Somewhere, I have some stamps that make these little faces, but I'll have to dig them up for future ornaments.  The little pearls across the forehead also form a type of halo so just play around with what you have on hand and see what you can come up with.  I also added some blush to the cheeks with chalks that I have from back at the same time.

Then I decided I wanted to create my own patterned paper with heat embossing to make another little angel face ornament.  So using the Altenew Pattern Play Diamonds Stamp Set, I stamped with Versamark onto thin pearlescent gold vellum.  I thought it would be interesting to create the pattern going horizontally, rather than vertically.  Still, I kept it very simple and just added a bit of Glitter Dust to the sheer ribbon.  Mostly, this really helps with keeping the ends of the ribbon clean.  Fray Check also works very well for this purpose as most seamstresses know.  I definitely need to find my little face stamps or get a whole lot better at drawing angel faces. *Ãœ*  I used a little pom-pom ball to touch to the ink cube for the little bit of color on the cheeks.  I really like the way this little Choir Angel turned out.  You could add gems, pearls or Nuvo drops at each intersection of the pattern, but I like the more subtle look of tone on tone heat embossing here.


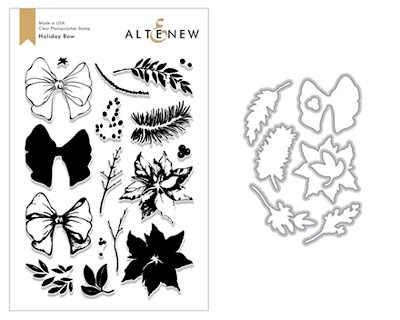
For the card and gift tag portion of this post, I finally got a chance to play with my Holiday Bow Stamps and Dies.  These layers are so easy to line up!  Because I wanted to add some touches of gold to this part of my project, I decided to stamp the Pine Boughs in Delicata Golden Glitz Ink. Even though I was using all pretty saturated colors of red, it was still super easy to line up each of the three layers.

For the bow, I stamped the outline first in Ruby Red, then Vineyard Berry for the detail stamp and Heartbeat for the most solid image.  I wanted a vibrant Christmas Red and you can see that I got that but I decided to add the outline in Antique Gold Embossing Powder.  That way it tied into my other projects better.  I planned to use two of the many brushstroke backgrounds I made a few weeks ago and I talked about how to do in THIS POST.

Watercolor Brushstroke Backgrounds are very easy to make.  Just get a small container and mix a small amount of Gold Watercolor with a few drops of re-inker in the colors you want.  Add a few drops of water or clear shimmer mist (or both) until you have the color concentration that you want.  I love rich color so I had a lot of that style and only a few in the lighter tones.  I typically use 2-3 colors of reinker and you'll want to use analogous colors so you don't get muddy brown.  Using a super smooth heavyweight cardstock is essential to this style of background.  I used Neenah Solar White for the Green ones I made today.  I also really like these because they have a lot of texture in them.  Use the cheapest, crummiest brush you can find for these.  The more uneven the bristles, the better the texture.  Here are a few more of the ones I've already created.


This is one time you do not want solid coverage. Also, when creating these and be sure to let them dry in between the layers just as you would for any kind of watercolor.  It is very hard to tell what the color will really look like until each layer dries.  You can do your brush strokes Vertically or Horizontally.  My card and tag use one of each.  When I first tried this technique, I was a bit heavy-handed with the gold ('cause you know how much I love Metallic Gold) and so I learned that it takes very little of the Gold Watercolor but more water and re-inker to get a nice blend of color.  You can make several while you have your supplies out and save them for later.  I still have a nice stack.


Making sure my image was dry and using a liberal amount of powder, I put the outline stamp back in place and double stamped and double heat embossed the outline of the bow.

I finished stamping all of the greenery and other elements I wanted, making sure I had plenty of pieces to work with.  The Pocket Banner Die from Altenew is high on my wishlist and I would have preferred that shape but I worked with what I had which happens to be a banner die from Lawn Fawn.

I always loosely arrange my elements to get an idea of what I'll be using to make the card.  By doing this, I was able to see that I had enough extra pieces to make a tag.  Since I still have lots of brushstroke backgrounds, I decided to use one for the tag as well.

Once I had a loose formation of my arrangement, I grabbed my 4.25 x 5.5 inch background panel and started transferring my arrangement to that.  Once I finished that, I put a piece of Press 'N Seal on top and smoothed it down.  That allows me to pick it up and keep everything where I want it by adding the adhesive to the backside one layer at a time.  For the very bottom layer, I used 1/8 inch Scor-Tape for the very bottom layer which was the 2 branches with the pink berries on it.  Next came the two laurel type branches (no berries) and I used skinny strips of Foam Tape for those.  Then came the 3 other branches that have berries stamped in Deep Iris.  The greens I used are Hunter Green with a bit of Evergreen sponged in at the base of each leaf.  I love the variegated look this gives.  Then we got to the golden pine boughs which I used regular tape runner on.  For the red bow, I again used a couple of skinny strips of Foam Tape to elevate it slightly from the rest of the arrangement.


And here you have it — a Home decor project with a card and a tag plus a little ornament snuck in there if you want or need it.  Thank you so much for stopping by today to see my project.  I had a heck of a time trying to get the lighting right for these photos.  I wish I had a wider angle lens, but since I normally only make cards or something that size, I'll live with this one for the time being.