Showing posts with label Altenew Educator Certification Program Level II. Show all posts

Wednesday, November 28, 2018

Altenew Educator Certification Program - Level II Final Challenge

Hello there!  I am back today with my assignment for my Final Challenge for the Altenew Educator Level II classes.  My assignment was to create a Home Decor project with a matching Card or Gift Tag in any theme. Being the Christmas Season, I wanted to make another of the angels like I did for the November 2018 Keeping Christmas Blog Hop.  That project was a silver angel and with this project, I made a gold angel.

So while I was looking through Pinterest, trying to decide what I wanted to do for my project, I came across these sweet little Angels made from books and I knew I wanted to try one.

Projects from the November 2018 Keeping Christmas Blog Hop © Vicki Finger
While I was at it, I picked up a few more books from my Dollar Tree Store to make a couple more angels for my best friend and also one for myself.  The folding process is the same for all of them so I will add a few pictures here for you and tell you what I did differently from the first one that I made.  Practice makes perfect as they say.

The techniques I used are:

  • Layered Stamping
  • Watercolor Brushstroke Backgrounds
  • Heat Embossing
  • Creating my own Patterned Paper
  • Adding Sparkle and Shine
  • Using Scoring to Add Dimension
  • Creating a Home Decor Project from Stamping Supplies
  • Using Inks in Non-Traditional Ways
  • Using Shimmer Sprays to add Texture and Dimension
  • Sponging

Depending on the type of book you use, you may want to remove the front and back cover.  I ended up doing that for all of mine.  This made it a bit easier to work with.  A few things that I learned during this process are that older books are harder to work with because the pages become brittle and often break off on the corners.  Most of the projects I saw used 150 pages, but I felt I could make the angels easier keeping to between 75 - 100 pages.  It's still a lot of folding, but it goes pretty fast, especially if you use your Teflon bone folder.


First, you want to fold the page in as shown in the first two photos above so that you end up with this conical shape.  Because I wanted my bottom to be completely flat, I also turned up the bottom corner so that the base would be flat.  Do the same thing to each page until you have 75 pages which will be 150 sides.  You can use more pages if you want a fuller "skirt". Because I was making an angel, I opted to do the additional fold as pictured in the third photo where you also fold up the bottom corner, making it completely flat on the bottom.  This also helps to thicken up that area which is especially important if you are using an older book that has brittle pages.  For today's project, I used a new book that I got at Dollar Tree so it was easier to fold and the pages were not brittle and falling apart.

Now you are ready to spray paint your Angel.  This can also become a Christmas Tree if you would prefer that or want something a little simpler to do.  It would definitely require more pages than the angel does because you want that fullness all the way around.  The angels' backs lay open to attach the wings, so it takes fewer pages.


I wanted to show you the paint and how it looks once it's dry so here are two more that are waiting to be finished.  The one on the left is done in Silver Spray Paint (I like Krylon) and Glitter Dust Spray while the one on the right is done in Gold Spray Paint with Glitter Dust Spray.  For the one on the right, I am planning to remove the wings to replace with the folded paper ones, or I am going to use an Edger's Style die to draw a scalloped line across the top and cut them freehand.  I don't normally use flash in my photos but it's 5 a.m. and I really wanted you to see how beautiful and sparkly these are with the glitter dust added.


Now you are ready to score and accordion fold your 12 x 12 paper for the wings.  I scored every ½ inch and then bending in the center, put the two sides together with Scor-Tape to form the wings.

Next, you want to prepare your angels head and halo.  While I was at the Dollar Tree store, I found some much thicker wire for my halo that I knew would work better for the size of books I was planning so I picked up some in gold.  Just because it is gold doesn't mean it will be the same gold as everything else you are using, so I planned to spray paint mine with the same paint that I used for the angel.

The easiest way I've found to create my Halo is to snip off a length of the wire (using the same snips as you do to cut dies apart).  Put an upside-down bottle of Embossing Powder on your work surface and pull the two ends around like this.  If you have a smaller book and smaller head, use one of the WOW! smaller embossing powder jars.

Once that part is nice and secure, keep wrapping the wire around itself.  You want a pretty good length on the "stem" as you will be tucking that in between the angel's head/body and the wings.

I have some small, very inexpensive glittery ornaments that I am using for the heads.  Styrofoam ones actually work best if you can find some.  I got some a few years ago from Hobby Lobby for a small Fiber Optic Christmas Tree that we had and I've been pilfering them from that.  I also got some small ones at Walmart the other day but they are plastic and don't work as well.  The particular one that I am using for today's is plastic and you can't cut those in half with any tools that I have, so Styrofoam is easier.  Plus, our electric carving knife cuts right through those.  Even in the rest of the house, I love finding additional purposes for a tool.  It's one of the things that we crafters do best!


Tuck the ornament into the center spine area with a little hot glue and the hanger side down to make the head.  Tie a length of ribbon around the neck to hide where the gluing might show. Then, using some hot glue, position your halo and hold it in place while it dries.  It has to have enough height to be over the head rather than resting on top of the head.  The back side of your Angel should look something like this.

The front of your angel should be something along these lines.  I wish I could capture the sparkly goodness of her!  She is so pretty!

I also wanted to show that you could make some simpler versions if you want to make an ornament using similar methods.  I took a 6 x 12 sheet of iridescent vellum and cut it in half to have two 6 x 6 pieces.  I sprayed it with some gold shimmer mist and let it dry.  Then I scored each piece with half inch score lines and creased them well with my bone folder.  You should have something that looks like this when you are finished.  Of course, mine is made from Vellum, so it isn't the same paper but you get the idea.  On the longer edge, put a ¼ inch piece of score tap all the way down and adhere the two pieces together for the "skirt".  Then on the underside of the wings, place another piece of Scor-Tape on each side where the arrows are pointing.  Then press those against the skirt to form wings.


I took my ornament one step further by also attaching at the top to form a different kind of halo.  I drew a little face making the "0" with its mouth so it looks like it's singing.  I got that idea from back in the day when Paper Dolls were popular in scrapbooking.  Somewhere, I have some stamps that make these little faces, but I'll have to dig them up for future ornaments.  The little pearls across the forehead also form a type of halo so just play around with what you have on hand and see what you can come up with.  I also added some blush to the cheeks with chalks that I have from back at the same time.

Then I decided I wanted to create my own patterned paper with heat embossing to make another little angel face ornament.  So using the Altenew Pattern Play Diamonds Stamp Set, I stamped with Versamark onto thin pearlescent gold vellum.  I thought it would be interesting to create the pattern going horizontally, rather than vertically.  Still, I kept it very simple and just added a bit of Glitter Dust to the sheer ribbon.  Mostly, this really helps with keeping the ends of the ribbon clean.  Fray Check also works very well for this purpose as most seamstresses know.  I definitely need to find my little face stamps or get a whole lot better at drawing angel faces. *Ü*  I used a little pom-pom ball to touch to the ink cube for the little bit of color on the cheeks.  I really like the way this little Choir Angel turned out.  You could add gems, pearls or Nuvo drops at each intersection of the pattern, but I like the more subtle look of tone on tone heat embossing here.


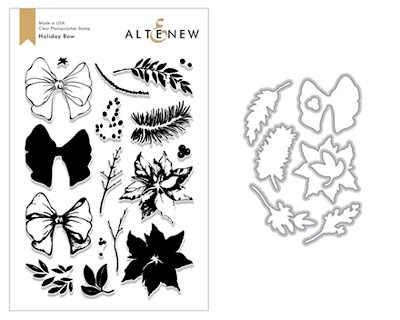
For the card and gift tag portion of this post, I finally got a chance to play with my Holiday Bow Stamps and Dies.  These layers are so easy to line up!  Because I wanted to add some touches of gold to this part of my project, I decided to stamp the Pine Boughs in Delicata Golden Glitz Ink. Even though I was using all pretty saturated colors of red, it was still super easy to line up each of the three layers.

For the bow, I stamped the outline first in Ruby Red, then Vineyard Berry for the detail stamp and Heartbeat for the most solid image.  I wanted a vibrant Christmas Red and you can see that I got that but I decided to add the outline in Antique Gold Embossing Powder.  That way it tied into my other projects better.  I planned to use two of the many brushstroke backgrounds I made a few weeks ago and I talked about how to do in THIS POST.

Watercolor Brushstroke Backgrounds are very easy to make.  Just get a small container and mix a small amount of Gold Watercolor with a few drops of re-inker in the colors you want.  Add a few drops of water or clear shimmer mist (or both) until you have the color concentration that you want.  I love rich color so I had a lot of that style and only a few in the lighter tones.  I typically use 2-3 colors of reinker and you'll want to use analogous colors so you don't get muddy brown.  Using a super smooth heavyweight cardstock is essential to this style of background.  I used Neenah Solar White for the Green ones I made today.  I also really like these because they have a lot of texture in them.  Use the cheapest, crummiest brush you can find for these.  The more uneven the bristles, the better the texture.  Here are a few more of the ones I've already created.


This is one time you do not want solid coverage. Also, when creating these and be sure to let them dry in between the layers just as you would for any kind of watercolor.  It is very hard to tell what the color will really look like until each layer dries.  You can do your brush strokes Vertically or Horizontally.  My card and tag use one of each.  When I first tried this technique, I was a bit heavy-handed with the gold ('cause you know how much I love Metallic Gold) and so I learned that it takes very little of the Gold Watercolor but more water and re-inker to get a nice blend of color.  You can make several while you have your supplies out and save them for later.  I still have a nice stack.


Making sure my image was dry and using a liberal amount of powder, I put the outline stamp back in place and double stamped and double heat embossed the outline of the bow.

I finished stamping all of the greenery and other elements I wanted, making sure I had plenty of pieces to work with.  The Pocket Banner Die from Altenew is high on my wishlist and I would have preferred that shape but I worked with what I had which happens to be a banner die from Lawn Fawn.

I always loosely arrange my elements to get an idea of what I'll be using to make the card.  By doing this, I was able to see that I had enough extra pieces to make a tag.  Since I still have lots of brushstroke backgrounds, I decided to use one for the tag as well.

Once I had a loose formation of my arrangement, I grabbed my 4.25 x 5.5 inch background panel and started transferring my arrangement to that.  Once I finished that, I put a piece of Press 'N Seal on top and smoothed it down.  That allows me to pick it up and keep everything where I want it by adding the adhesive to the backside one layer at a time.  For the very bottom layer, I used 1/8 inch Scor-Tape for the very bottom layer which was the 2 branches with the pink berries on it.  Next came the two laurel type branches (no berries) and I used skinny strips of Foam Tape for those.  Then came the 3 other branches that have berries stamped in Deep Iris.  The greens I used are Hunter Green with a bit of Evergreen sponged in at the base of each leaf.  I love the variegated look this gives.  Then we got to the golden pine boughs which I used regular tape runner on.  For the red bow, I again used a couple of skinny strips of Foam Tape to elevate it slightly from the rest of the arrangement.


And here you have it — a Home decor project with a card and a tag plus a little ornament snuck in there if you want or need it.  Thank you so much for stopping by today to see my project.  I had a heck of a time trying to get the lighting right for these photos.  I wish I had a wider angle lens, but since I normally only make cards or something that size, I'll live with this one for the time being.

Tuesday, November 20, 2018

Altenew Educator - Masking Unleashed

THIS POST HAS BEEN EDITED TO ADD CONTENT!

Hello everyone!  I am here today with my last project for the Altenew Educator Certification Program Level II Classes.  Once this is submitted I will be assigned my class project for my "final" exam.

My project for today uses very simple masking to create the look of a flower with a lot of foliage behind it.  I used Versamark to stamp and heat emboss all of the outline images in this set and that can get super tricky as your mask will leave some sticky residue on your image, so you must use lots of powder between each stamping to make sure your image stays nice and clean.  I also did mine on Arches Hot Pressed Watercolor Paper because it is smoother for heat embossing and stamping.

Because I have RA, I have a difficult time cutting masks by hand, so I kept my card very clean and simple so I only had to cut one mask for the bloom.  I love the bloom and the leaves in this set, so I still stamped the additional layers but after that was done I took a plain water brush and blended all the color around.  The leaves first and then the bloom.  It just makes it so the lines are softened out a bit and the color blends a bit more.  For my leaves, I used Sweet Leaf and Just Green Inks and the bloom was done in Rose Quartz and Pinkalicious which are all from Altenew.  I wanted something very soft for the bloom which is why I chose to blend everything out with a water brush.  It gives it the look of watercolor without the work.  I'm not very good with watercolor and I haven't had much time to practice this year, but I have a couple of classes that I plan to go back and revisit with the colder temperatures setting in.


I did not get a very good picture of my card this time before the sun moved (with the shorter daylight hours) into my window, so I apologize for the image quality this time around.  For a touch of sparkle, I added some Ballerina Pink sequins with some gems in the center and also some Tonic Nuvo Shimmer Pen to the bloom and leaves.

Thank you so much for stopping by today and checking out my project.  I hope you'll come back soon.  Wishing all of my American friends a very Happy Thanksgiving weekend.  I'm both dreading and excited to see what the Black Friday or Cyber Monday Sales bring to us this year.

I have sent about 80 Christmas Cards today and still have a few more to make to finish up for the season plus I have the Keeping Christmas Blog Hop and the Papertrey Ink Blog hop on the 25th so I'll be back soon with more projects for you to see.


*Edited 11/22/2018:  So after sitting on my desk for a few days, I decided I really needed more color and contrast in my focal image.  Using my stamping as a guideline, I went back in with my Pink Zig Clean Color Real Brush Marker and added some additional color and details to my water-brushed image.  I like this much better.  I would encourage you to try adding some color if you aren't satisfied with the way an image turns out.  In my case, the greens seemed very vibrant while the bloom was too soft and pastel to compete with the leaves.  I'm much happier with the way the bloom looks now.

Sunday, November 11, 2018

Altenew Educator - Impressive Heat Embossing

Hello there!  Today I am back with my next project for the Altenew Educator Certification Program.  This class is "Impressive Heat Embossing" and I got to do one of my favorite techniques which is watercolor over a heat embossed background.

Today's project is a special one because it's a card I made for my best friend who's birthday is Tuesday, November 13th.  Gloria has been my best friend for many years.  I met her when we lived in Frisco, TX and I think she moved there in 2000.  We became friends through a Creative Memories Class that I taught at my next door neighbors house through another of my friends, Xochil.  It wasn't long before Gloria and I were "thick as thieves" and through the years we've become even closer.  Even though I spent 8½ years living in Oklahoma, she still came to visit me and when I came here to see my daughter and grandkids, I would make sure to see her as often as possible.  Several times over the years that I was gone, we would still get to share Christmas and Thanksgiving meals.  My daughter and son-in-law are gracious hosts and would always let me invite her to the special family dinner that we traditionally hold on Christmas Eve.

It was hard being away from each other during the years in Oklahoma so as you can imagine, we see each other as often as possible now that we're closer to each other.  I don't know how much you all know about the Dallas area, but a 40-minute drive is nothing.  She still lives in the same house in Frisco still so it's about an hour for her to drive here from her house.  I go to Frisco pretty often as two of my doctors are there. But I'm normally running around doing other tests and don't often get time to visit when I'm there as she is at work.  We've had at least 1 weekend together every month since we've moved back to Texas and she is the most frequent visitor in my guest room.  We spend a lot of time making cards and a lot of time outside on our back deck, sometimes deep in conversation, and other times just relaxing.  We watch movies and hang out.

All of this is just to say I wanted to create a beautiful card for her birthday and heat embossing wows her every single time.  I chose the Simon Says Stamp Rebecca Lace Background Stamp for my card, which is one of my absolute favorites!  I stamped the image in my Original MISTI onto a 5 x 7 piece of Fabriano Artistico Extra White Hot Pressed Watercolor Paper.  This is a very detailed stamp with fine lines and it can be hard to get a good impression, so I inked it up with Versamark two times before adding Antique Gold Embossing Powder to it.  I could see a place in the center of the image where I did not get it inked up well the first time so rather than trying to fix it or cover it after the fact, I decided to just ink it twice to make sure all the areas were covered with Versamark. I inspected it carefully before adding the embossing powder and I got a perfect image.  This was somewhat of a surprise since I'm kind of out of practice with heat embossing lately and forgot to use my powder tool first.  So I breathed a huge sigh of relief when I got a clean image.

I wanted to use a Wet-on-Wet technique for the background so that my colors would blend and move seamlessly. I chose to use Altenew Re-inkers in Puffy Heart, Coral Berry, and Maple Yellow. After wetting the entire panel of paper, I started adding a diagonal area of Maple Yellow from the upper left to the bottom right as I wanted the other two colors from each side to blend into the yellow. I let that dry a little bit but while the paper was still damp, I added Coral Berry with a good amount of water to the upper right portion of the panel. Next, I added Puffy Heart to the bottom left of the panel and let all of those colors dry a little bit. Once the excess water was evaporated, I went back into each area adding more intense color while the panel was still damp to kind of brighten it up a bit. Once all the excess water was evaporated again, I sprayed it with some Iridescent Gold Shimmer Mist from Tattered Angels which helps the blends be an even smoother transition from color to color. I set it in my window sill to dry well. With the shorter winter days, the sun comes in through the window much earlier and at the time, it was in full force in my window so it didn't take very long to dry.


Once the panel was dry, I lined up my WPLUS9 Stitched Rectangle Die (from the Gift Card Layers set) and die cut it where I wanted.  I adhered it to a top folding Card Base made from Stampers Select White Cardstock.  I chose the Simon Says Stamp Big Happy a word die and cut it from Gold Foiled Cardstock.  Then using a sentiment from the Papertrey Ink Painted Petals Stamp Set (2016 Anniversary Set), I stamped Birthday Wishes onto a strip of black cardstock with Versamark and heat set it with Antique Gold Embossing Powder.  I used some pink pearl gems from Hero Arts to embellish the card which finishes off my project.  I love how this card came out and I know she will love it also.  We aren't celebrating her birthday until next weekend, so I'm saving it to give to her then.


I hope you all enjoyed my project for this class and that you'll give it a try.  Wet on Wet backgrounds are among the easiest of watercolor techniques to do and no two cards will ever look the same. 

Sunday, October 14, 2018

Altenew Educator Beautiful Details

Hello there!  I am back today with a project that is part of my Altenew Educator Certification Program.  Today's project is for the Beautiful Details Class taught by Marika Rahtu.  This class is one I had taken before so I wanted to try a new to me technique that I hadn't previously tried, which was coloring with Copics on the back side of a heat embossed Vellum image.  Marika used a Dull Embossing powder but since I didn't have any I used Pearl White.  It can be a little hard to see, but if you put something behind it, it makes it a bit easier.

I used 44# vellum from Papertrey Ink to do my heat embossing of the bloom and leaves from Altenew's Beautiful Heart.  It's a very heavyweight vellum and doesn't warp much if at all.  Just keep the heat tool moving and it will work out alright.  I used Copics in a variety of shades of  Red Violet to create the colors.  Unfortunately, I put them all away before I wrote them down, so I can't say which specific colors I used, but the shades were in the deeper pinks.  Initially, I was planning to do just the pink, but once I had the flowers and leaves done, I felt that the color kind of the bloom disappeared once I put it on the white oval die cut.  So I decided that I would put a white die cut behind it.  When I was putting the dies back into their stamp pocket, I noticed that I had one previously partially colored but unfinished in Coral tones.  When I popped the vellum layer over that, it really brought out a lot of color in my petals and so I decided to use the partially colored bloom for the base underneath the vellum layer.  Now my color wasn't lost in the sea of white. I don't have very many colored pencils but I did add a few coloring lines to the leaves to bring out a little more of the veining in the leaves.


Because I used White Satin Pearl Embossing Powder, I thought it would look pretty to used White Shimmer Cardstock for my background and the oval die cut.

Next, I used some Heidi Swap Gold Lamé Shimmer Spray to create droplets on the card.  When I put the card together, I felt it needed a bit more dimension, so I used Gold Pico Embellisher to add drops over the gold splatter.  Now comes confession time -- I liked it better without the pico embellisher and just the gold splatter. But you never know until you try it!  Since I glued down the vellum to the oval panel, I can't remove it and do it over.  It doesn't have to be our vision of perfection but I am happy when my projects are.  Trust me, no one says "oh, I see you did that wrong" when they get a card in the mail.  They only think of your thoughtfulness at sending it.  So while it isn't "perfect" in my eyes, it's still beautiful.

The technique I was using was Copic coloring on the back side of Vellum and I am happy with the way that looks.  I'd like to try it again sometime adding colored pencil details along with the Copics.

This past couple of weeks has been absolutely crazy between doctors appointments, getting my Mammogram and Bone Density Scans done, and now I have several MRI's scheduled because I have MS.  They like to get a thorough look every year or two in order to see how I am getting along, but I am not looking forward to a few hours spent inside a very claustrophobic tube to have it done.  Plus I've had all of the grandkids at various times this week, so I have been busy! 

 Anyhow, I will try to link as many supplies as I can remember, but I made this card a few weeks ago for this class and I'm just now getting the blog post written.

Affiliate Links Used Whenever Possible

Altenew Beautiful Day
Shop at:
SSS | ALT
Altenew Beautiful Heart Stamp & Die Bundle
Shop at:
ALT
Kokuyo Long Dot Runner Adhesive
Shop at:
SSS
PTI Shape Shifters Oval #2
Shop at:
PTI
PTI Stamper's Select Vellum (#44)
Shop at:
PTI
PTI Stamper's Select White Cardstock
Shop at:
PTI
SSS Antique Gold Embossing Powder
Shop at:
SSS
Teflon Bone Folder
Teflon Bone Folder
Shop at:
SSS
Versamark Ink
Versamark Ink
Shop at:
SSS
Wagner Heat Tool
Wagner Heat Tool
Shop at:
SSS
WPLUS9 Gift Card Layers Designer Dies
Shop at:
SSS

Friday, September 28, 2018

Altenew Educator - Polychromatic

Hello there!  I am finally back with my next project for the Altenew Educator Certification Program and the class is "Polychromatic" which simply means a variety of colors. It might mean a wide variety of different colors or a variety of colors in one specific color-way such as blues, greens, purples, etc.  For my project today, I chose to use several different hues of blue with White Pearl Embossing Powder from Hero Arts.  I used primarily blues from my Zig Clean Color Real Brush Markers in Light Blue, Cobalt Blue, and Persian Green but I also added in a touch of Mermaid Lagoon Distress Marker as well.  I didn't have quite the right shade in the Zigs so I chose to use the one distress marker as well.

Nina used the Altenew Bejeweled Stamp set for her project, but I don't have that set yet.  I may very well get it eventually.  I started by heat embossing two butterflies (Stampendous Pen Pattern Butterflies - NLA) with Versamark and White Pearl Embossing Powder onto Arches Hot Pressed Watercolor Paper.  This paper is very smooth so it makes it very easy to heat emboss an image on.  I also used the MISTI just in case and it so happened that I missed a spot on the second one and had to go back and add a bit of ink right in the middle, so I was glad I had used the MISTI.  

I have two different examples for you today, one done in pinks/purples and one done in blues with a touch of teal.  For the pink one, I opted to leave the butterfly on the panel for a one layer card and also stamped the sentiment on there.  The Sentiment is from a set I collaborated on with Altenew, "Kind Words".


For the second card, I wanted the loose watercolor under the butterfly to show and also to bring attention to the small detailed images on that panel so I die cut the butterfly with the coordinating dies.  I love butterflies any time of year, so I figured I could use a few in my stash of cards.


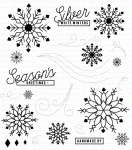
For the little swirls on the blue butterfly background, I used a couple of stamps from the Silver White Winters Stamp set from Papertrey Ink.  Just as they give the impression of movement to the snowflakes in that set, they also give the same impression to the butterflies on this card.  However, this is one time when I didn't want to put a sentiment on the card.

I'm not great at the loose watercolor techniques, but I keep plugging along and practicing.  I'd try this style of card again in a heartbeat but next time I would probably use gold embossing powder.  I have one more of these butterflies already stamped and heat embossed in gold, so if I get a chance, I will definitely come back and share it here.

While I do love my Zig Markers, I find the color of them fades out very quickly so you might want to go in with brighter colors to start with.  I still like the outcome of this project, so I'm keeping it as is.  For the Blue Butterfly, I used Tonic Aqua Shimmer Pen to add a lot of sparkle to the inner and outer portions of the wings while leaving the center section of the wings plain.  For the Pink Butterfly, I put Tonic Nuvo Aqua Shimmer Pen over all of the wings.  I added some sequins to both cards for another pop of color.

My next class is Beautiful Details and is one that I've taken before and was taught by Marika Rahtu.  It was early on in my cardmaking so I am excited to see what I can do after taking the class again.   The supplies I've used are listed below (Affiliate Links are used whenever possible).


Altenew Bejeweled Stamp and Die Bundle
Shop at:
ALT
Altenew Kind Words Stamp Set
Shop at:
SSS | ALT
Arches Hot Pressed Watercolor Paper
Shop at:
SSS
Cuttlebug Die Cutting Machine
Shop at:
SSS
Gina K Designs Wreath Builder Templates
Shop at:
SSS | GKD
Hero Arts White Satin Pearl Embossing Powder
Shop at:
SSS
Kokuyo Long Dot Runner Adhesive
Shop at:
SSS
Mini MISTI Stamping Tool
Shop at:
SSS | ALT | GKD
PTI Silver Shite Winters Stamp Set
Shop at:
PTI
PTI Vintage Cream Cardstock
Shop at:
PTI
Ranger Multi Medium Matte
Shop at:
SSS
Teflon Bone Folder
Teflon Bone Folder
Shop at:
SSS
Tim Holtz Tonic Paper Trimmer
Shop at:
SSS
Tonic Aqua Shimmer Pen
Shop at:
SSS
Versamark Ink
Versamark Ink
Shop at:
SSS
Wagner Heat Tool
Wagner Heat Tool
Shop at:
SSS
Zig Clean Color Real Brush Markers - 48 Set
Shop at:
SSS