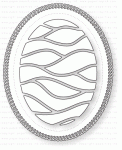
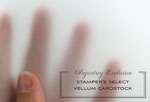
I used 44# vellum from Papertrey Ink to do my heat embossing of the bloom and leaves from Altenew's Beautiful Heart. It's a very heavyweight vellum and doesn't warp much if at all. Just keep the heat tool moving and it will work out alright. I used Copics in a variety of shades of Red Violet to create the colors. Unfortunately, I put them all away before I wrote them down, so I can't say which specific colors I used, but the shades were in the deeper pinks. Initially, I was planning to do just the pink, but once I had the flowers and leaves done, I felt that the color kind of the bloom disappeared once I put it on the white oval die cut. So I decided that I would put a white die cut behind it. When I was putting the dies back into their stamp pocket, I noticed that I had one previously partially colored but unfinished in Coral tones. When I popped the vellum layer over that, it really brought out a lot of color in my petals and so I decided to use the partially colored bloom for the base underneath the vellum layer. Now my color wasn't lost in the sea of white. I don't have very many colored pencils but I did add a few coloring lines to the leaves to bring out a little more of the veining in the leaves.
Because I used White Satin Pearl Embossing Powder, I thought it would look pretty to used White Shimmer Cardstock for my background and the oval die cut.
Next, I used some Heidi Swap Gold Lamé Shimmer Spray to create droplets on the card. When I put the card together, I felt it needed a bit more dimension, so I used Gold Pico Embellisher to add drops over the gold splatter. Now comes confession time -- I liked it better without the pico embellisher and just the gold splatter. But you never know until you try it! Since I glued down the vellum to the oval panel, I can't remove it and do it over. It doesn't have to be our vision of perfection but I am happy when my projects are. Trust me, no one says "oh, I see you did that wrong" when they get a card in the mail. They only think of your thoughtfulness at sending it. So while it isn't "perfect" in my eyes, it's still beautiful.
The technique I was using was Copic coloring on the back side of Vellum and I am happy with the way that looks. I'd like to try it again sometime adding colored pencil details along with the Copics.
This past couple of weeks has been absolutely crazy between doctors appointments, getting my Mammogram and Bone Density Scans done, and now I have several MRI's scheduled because I have MS. They like to get a thorough look every year or two in order to see how I am getting along, but I am not looking forward to a few hours spent inside a very claustrophobic tube to have it done. Plus I've had all of the grandkids at various times this week, so I have been busy!
Anyhow, I will try to link as many supplies as I can remember, but I made this card a few weeks ago for this class and I'm just now getting the blog post written.
Affiliate Links Used Whenever Possible
 Altenew Beautiful Day Shop at: SSS | ALT |
 Altenew Beautiful Heart Stamp & Die Bundle Shop at: ALT |
 Kokuyo Long Dot Runner Adhesive Shop at: SSS |
 PTI Shape Shifters Oval #2 Shop at: PTI |
 PTI Stamper's Select Vellum (#44) Shop at: PTI |
 PTI Stamper's Select White Cardstock Shop at: PTI |
 SSS Antique Gold Embossing Powder Shop at: SSS |
 Teflon Bone Folder Shop at: SSS |
 Versamark Ink Shop at: SSS |
 Wagner Heat Tool Shop at: SSS |
 WPLUS9 Gift Card Layers Designer Dies Shop at: SSS |


The large blooms look so beautiful with the vellum! GREAT write-up and details, Vicki! Thanks so much for entering your beautiful work in Altenew AECP assignment Gallery. Beautiful colors and design. Well done!
ReplyDelete