It's time for the monthly Keeping Christmas Blog Hop that we hold on the 25th of each month, except in December. We will be sharing Christmas Creations with tips and tricks on the 25th of each month. The idea behind this is to create a few Christmas Cards or tags each month so we don't have to panic to get all of our cards made for December 2018. Kelly Lunceford is our host as always. We always share tips and tricks to help you get things done. I've pretty much made 4 - 6 cards each time I sit down to do my card for this hop, so I have a hefty supply of Christmas Cards on hand for this coming Holiday Season.
Vicki Finger (You are Here)
For my main two projects today, I put a slightly different spin on a couple of cards for a few of the men in my life; a brother-in-law and a brother. So I made a few Christmas cards with more of a masculine spin.
I started by looking through my foiled card stock and also my patterned papers that had foil or metallic on them and choosing more masculine colors. You know I'm a sucker for some foiled patterned paper and I picked up several different ones last year at Michael's during their Cyber Monday Sale. Both of the papers I selected use backgrounds that are dark tones - Navy and Dark Grey. Both happened to have Copper foil accents. I had made a couple of these earlier in the week, but there was one thing I didn't really like about them and so I changed it up a bit for these two cards.
I die cut 2 of the Papertrey Ink Bold Borders: Yuletide from Copper Foil Cardstock. Then I cut 2 panels from the Foil Patterned Papers at 4 1/8th by 5 3/8ths. That way there aren't any edges sticking out but you can rest assured that your background fully fits behind your die cut without any gaps. Just using a simple pattern behind the die cut gives so much texture to a very simple card. But on the ones I made previously, I used the same cardstock for the interior panel and I knew it would look better if the background was more of a solid behind the sentiment so I changed that part up on these cards.
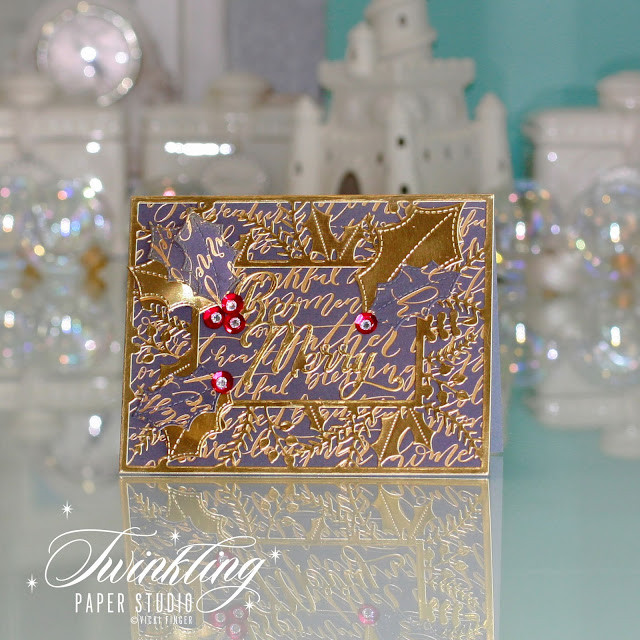
The interior of the grey card is cut from PTI Smokey Shadow Cardstock while the other is a more solid sheet from the same pack. I used the scraps from the 6 x 6 patterned paper and some of the foiled cardstock to die cut the Festive Holly Leaves from Pretty Pink Posh from both so that I could have a few leaves to add to the card. For quick and easy cards, using Cover Plate dies is super easy and requires no stamping. As you see, you can still make a beautiful card with a more masculine vibe or even a more traditional one like this one I posted about 10 days ago in the Create Along With Us Challenge at Papertrey Ink. I used Satin Red Sequins with gems in the center for the Holly Berries on this particular one.
For the more masculine cards, I tried a couple of different things as far as the berries. For the dark Navy and Copper card, I used Nuvo Drops in Copper Penny but mine are a strange consistency so for the Smokey Shadow and Copper, I used the dies that came with the Festive Holly Dies for the berries. I didn't like the plain ones, so I added a tiny touch of Golden Sunset for the highlight on the berries.
I'm pretty selective about the cover plate dies that I buy because they are more expensive, but I still feel like Papertrey Ink has the best value for the dollar and this is a cover plate that I can use over and over again. In fact, I also bought this month's Bold Borders: Flurries Die and I plan to make a few more cards with it when I receive it. I love seeing all the different ways to use the Cover Dies during the Papertrey Challenges and I often see things that I might never have thought to try. I'm trying to hold out for the new cover plate die until it arrives but I will probably be using that one for next month's Blog Hop.
Here's a few more I made in this same style.
I would have liked these better with a solid center panel, but they are still pretty cool with the text or pattern in the foil background panels. I think I will reserve the ones with gems for friends who are female.
If you aren't sure about using the Liquid Pearls or Crystal Drops, be sure to play with them on a piece of scrap paper first. I like to put my bottle upside down and whack it on my table a couple of times to get the drops down to the tip. Then make a circle as full as you want and then pull straight up. It does take a little bit of practice, but once you get the hang of it, they are easy to do. It's also a good idea to check the consistency of your drops before you try to put any on your card. I feel like the copper penny ones I did first weren't any good so I scraped them off and tried manipulating my bottle a little bit to get a better mix. You know how you are supposed to roll nail polish between your palms rather than shaking it? Well, that's the technique I used to get a better consistency in my bottle. It's like mine weren't mixed up well plus I had a clog in the tip, so better to practice a few first on scratch paper. Experience always teaches us something. I'd rather not learn when actually putting them on my card though.
Just to show you what other colors can do, here's a few more cards made using other alternative colors for cards:
The two light blue cards actually have subtle differences. One uses Silver Shimmer Cardstock and the other uses grey but has silver foiled Holly Leaves and Sentiment. The word "JOY" is from the October 2018 PTI Bold Borders: Flurries. I LOVE that font! For those cards I die cut two of the Bold Borders: Yultetide and rotated one of the 180 degrees. This gives that layers effect.
Thank you so much for stopping by today. I hope this gives you some ideas for a few fast but very elegant cards. You can do all the die cutting and then sit and assemble while you watch (a.k.a. listen) to the TV, listen to music or an audiobook.
We'll be back next month for the final projects of 2018 and we hope you'll join us again.
Affiliate Links Used Whenever Possible
 Cuttlebug Die Cutting Machine Shop at: SSS |
 Kokuyo Long Dot Runner Adhesive Shop at: SSS |
 Marvy Jewel Picker Shop at: SSS |
 PPP Festive Holly Die Shop at: SSS |
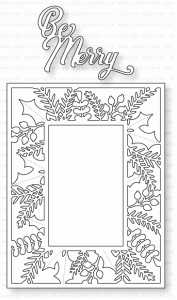
 PTI Bold Borders: Yuletide Shop at: PTI |
 PTI Scarlet Jewel Cardstock Shop at: PTI |
 Ranger Multi Medium Matte Shop at: SSS |
 Scor-Pal Scoring Board Shop at: SSS |
 Scrapbook Adhesives Thin 3D Foam Squares Shop at: SSS |
 Teflon Bone Folder Shop at: SSS |
 Tim Holtz Tonic Paper Trimmer Shop at: SSS |
 Tonic 6 Inch Personal Trimmer Shop at: SSS |
 Tonic Nuvo Crystal Drops Metallic Copper Penny Shop at: SSS |
 Tonic Nuvo Glitter Drops Golden Sunset Shop at: SSS |


Vicki, your cards are so elegant and festive! That bold borders die is so beautiful when used with the foil papers! What a nice post, thanks for all your tips and tricks and inspiration.
ReplyDeleteThank you so much, Nancy! Your projects were all gorgeous!!
DeleteWow...these are so beautiful. Love all the gorgeous shine, gives your cards such a beautiful elegance!
ReplyDeleteThese are all just incredible, Vicki! Love how elegant they all are!
ReplyDeleteSuch a beautiful assortment of cards! You've certainly been busy! How lucky the recipients will be!❤❤❤
ReplyDeleteThese cards are absolutely gorgeous and wonderful for the holiday season! Love the color and design choices. Thank you so very much for the inspiration! :D
ReplyDelete