Showing posts with label Cards With No Stamping. Show all posts

Wednesday, February 20, 2019

Papertrey Ink's Win It Wednesday

Look at me getting more than one blog post done in a week!  This card is for the Win It Wednesday Challenge over at Papertrey Ink.  This week's challenge is Stand Alone Dies.  While I am at it, I will add this to Virgina Lu's Show & Share as well.  There's no prizes or rules so we can share as often as we want to.

I have mentioned this in previous posts, but I  LOVE Art Deco Styles and so I have another Art Deco Styled group of die cuts that I am using to make my card.  And if you know me, I always love the chance to put Pink and Gold Together.

These things all came from Papertrey Ink with the exception of the label that I stamped my greeting on. That particular die I got several years ago (maybe 15 or so) at the Great American Scrapbook Convention in Arlington, TX at the Spellbinders Booth.  They had several small dies in a box that had been discontinued and this one was love at first sight for me.  I actually always loved it, but more than ever since I got my Gemini Die Cutting Machine because it embosses dies so very well!  Before that, I embossed it in my Cuttlebug but the detail just didn't show up that well.  Now you can really see that bookplate detail and I like to brush some ink in the matching color on it to bring those sweet details out even more.


The products that I used are Sweet Blush Cardstock, Gold Foiled Cardstock, Cover Plate: Twist, Sweet Blush Ink, and I am loving the Delicates Dies all layered up.  These dies are just so striking when you put them together this way.


As I did on some of the previous cards I've shared here and on Instagram, I use my bone folder to curve the bottom petals downward and the upper petals upward.  Then I put two or 3 layers of foam tape under the base flower and just a glue dot in the center to adhere the top layer to it.  It makes it looks so much fuller and more like a flower.  I just love these dies.  Right now, I just want to put them on everything!

This is another of those cards that you have almost no stamping to complete.  I love doing layered florals, but sometimes I want to do something cleaner and simpler to do.  I like pretty much every style of cardmaking and this style is no exception.  It's so clean and graphic!


This image lets you see how the bottom layer of petals are bent downward and the top layer bent upward.

I'll get back to stamping sometime soon, but right now I am enjoying playing with some of the Cover Plate Dies that I have and combining them with other things that I also have.


I'll be looking forward to seeing what everyone completes for their projects over at the Win It Wednesday Link-Up.  Thanks for stopping by to check out my project!

Simon Says - No Stamps Allowed!

Hey there!  I just saw the new Wednesday Challenge over at Simon Says Stamp and lo and behold I just finished making a card that totally works for this challenge so I thought I'd pop in here with a blog post.

If you saw my last post, then you know that I have been playing a ton with some of my new goodies from Hero Arts and the Delicates Dies from Papertrey Ink.  The most recent kit from Hero Arts is Art Deco in Style which I love so I am still playing with that and other dies I have in my collection.  When I first started cardmaking, I couldn't stamp worth a darn, so I made lots of cards with die cuts only.  This is definitely a  throwback to those days.  

Part of the reason I really like Art Deco is that the lines are always so graphic which makes for a super striking look in a card.  

The cover die I am using is in the Hero Arts My Monthly Hero Kit for February 2019.  With other things I have in my supplies, I could play for weeks with this stuff!  

My card project for the Challenge is simple die cutting at it's best for the most part.  I did decide to use a technique that Jennifer McGuire shared during that blog hop that you can find at this link.


This card uses Light Blue, Medium Grey, Dark Blue Shimmer Cardstock and of course the gold cardstock that gives all of that shine.  The diamond die cuts are from very old QuicKutz dies that I have had for many years with 5 different sizes in the group.  I have another card that I will be using them for coming up ad the "hello" die cut is from the Hero Arts Stamp and Cut Hello Set.

Everything here is super simple and all you have to do is the die cutting and assembly.  I cut several of each piece I was working with so I could just play with the colors and see what combinations I could come up with.  In fact, I will have more cards to share in the coming days.  I am enjoying my time playing with these dies, stencils and other products.  

Just a short and sweet post for today.  I'm still working on getting my links list straightened out but hope to have that done by the end of this coming weekend.  

Thursday, October 25, 2018

Keeping Christmas - Be Merry & Joy


It's time for the monthly Keeping Christmas Blog Hop that we hold on the 25th of each month, except in December.  We will be sharing Christmas Creations with tips and tricks on the 25th of each month. The idea behind this is to create a few Christmas Cards or tags each month so we don't have to panic to get all of our cards made for December 2018. Kelly Lunceford is our host as always.  We always share tips and tricks to help you get things done.  I've pretty much made 4 - 6 cards each time I sit down to do my card for this hop, so I have a hefty supply of Christmas Cards on hand for this coming Holiday Season.

Vicki Finger (You are Here)

For my main two projects today, I put a slightly different spin on a couple of cards for a few of the men in my life; a brother-in-law and a brother.  So I made a few Christmas cards with more of a masculine spin.  

I started by looking through my foiled card stock and also my patterned papers that had foil or metallic on them and choosing more masculine colors.  You know I'm a sucker for some foiled patterned paper and I picked up several different ones last year at Michael's during their Cyber Monday Sale.  Both of the papers I selected use backgrounds that are dark tones - Navy and Dark Grey.  Both happened to have Copper foil accents.  I had made a couple of these earlier in the week, but there was one thing I didn't really like about them and so I changed it up a bit for these two cards.  

I die cut 2 of the Papertrey Ink Bold Borders: Yuletide from Copper Foil Cardstock.  Then I cut 2 panels from the Foil Patterned Papers at 4 1/8th by 5  3/8ths.  That way there aren't any edges sticking out but you can rest assured that your background fully fits behind your die cut without any gaps. Just using a simple pattern behind the die cut gives so much texture to a very simple card.  But on the ones I made previously, I used the same cardstock for the interior panel and I knew it would look better if the background was more of a solid behind the sentiment so I changed that part up on these cards.  

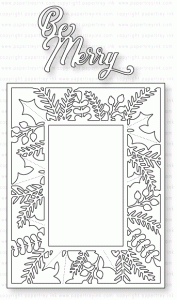
The interior of the grey card is cut from PTI Smokey Shadow Cardstock while the other is a more solid sheet from the same pack.  I used the scraps from the 6 x 6 patterned paper and some of the foiled cardstock to die cut the Festive Holly Leaves from Pretty Pink Posh from both so that I could have a few leaves to add to the card.  For quick and easy cards, using Cover Plate dies is super easy and requires no stamping.  As you see, you can still make a beautiful card with a more masculine vibe or even a more traditional one like this one I posted about 10 days ago in the Create Along With Us Challenge at Papertrey Ink.   I used Satin Red Sequins with gems in the center for the Holly Berries on this particular one.  


For the more masculine cards, I tried a couple of different things as far as the berries.  For the dark Navy and Copper card, I used Nuvo Drops in Copper Penny but mine are a strange consistency so for the Smokey Shadow and Copper, I used the dies that came with the Festive Holly Dies for the berries.  I didn't like the plain ones, so I added a tiny touch of Golden Sunset for the highlight on the berries.


I'm pretty selective about the cover plate dies that I buy because they are more expensive, but I still feel like Papertrey Ink has the best value for the dollar and this is a cover plate that I can use over and over again.  In fact, I also bought this month's Bold Borders: Flurries Die and I plan to make a few more cards with it when I receive it.  I love seeing all the different ways to use the Cover Dies during the Papertrey Challenges and I often see things that I might never have thought to try.  I'm trying to hold out for the new cover plate die until it arrives but I will probably be using that one for next month's Blog Hop.

Here's a few more I made in this same style.


I would have liked these better with a solid center panel, but they are still pretty cool with the text or pattern in the foil background panels.  I think I will reserve the ones with gems for friends who are female.     

If you aren't sure about using the Liquid Pearls or Crystal Drops, be sure to play with them on a piece of scrap paper first.  I like to put my bottle upside down and whack it on my table a couple of times to get the drops down to the tip.  Then make a circle as full as you want and then pull straight up.  It does take a little bit of practice, but once you get the hang of it, they are easy to do.  It's also a good idea to check the consistency of your drops before you try to put any on your card.  I feel like the copper penny ones I did first weren't any good so I scraped them off and tried manipulating my bottle a little bit to get a better mix.  You know how you are supposed to roll nail polish between your palms rather than shaking it?  Well, that's the technique I used to get a better consistency in my bottle.  It's like mine weren't mixed up well plus I had a clog in the tip, so better to practice a few first on scratch paper.  Experience always teaches us something. I'd rather not learn when actually putting them on my card though.  

Just to show you what other colors can do, here's a few more cards made using other alternative colors for cards:


The two light blue cards actually have subtle differences.  One uses Silver Shimmer Cardstock and the other uses grey but has silver foiled Holly Leaves and Sentiment.  The word "JOY" is from the October 2018 PTI Bold Borders: Flurries.  I LOVE that font!  For those cards I die cut two of the Bold Borders: Yultetide and rotated one of the 180 degrees.  This gives that layers effect.

Thank you so much for stopping by today.  I hope this gives you some ideas for a few fast but very elegant cards.  You can do all the die cutting and then sit and assemble while you watch (a.k.a. listen) to the TV, listen to music or an audiobook.  

We'll be back next month for the final projects of 2018 and we hope you'll join us again.  


Affiliate Links Used Whenever Possible
Cuttlebug Die Cutting Machine
Shop at:
SSS
Kokuyo Long Dot Runner Adhesive
Shop at:
SSS
Marvy Jewel Picker
Marvy Jewel Picker
Shop at:
SSS
PPP Festive Holly Die
Shop at:
SSS
PTI Bold Borders: Yuletide
Shop at:
PTI
PTI Scarlet Jewel Cardstock
Shop at:
PTI
Ranger Multi Medium Matte
Shop at:
SSS
Scor-Pal Scoring Board
Shop at:
SSS
Scrapbook Adhesives Thin 3D Foam Squares
Shop at:
SSS
Teflon Bone Folder
Teflon Bone Folder
Shop at:
SSS
Tim Holtz Tonic Paper Trimmer
Shop at:
SSS
Tonic 6 Inch Personal Trimmer
Shop at:
SSS
Tonic Nuvo Crystal Drops Metallic Copper Penny
Shop at:
SSS
Tonic Nuvo Glitter Drops Golden Sunset
Shop at:
SSS

Tuesday, February 13, 2018

Papertrey Ink 11th Anniversary - Day 7 Challenge

Hello!  It is time for the Day 7 Challenge as part of the Papertrey Ink 11th Anniversary Festivities.  Our challenge for today is to make a card using only die cuts - no stamping allowed.

What you might not know about me is that I used to make all of my card this way because I was a terrible stamper.  I got better before I ever got a MISTI, but I am so much better at stamping now because of the MISTI tool.  Even if I am only doing a sentiment, I use the MISTI.  I am fortunate enough to have the regular sized one and the Mini MISTI.  I started with the regular sized one and then several months later I got the Mini MISTI when Simon Says Stamp had it on sale.  If I remember right, it was a Black Friday Weekend sale.  Whenever it was, I am grateful for Iliana, who is the inventor and patent holder for MISTI.  That gave me a lot more options in stamping and I'm a confident stamper these days.

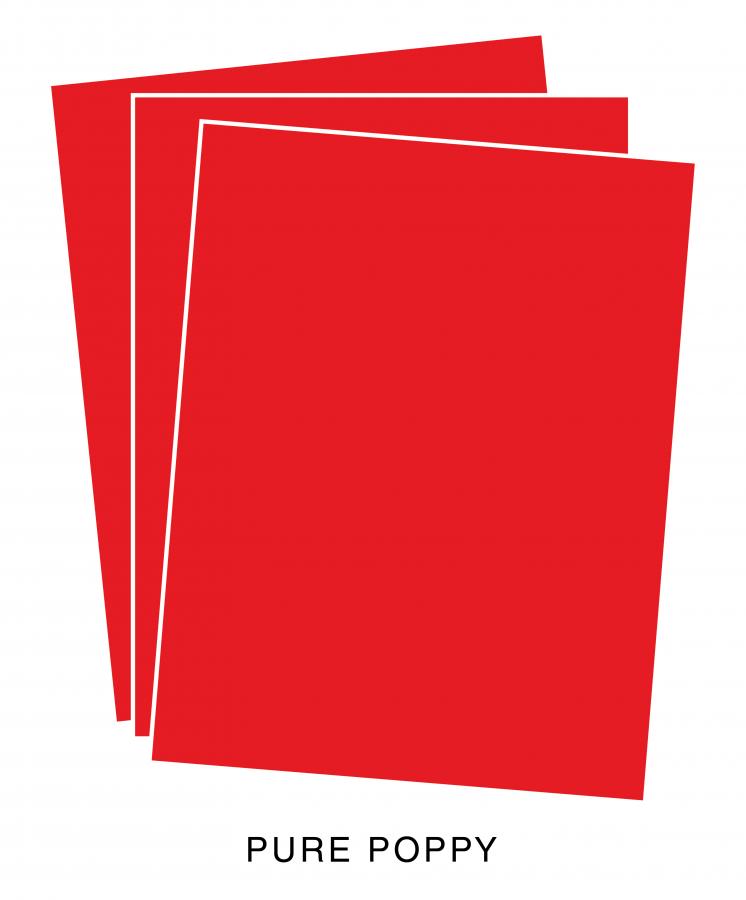
In order to hit two birds with one stone today, I used the colors specified in this week's The Paper Player's Challenge of Kraft, Red and White. I started by making a card base from Papertrey Ink Kraft Cardstock.  Since the rest of my elements would be cut from Pure Poppy or Gold Foiled Cardstock, I also cut a background panel from Stamper's Select White Cardstock.

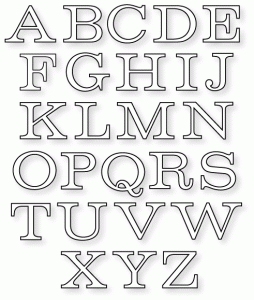
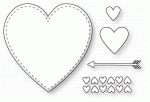
Next I did all of my die cutting.  I used Papertrey's You Have My Heart Dies, Wonderful Words: Love Die, and Bookprint Alpha Upper.  Once I had everything cut out, I took it back to my desk for assembly which was super quick and easy.


So there you have it.  A card made using only die cuts with no stamping.  The supplies I've used are linked below for your convenience (Affiliate Links may be used).

Cuttlebug
Cuttlebug
Shop at:
SSS
Kokuyo Long Dot Runner Adhesive
Shop at:
SSS
PTI Bookprint Alpha Upper
Shop at:
PTI
PTI Kraft Cardstock
PTI Kraft Cardstock
Shop at:
PTI
PTI Pure Poppy Cardstock
Shop at:
PTI
PTI Stamper's Select White Cardstock
Shop at:
PTI
PTI Wonderful Words: Love Die
Shop at:
PTI
PTI You Have My Heart Dies
Shop at:
PTI
Ranger Multi Medium Matte
Shop at:
SSS

Friday, September 15, 2017

Merry Monday #256 Challenge

Over the course of the last year I have been on some Challenge Design Teams and through this, I've found a lot of other card makers whose work I really enjoy. One of the most recent people I found is Kelly Lunceford.  I just adore her work! When I saw that she is now designing for the Merry Monday Challenge, I just had to play along.

I must say, it took several tries for me to achieve the look I was going for but, I'm ahead of the Christmas Card "Game" now because I already have about 8 cards made, which is one of the reasons for Merry Mondays. This is a weekly year round challenge with the idea that if you make one card a week for the whole year, you'll have your Christmas Cards well started or maybe even finished by the time Christmas rolls around.  I make a lot of one-off's during the Holiday's so that I can showcase new products that have been released and since blogging and card making are my job, there are usually many Christmas cards shared here between now and the first week or two in December.

This week's Merry Monday Challenge is "Holiday Movie List" and the Movie I chose is "It Came Upon a Midnight clear".  As I said, I had several tries to get to a finished product I was happy with, not for the work itself but to clearly convey my movie choice.

Can't you just picture peeking out through snow laden branches in the deep, clear, still night and seeing the stars? There is something so magical about the stillness of a snowy night.  This card is incredibly simple in the design but a bit trickier to capture.  I still didn't get it nearly as good as I would like but sparkle is very hard to capture. In fact, I felt it was really only captured in my last card photo and even then, not very well.

For this card, I started with a Cover Plate: Winter Floral cut from White Shimmer Cardstock and a background panel of Night Sky Shimmer Cardstock.  I misted both with a heavy layer of Tsukineko Sparkle Sheer Shimmer Spritz and let them dry while I did some other things. Even though the paper is shimmery, it doesn't sparkle until you add the sparkle spritz. Once they were dry, I adhered them together with Ranger Multi Medium Matte.  I applied that to a top folding card base made from Stamper's Select White Cardstock.  I knew I wanted to use the "Believe" die from Simon Says Stamp (it was my favorite from last year) but I also wanted to be able to have an iconic symbol for Christmas in that night sky. It just so happens that Memory Box makes a die called "Star of Wonder", available from Simon Says Stamp and other retailers.


So as you can see, this design was very simple and easy to execute.  The hardest part was finding the right color and style of cardstock to really emphasize the sparkling white and starlit night.  If you look closely at the top photo, I think you will see the shimmer, I took a photo from that angle so that you could see a tiny bit of that sparkle.  It is truly stunning in real life!  Of course after I had this blog post all put together, I decided I need to add a gem to the center of that star, so I did, but I did not take a picture of it.

Thank you so much for stopping by today and I hope I've inspired you in some way.  As always, if you'd like to leave a kind and encouraging comment, I really appreciate them!

Thursday, June 8, 2017

The Challenge #86

Hello everyone and welcome! Today's card is for The Challenge where we have a sketch challenge for you this week.  I realized as I was finishing up my project that I did no stamping on my project - alas, the reason I struggle to use patterned papers! So this post is an example of what you can do if you don't have time to stamp something but you still need a card for a special occasion.  Lesley provided dimensions for you or you can wing it which is what I have done. Even though there isn't any stamping on this card, I really like how this card came together.

All of the papers came from the same 6x6 paper pad from My Mind's Eye Fancy That Collection. I had some of these papers a few years ago from a Simon Says Stamp Card Kit and loved them! Then when we were in Dallas for Christmas last year, I picked three more pads up at Michaels. Because these papers were all meant to work together, it was super easy to pull a coordinated look together.  

I love the way color blocking looks and I wanted to incorporate that into my card. This particular sheet comes with 4 stripes, but I cut off the eggshell white stripe and then used it for one of my vertical pieces (#4).  The color blocked panel was cut with a Simon Says Stamp Stitched Rectangle Die in the largest size. I used a bit of washi tape to hold it in place so it wouldn't come out crooked.


The paper with the Gold Confetti on it was cut with a Simon Says Stamp Stitched Rectangle two sizes down from the largest.  This pattern has the gold confetti bits going all around with open space in the center so I positioned the die to include the confetti in primarily one corner.  The pale pink confetti piece is cut from the pattern that has much more confetti on the whole pattern and it was perfect for the little banner. That banner was cut from the Number The Stars Die by Papertrey Ink.  I use that die A LOT along with a couple of other ones from Papertrey that I use all the time.  Tag Sale Quilted has a banner the perfect size to go across a card and is another that I leave out all the time.  It has stitching all the way around and I love that.


Since I had two papers that used the Confetti, by the time I got this far, I thought it would make a fun and festive Birthday Card so I cut the "Happy Birthday" using a Penny Black Die that I have had for quite a few years.  I have several stamp sets that I could have used to stamp a greeting, but I wanted the gold to coordinate so I used the die.  The star is one from Spellbinders that cuts and embosses at the same time.  It has a long curly tail on it, but I had previously cut it off thinking I would use it for another project and then didn't. But I don't throw those things out so it was sitting there in my little container of "parts and pieces" as I call them. I try to keep all but the smallest scraps of any specialty paper as well and for a coordinated line such as this one, they get their own file pocket so that when I am trying to pull a look together, everything is right there.  

I assembled everything onto a top folding Horizontal Card Base made from Papertrey Ink's True Black Cardstock.  Whenever I use a black note card, I always put a white panel on the inside to write or stamp on.  I've found this much easier than trying to find a pen that works well on black cardstock.

Thank you so much for joining me today.  I hope you'll leave a comment and be sure to check out all the projects the design team has created to inspire you.  You can find the blog post here.