Showing posts with label Hero Arts Stamp & Cuts. Show all posts

Wednesday, February 20, 2019

Simon Says - No Stamps Allowed!

Hey there!  I just saw the new Wednesday Challenge over at Simon Says Stamp and lo and behold I just finished making a card that totally works for this challenge so I thought I'd pop in here with a blog post.

If you saw my last post, then you know that I have been playing a ton with some of my new goodies from Hero Arts and the Delicates Dies from Papertrey Ink.  The most recent kit from Hero Arts is Art Deco in Style which I love so I am still playing with that and other dies I have in my collection.  When I first started cardmaking, I couldn't stamp worth a darn, so I made lots of cards with die cuts only.  This is definitely a  throwback to those days.  

Part of the reason I really like Art Deco is that the lines are always so graphic which makes for a super striking look in a card.  

The cover die I am using is in the Hero Arts My Monthly Hero Kit for February 2019.  With other things I have in my supplies, I could play for weeks with this stuff!  

My card project for the Challenge is simple die cutting at it's best for the most part.  I did decide to use a technique that Jennifer McGuire shared during that blog hop that you can find at this link.


This card uses Light Blue, Medium Grey, Dark Blue Shimmer Cardstock and of course the gold cardstock that gives all of that shine.  The diamond die cuts are from very old QuicKutz dies that I have had for many years with 5 different sizes in the group.  I have another card that I will be using them for coming up ad the "hello" die cut is from the Hero Arts Stamp and Cut Hello Set.

Everything here is super simple and all you have to do is the die cutting and assembly.  I cut several of each piece I was working with so I could just play with the colors and see what combinations I could come up with.  In fact, I will have more cards to share in the coming days.  I am enjoying my time playing with these dies, stencils and other products.  

Just a short and sweet post for today.  I'm still working on getting my links list straightened out but hope to have that done by the end of this coming weekend.  

Wednesday, January 24, 2018

Case This Sketch #255!

I have a quick card today for this week's Case This Sketch Challenge #255. Actually, I have three, but only one follows the sketch so I will start with that one. *Ü* Anytime I get a new layering stamp set, it's good to sit down and stamp several to get the hang of how it lines up and have a bit of practice. There will pretty much always be a few duds so this way, I get them out of the way first thing before I mess something up that is actually on a card front.  I'm pretty sure this is why I nearly always use a card panel to work on rather than a whole card base that might get messed up.  To make things easy for myself, I keep a stash of cards bases and card panels pre-cut so I can just grab a few and go. I take my cardstock to Fed Ex/Kinko's and have them cut.  They can slice through a whole stack and this saves me a ton of time.  For these cards, I did something a bit different so I wanted to share it with you what I did.

Craftsmith Dark Floral
I was sitting on the floor of my studio yesterday, looking through a collection of papers that I have called "Dark Floral" by Craftsmith.  This is one of those Hot Buys that I got at Michaels on Cyber Monday for $5.99.  Every time I glanced at the stamp set sitting on my desk, I thought of those papers so I decided to grab them and see if I could stamp some elements in colors that coordinated. That's why I was sitting on my floor.  Most of my paper is in crates that come up waist high, but I have about 6 or 7 of these collections that wouldn't fit, so I have them in a container on the floor where I keep my Stampin' Up Cardstock.  The thing about these papers is that they are meant for scrapbooking rather than card making, but if I really like something, I will find a way to make it work.  Some of the designs in these packs really aren't the right scale for card making, but they are so nice that I wanted to be able to use them somehow and I don't really scrapbook anymore. I decided to piece them together strategically to get what I wanted.  I've done this one other time to really give a unique twist to something I was working on and you can see that post here. Some of the designs go completely across a page and others are divided into half sheet sizes while yet others are done in 6 by 4 rectangles.  Nothing is sized for card making the way I do it since the cards I make are A2 sized. The colors in these papers are too pretty not to use and some of the elements (a.k.a. the gold foil) are right up my alley.

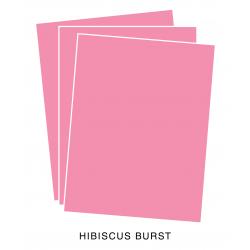
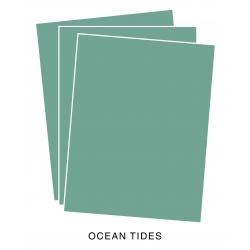
I love the rich tones and I wanted to stamp in matching colors so I die cut several elements from white cardstock and started practicing using the Rose Builder Stamp and Die Set from WPLUS9 Designs. I also cut some of the blooms from Hibiscus Burst Cardstock and leaves from Ocean Tides Cardstock.  I just love these roses and Dawn designed them with that hand drawn look that I love.  For this first card I mirrored the sketch.  I used the Honey Bee Large Thanks Die cut with Gold foiled cardstock, then matted it with black cardstock so it would show up against the stripes on the background.  To give it a bit more dimension, I cut skinny little strips of black fun foam, added 1/8th inch score tape to the back of it behind the letters and glued that to my card base with Ranger Multi Medium Matte. The black fun foam I have is extra thick, so it really popped that sentiment up and I will need to use a padded envelope for mailing.


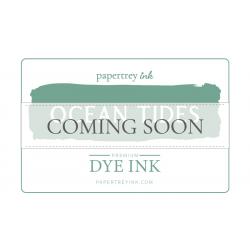
I started by stamping all of the white roses first; the base layer in Lovely Lady, the next layer with Hibiscus Burst, the third layer in Autumn Rose and the final detail layer is Scarlet Jewel, all Papertrey Inks. For the Hibiscus Burst roses, I skipped the first layer of ink and stamped the 2nd, 3rd and 4th layers in the same ink colors. I couldn't decide if I wanted the white border or no white border so I did some both ways and I actually used all of the ones I stamped to create a total of four cards. I wanted something eye catching and memorable for a special thank you card I needed to send and when I got to the point of assembling the cards, I didn't want to have to stop and stamp more roses or leaves. The leaves are super easy. I stamped the white leaf die cuts with Stormy Sea Ink and the detail layer in Ocean Tides. For the leaves that were cut from Ocean Tides Cardstock, I stamped the base layer in Ocean Tides for that tone on tone look and the detail layer in Smokey Shadow, again all Papertrey Inks.  Using grey inks is a great way to add in some detail if you don't have the right color.  Since I was trying to match the cardstock, I didn't use the traditional greens that I normally would.


Once I had everything stamped, I started piecing my backgrounds together.  I took a strip from one section and paired it with a strip from another to get a panel slightly larger than the size of an A2 card so that I could die cut it to have those crisp edges. This let me have several different but similar backgrounds for my cards.  I had enough roses to make 4 cards and I have enough left to make at least one more. 


Even though this is the simplest card, I think it is my favorite of the group.  I had to do some really creative piecing to get just the word beautiful on the card but it came out perfectly.

The basic supplies I've used are linked below for your convenience (affiliate links may be used). 


Cuttlebug
Cuttlebug
Shop at:
SSS
Hero Arts Hello Stamp & Cut
Shop at:
SSS
Honey Bee Stamps Large Thanks Die
Shop at:
SSS
Kokuyo Long Dot Runner Adhesive
Shop at:
SSS
PTI Hibiscus Burst Cardstock
Shop at:
PTI
PTI Ocean Tides Cardstock
Shop at:
PTI
PTI Perfect Match Autumn Rose Ink
Shop at:
PTI
PTI Perfect Match Hibiscus Burst Ink
Shop at:
PTI
PTI Perfect Match Lovely Lady Ink
Shop at:
PTI
PTI Perfect Match Ocean Tides Ink
Shop at:
PTI
PTI Perfect Match Scarlet Jewel Ink
Shop at:
PTI
PTI Perfect Match Smokey Shadow Ink
Shop at:
PTI
PTI Perfect Match Stormy Sea Ink
Shop at:
PTI
PTI Stamper's Select White Cardstock
Shop at:
PTI
PTI True Black Cardstock
Shop at:
PTI
Ranger Multi Medium Matte
Shop at:
SSS
Teflon Bone Folder
Teflon Bone Folder
Shop at:
SSS
Tonic 6 Inch Personal Trimmer
Shop at:
SSS
WPLUS9 Rose Builder Coordinating Stamp & Die Set
Shop at:
SSS
WPLUS9 Rose Builder Dies
Shop at:
SSS
WPLUS9 Rose Builder Stamp Set
Shop at:
SSS

Sunday, March 26, 2017

The Paper Players & Fusion Challenges

My card today is for not just one, but two challenges; The Paper Players Challenge #337 which is a sketch and The Fusion Challenge - "Paris Rain".   We can be inspired by the colors, the imagery, or the sketch or we can combine all of them at the Fusion Challenge.  I was inspired by the color palette but used the sketch from The Paper Players Sketch Challenge to make my card.  This card is for my hubby and will be a little surprise that he finds somewhere -- his lunchbox, or his closet or laying on his keyboard in his home office; everyone likes to feel appreciated and he is no exception although I think he would deny it if you asked him.


This card uses SU! Smoky Slate Cardstock for the background panel on top of a top folding card base made from Stamper's Select White Cardstock.  The circle and banners are cut from True Black Cardstock.  The Silver and Red piece was made by stamping the Simon Says Stamp Emma Background on Stamper's Select White Cardstock, heat embossing with Silver Embossing Powder and then ink blending with Festive Berries and then Pure Poppy on top. I think Ink Blending is my 2nd favorite technique after heat embossing.  I cut a 2 inch strip down the center of the panel and then punched it with a Stampin' Up Banner Ends Punch. I cut two of the shorter banners from the Doubled Ended Banner Die, one from Smoky Slate and the other in True Black. I cut the Smoky Slate banner in half and then put that on the back of the black banner so that just a bit was showing on each end to help it pop. I used Thin 3D Foam Squares to mount it.  For the sentiment, I used "you are my favorite" from the Hero Arts Hello Stamp & Cut Set.  He is, after all, my favorite husband! *Ü*


The supplies I used are linked in the post or you can find links for the Simon Says Stamp Store and Papertrey Ink Store on the right hand sidebar. Thanks so much for stopping by today!  I hope you'll come back soon.

Saturday, November 12, 2016

Simon Says Stamp Flickr Challenge #58

I have another super quick post today for the Simon Says Stamp Flickr Challenge #58.  Just in case you are wondering, the Flickr Group is actually spelled F-L-I-C-K-R, without the "E" in there. I do occasionally make typos, but this isn't one of those times. *Ü*


This is so similar to other cards I've done in the last few weeks so I'm just going to give you a run down of the products and colors I used here:

Card Base: Simon Says Stamp Audrey Blue Cardstock
Die Cut Word: Simon Says Stamp Believe Dies, Teal Mirror Card Stock
Ornaments: Hero Arts Ornaments Stamp 'N Cut Coordinating Set, Amethyst Allure Reinker, Simon Says Stamp Antique Gold Embossing Powder
Branch:  Sunny Studios Holiday Style Stamp Set, WOW! Neutral Ultra Shimmer Embossing Powder, Papertrey Ink Ocean Tides Ink
Background Ink Blending: Simon Says Stamp Audrey Blue Ink
Canson Bristol Watercolor Paper for the base panel

I ink blended the background color on first and then stamped the branch twice for a wider bough and heat set with the Neutral Ultra Shimmer Embossing Powder. Some of the other ornament dies I have cut closer to the edge of the outline and I definitely like that better, but I just love the shape of these ornaments and the optical illusion of the design.

We are enjoying still very warm temperatures during the daytime hours here.  We went for a drive this morning to see some fall color, but we don't have much color yet here. Enjoy your weekend! Thank you so much for stopping by and taking time to comment.

Saturday, April 16, 2016

Everything's Coming Up Roses

I am so happy to be back on my blog again this evening. I have had a tough week this week, especially the last 48 hours while one of my little puppy girls has been so sick. In the last hour, she has really rallied and is back with her happy feet and playful manner. She will always be like a puppy no matter how old she is.  I mean, really, who could resist this face?  But she has been pitiful!

I started so many projects this week and I was not happy with any of them until now.  This one is not what I originally had in mind, but I do love it.  In some ways, this started as an experiment with some of my Peerless Watercolors.  It is so hard to get a deep red in any kind of watercolor.  I didn't go as far as getting out my tube watercolors, but I have been intrigued by this color called Carnation Pink which is one of the Pretty In Pink Collection by Nicholson's Peerless Watercolors.  I have all of those colors swatched but this one is decidedly more red than pink. I could have made it Pink by increasing the amount of water, but I love how intense I was able to get this red.  It takes lots of layers of Festive Berries to get anything even remotely close to this.


For this card, I stamped the flower and two clusters of leaves from the Beautiful Day Stamp Set by Altenew onto watercolor paper, twice and heat embossed it using Simon Says Stamp Antique Gold Embossing Powder.  I only recently got the coordinating dies for this stamp set because I use this set so often. Somewhere when this stamp set first came out, I heard that it is supposed to be a peony, but it always makes me think of wild roses when I see it and that's always how I use it.  If I want a peony, I have another set I can use. *Ü*

I water colored the flower and the leaves on the extra images and the flower layer on the card base panel.  I wanted to pop up the top layers on Thin 3D Foam Squares (Scrapbook Adhesives makes it in white and black) and I didn't want the unpainted image to be noticed underneath, so I painted it.  I die cut the extra for my top layer.  As I mentioned, the rose is water colored with Carnation Pink and the leaves with Hunter's Green, both Nicholson's Peerless Watercolors.  Once that was done, I die cut the panel with a Simon Says Stamp Stitched Rectangle in the largest size.  


This week over at the Simon Says Stamp Wednesday Challenge Blog the theme is "Let's Do The Polka", which I immediately interpreted as Polka-Dots.  I am not really a polka-dot kind of girl, so I took liberties with the theme.  I used one of my stencils that has the three dots in the curve and using a Versamark Marker, inked it up then heat embossed it with Ranger Gold Tinsel Embossing Powder. I went over all of the dots a second time and added more embossing powder.  I love the whimsical feel this added to my card.  I used the Hero Arts Love Stamp & Cuts set for the sentiment and die cut the word from Gold Poster Board then adhered it to my panel with Ranger Multi Medium Matte.   

The butterfly is from SU's Papillion Potpourri as is the matching punch. I was going to use a bigger butterfly die cut, but that seemed to overwhelm the rose so I went with this smaller one.  It's heat embossed on Papertrey Ink Stamper's Select Vellum.  I made a top folding A2 card base using Papertrey Ink's Pure Poppy Cardstock.  I plan to surprise my husband by sneaking this into his lunchbox to find.  I wonder how long it will take him?  

I'll be entering this card at the Simon Says Stamp Wednesday Challenge "Let's Do the Polka", the Simon Says Stamp Monday Challenge of "April Showers Bring May Flowers" and the CAS Mix Up Challenge with my 3 being Stamping, Stenciling, and Watercolor with Die Cutting and Heat Embossing thrown in for good measure.  

I hope you all have a great rest of the weekend.  Thank you so much for stopping by and leaving me a comment if you'd like!