 Hello! I'm back with my post for this week's Designer in the Spotlight at Simon Says Stamp Wednesday Challenge Blog. This week our theme is "Anything Goes" and we are featuring products from Stampendous. You don't have to use Stampendous products to enter the challenge, but if you have some, we would love to see them used. This is my last week in the Designer Spotlight and it has been a treat to get to create alongside some of my favorite ladies! Thank you so much for having me along this month. You've left such sweet comments for me here on my blog and I really appreciate it.
 Simon Says Stamp generously provides a $50.00 Gift Voucher each week for each of their blog challenges. Winners are selected from all of the entries by Random Draw each week. Thank you, Heidi, for providing that each week.
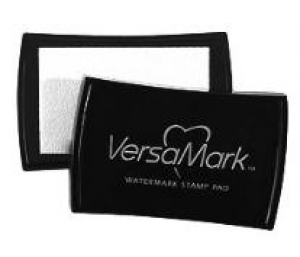
For my card, I started with a piece of Arches Hot Pressed Watercolor Paper and heat embossed my images using Versamark and Simon Says Stamp Antique Gold Embossing Powder. When I buy the pads of watercolor paper, I take them to Kinkos and have them cut into 4.5 x 6 inch panels so they are a little bit larger than the size I need when making a card. I like to die cut my background panels for that super crisp and clean cut so the smaller size makes it easy.
Whenever you do heat embossing of your outline images, this creates a channel for the water to flow in. Easy-peasy! I worked in a Jewelry Store many years ago where we sold lots of loose diamonds and created custom mountings for engagement, wedding and dinner style rings. Many of the smaller stones were set into a channel to keep them contained and water works the same way. I'm just creating a little gold channel when I heat emboss. You can use any color of embossing powder that you like. I just happen to like this one the most. I go through about 6 jars of it a year. I do a lot of heat embossing and the most important thing is to use some kind of a powder tool first!
For all of my watercoloring today, I wanted something easy, so I smooshed a bit of Distress Ink onto an acrylic block and picked it up with a water brush to color my images. For the Lilacs, I used Seedless preserves and the darker blooms just have additional layers of color on them and the same is true for the leaves and butterfly. The leaves were done with Mowed Lawn Distress Ink and the butterfly with Peacock Feathers Ink. This is an easy way to color without the stress of trying to use "real" watercolors in the correct technical manner.
Once all of the painting was finished and dry, I went back in with my Tonic Aqua Shimmer Pen and gave some shimmer to all of the images, especially the butterfly and let it dry again. Once it was dry, I die cut all of the images with the coordinating dies. I cut a stitched rectangle using the WPLUS9 Gift Card Layers Stitched Rectangle Die to cut a white background panel and did a bit of ink blending with some Tumbled Glass Distress Ink. I used a combination of Thin 3D Foam Squares, Scotch 3D Foam Tape and Ranger Multi Medium Matte to adhere the elements to the background panel and I put a piece of fun foam behind that panel to give a little bit more dimension. I really considered adding for sequins or confetti but in the end, I liked the simpler image much better.
For the sentiment, I used the Simon Says Stamp "oh hello there" die to die cut the sentiment, but just used the word "hello". I love the handwriting of this die (Kristina Werner's I'm sure) and it's one that I use often to send cards to friends.
Thank you so much for stopping by today to see my card! I appreciate all of the kind and encouraging comments. I've linked the supplies I've used below for your convenience (Affiliate Links may be used at no additional cost to you).
 Arches Hot Pressed Watercolor Paper 9 x 12 #140 Shop at: SSS |
 Cuttlebug Die Cutting Machine Shop at: SSS |
 Distress Ink Mini Cube - Mowed Lawn Shop at: SSS |
 Distress Ink Mini Cube - Peacock Feathers Shop at: SSS |
 Distress Ink Mini Cube - Seedless Preserves Shop at: SSS |
 Kokuyo Long Dot Runner Adhesive Refill Shop at: SSS |
 MISTI Stamping Tool Shop at: SSS |
 Ranger Multi Medium Matte Shop at: SSS |
 Scotch 3M Foam Tape Shop at: SSS |
 Scrapbook Adhesives Thin 3D Foam Squares Shop at: SSS |
 SSS Antique Gold Embossing Powder Shop at: SSS |
 Stampendous Lilac Die Cut Set Shop at: SSS |
 Stampendous Lilac Stamp Set with Stencil Shop at: SSS |
 Teflon Bone Folder Shop at: SSS |
 Tonic 6 Inch Personal Trimmer Shop at: SSS |
 Tonic Aqua Shimmer Pen Shop at: SSS |
 Versamark Ink Shop at: SSS |
 Wagner Heat Tool Shop at: SSS |
 WPLUS9 Gift Card Layers Designer Dies Shop at: SSS |


