Wednesday, April 25, 2018

Papertrey Ink April 2018 Blog Hop and The Card Concept # 91


Hello there! Thanks for stopping by for the April 2018 Papertrey Ink Blog Hop.  This will be my last blog post for a little while as we are getting very close to our move. I am not sure I'll have things unpacked and sorted well enough for the May Blog Hop, so I wanted to make sure I had a project for this month's hop. June should be no problem or at least I hope to be organized and back to creating by that time.

If you are here for the Keeping Christmas Blog Hop, keep scrolling down.

The photo on the left is our inspiration image for the Papertrey Blog Hop this month.  I love the fancy tea cups and they remind me of several my mother has but they also remind me of Chintz fabric.

I also noticed this morning, that my colors and florals happen to match The Card Concept Inspiration and so this card will also be entered into that challenge.  I'm on The Card Concept Design Team, but I took this term off because of how busy we are and how much travel has been required with our new house.

There is a whole lot of texture in the inspiration image and I wanted to bring some of that into my card so I chose to do a bit of inking on a panel of Linen Texture Cardstock using Hawaiian Shores Ink.  To get the effect I wanted, I ran the ink blending tool in straight lines all around the outside edge of the panel toward the center of the panel but I only went about half way with the ink leaving the center with a very light blend.  I mostly covered the center up in the end but the texture of the linen panel is definitely there.

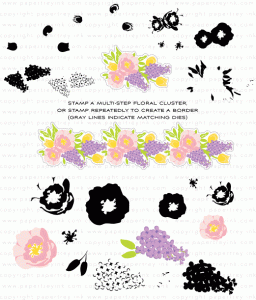
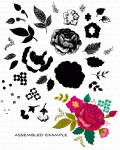
To mimic the feel of the florals, I wanted to use something that you might find on a Chintz print, so I used the Seasonal Borders: Spring Stamps and Dies which were designed by Betsy Veldman for Papertrey Ink.  I used Betsy's technique she showed on how to stamp the repeats with this set and it was pretty easy.  In case I messed up, I wanted to have a couple of them done, but I didn't mess any of them up so I had three borders to use.  You can find Betsy's tutorial here and the YouTube video here.  It was really easy to do this with my MISTI and a little bit of painters tape to hold the negative in place.

My pink flowers were all stamped with Lovely Lady and Raspberry Fizz with Lemon Tart centers.  The Lilacs were stamped with Lilac Grace and Amethyst Allure while the foliage was stamped with New Leaf Ink.

I die cut a panel of Hawaiian Shores Cardstock for my background panel and adhered that to a top folding card base made from Stamper's Select White Cardstock.  Next, I die cut the Linen Panel with a slightly smaller Stitched Rectangle and adhered that.

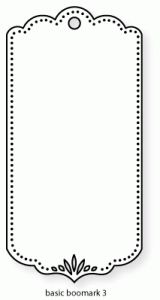
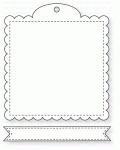
For the sentiment, I wanted to use this scripture verse so I looked for a label or similar die that I could fit the whole thing onto which led me to Basic Bookmark #3.  I love all the pierced and cut out detail on this die.

I adhered that to my card base so that I could use the Seasonal Border down the side of my card.  Once I got that assembled, I decided to stack all three of them using foam tape for a unexpected bit of dimension.  I'm trying to weed through all my extra pieces of stamped and die cut elements right now in preparation for our move so rather than just using one, I used all three and I love how it turned out.


Be sure to hop along today to see all of the beautiful creations from other Papertrey Ink customers.  We look forward to this monthly event where we get to share our love of the products and support each other as card makers.  Thanks so much for stopping by.

The supplies I've used are linked below for your convenience (Affiliate Links may be used at no additional cost to you).

Cuttlebug Die Cutting Machine
Shop at:
SSS
Kokuyo Long Dot Runner Adhesive
Shop at:
SSS
PTI Basic Bookmark #3
Shop at:
PTI
PTI Fresh Snow Linen Cardstock
Shop at:
PTI
PTI Hawaiian Shores Cardstock
Shop at:
PTI
PTI Perfect Match Amethyst Allure Ink
Shop at:
PTI
PTI Perfect Match Hawaiian Shores
Shop at:
PTI
PTI Perfect Match Lemon Tart Ink
Shop at:
PTI
PTI Perfect Match Lilac Grace Ink
Shop at:
PTI
PTI Perfect Match Lovely Lady Ink
Shop at:
PTI
PTI Perfect Match New Leaf Ink
Shop at:
PTI
PTI Perfect Match Raspberry Fizz Ink
Shop at:
PTI
PTI Perfect Match Vintage Jadeite Ink
Shop at:
PTI
PTI Seasonal Borders: Spring Dies
Shop at:
PTI
PTI Seasonal Borders: Spring Stamps
Shop at:
PTI
PTI Vintage Cream Cardstock
Shop at:
PTI
PTI Vintage Jadeite Cardstock
Shop at:
PTI
PTI Year of Psalms - February
Shop at:
PTI
Scotch 3M Foam Tape
Scotch 3M Foam Tape
Shop at:
SSS
SSS Antique Gold Embossing Powder
Shop at:
SSS
Versamark Ink
Versamark Ink
Shop at:
SSS
Wagner Heat Tool
Wagner Heat Tool
Shop at:
SSS

Keeping Christmas

Hello everyone! Thank you so much for stopping by today to check out the monthly Keeping Christmas Blog Hop that a group of us hold on the 25th of each month, January through November. This monthly hop is the brain child of Kelly Lunceford and Lesley Croghan and the members of the team are former teammates from The Challenge. Our goal is to show you how to build your stash of cards (or tags) a few at a time all through the year. We try to include all of the tips and tricks to help you get it done and to know that it is do-able so you don't get overwhelmed. Hop along and be sure to visit each blog. There is always a lot of inspiration and ideas to get your creative juices flowing!

My post today is a long one, but I have several cards and tried to keep everything very simple as far as instructions and thought processes.  Here are the other stops on the hop:


I am actually writing this post very early on (April 15th) because we are getting ready to move to another state and I have got to finish packing up my studio for the move.  In fact, I have basically opened every box that was packed at one time to get some thing or other out and use it so I really have to get it in gear and get everything packed up soon.    

I could not make up my mind today what I wanted to make so I grabbed the two products I wanted to use together and started thinking about the color combination I wanted to use.  I decided to use some deep red shimmer vellum  with some traditional Pinefeather and Vintage Cream Cardstock for a really elegant but Christmas-y look. As usual, I wanted to use Gold Foiled Cardstock for one of the elements as well.  The particular one I used today is from Die Cuts With a View (DCWV) and I've had it for a really long time.  It is foiled, rather than being mirrored cardstock which is what I like better most of the time.  Gold Mirror Cardstock is much more yellow than the Antique Gold color I prefer although I've recently been trying some of the Satin Effect Cardstocks from Tonic and I like those a lot.  I have a few of the monthly card kits from Spellbinders and they have a nice one that they often include.  It is a nice color as well but I don't know who makes it or where they are getting it.

I guess my point is that there's a lot of different options out there, so just find what you like as far as style, color and finish. It usually is more expensive  but a couple of sheets will create lots of die cuts for you. I can think of about 5 different ones I have on hand and as you may remember, I often use the gold foiled poster board from Hobby Lobby.   The one downfall to that is that you cannot "clean" it up if you get a bit of glue on it.  That's why I have others.  Gold Mirror Board or cardstock, has a very thin protective layer of plastic over the top so you can use a little alcohol swab if you get messy.  I haven't really tested this theory on any of my other gold cardstock which includes Papertrey Gold Luxe cardstock.  One cardstock that is a shimmer gold versus a foiled gold is the Gina K Designs Metallic Cardstock.  It is a very thick cardstock, but glue dries matte so it doesn't matter.  I still use Multi Medium Matte 99% of the time for dies. 

I always start by die cutting all of my elements, then scoring and folding my card bases. I used two sets of dies from Pretty Pink Posh for these cards; the Joy Shaker Die and Festive Holly Dies.  I adhered the die cut panels of the Shimmer Red Vellum to the card base and then played with a set of elements to figure out how I wanted to arrange them.  To make them easier to adhere, I put a small and a large holly leaf together with some Multi Medium Matte.  I also adhered the large red satin sequin to the tip of the Holly leaves.  I love those Satin Finish sequins.  They were in a pack with several sizes and I have no idea where I got them from by now.  It was before I started making cards seriously or blogging. I added a Bitty Bling gem in the center of each that I think came from Close to My Heart but they might have come from Stampin' Up. I also decided I wanted some backers for the Joy die cuts, so I die cut them using a die from PTI's Limitless Layers 2½ Inch Circles Die from some patterned paper that had a design done on cream with gold glitter.  I love how that decorative edge shows up behind the gold die cut.

This uses a couple of basics that I have mentioned here before in the Keeping Christmas posts.  Anytime you have to or want to create multiples of a card, use your patterned paper and dies to make quick work of this.  Just break it into stages by how many cards you are preparing to make.  In my case, I wanted to make four cards so I die cut four of each thing I was planning to use.  The Festive Holly dies have two different styles of holly so I chose which one I was planning to use.  I somehow never tire of the stitched look.

Once I got those four cards done, I had an extra set of the holly leaves on my desk, so using some other scraps, I pulled a single card together for this look.  I used a scrap of Silver Glittered Cardstock to go behind the Joy die cut (I used a plain circle die for this) the three leftover leaves for the Holly with a Red Satin Sequin and Bitty Bling.  Again, I used Vintage Cream for the card bases and put a lot of shimmer mist on the holly leaves.  I love the Iridescent Gold Shimmer Mist from Tattered Angels (a.k.a. Canvas Corp Brands) and I cannot get it at Simon's because they don't carry it.  I've asked, but so far, no go.  So I order it directly from Canvas Corporation which happens to be in a neighboring state and I get it right away.  In fact, I ordered 6 bottles (about a one year supply for me) on Saturday and it came today.  That's pretty darn quick.  The stitched rectangle of the background panel is the same cardstock as the die cut "Joy", and the pattern in the smaller background was also a scrap.  I really try to utilize my scraps but about once a year I go through them and throw out the smaller pieces.  I'll be doing that soon with our upcoming move.


As I was getting stuff put away, I thought how fun it would be to do a card in some non-traditional colors so I pulled the dies back out and cut enough pieces for an additional 4 cards.  This time I went with the more fun color of Vintage Jadeite which is my favorite Papertrey green and Hawaiian Shores for the background panel.  I was so excited to see the new stitched rectangle dies from Papertrey Ink in this month's release of Simply Stitched A2 Vertical which cuts a vertical cardbase in two passes that has the stitching detail on it.  There are several other stitched rectangle dies in the set to use for layers and that will be one die set that I plan to add in the future.

I took all of the die cut holly leaves and gave them a healthy spritz of shimmer mist and let them dry. I misted the background panels, let them dry and again die cut with a stitched rectangle die.  I created my white card bases, this time opting for a  top folding horizontal card base. Next I used a Mini Round Ink Blending Tool to go all the way around all the edges with Vintage Jadeite Ink to help define them and add that bit of dimension.  Then I glued the two Holly Leaves together and used a big hot pink gem for the berry this time around. I assembled this set of cards without the backer for the "Joy" die cut.  I also added some thinner foam tape behind the holly leaves to pop them up just a bit.


I loved using this less than traditional color scheme for my cards and all together, I have 9 more cards for my stash.  It's pretty early in the year to have so many cards made, but I do share cards with my Sisters-in-Law each year, so I need a lot of them in order to do that.


I hadn't realized before how much I love Holly leaves until I looked back through the cards in my Keeping Christmas stash and they all have Holly leaves except for the first set which has Mistletoe. The thing is, Holly is an iconic Christmas image so it works great to immediately convey that this is a Holiday Card. By using die cuts and patterned or specialty papers and not doing any stamping, you can pull your cards together by doing one thing every time you have a few minutes.

Except for the gold foiled paper, all of the cardstock came from Papertrey Ink for these cards.  For the most part, Papertrey Ink is my go to for cardstock.  Their paper is heavyweight at #110 lbs. and is very smooth and nice with a fantastic color selection. It is also the most reasonably priced cardstock out there.  I have a few cardstock colors in other brands, but pretty much only when its a color not found in Papertrey's line up.

I hope I've been able to give you some ideas for creating a few Holiday Cards for your stash.  Be sure to check out all the stops along the hop for even more inspiration and ideas.  I've linked many of the supplies I've used below for your convenience (Affiliate Links may be used).

Kokuyo Long Dot Runner Adhesive
Shop at:
SSS
PPP Festive Holly Die
Shop at:
SSS
PPP Joy Shaker Die
PPP Joy Shaker Die
Shop at:
SSS
PTI - Limitless Layers 2½ Circles
Shop at:
PTI
PTI Hawaiian Shores Cardstock
Shop at:
PTI
PTI Perfect Match Vintage Jadeite Ink
Shop at:
PTI
PTI Vintage Cream Cardstock
Shop at:
PTI
PTI Vintage Jadeite Cardstock
Shop at:
PTI
Ranger Multi Medium Matte
Shop at:
SSS
Scotch 3M Foam Tape
Scotch 3M Foam Tape
Shop at:
SSS
Scrapbook Adhesives Thin 3D Foam Squares
Shop at:
SSS

Thursday, April 5, 2018

The Card Concept {Sweet Treats}

Hello there!  It has been a few months since I've gotten to make a card for the The Card Concept Challenge.  I took this term off from the Design Team because I am so busy with the house that we are building in another state. We've been traveling back and forth every two weeks or so since December but we are making some real progress this week.  Many of the things we've been waiting on have finally arrived and are getting put in place.  This week the wall color got painted. I have a picture, but it was taken in low light, so you can't see very well.  But you can see what this guy is working on for my studio!  That entire wall will be lined with Ikea Cabinets that are being built in.  I would have loved to do more, but it all comes down to money.

The cabinets themselves will sit on a base structure a bit higher than they are right now and the top will have some built in paper cubbies for my most used colors.  That will have a top that is white and then tempered glass will be covering the whole thing.  That will be my staging area for photos.  I am hoping I can give up my very rigged lighting system, but I just won't know until I start working in that room. Because my desk is so large (8 x 8), it will take up the rest of the space in this room which is why we converted the formal dining room into additional studio space. We're not formal dining folks anyway.  We don't entertain or anything so this room will actually get used.  This picture was taken on Monday so they will be a lot farther along when we get pictures later today.  When we started this house last year, I asked Jennifer McGuire if I could use the pictures of her "craft room" in her old house to show to my builder and she said I could.  So this bank of cabinets follows a similar design.

Anyhow, I saw the post yesterday with the inspiration image and I wanted to play along, so I grabbed my Stitching Garden Stamp and Die Set to mimic the big rose on the one cupcake.  Not all of my color follows the inspiration photo and I ended up with a very monochromatic palette with the exception of the roses, but I hope you'll enjoy it anyway.

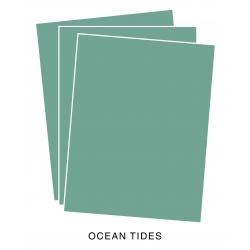
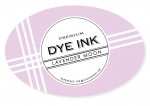
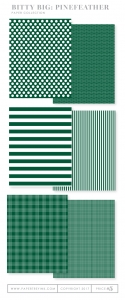
The products I used are all from Papertrey Ink and will be linked below for your convenience.  For the leaves, I stamped the base layer in Stormy Sea and the detail layer in Ocean Tides. For the blooms, I stamped the base layer in Lovely Lady, the 2nd layer in Lavender Moon and the detail layer in Autumn Rose.  The card base is made from Ocean Tides Cardstock and the striped paper is one of the patterns in Pinefeather Bitty Big.  I cut the card base using the Noted A2 Vertical Scallop Die Set.  The sentiment is from Botanical Blocks stamped on the banner from Tag Sale Quilted using Versamark and heat embossed using Simon Says Stamp Antique Gold Embossing Powder.  The little gold leaves were leftovers from another project, but I love the special little touch they added.


Thanks for popping in today to see my card.  I'm not blogging as much as usual  with our upcoming move, but I hope you'll keep coming by.  We hope to close on our house May 1st so by June 1st, I should be back in the swing of things.  The supplies are linked below (Affiliate Links may be used).

I wanted to sneak back in here to post a picture of my cabinets all assembled. The top bins are for my White Cardstock, Pre-Cut Card bases in vertical and horizontal and all of the specialty papers I use - 3 types of watercolor paper, X-Press-It Blending Card.


Cuttlebug Die Cutting Machine
Shop at:
SSS
Kokuyo Long Dot Runner Adhesive Refill
Shop at:
SSS
MISTI Stamping Tool
MISTI Stamping Tool
Shop at:
SSS | GKD
PTI Botanical Blocks Stamp Set
Shop at:
PTI
PTI Ocean Tides Cardstock
Shop at:
PTI
PTI Perfect Match Lavender Moon Ink
Shop at:
PTI
PTI Perfect Match Lovely Lady Ink
Shop at:
PTI
PTI Perfect Match Ocean Tides Ink
Shop at:
PTI
PTI Perfect Match Stormy Sea Ink
Shop at:
PTI
PTI Pinefeather Bitty Big
Shop at:
PTI
PTI Stamper's Select White Cardstock
Shop at:
PTI
PTI Stitching Garden Dies
Shop at:
PTI
PTI Stitching Garden Stamp Set
Shop at:
PTI
PTI Tag Sale: Quilted
Shop at:
PTI
Ranger Multi Medium Matte
Shop at:
SSS
Scrapbook Adhesives Thin 3D Foam Squares
Shop at:
SSS
SSS Antique Gold Embossing Powder
Shop at:
SSS
Teflon Bone Folder
Teflon Bone Folder
Shop at:
SSS
Tonic 6 Inch Personal Trimmer
Shop at:
SSS
Tonic Aqua Shimmer Pen
Shop at:
SSS
Versamark Ink
Versamark Ink
Shop at:
SSS
Wagner Heat Tool
Wagner Heat Tool
Shop at:
SSS