When I first started making cards, I was not a very good stamper and so I made cards using mostly die cuts with card stock. Along came the Misti and now I'm a pretty great stamper but sometimes I just don't want to do any stamping. Half the purpose of great dies is being able to make quick cards in a short amount of time and so I used a method I like to call Double Metallics.
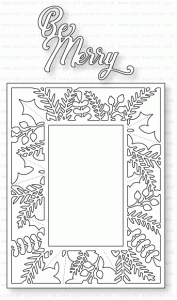
For my project for today, I wanted to use the beautiful Bold Borders: Yuletide Cover Die designed by Lizzie Jones and just let it take me wherever I wanted to go. As often happens, I had gold foiled cardstock on my table where my die cutting machine sits. I also have a selection of other metallic cardstock and foiled prints in my supplies. I am a "metallic" lover. This never rang truer than when I was selecting colors for our new house. The colors that I chose seem to all have something metallic in the name; Samovar Silver, Stainless, Pewter, Platinum, Brushed Nickel and so on. The only thing that was a normal color name is all our white trim. I'm pretty sure this reverts back to my days of working in a jewelry store. I like all metals and if you pop a little color in there, well that is just the icing on the cake for me.
I pulled a sheet of Gold Foiled Cardstock, die cut it with the die and pulled a foiled print that I like with only a few pieces left and looked at them together. You know that I have foiled cardstock in my stash because I'm just a shiny, sparkly, blingy kind of girl that way! I liked it, but I knew I would have to tie all the elements together for it to work.
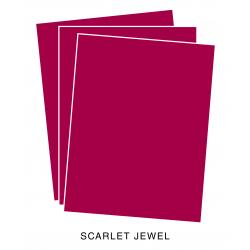
I created a card base from Scarlet Jewel Cardstock. I also die cut the center rectangle from Scarlet Jewel to inlay for the center panel. I cut a piece of the foiled paper just slightly smaller than the die to 4 1/8th by 5 3/8ths. It works best when you are adhering the gold foiled piece if it is not quite as large then You don't have to worry about any wonky edges popping out where you don't want them. I also used some of the gold foiled cardstock to die cut some Holly Leaves from Pretty Pink Posh to match the stitched leaves in Lizzie's design. I actually made two similar cards but the other one has Holly leaves die cut from the patterned paper instead of the gold. I love both of them. For the Holly Berries, I used Red Satin Finished Sequins with a jewel in the center of them. Honestly, that bit takes the longest in putting the cards together. You have to pick up each little sequin and each little jewel and glue them together and it can get tedious but I love the end result, so I think it is worth the time it takes.
There will be lots of beautiful projects along the hop, so I hope you'll stop by to see everyone's projects and leave them a little love in the form of a comment.
Affiliate Links Used Whenever Possible
 Cuttlebug Die Cutting Machine Shop at: SSS |
 Kokuyo Long Dot Runner Adhesive Shop at: SSS |
 Marvy Jewel Picker Shop at: SSS |
 PPP Festive Holly Die Shop at: SSS |
 PTI Bold Borders: Yuletide Shop at: PTI |
 PTI Scarlet Jewel Cardstock Shop at: PTI |
 Ranger Multi Medium Matte Shop at: SSS |
 Teflon Bone Folder Shop at: SSS |
 Tim Holtz Tonic Paper Trimmer Shop at: SSS |
 Tonic 6 Inch Personal Trimmer Shop at: SSS |


This is just Beautiful and Elegant!! Such a pretty Christmas card!!
ReplyDeleteGorgeous! Beautifully done!
ReplyDeleteBeautiful card, Vicki! Congrats on winning this month’s challenge!
ReplyDeleteStunning creation Vicki, congrats on your win! :)
ReplyDelete