Showing posts with label Papertrey Ink Create Along With Us Challenge. Show all posts

Wednesday, October 17, 2018

Papertrey Ink October 2018 Create Along With Us

Hello everyone!  I am getting to spend a lot of time in the studio this week so I have a card for this month's Create Along With Us as Papertrey Ink.  We're supposed to use something that inspired us as the starting place for our project.  In my case, Everything inspired me so I decided to make a few Christmas cards using a method that I haven't used in a while.

When I first started making cards, I was not a very good stamper and so I made cards using mostly die cuts with card stock.  Along came the Misti and now I'm a pretty great stamper but sometimes I just don't want to do any stamping.  Half the purpose of great dies is being able to make quick cards in a short amount of time and so I used a method I like to call Double Metallics.

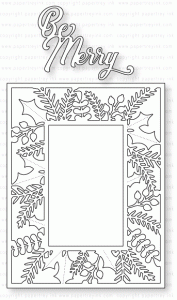
For my project for today, I wanted to use the beautiful Bold Borders: Yuletide Cover Die designed by Lizzie Jones and just let it take me wherever I wanted to go.  As often happens, I had gold foiled cardstock on my table where my die cutting machine sits.  I also have a selection of other metallic cardstock and foiled prints in my supplies.  I am a "metallic" lover.  This never rang truer than when I was selecting colors for our new house.  The colors that I chose seem to all have something metallic in the name; Samovar Silver, Stainless, Pewter, Platinum, Brushed Nickel and so on.  The only thing that was a normal color name is all our white trim.  I'm pretty sure this reverts back to my days of working in a jewelry store.  I like all metals and if you pop a little color in there, well that is just the icing on the cake for me.

I pulled a sheet of Gold Foiled Cardstock, die cut it with the die and pulled a foiled print that I like with only a few pieces left and looked at them together.  You know that I have foiled cardstock in my stash because I'm just a shiny, sparkly, blingy kind of girl that way!  I liked it, but I knew I would have to tie all the elements together for it to work.


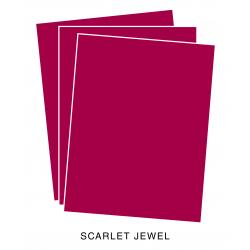
I created a card base from Scarlet Jewel Cardstock.  I also die cut the center rectangle from Scarlet Jewel to inlay for the center panel.  I cut a piece of the foiled paper just slightly smaller than the die to 4 1/8th  by 5 3/8ths. It works best when you are adhering the gold foiled piece if it is not quite as large then You don't have to worry about any wonky edges popping out where you don't want them. I also used some of the gold foiled cardstock to die cut some Holly Leaves from Pretty Pink Posh to match the stitched leaves in Lizzie's design.  I actually made two similar cards but the other one has Holly leaves die cut from the patterned paper instead of the gold.  I love both of them. For the Holly Berries, I used Red Satin Finished Sequins with a jewel in the center of them.  Honestly, that bit takes the longest in putting the cards together.  You have to pick up each little sequin and each little jewel and glue them together and it can get tedious but I love the end result, so I think it is worth the time it takes.

There will be lots of beautiful projects along the hop, so I hope you'll stop by to see everyone's projects and leave them a little love in the form of a comment.

Affiliate Links Used Whenever Possible

Cuttlebug Die Cutting Machine
Shop at:
SSS
Kokuyo Long Dot Runner Adhesive
Shop at:
SSS
Marvy Jewel Picker
Marvy Jewel Picker
Shop at:
SSS
PPP Festive Holly Die
Shop at:
SSS
PTI Bold Borders: Yuletide
Shop at:
PTI
PTI Scarlet Jewel Cardstock
Shop at:
PTI
Ranger Multi Medium Matte
Shop at:
SSS
Teflon Bone Folder
Teflon Bone Folder
Shop at:
SSS
Tim Holtz Tonic Paper Trimmer
Shop at:
SSS
Tonic 6 Inch Personal Trimmer
Shop at:
SSS

Saturday, September 15, 2018

Papertrey Ink September 2018 Create Along With Us

Hello fellow Papertrey Fans!  It feels like forever since I got to participate in any Papertrey Blog Hops or Make it Mondays, etc. so I am excited to share a card with all of you today.  This month's Release is filled with lots of Christmas and Holiday goodies and among my favorites is Lizzie Jones' Bold Borders Yuletide. 

Isn't this just heavenly?  It made me think of a cover plate die I have from Papertrey Ink that I haven't used for quite a while, Cover Plate:  Winter Floral.

So Lizzie's new die that is releasing tonight was my inspiration for this card as well as being a card using the techniques taught in my recent AECP Class "With A Twist".  For my twist, I used an somewhat unexpected color combination. 

I still have several pieces of Alcohol Inked Backgrounds that have been run through my Minc Machine for the added touches of gold.  This particular piece didn't have much foiling so I "sacrificed" it to use for cutting my cover plate.  There was a fairly good sized piece of it left so I cut some smaller die cuts out of it.  The thing I really like about Lizzie's new one is the additional of the words die.  So I will have to add the new one to my collection. 


Instead of traditional red berries, I used White Pearls to embellish the card which I think makes this a very Elegant Card.   The Sentiment is from an older Papertrey Set called Holiday Photo Finishers which was discontinued. 


There are so many beautiful new products to see in this month's release and Betsy Veldman's annual Make it Market Holiday Kit releases on October 1st.  In this month's release, she has a Make It Market Mini Kit that is in tonight's release.  Be sure to go to the Papertrey Blog and check out all of the beautiful release items for this month.  Here's an image of the Make-It Market Mini Kit for tonight's release. 

Betsy's kits are always a great value and if you run out of pre-printed supplies, you still have the stamps and dies to make your own and you can also use the contents to make cards.  There is just so much goodness in this release!

In case you aren't familiar with Papertrey's Countdown, they start on the 10th of each month and each day features a few products from the new release.  On the 15th of the month, the entire month's release is revealed and available for purchase beginning at 10 p.m. Eastern.  If you'd like to shop through my Papertrey Ink Affiliate Link, that is always appreciated! 

Be sure to check out the Create Along With Us Blog Hop and you will see many lovely projects there as well.  Have a great Day and Thanks for stopping by today!  I still have several classes for my Altenew Educator Certification Program and many other projects in the works for The Card Concept Design Team and the Keeping Christmas Blog Hop that comes around on the 25th of each month minus December.  We have a new challenge beginning this Wednesday at The Card Concept so be sure to join us for some fun there as well.

Thursday, March 15, 2018

Papertrey Ink March 2018 Create Along With Us

Hello there!  It has been several weeks since I was able to join in a challenge at Papertrey Ink but I really enjoy creating a project each month so I'm taking time out today from an incredibly busy schedule in order to participate.

I normally blog 3-5 times a week but right now, we are building a house in another state and are traveling back and forth every other weekend.  I have other things to do regarding the house and I am also the Designer in the Spotlight this month on the Simon Says Stamp Wednesday Challenge so I feel like that's where my blogging focus is right now.  It's important to me to do a good job when I'm invited to participate in those occasions.  I am definitely road weary but hopefully we will be in the house in about 6 more weeks.

This month over at Papertrey's release week, I am ga-ga over all of the DT projects and these 2 cards in particular by Laurie Schmidlin. This card from a few days ago used Farmer's Market Florals and so that is the set I chose to use today.  I wish I had gotten the Diamond Stencil last month but it is definitely on my wish list after seeing Laurie's card from yesterday (above)  used a new stamp set that was introduced yesterday called Stitching Garden.  It's a set designed by Betsy Veldman and it will be available tonight at 9:00 p.m. Central.

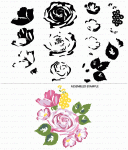
I have primarily 3 brands of inks that I use on a day to day basis.  While I do have others, I don't have them in nearly as many colors as I do in these three brands. Papertrey Inks are the ones I reach for the most and I know these colors well and how they all work together if you want to use a layering set.  For today's card, I used Lavender Moon, Hibiscus Burst and Raspberry Fizz for the roses from Farmers Market Florals with some new leaf for the leaves. The purple flowers were done with a variety of Papertrey Inks and were a lot of experimentation to see what stamping one color on top of another would do.  I used Lavender Moon, Winter Wisteria and Amethyst Allure.  The small spray of lilacs were stamped in Lavender Moon and then had a bit of Winter Wisteria sponged onto the stamp as well.  I've used this stamp set one other time, but I was finding the rose hard to line up.  So I die cut several and played around until I was sure I was doing it according to the examples on the package.  Anytime I have trouble with a new layering set, this is what I do.  With this set it is not nearly as important to line up as I made it but I didn't know that until I had some that were lined up correctly so it pays to be a little neurotic from time to time.  No biggie if you don't have them lined up perfectly because they still look lovely.

Once I had several of each bloom stamped, I started trying to pull a card together.  Because Laurie had used a frame, I wanted to do the same so I reached for a staple in my studio, metallic gold cardstock.  Some might call it shimmer.  It's definitely different than the Gold Foiled Cardstock that I frequently use for sentiments.  The one I am using here is from Gina K Designs.  She also has silver but I haven't tried that yet.  I have lots of silver foiled cardstock and I don't need anything different than that.  I rarely use silver, but at Christmas and in the winter, I like to have the choice of silver vs. gold. True to form, I almost always like gold better but I like to keep my options open.


For the front panel, I die cut it from Lavender Moon Cardstock and hit it with some iridescent gold shimmer mist which is also a staple in my studio.  Once it was dry, I adhered it to a top folding cardbase made from Stamper's Select White Cardstock. Then I placed the gold frame using Thin 3D Foam Squares.  Once that was down, I arranged my flowers and used a piece of Press N Seal to pick up the arrangement and flip it over.  Using the same Thin 3D Foam Squares, I adhered the flowers to the frame.

Using the "Just a Note" sentiment from Botanical Blocks, I stamped that onto a Tag Sale: Quilted banner of white cardstock using Versamark and heat set it with Antique Gold Embossing Powder. I attached that to the card front using foam squares on the ends but not in the center of the banner so that it would lay flat against the bouquet.  I added three different sizes of pearls to the front which makes for an ultra feminine touch.

Today's card will also be for The Paper Players Challenge #384 where our challenge is to use any shade of pink.  That is super easy for me as I frequently reach for the pink inks in my collection.

That completes my card for this month's Create Along With Us.  The supplies I've used are linked below for your convenience (Affiliate Links may be used).  Thank you so much for stopping by today!


GKD Gold Metallic Cardstock
Shop at:
GKD
Kokuyo Long Dot Runner Adhesive
Shop at:
SSS
PTI Farmer's Market Florals
Shop at:
PTI
PTI Farmer's Market Florals Dies
Shop at:
PTI
PTI Lavender Moon Cardstock
Shop at:
PTI
PTI Perfect Match Hibiscus Burst Ink
Shop at:
PTI
PTI Perfect Match Lavender Moon Ink
Shop at:
PTI
PTI Perfect Match New Leaf Ink
Shop at:
PTI
PTI Perfect Match Raspberry Fizz Ink
Shop at:
PTI
PTI Perfect Match Winter Wisteria Ink
Shop at:
PTI
PTI Stamper's Select White Cardstock
Shop at:
PTI
Scrapbook Adhesives Thin 3D Foam Squares
Shop at:
SSS
SSS Antique Gold Embossing Powder
Shop at:
SSS
Teflon Bone Folder
Teflon Bone Folder
Shop at:
SSS
Tim Holtz Mini Round Ink Blending Tool
Shop at:
SSS
Versamark Ink
Versamark Ink
Shop at:
PTI | SSS
Wagner Heat Tool
Wagner Heat Tool
Shop at:
SSS
WPLUS9 Gift Card Layers Designer Dies
Shop at:
SSS

Saturday, January 20, 2018

Papertrey Ink's January 2018 Create Along With Us

Hello everyone!  I want to take a few minutes today to share that I am still blogging but because we are moving to another state and I'm having to travel a lot, I don't have time for as many blog posts.  We've been working on this move for nearly a year now and things are starting to come together but I have been gone quite a bit over the holidays and now with the details and decisions of getting our home built. There are just so many details to work out but we're getting there.  I hope you'll stay with me even though I can't share as often until we get settled in our new home which should be sometime between March 1st  and May 1st of this year.

Today's card is for the Papertrey Ink January 2018 Create Along With Us Challenge and I chose one of Laurie Schmidlin's Day 1 Release projects to be inspired by.  There are always so many fantastic projects from all of the design team which makes it very hard to choose sometimes, but I wanted to make a card to send to my best friend who came to visit last weekend.  She is one of the reasons that I am so excited to be moving back to Texas as I had to leave her behind when we moved here eight years ago. We've made the best of it but we definitely plan to spend more time together once we get moved back. She works a full time+ job and doesn't have a lot of free time since she is also a mom to one daughter in high school and a son in his first year of college.


Because I feel so behind in my work right now (I'm really not behind) I wanted to try to make maximum impact at first glance by using this Quoted: True Friends saying for the focal point of my card.  I was also inspired by this card from Laurie that was posted last week for a post she did on using vellum.  Like Laurie, I like to use vellum to soften the look of background papers on my cards.  The color is there for the feel but the pattern becomes so much softer.

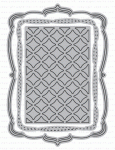
For my card, I started with a 4.25 x 5.5 inch panel of Stamper's Select Vellum and my sentiment from the Quoted: True Friends stamp set. This is a $5.00 stamp set which is fantastic. You can arrange some or all of the words however you want it to read and this time I left one group out.  Since we are moving back, I didn't want to use the "difficult to leave" part of the sentiment.  I stamped the sentiment using Versamark Ink and Heat Embossed it with Antique Gold Embossing Powder.  I repeated this twice but you have to be super careful doing this on vellum because it is very easy to burn the embossing powder. And because Vellum has a tendency to warp, you'll want to make sure you are stamping in the exact same place.  Three light coats is better than one or two heavier coats.  Once I had it embossed, I die cut it using Mix & Mat: Pretty Brackets without the center insert piece of the die.  The Mix & Mat series is so great because every single part of the die is interchangeable with other pieces from the series although I didn't use it that way today. So far there have been 11 of these die sets.


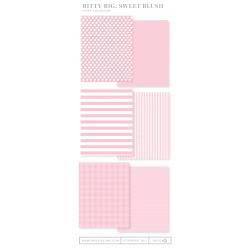
I cut the vellum so that my saying was a little closer to the right side of the mat because I wanted to use some of the Fancy Foliage Details leaves around the left side to kind of frame it up. I die cut a stitched rectangle from Bitty Big Sweet Blush Patterned Paper to go behind the vellum and used some Metallic Gold Cardstock from Gina K Designs for my background mat and the leaves. Once I attached that to a top folding card base made from Stamper's Select White Cardstock, I added a few sequins from Lucy's Rose Gold Collection to finish it off. Since 95% of the cards I make actually get mailed, I didn't want to use any 3D Foam Tape. 

The supplies I've used are linked below for your convenience (affiliate links may be used).
Cuttlebug Die Cutting Machine
Shop at:
SSS
GKD Gold Metallic Cardstock
Shop at:
GKD
Kokuyo Long Dot Runner Adhesive
Shop at:
SSS
PTI Mix & Mat: Pretty Brackets
Shop at:
PTI
PTI Quoted: True Friends
Shop at:
PTI
PTI Stamper's Select Vellum (#44)
Shop at:
PTI
PTI Stamper's Select White Cardstock
Shop at:
PTI
PTI Sweet Blush Bitty Big Patterned Paper
Shop at:
PTI
Ranger Multi Medium Matte
Shop at:
SSS
SSS Antique Gold Embossing Powder
Shop at:
SSS
SSS Stitched Rectangles Dies
Shop at:
SSS
Teflon Bone Folder
Teflon Bone Folder
Shop at:
SSS
Versamark Ink
Versamark Ink
Shop at:
PTI | SSS
Wagner Heat Tool
Wagner Heat Tool
Shop at:
SSS
WPLUS9 Gift Card Layers Designer Dies
Shop at:
SSS
Little Things from Lucy's Rose Gold Sequin Shaker Mix
Shop at:
SSS