Showing posts with label Little Things from Lucy's. Show all posts

Saturday, January 20, 2018

Papertrey Ink's January 2018 Create Along With Us

Hello everyone!  I want to take a few minutes today to share that I am still blogging but because we are moving to another state and I'm having to travel a lot, I don't have time for as many blog posts.  We've been working on this move for nearly a year now and things are starting to come together but I have been gone quite a bit over the holidays and now with the details and decisions of getting our home built. There are just so many details to work out but we're getting there.  I hope you'll stay with me even though I can't share as often until we get settled in our new home which should be sometime between March 1st  and May 1st of this year.

Today's card is for the Papertrey Ink January 2018 Create Along With Us Challenge and I chose one of Laurie Schmidlin's Day 1 Release projects to be inspired by.  There are always so many fantastic projects from all of the design team which makes it very hard to choose sometimes, but I wanted to make a card to send to my best friend who came to visit last weekend.  She is one of the reasons that I am so excited to be moving back to Texas as I had to leave her behind when we moved here eight years ago. We've made the best of it but we definitely plan to spend more time together once we get moved back. She works a full time+ job and doesn't have a lot of free time since she is also a mom to one daughter in high school and a son in his first year of college.


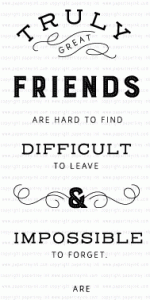
Because I feel so behind in my work right now (I'm really not behind) I wanted to try to make maximum impact at first glance by using this Quoted: True Friends saying for the focal point of my card.  I was also inspired by this card from Laurie that was posted last week for a post she did on using vellum.  Like Laurie, I like to use vellum to soften the look of background papers on my cards.  The color is there for the feel but the pattern becomes so much softer.

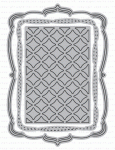
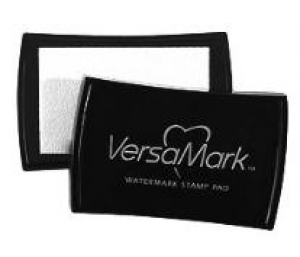
For my card, I started with a 4.25 x 5.5 inch panel of Stamper's Select Vellum and my sentiment from the Quoted: True Friends stamp set. This is a $5.00 stamp set which is fantastic. You can arrange some or all of the words however you want it to read and this time I left one group out.  Since we are moving back, I didn't want to use the "difficult to leave" part of the sentiment.  I stamped the sentiment using Versamark Ink and Heat Embossed it with Antique Gold Embossing Powder.  I repeated this twice but you have to be super careful doing this on vellum because it is very easy to burn the embossing powder. And because Vellum has a tendency to warp, you'll want to make sure you are stamping in the exact same place.  Three light coats is better than one or two heavier coats.  Once I had it embossed, I die cut it using Mix & Mat: Pretty Brackets without the center insert piece of the die.  The Mix & Mat series is so great because every single part of the die is interchangeable with other pieces from the series although I didn't use it that way today. So far there have been 11 of these die sets.


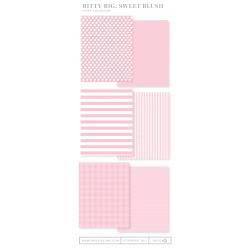
I cut the vellum so that my saying was a little closer to the right side of the mat because I wanted to use some of the Fancy Foliage Details leaves around the left side to kind of frame it up. I die cut a stitched rectangle from Bitty Big Sweet Blush Patterned Paper to go behind the vellum and used some Metallic Gold Cardstock from Gina K Designs for my background mat and the leaves. Once I attached that to a top folding card base made from Stamper's Select White Cardstock, I added a few sequins from Lucy's Rose Gold Collection to finish it off. Since 95% of the cards I make actually get mailed, I didn't want to use any 3D Foam Tape. 

The supplies I've used are linked below for your convenience (affiliate links may be used).
Cuttlebug Die Cutting Machine
Shop at:
SSS
GKD Gold Metallic Cardstock
Shop at:
GKD
Kokuyo Long Dot Runner Adhesive
Shop at:
SSS
PTI Mix & Mat: Pretty Brackets
Shop at:
PTI
PTI Quoted: True Friends
Shop at:
PTI
PTI Stamper's Select Vellum (#44)
Shop at:
PTI
PTI Stamper's Select White Cardstock
Shop at:
PTI
PTI Sweet Blush Bitty Big Patterned Paper
Shop at:
PTI
Ranger Multi Medium Matte
Shop at:
SSS
SSS Antique Gold Embossing Powder
Shop at:
SSS
SSS Stitched Rectangles Dies
Shop at:
SSS
Teflon Bone Folder
Teflon Bone Folder
Shop at:
SSS
Versamark Ink
Versamark Ink
Shop at:
PTI | SSS
Wagner Heat Tool
Wagner Heat Tool
Shop at:
SSS
WPLUS9 Gift Card Layers Designer Dies
Shop at:
SSS
Little Things from Lucy's Rose Gold Sequin Shaker Mix
Shop at:
SSS

Thursday, November 2, 2017

Papertrey Ink's Make It Monday #302

Hello there!  Today's card is for this week's Make It Monday #302 with Stephanie Gold showing us less traditional ways to use twine, ribbon, and the like on our cards. Since we were using less traditional techniques I made my colors a little less than traditional by using Pine Feather with Autumn Rose and Scarlet Jewel Inks and coordinating patterned paper.

I started by die cutting a few of each of the die cuts from Spruce & Sprig Stamp Set and Spruce & Sprigs Coordinating Dies.  I used a negative as my place holder in my Mini Misti and stamped the die cuts in this way.  I prepared 2-3 of each piece as this makes it easy when you start assembling your arrangement.  I used Pine Feather for the dark green, Scarlet Jewel for the dark red berries and Autumn Rose for the rose colored springs.  This makes me think of when you do a planter and you need Pillars, Fillers and Spillers.  It's kind of the same philosophy.

I die cut a banner using the Number the Stars Banner Die, then stamped my sentiment from Beautiful Berries: Winter on the banner using Versamark and heat embossed it with Antique Gold Embossing Powder

I die cut a stitched rectangle panel from Scarlet Jewel Bitty Big in the wide stripes and attached it to my top folding card base made from Stamper's Select White Cardstock.  If you haven't seen the new Bitty Big Patterned Papers from Papertrey Ink, they are awesome. There are stripes, plaids and polka dots.  There is a wide stripe on one side of the paper and a narrower stripe on the opposite side so you can use whichever side you want. It's the same with the plaids and polka dots, so you just use whichever side you want. So far, 9 of the Papertrey Colors have been released, but each month a few more get released. I'm ready for some pink ones - Hibiscus Burst for instance.  The Spring Rain is just the most awesome color.  In fact, I think I might take it to do a color match for paint for my studio in the home we are building although I have already selected a similar color.


Next I die cut Rustic Wreath 3 times from Ocean Tides Cardstock.  Rather than stacking them one on top of the other, I staggered them to make my wreath appear fuller.  I put about 6 dots of Ranger Multi Medium Matte on the back side of each one and let them dry for a couple of minutes before moving on.

I had some Hemp Cord in burgundy that I tried out first but I didn't care for the look so I switched gears and used some thread.  I unwound enough of the Gold DMC Thread to make a messy "nest" of thread in front of my wreath.  I wrapped a small piece of Scor-Tape (with the release paper intact) around the side where the ends met so I could kind of keep it in the shape I desired without having to hold it constantly. I knew that my arrangement of greenery would cover that up so it was no big deal.

I adhered the striped paper to the card base and then using 1/8" Scor-Tape, stuck about 4 pieces on the back of my wreath layers to adhere it to the card front.  Using another skinny piece of Scor-Tape, I attached the gold thread on top of that at the left side.

I created the arrangement by using a combination of Scor-Tape, Kokuyo Dot Liner Adhesive, and Ranger Multi Medium Matte.  In the 2nd photo you can really see all the different layers.  The only part that I used foam tape for is the big cluster of berries.  The rest of the layers are laid on top of or tucked under the other parts. Even the banner is just stuck down with Kokuyo Adhesive.  It looks dimensional because it's laying on top of more layers.


In my attempt to really use ribbon and twine (albeit elevated quality twine) I made a small bow from some white sheer ribbon that has a gold accent thread.  Once I got the card finished and photographed, I decided it need a little something more so I added a few sequins from Lucy's Rose Gold Shaker Selection.  It even has those tiny stars in the mix like the one I added to the banner.
Before Sequins
Just for the sake of comparison,  the image on the left was before sequins.  I'm so happy with how this card turned out that I am planning to make a few more that are similar in design for a special blog hop that is coming to you this weekend.  We will be honoring Papertrey Ink's very own Designer and Design Team Member, Dawn McVey with a blog hop starting this Saturday at 7:00 a.m. over on the Papertrey Blog.  Everyone will be using stamps and dies designed by Dawn who received a small intestine transplant early last Sunday Morning.  She has a long recover so we are surprising her with the blog hop.  The linky will be open for 1 week and you can link up as many projects as you wish, as long as they all use one of the products that Dawn has designed. We hope to see you there!!

I am also linking this up to the challenge over at The Paper Players.  They have a Tic Tac Toe Challenge this week and I used the center row across: Christmas, Die Cut, and Wreath.