Showing posts with label Cardmaking. Show all posts

Friday, January 24, 2020

Memory Box Valentine's Day Card with Selective Coloring


Hello everyone!  Vicki here with you today sharing a Valentine's Day card that uses typical supplies in a less than typical way.

By now, I am sure you all know of my love for gold foiled cardstock and papers.  I wanted to create a card that shows you one of the reasons that I love white and gold foiled papers in particular.


Last week I was in the city for an appointment and I had time to run into Joann's as I was looking for Sateen Supima Cotton in a certain color and the particular store I was in has a much larger fabric selection than the one near my home.  I didn't find the fabric I was looking for, but I almost always do a quick walkthrough of the Scrapbooking section on my way out.  I was pretty excited when I saw this 6 x 6 Mat Stack from Die Cuts With a View that contained all white and gold foiled cardstock.  It doesn't have a GSM or weight on the paper but it's comparable to Text Weight Papers if you want a comparison.  Anyhow, there were two of these at 60% off and I grabbed them both.  My total came to $4.00 and some change.  

While I do love the gold, I also love the things you can create using White & Gold papers like these.  You can do ink blending on them to get the exact background color you want, or you can use any one of several coloring media to make it your own, which is what I did today.  

I grabbed my drawer containing all of my Red and Red Violet Copic Markers and sat down to start coloring the sheet seen above.  I have a stacking four drawer unit that has all of my markers in them and those two color groups are in the same drawer.  

I knew I wanted to use a favorite Memory Box Die to create this card but I wanted something other than a solid color behind it so I started coloring in the flowers.  I could also have colored in the leaves, but I didn't want that look, so I only colored the flowers.  Let me just say, I am not a person who has "Mad Coloring Skills" as they like to say in this industry.  But I was really only looking to enhance the white paper by adding bits of color.  My approach would have been different if I wanted to use it for the whole background, but for what I wanted, this was great.  


The single 6 by 6 sheet yielded two hearts for behind the La Rue Heart.  In order to get the correct sized heart to go behind, I used the negative piece from the Die Cut Gold La Rue Heart as my template. 


If I would have used the die for my template to trace around, it would have been too large, so I traced the negative opening and then fussy cut them.  Yes, I did actually fussy cut the two hearts!  Most of my followers know that I detest fussy cutting, but sometimes you just have to do it.  I slipped the extra heart into the stamp pocket that has the La Rue Heart in it for future use.  


After I did that, I also had this long diagonal piece left to use.  I used it to put a band across the bottom of the card for my die cut Love Airy Script Die.  I die cut a background panel from red cardstock for the base using the largest Basic Rectangle Dies.  I cut the second largest rectangle from some scrapbooking paper in a similar color to the flowers that I colored with Copics.  It's not quite red, but not quite coral either.  And with the gold foil accents, it was perfect! 


I love how this card turned out and there won't be another like it anywhere.  That is one of the many advantages of using White and Gold Coiled cardstock and making it your own. 

  
This made such a striking card!  I love that I could add a single little gem to the center of the La Rue Heart for that additional touch of bling. 


In case you'd like to try this technique for yourself, I did a few other examples of adding color to White and Gold Foiled Papers for you here. The sky is the limit.  I also love that many times the patterns for this are geometric because most guys like geometric patterns.  You can make stripes in straight or diagonal lines, quilt patterns or any kind of random coloring you want.  Use Ink Blending Brushes, Mini Round Ink Blending Tools, Markers, or even paint if you have the time and desire to do that.  The amount of time you spend is up to you.  I hope you enjoyed this post and if you try this out, be sure to tag us on social media!  

Don't forget this month's challenge is a friendship card and this would be a fun way to make something special.  


Affiliate Links may be used at no additional cost to you.
Gemini Junior Die Cutting Machine
Shop at:
SSS
Kokuyo Long Dot Adhesive
Shop at:
SSS
Kokuyo Long Dot Adhesive Refill
Shop at:
SSS
Memory Box La Rue Heart
Shop at:
SSS
Memory Box Love Airy Script Die
Shop at:
SSS
PP.Com - Cougar White Digital Smooth - #110, 200 pack
Shop at:
PPC
Ranger Multi Medium Matte
Shop at:
SSS
Scor-Pal Scoring Board
Shop at:
SSS
Scotch 3M Foam Tape
Scotch 3M Foam Tape
Shop at:
SSS
ScraPerfect No Clog Tip for Ranger Multi Medium Matte
Shop at:
SSS
Teflon Bone Folder
Teflon Bone Folder
Shop at:
SSS
Tim Holtz Mini Craft Snips
Shop at:
SSS
Tim Holtz Mini Round Ink Blending Tool
Shop at:
SSS
Tim Holtz Tonic Paper Trimmer
Shop at:
SSS
Tonic 6 Inch Personal Trimmer
Shop at:
SSS

Monday, September 9, 2019

Altenew Inspiration Challenge - September 2019

Hi there!  Today I have a project for this month's Altenew Inspiration Challenge.  I took my cues from Svitlana's Image and from her project as well.  I love the contrasting colors of purples and oranges, so it was pretty easy for me to figure out what I wanted to do for my fall-inspired project.

I always enjoy making encouragement cards and they are my favorite kind to send to friends or loved ones.  It's always a nice little surprise for the recipient when they get a card for no particular reason.  I love a surprise in my mailbox, don't you?

I wanted to do some ink blending so I started with a piece of Canson Bristol Smooth Cardstock and my ink blending brushes.  I chose to use Autumn Blaze and Midnight Violet in a totally random manner.  As I was blending I thought I needed to add some darker orange so I added some Fired Brick as well.  Once I had the inks blended on the cardstock, I hit it with some shimmer mist and set it aside to dry while I did a bit of die-cutting.

I love the Leaf frame cover die and knew that I wanted it in some gold foiled cardstock.  I also wanted to use a sentiment from "Kind Words Stamp Set" which is a sentiment set that I collaborated on with Tasnim at Altenew.  There are lots of encouraging sentiments in that set.

After my ink blended panel dried, I gave it a lot of Finetec Gold Watercolor splatter and let it dry again.  Originally, I heat embossed the sentiment directly onto the background panel, but it was too difficult to read in Gold Embossing Powder, so I used a piece of white cardstock and then blended what was left on the purple blending brush to add that bit of color.  The stark white background didn't look right, so this was my solution to that problem.  The brush didn't have much color left on it, so it worked out okay.


I wanted to use the purple, orange and gold cardstock with the Fantasy Floral 3D Die for my embellishments.  I really love this particular die.  I have a few of the Altenew 3D Dies, but this one is a great size, is less expensive than most, and easy to assemble.  Also, by simply rotating the piece a little one way or the other, you can change up the look of each bloom.  This is a Win-Win for me as I don't always have time to do the more complicated flowers from some of the other 3D Die Sets.  I added a few sequins and gems to add some bling to my card.  I was able to pull this together very quickly.

Thanks for stopping by today!  I have so many things on my desk that I want to work with, so I will be back soon with another project for you!

Sunday, October 14, 2018

Altenew Educator Beautiful Details

Hello there!  I am back today with a project that is part of my Altenew Educator Certification Program.  Today's project is for the Beautiful Details Class taught by Marika Rahtu.  This class is one I had taken before so I wanted to try a new to me technique that I hadn't previously tried, which was coloring with Copics on the back side of a heat embossed Vellum image.  Marika used a Dull Embossing powder but since I didn't have any I used Pearl White.  It can be a little hard to see, but if you put something behind it, it makes it a bit easier.

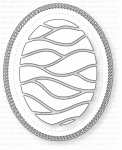
I used 44# vellum from Papertrey Ink to do my heat embossing of the bloom and leaves from Altenew's Beautiful Heart.  It's a very heavyweight vellum and doesn't warp much if at all.  Just keep the heat tool moving and it will work out alright.  I used Copics in a variety of shades of  Red Violet to create the colors.  Unfortunately, I put them all away before I wrote them down, so I can't say which specific colors I used, but the shades were in the deeper pinks.  Initially, I was planning to do just the pink, but once I had the flowers and leaves done, I felt that the color kind of the bloom disappeared once I put it on the white oval die cut.  So I decided that I would put a white die cut behind it.  When I was putting the dies back into their stamp pocket, I noticed that I had one previously partially colored but unfinished in Coral tones.  When I popped the vellum layer over that, it really brought out a lot of color in my petals and so I decided to use the partially colored bloom for the base underneath the vellum layer.  Now my color wasn't lost in the sea of white. I don't have very many colored pencils but I did add a few coloring lines to the leaves to bring out a little more of the veining in the leaves.


Because I used White Satin Pearl Embossing Powder, I thought it would look pretty to used White Shimmer Cardstock for my background and the oval die cut.

Next, I used some Heidi Swap Gold Lamé Shimmer Spray to create droplets on the card.  When I put the card together, I felt it needed a bit more dimension, so I used Gold Pico Embellisher to add drops over the gold splatter.  Now comes confession time -- I liked it better without the pico embellisher and just the gold splatter. But you never know until you try it!  Since I glued down the vellum to the oval panel, I can't remove it and do it over.  It doesn't have to be our vision of perfection but I am happy when my projects are.  Trust me, no one says "oh, I see you did that wrong" when they get a card in the mail.  They only think of your thoughtfulness at sending it.  So while it isn't "perfect" in my eyes, it's still beautiful.

The technique I was using was Copic coloring on the back side of Vellum and I am happy with the way that looks.  I'd like to try it again sometime adding colored pencil details along with the Copics.

This past couple of weeks has been absolutely crazy between doctors appointments, getting my Mammogram and Bone Density Scans done, and now I have several MRI's scheduled because I have MS.  They like to get a thorough look every year or two in order to see how I am getting along, but I am not looking forward to a few hours spent inside a very claustrophobic tube to have it done.  Plus I've had all of the grandkids at various times this week, so I have been busy! 

 Anyhow, I will try to link as many supplies as I can remember, but I made this card a few weeks ago for this class and I'm just now getting the blog post written.

Affiliate Links Used Whenever Possible

Altenew Beautiful Day
Shop at:
SSS | ALT
Altenew Beautiful Heart Stamp & Die Bundle
Shop at:
ALT
Kokuyo Long Dot Runner Adhesive
Shop at:
SSS
PTI Shape Shifters Oval #2
Shop at:
PTI
PTI Stamper's Select Vellum (#44)
Shop at:
PTI
PTI Stamper's Select White Cardstock
Shop at:
PTI
SSS Antique Gold Embossing Powder
Shop at:
SSS
Teflon Bone Folder
Teflon Bone Folder
Shop at:
SSS
Versamark Ink
Versamark Ink
Shop at:
SSS
Wagner Heat Tool
Wagner Heat Tool
Shop at:
SSS
WPLUS9 Gift Card Layers Designer Dies
Shop at:
SSS