Showing posts with label Altenew Beautiful Heart. Show all posts

Sunday, January 13, 2019

Altenew Educator Final Certification


Hello everyone!  I am here today with my last post for my Altenew Educator Certification Program.  Because this was a class that I held at my home, this is a very photo heavy post!  If you want to watch the video of my class, You'll have to watch it on my Facebook Live HERE. Class actually starts at 13:41 if you want to skip the chit-chat.

Virginia Lu and Nicole Picadura joined our Facebook live so they could observe me in a class environment.  Nicole is the Operations Manager for Altenew and Virginia is in charge of the Altenew Educator Certification Program.

For my final assignment, I held a class at my home for 6 friends - new friends and longtime friends.  All but one of the ladies who is a neighbor in our new subdivision, my friends traveled anywhere from 45 miles to as many as 78 miles to be here!  Since we moved back to Texas this year, I don't know a lot of people in our new town but some of my longtime friends, (Jenica, Gloria, and Diane), drove a long way to see me and join me for the class.  I treasure these ladies and could never express in words how much it meant to me that they were here and came to support me.  I also got the chance to meet a fellow card maker, Carol Hintermeier, and get to meet her in person.  Carol is also doing the AECP so it was a chance for her to observe and see what it was like to hold a class when she gets to the final stage of her program.  We know each other from working in the same industry and we follow each other on Instagram so it was awesome to get to meet in person.  Gloria brought her friend Paula and although Gloria talks about Paula, we hadn't ever met before so it was great to put a face with the name.  Paula is pretty crafty and she was a natural for this class.  While I have met Trisha because we live in the same subdivision, we hadn't gotten to speak more than a few minutes for a few times.  Everyone has been busy moving and unpacking.  It was nice to get to know her a little more.

In order to prepare for the class, I did quite a bit of work ahead of time to make things go smoother for the actual class.  I prepared a simple outline to follow along to try to keep from rambling and the class taking too long.  We finished in about an hour and a half so that was great!

My outline consisted of a little bit about how the company got started in 2014 and then moved on to the basic products that we would be using for the class.  I talked about the beautiful layering stamps that Altenew has, their inks and some basic supplies that are needed if you want to make cards.  I kept the outline to one sheet of paper so I would be able to tuck it into my student packets so they could refer back to it later.

I also created three sample cards to show them what we would be making.  I die cut all of the elements for them and set up my MISTI's using the negatives as a place holder for the actual stamping.  I wanted my participants to be able to see how easy it is to stamp multi-layered images in this way and also be able to see how to mass produce several cards with the same design.


This was by far the best way to do this.  And it meant that I only had to change the stamp once for each MISTI.  Right now, I have the Original and the Mini MISTI, so I used the larger MISTI for the blooms and the Mini MISTI for the leaves.

In the student packets, I included a picture of the sample card and a small copy of the layering guide, a half sheet that showed a picture of the card we would be making with simple, step by step instructions, and a small copy of the stamp set image that we would be using.  I stamped all of the sentiment strips in advance and included one in each packet.  

Here you can see the contents of the packets which included a card base, an envelope, the layering guide, the image of the stamp set we would be using, the die cut pieces we would be stamping, and the sentiment strip all ready to go for them.


We talked quite a bit about the MISTI and how it changed the stamping world.  Carol and I both commented that we really didn't care for stamping until the MISTI hit the market and how we would never go back to stamping without one for the multi-layered images or really, any stamping.  I used to make cards using die cuts only so the MISTI changed my cardmaking skills dramatically!  Jenica actually gave me all of her old stamping stuff and I inherited her Stamp-a-majig.  What a pain that thing was!  The MISTI is superior to that in every imaginable way!

Trisha, Diane, Me, Jenica, Carol, and Paula.  Gloria was behind the lens! 
Jenica, Paula, & Carol
We were able to get down to the stamping pretty quickly after that.  I talked about ink pad sizes and why I have a preference for ink cubes over regular sized ink pads, but how both options were available.  I can't count the number of times I've dropped a full-sized ink pad on my nearly finished project!  Because I have MS, it affects my balance and coordination so I stick with the ink cubes rather than the full sized pads.  Plus, as a bonus, I can have more colors that way!  You definitely need to have the reinkers if you use the ink cubes and stamp as much as I do. 

Diane
Trisha


The ladies all loved the whole concept of and the actual process of stamping using the MISTI! Carol and I agreed that it was the thing that converted us to stamping - that ability to line things up and have them crisp, clean images. It can be really frustrating trying to use an acrylic block for layering stamps and once you use a MISTI, you just get used to using it for everything.

Seriously, how did we survive before the invention of that?  I know that until I got one,  I wasted a lot of premium cardstock.  There was also really no way to mass produce cards in an easy way and it was too frustrating to try.

Carol
Once all the stamping was done, I had the ladies arrange their card front how they wanted.  Each person has their own spin on things and I wanted them to do it how they wanted it; it didn't have to be like mine.  I forgot to get a picture of Gloria's and Paula's Cards when they were finished, but they do show them during the LIVE class toward the end.  

Jenica's Card
Trisha's Card


Diane's Card
Carol's Card
Paula's and Gloria's cards were probably the most unusual because they added distressing to their sentiment strips and Gloria did a Horizontal rather than a Vertical orientation card.  

As far as my thoughts on the class, I feel I was very well prepared.  I gave them enough information about Altenew to interest them, but not so much as to overwhelm them.  I kept anything I thought might be needed nearby for quick and easy access (tweezers).  The one thing I would change would be to go back and wear quieter shoes.  My boots made a lot of racket on the hardwood floors but hopefully, no one besides me noticed that.  I would have liked to have everyone at the same table, but that just wasn't possible.  

Now, I just have to wait for feedback from Altenew and then I will be a fully certified Altenew Educator.  Wish me luck!  

Sunday, October 14, 2018

Altenew Educator Beautiful Details

Hello there!  I am back today with a project that is part of my Altenew Educator Certification Program.  Today's project is for the Beautiful Details Class taught by Marika Rahtu.  This class is one I had taken before so I wanted to try a new to me technique that I hadn't previously tried, which was coloring with Copics on the back side of a heat embossed Vellum image.  Marika used a Dull Embossing powder but since I didn't have any I used Pearl White.  It can be a little hard to see, but if you put something behind it, it makes it a bit easier.

I used 44# vellum from Papertrey Ink to do my heat embossing of the bloom and leaves from Altenew's Beautiful Heart.  It's a very heavyweight vellum and doesn't warp much if at all.  Just keep the heat tool moving and it will work out alright.  I used Copics in a variety of shades of  Red Violet to create the colors.  Unfortunately, I put them all away before I wrote them down, so I can't say which specific colors I used, but the shades were in the deeper pinks.  Initially, I was planning to do just the pink, but once I had the flowers and leaves done, I felt that the color kind of the bloom disappeared once I put it on the white oval die cut.  So I decided that I would put a white die cut behind it.  When I was putting the dies back into their stamp pocket, I noticed that I had one previously partially colored but unfinished in Coral tones.  When I popped the vellum layer over that, it really brought out a lot of color in my petals and so I decided to use the partially colored bloom for the base underneath the vellum layer.  Now my color wasn't lost in the sea of white. I don't have very many colored pencils but I did add a few coloring lines to the leaves to bring out a little more of the veining in the leaves.


Because I used White Satin Pearl Embossing Powder, I thought it would look pretty to used White Shimmer Cardstock for my background and the oval die cut.

Next, I used some Heidi Swap Gold Lamé Shimmer Spray to create droplets on the card.  When I put the card together, I felt it needed a bit more dimension, so I used Gold Pico Embellisher to add drops over the gold splatter.  Now comes confession time -- I liked it better without the pico embellisher and just the gold splatter. But you never know until you try it!  Since I glued down the vellum to the oval panel, I can't remove it and do it over.  It doesn't have to be our vision of perfection but I am happy when my projects are.  Trust me, no one says "oh, I see you did that wrong" when they get a card in the mail.  They only think of your thoughtfulness at sending it.  So while it isn't "perfect" in my eyes, it's still beautiful.

The technique I was using was Copic coloring on the back side of Vellum and I am happy with the way that looks.  I'd like to try it again sometime adding colored pencil details along with the Copics.

This past couple of weeks has been absolutely crazy between doctors appointments, getting my Mammogram and Bone Density Scans done, and now I have several MRI's scheduled because I have MS.  They like to get a thorough look every year or two in order to see how I am getting along, but I am not looking forward to a few hours spent inside a very claustrophobic tube to have it done.  Plus I've had all of the grandkids at various times this week, so I have been busy! 

 Anyhow, I will try to link as many supplies as I can remember, but I made this card a few weeks ago for this class and I'm just now getting the blog post written.

Affiliate Links Used Whenever Possible

Altenew Beautiful Day
Shop at:
SSS | ALT
Altenew Beautiful Heart Stamp & Die Bundle
Shop at:
ALT
Kokuyo Long Dot Runner Adhesive
Shop at:
SSS
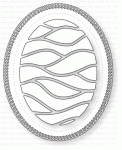
PTI Shape Shifters Oval #2
Shop at:
PTI
PTI Stamper's Select Vellum (#44)
Shop at:
PTI
PTI Stamper's Select White Cardstock
Shop at:
PTI
SSS Antique Gold Embossing Powder
Shop at:
SSS
Teflon Bone Folder
Teflon Bone Folder
Shop at:
SSS
Versamark Ink
Versamark Ink
Shop at:
SSS
Wagner Heat Tool
Wagner Heat Tool
Shop at:
SSS
WPLUS9 Gift Card Layers Designer Dies
Shop at:
SSS

Tuesday, August 28, 2018

Altenew Educator - Irresistible Inking Techniques

I am happy to be here today with my last project for the Level 1 Classes of the Altenew Educator Certification Program.  Today's card features Irresistible Inking Techniques.  In this class we learned several different techniques for using our inks in less than traditional ways and there were a few I hadn't tried before.  So I chose to combine a couple of the techniques from the class with a twist of my own  for this project. 

I started with one of the Stamp Sets from Altenew's July 2018 Release, Beautiful Heart.  One of the techniques we learned was how to use ink with a brayer or an acrylic block for a soft background on our cards.  I had a brayer that I had never actually used and I loved the texture it added to my background panels.  You can smoosh some ink onto a craft mat, spray it with water (or in my case I used shimmer mist) and then run your brayer through it and then onto your cardstock panel.  For all of my panels and elements today, I used Bristol Cardstock because water moves so well on it.  This gives a kind of uneven texture to the ink so it looks like you've added a loose wash of watercolor.  I wanted to bring in both color families that I used, so I decided to create a background panel and a smaller panel done in this way.  I die cut both panels with Spellbinders Hemstitched Rectangles.


I tried several different colors before I settled on the backgrounds I had brayered with Frayed Leaf and Coral Bliss.

One of the other techniques in the class is one you've seen me use often - Heat Embossing using inks for watercolors.  I must say, this is still my preferred way to color images.  I love the translucent quality of the dye based inks and I'm not technically an artist, so it doesn't bother me that I'm not using watercolor.  However, I did a little change up here to the technique taught in the class and did a technique that I call Watercolor Detail Stamping.


I started by heat embossing the outline images using Antique Gold Embossing Powder.  For the larger area of the bloom, I used Pink Pearl Ink.  I inked up the image very well and then gave it a couple of spritzes of shimmer mist, then stamped it down into the outline of the image.  For the leaf I did the same thing using Frayed Leaf and Forest Glades for the one under the bloom.  For the 2nd layer of the bloom, I used Coral Bliss.  For the detail layer of the leaves I used Forest Glades on the light image and Evergreen on the darker leaves.  The little bit of moisture from the shimmer mists really softens and blends the edges together.  I try to use a light hand when I apply the water or mist to the blooms so that I am not getting drips and it's important to have a sprayer that produces a very fine mist.  I love the ones that come on the Tattered Angels Shimmer Mists and so I have one that is now labeled "Water" and another that is labeled "91% Rubbing Alcohol" that I use with Alcohol Inks sometimes.  Just find one that works the way you want it to and put a label on it.


This image is not quite as straight on, so you can really see the Gold Embossing on the images and the sentiment as well.  The sentiment I chose is one from Altenew Build-A-Flower Sakura Blossom.


Of course, I had to put an image in here for you where you can really see the reflection of the gold. 

Thanks so much for stopping by today!  I hope you enjoyed my little spin on this class.  As usual, I've linked the products I used below for your convenience.  Affiliate Links are used. 


Altenew Antique Gold Crisp Embossing Powder
Shop at:
ALT
Altenew Beautiful Heart Die Set
Shop at:
ALT
Altenew Beautiful Heart Stamp & Die Bundle
Shop at:
ALT
Altenew Beautiful Heart Stamp Set
Shop at:
ALT
Altenew Build-A-Flower Sakura Blossom
Shop at:
SSS | ALT
Altenew Green Fields Mini Cube Collection
Shop at:
SSS | ALT
Altenew Tea Party Mini Cube Collection
Shop at:
SSS | ALT
Canson Bristol Paper
Shop at:
SSS
Cuttlebug Die Cutting Machine
Shop at:
SSS
PTI Stamper's Select White Cardstock
Shop at:
PTI
Ranger Multi Medium Matte
Shop at:
SSS
Ranger Non-Stick Craft Sheet
Shop at:
SSS
Scotch 3M Foam Tape
Scotch 3M Foam Tape
Shop at:
SSS
Spellbinders Hemstitched Rectangle Dies
Shop at:
SSS | SPB
Versamark Ink
Versamark Ink
Shop at:
SSS
Wagner Heat Tool
Wagner Heat Tool
Shop at:
SSS