Showing posts with label Hero Arts. Show all posts

Friday, February 8, 2019

February 2019 My Monthly Hero Kit - Art Deco


Hello there!  I know its been quite a few days since I wrote a blog post but I wanted to share this news with you all.  I just became an affiliate for Hero Arts and they actually send a Newsletter out to their affiliates with information to share with my readers, so I wanted to be sure you got to see this month's, My Monthly Hero Kit!

I fell in love with Art Deco Architecture when I was in high school.  Until we moved to Tulsa in 2010, I had no idea that Tulsa boasts one of the nations largest collections of Art Deco Architecture.  They have a Deco District in Downtown Tulsa as well as many other buildings throughout the city and even a museum called The Tulsa Deco Museum.  You can see all the possibilities on the Tulsa Convention and Visitors Bureau page HERE.

While I did order this month's kit with most of the add-ons, I haven't received mine yet, but I'm providing links for you in this post.

Are you ready to party like it's 1922? Step back in time with this month's kit, inspired by the sophisticated glamour and swinging jazz of the era. Your projects will be the bee's knees when you craft with the stylish stamps in this month's kit! We've included a bag of gold and black Mirror Confetti, as well as the prettiest, shiniest silver and gold reflective cardstocks, which look amazing when die cut with this month's Art Deco-inspired Fancy Die. A fun new element rounds out the kit - a smaller stencil of gorgeous architectural design, sized perfectly for handmade cards! Be sure to check it out:

February 2019 My Monthly Hero


The Kit Price is $34.99 and includes the following:
  • 6" x 8" Clear Stamp Set
  • 7 Coordinating Frame Cuts
  • 4.25" x 5.5" Fancy Die
  • 4.5" x 5.75" Stencil
  • Art Deco Mirror Confetti
  • 1 5.5" x 8.5" Sheet of Silver Reflective Cardstock
  • 1 5.5" x 8.5" Sheet of Gold Reflective Cardstock
Once the kit sells out, that's it, it is no longer available. As I am writing this, there is still stock to promote.

If you'd like to subscribe to the kit each month, You can sign up for one of three options here: https://heroarts.com/pages/subscribe.

In addition to the main kit, several other products were released this month:

February 2019 Monthly Release


I got several of the add-ons myself and I can hardly wait for my kit to arrive.  There is one die and a background stamp that I am hoping to get later on but since they are not part of the kit, they'll be around after the kit is sold out.

They did a huge Blog Hop on Release Day and you can see all of the projects here:  https://heroarts.com/blogs/hero-arts-blog/february-2019-my-monthly-hero-is-here-giveaway


I hope you enjoyed this update! Shop soon before the kit is sold out.  As always, thank you so much for stopping by!

Thursday, February 1, 2018

Anniversary Wishes

Not long ago, I ordered my very first Hero Arts My Monthly Hero Kit. There are still kits available as of the writing of this, but once they are gone, they're gone.  I just loved the stamp that was included in the kit although I don't normally buy too many kits. There always seems to be a great deal of product in them that I won't use so I normally wait until the stamp set goes separately to get one.  But everything in this particular kit seemed like something I would use eventually if not right away.  No sooner had I ordered the kit, than Jennifer McGuire posted a video (here) using the stamp set and I could hardly wait to get mine.  Well, you know how the saying goes about the best laid plans?  Well, that's kind of what happened to me.  With the construction of our new home in Texas, the traveling back and forth for that and my regular work meant I didn't actually have time to try it out until yesterday but there was a specific card I wanted to make.

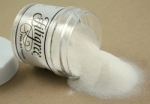
Today's card is for the Anything Goes Challenge at the Simon Says Stamp Wednesday Challenge Blog found here. For my card, I started with a piece of Scarlet Shimmer Cardstock from Papertrey Ink and stamped the first layer of embossing in Versamark, then heat set it with Hero Art White Embossing Powder.  For the second layer, I used Hero Arts White Pearl Embossing Powder. With the white powder behind it, this gave me a white sentiment rather than a pearly sentiment in the same color as my cardstock.  For the third and fourth layers I used Filigree Silver Embossing powder.  Silver embossing powder melts very quickly and I was careful not to overheat mine.  While I was at it, I also did this card in the white and gold combination that might make it's way to the mister sooner or later.  The first card is for my Daughter and Son-in-Law for their anniversary, so I didn't add any sparkle to that and I definitely left it off the one for my mister. 

This card was matted in Tonic Silver Mirror Board and the hearts were also cut from that. The lacy looking heart is an old Accucut die and the XO is an old Quickutz die.  The bigger heart is from the Little B Heart Dies.  There is a lacy heart die included in the Hero Arts Kit, but I didn't want one quite that feminine.  Everything was adhered using Kokuyo Dot Runner Adhesive.

I mounted that to a top folding card base made from True Black Cardstock.  I also die cut a white stitched rectangle panel for the inside of the card to write my message on.

I have been enjoying the technique of double (or more) heat embossing because it's a way to really make your sentiment pop off the page.  This technique using multiple layers and colors was too eye catching not to try.

I've linked most of the supplies I've used for your convenience below (affiliate links may be used).

Cuttlebug
Cuttlebug
Shop at:
SSS
Filagree Silver Embossing Powder
Shop at:
PTI
Hero Arts White Embossing Powder
Shop at:
SSS
Hero Arts White Satin Pearl Embossing Powder
Shop at:
SSS
Kokuyo Long Dot Runner Adhesive
Shop at:
SSS
Little B Hearts Designer Dies
Shop at:
SSS
Mini MISTI Stamping Tool
Shop at:
SSS | GKD
PTI Scarlet Shimmer Cardstock
Shop at:
PTI
PTI True Black Cardstock
Shop at:
PTI
SSS Stitched Rectangles Dies
Shop at:
SSS
Teflon Bone Folder
Teflon Bone Folder
Shop at:
SSS
Tonic 6 Inch Personal Trimmer
Shop at:
SSS
Tonic Frosted Silver Mirror Cardstock Satin Effect
Shop at:
SSS
Versamark Ink
Versamark Ink
Shop at:
PTI | SSS
Wagner Heat Tool
Wagner Heat Tool
Shop at:
SSS

Tuesday, December 1, 2015

Merry & Bright

A few weekends ago my husband and I traveled to Kansas City for a car show where his brother had a car entered into the competition.  While we were there, we walked around a lot and saw the others cars that were there, but we also had a lot of time just sitting around.  I knew it would be that way, so in my quest for a great Christmas Card, I had stamped several card fronts onto Canson 96# Bristol Watercolor Paper to take with me to watercolor.  This Canson paper is super smooth and much whiter than my Canson 140# Cold Pressed Watercolor Paper. I put those watercolor panels into a stamp pocket to keep them clean, grabbed a water brush and about 5 different greens in Distress Markers and in Zig Clean Color Real Brush Pens so I could think about how I wanted to watercolor them and in which shade of green.

This 1940's Vintage Panel Truck was our second favorite of the car show after my brother-in-law's car.   There were so many great vehicles at this show which was the Boyd Coddington Inaugural All Speed Expo.  It was pretty fantastic being there for my brother and sister-in-law 's first place finish in the 1960-1990 Custom Category.  Okay, back to cards now....


I had kind of mocked up what I thought I would do for this card and even had one die cut in the gold glitter paper for my prototype.  In the end, I didn't actually color any of these at the car show and only colored all 17 of them yesterday.

I didn't stick with one color or type of marker for these, choosing instead to do each one however I saw it at the moment I was painting it.  So, there's a variety of greens in these.  The newest Distress Marker from Tim Holtz is "Lucky Clover" and I thought I would use that color for the images.  Lucky Clover is a gorgeous color of Kelly Green but it's really not a deep enough green for the holly leaves in this Hero Arts Holly Jolly Stamp Set.  There is a coordinating Holly Jolly die cut for this set as well, but I didn't ever plan to use it for this card. I knew I wanted the Mama Elephant "Merry" die using DCWV Gold Glitter Card Stock, so I used Simon Says Stamp Ultra Fine Detail Gold Embossing Powder for the holly leaves and the "& Bright" part of the sentiment. If I would have thought of it sooner, WOW! Metallic Gold Glitter Embossing Powder would have been beautiful also.  But I'm okay with how it looks.  I was hurrying when I stamped and heat embossed these panels.

I tried several other green family distress markers including Forest Moss and Pine Needles but ultimately I used Zig Clean Color Real Brush Pens in Green and Dark Green.  There you have it - no need to buy all of the colors of those pens because you can make any color you want from the basic set of 36 Pens.  In fact, I have purchased 4 additional markers outside of that set and I have yet to find an image that they are suitable for.  Persian Green is one such color but in reality it is a teal color and not green at all.


There are also holly berries included in the dies, but I stamped these with Versamark and heat embossed them with WOW! Primary Apple Red Embossing Powder.  After I had assembled all of the card fronts to the card bases, I went over the berries with a coat of Glossy Accents.  That was about 8 p.m. last night so with the way I had them lined up, they could dry overnight.  Any time I try to hurry Glossy Accents, I always mess them up by sticking a finger or some such into them!


I used Ranger Multi Medium Matte to adhere the "Merry" die cut to the Simon Says Stamp Stitched Rectangle watercolor panel.  I really like that there is so much white space in this design. I hadn't known until recently that I have a strong preference for really bold graphics.  The Mama Elephant dies are my favorites among my dies and are the handwriting of one of the owner mom's.  I still need to stamp a sentiment on the inside of these cards before I start sending them out but these are primarily for immediate family. This is a clean and simple design that I am very happy with.


I'll be entering this in the Simon Says Stamp Wednesday Challenge which is still "Anything Goes" but already has 738 other entries!  Thanks for stopping by today.  I have several projects in the planning stages so I'll be back soon.

Sunday, October 4, 2015

Fall is Here!

Today's card is one I've worked on for a few days.  It had to be just right for my oldest grandson who is getting married next weekend.  I really agonize over the cards I make for a particular occasion vs. just sending along a note card to someone.   I always want it to be just right for the person and the occasion.

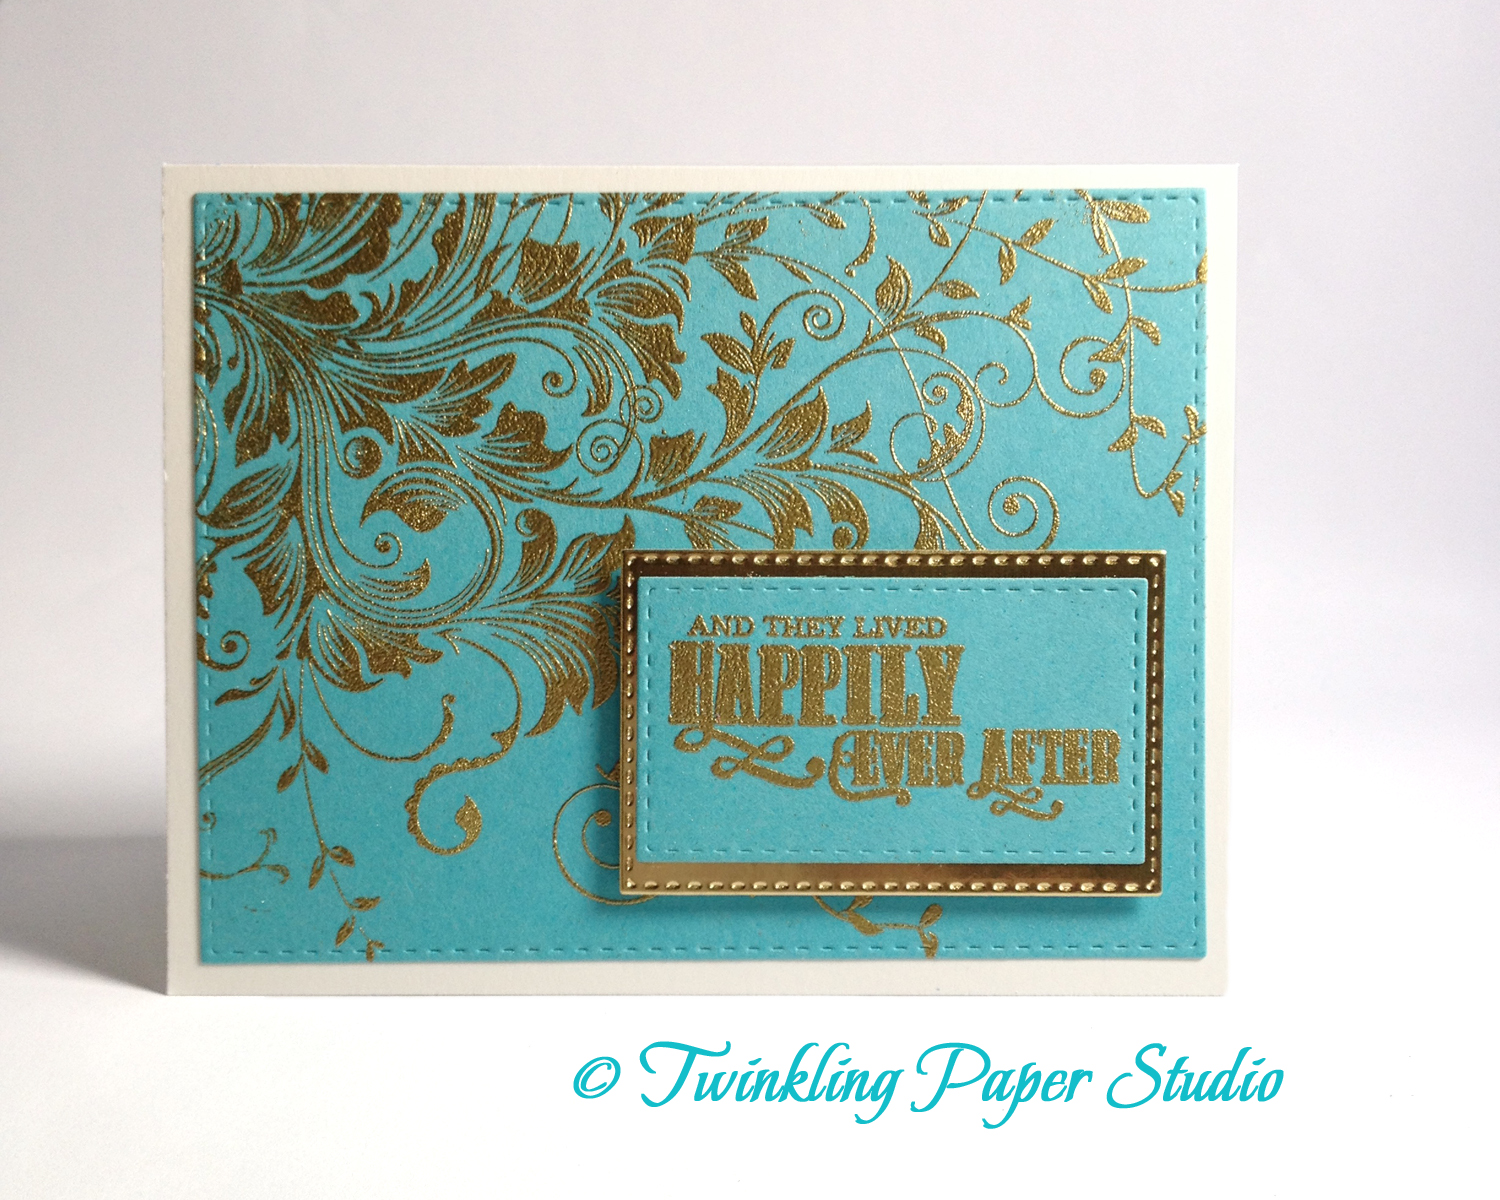
For this card I started with a 5.5 x 8.5 card base scored and top folded at the 4.5 inches made from Bazzill Marshmallow which is a 100# card stock.  Next I stamped a Hero Arts Leafy Vines Stamp onto a panel of 4.25 x 5.5 inch Simon Says Stamp Audrey Blue with Versamark Ink and heat embossed it with Simon Says Stamp Ultra Fine Gold Detail Embossing Powder.  This is one of Simon Says Stamp's many exclusive 100# card stocks.  Being an Audrey Hepburn fan, I, of course, had to get this paper as well as a package of Surf Blue.  It was a bit tricky getting this image stamped and heat embossed but I did manage it on my first try which is always a good thing.  I put the cling stamp onto my largest acrylic block then flipped it over and took the paper to the stamp after I had inked it well. I like the Inkadinadoo Extra Large Block with the wavy sides to hold on to.   I was very careful not to move the paper but to press it down to make sure it was inked well. I carefully removed the paper from the stamp and put the embossing powder on it. Sometimes you can't tell how well you've done until you finish heat setting it. Next I cut that panel with the Simon Says Stamp Stitched Regtangles with the largest die in that set.


Next I used a sentiment from the Clearly Besotted Fairytale Ending Stamp Set for the greeting and heat embossed it in the same Simon Says Stamp Ultra Fine Gold Detail Embossing Powder.  I cut that with a smaller sized Stitched Rectangle then I cut a differently proportioned Memory Box Stitched Rectangle Die Set for the Gold Mat.  This gave me the look I was going for.  Once I had all of the components for the outside of the card done I started assembling it.  The largest panel was adhered using Tombow Mono Adhesive Permanent Tape Runner.   I used the same adhesive to attach the sentiment to the gold mat.  Next I used Foam Squares to pop that panel up just a bit on the card front.

One of the things I really like to do is to incorporate part of the invitation into the card I'm giving back.  In this case I cut the large heart from a part of the invitation that had their photo on it using the largest die from the Memory Box Stitched Hearts Die Set.  Next I used a stamp from the Simon Says Stamp Congratulations Set. This set was a part of the Simon Says Stamp May 2015 Card Kit.  I saw a card that one of my favorite Papercrafters, Debby Hughes of Lime Doodle Design, used way back when that card kit was announced and I loved the papers in that kit.  There's still a few of those kits left and the stamp set is also available separately.  I was glad I wasn't having to find something at the last minute.  I only had to figure out which part of those two stamp sets that I was using and where.

So for the inside of the card, I stamped the inside greeting in Versamark, and heat set using Simon's Gold Embossing Powder again.  Next I cut several hearts from the Simon Says Stamp Holiday Shapes - Hearts and Stars die and the Simon Says Stamp Large Holiday Shapes die set.  I like the variety of sizes offered in these two dies and I use them a lot!  If I have extras I just put them in my little container with the other bits of unused die cuts so they are ready if I need just a few when I'm working on cards.  I cut one set of the large die and three sets of the small die.  Those itty bitty little hearts are so cute!  I used Die Cuts with a View Glitzy Glitter Paper for the hearts and adhered them randomly using Ranger Multi Medium Matte.


This card was not difficult but I did give it a lot of thought as to how I wanted it to all come together.  I hope they appreciate the hand made card as much as I treasure the scrapbook that Lance made me when he was 7 years old.  It's always on display in our home.

I always appreciate it when my blog readers or lookers take time to comment, so thanks to those of you who have done it!