Showing posts with label Birthday. Show all posts

Tuesday, February 25, 2020

Poppy Stamps Adriana Easel Pop Up Card Die

Hello friends and visitors.  I am going to try to do a quick post for you today, just because!  I have been so sick for three weeks and today is my first day of feeling almost normal.  I still have just a bit of a cough, but the rest of me is feeling pretty dang good!  My MS Treatments have helped already which is so encouraging. 

I absolutely fell in love with this die when Dave Brethauer did a video of this over on the Memory Box YouTube Channel last weekend.  Click on that hyperlink to follow it to their Channel.   I'm on the Memory Box Design Team but Dave included this die in a recent purchase I made from Poppy Stamps. I was so excited to get it because it is simply genius and makes creating an easel card so super easy - no measuring involved.  The score lines are engineered into the die. I also love how it has all the elements built into the die set for easy assembly of Easel Cards so that the recipient can display it.    


My first card uses some of the new Memory Box Glitter Papers from the Delicate Pastels Glitter Pad along with some gold foiled cardstock and two different shades of Pink Cardstock - Hibiscus Burst and Pale Peony from Papertrey Ink.  The die itself comes on a Magnet Sheet to keep all the elements together. If you are very careful you can get both the bottom of the card and the top of the card from a single sheet of 8.5 x 11-inch cardstock using your Gemini Full Size Die Cutting Machine.  A sheet of 12 x 12 is easy peasy by cutting it in half.  I used my Cuttlebug with the extended cutting pads and Cutting a 4.35-inch by 11-inch for4 the card base and then the leftovers for the card top.  You may need to move it up and down the piece to find where it fits the best.  In this instance, because there are many layers and I have a lot of 12 x 12 Cardstock left from my scrapbooking days, I think you could go with a lighter weight cardstock.  I have not tried that, but I don't think you'd have any problem using a lighter weight for the top and bottom.


The decorative layer could be used in many ways and I tried to show you a few more here that are different than what Dave showed in his video. I would definitely say to use a very gentle touch and heavier cardstock for this particular layer as the little branches tear off very easily.  Also, use a traditional die cutting machine vs the electric ones for this layer if you have one.  I found that this piece tore just cutting it in the electric machine, even when I made the sandwich less tight.  I personally, still use my hand-crank machine more often than my electric machine. In the instance where my decorative layer got torn up, I used an oval die to cut the center and heat emboss my sentiment onto.


I made a couple of variations of this card, switching up the colors and papers.  The left hand is done in Blueprint Shimmer Cardstock with Silver Cardstock, the Green is some watercolor I did on a piece of #140 Canson Watercolor Paper with some Fairway Green Shimmer Cardstock and the Pnks as I mentioned above.  Each of these cards has the interior layer cut from Glitter Cardstock from Memory Box.


I used a couple of different Memory Box Dies to add to the little labels that let you pop it up.  The Blue Card has little silver birds from the Birds & Blossoms Die (#94243) and the butterfly is the one that I keep on my desk all of the time.  I used it on the pink and the green cards.


I wanted to challenge myself to use this die in a more masculine way, so I chose Curious Skin Black Cardstock, which is totally matte. It never gets shiny and it feels so unusual.  It's a great paper to use for anything black.  I also used the little birds from Bird & Blossoms again. for the little inside tag again.  I forgot the foam tape here, which helps to give a little height to what is holding the easel part in place for display.  So it still worked, but it would have worked better had I remembered the foam tape.


 I wanted to provide you with this side view so you can see how the easel stays up.  I have so many other combinations I want to try.  I'm waiting on an order from Poppy Stamps for some other sentiments. These cards use Poppy Stamps Butterfly Greetings and Blooming Greetings.

I cannot wait to see how many other designs Dave comes up with for this easel card die design.  I can see Holly and Berries with Mistletoe at Christmas, and many other things that I think I'll have to start making a list of them!

Last but not least is a card that I made for my daughter to give to her best friend that is getting married in a few weeks.  I don't think she has time to visit my blog, so I am going to post it here rather than in my IG feed.


I used an Iceberg Metallic Cardstock which is close to a periwinkle color with a white front panel, and a  Violet Satin Shimmer Cardstock for the interior panel.  I remembered the Foam Tape this time around.


I like to use foam tape on the front end of the butterfly and glue to hold down the back end.  My glue of choice is Ranger Multi Medium Matte.  For this card, since it is for a special occasion, I used Aurora Borealis Swarovski Crystals in the 12 and 16 sizes.


One of the really cool things is that this card still fits in a standard A2 Envelope.  If I were mailing this card, I would probably use a padded mailer or a "flat" mailer.  Since my daughter is the Matron of Honor, I happen to know she'll be delivering it in person.  I hope you enjoy today's blog post, just for fun!  I'll be back on Thursday and Friday with posts for Memory Box!

If you would like to get the Adriana Pop Up Easel Card Die Set, you can find it here:  Adriana Pop Up Easel Card Die Set.

Have a great day all!

Sunday, July 8, 2018

Altenew Educator Certification Program - Dynamic Die Cutting

Recently, I was accepted into the Altenew Educator Certification Program and while I have completed a number of these classes already, it's always great to get a refresher course  or maybe try something that you didn't try the first time around.  There's also quite a few classes that I have not taken and this was one of them.

Today's card is a technique that is really very simple and I loved the whole concept because it is a totally different way to use Nesting Dies that you might already have in your supplies called Inverted Die Cutting. 

Card by Lydia Evans
I really love the simplicity of White on White cards and this was a new spin on that look.  This was a really fun and interesting class and we learned a lot of "out of the box" things we could do using standard dies.  Any kind of nesting dies will work for this but it was Lydia's Nesting Stars Card that got my attention.  We are supposed to choose our favorite technique and card from the class to share and this is the one I chose.  I have quite a few birthdays coming up this month so I wanted to make a birthday card to share with you.

I also think it's important to know that you can use whatever kind of nesting dies you have in your supplies.  Mine happen to be very old Quickutz Dies that nest and I didn't have as many sizes as Lydia had, but you can see they worked great.  Lydia used Halftone Stars Nesting Dies.

I also wanted to add a small sparkly pop of color to my card so I carefully added some glitter card stock behind the smallest layer of stars.  This was really easy to do.  I just cut a glitter star one size larger than the opening to use behind it. 


It's a super clean and elegant look for a birthday card and with the glitter cardstock added, it gives a slightly more festive element to the card.  I used Label Love to stamp my sentiment and backed that with another strip of the same glitter cardstock to help it pop.

If you haven't taken any classes at Altenew Academy before now, they are quite reasonably priced.  Most are around $10.00 or less.  They are online classes so you can work at your own speed.  This works well for me anytime because you just never know what life is going to throw your way!  Although we have finally moved into our new home it seems that every day, we have something come up that needs to be fished or completed or whatever on the house and that is a full time job in and of itself. 

Thanks so much for stopping today to see my project.  I'll be back often to share  with you in the coming weeks while I work towards completing projects for my certification.  Have a great day!

Thursday, January 25, 2018

Papertrey Ink January 2018 Blog Hop

Hello!  It's the 25th of the month which means it's time for the January 2018 Papertrey Ink Blog Hop.  I'm actually doing two blog hops on the 25th of every month now which is why this is my second post of the day!  Keep scrolling down to get to the previous Keeping Christmas Blog Hop post.

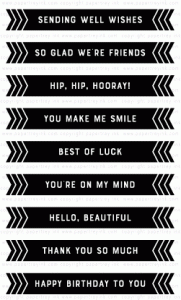
Today's Blog Hop inspiration picture made me think "birthday" so that is the direction I took for my card.  I also tried to use a rainbow of bright colors like in the photo.  Because I wanted to use so many colors, I decided right off that I was going to use Direct Messages, a set designed by Lizzie Jones.

To begin, I selected 7 colors of ink to stamp with that would be similar in depth and value, so sort of mid-tones.  Not the darkest or the lightest.  I did actually stamped a lighter pink to begin with but you couldn't read it so I switched to this brighter version.  In order, the colors I selected are Hibiscus Burst, Berry Sorbet, Pure Poppy, Vintage Jadeite, Hawaiian Shores, Blueberry Sky and Amethyst Allure. Once I selected my ink colors, I looked through my patterned papers to see what I might have that coordinated with so many colors.  My first instinct was to use a stripe from the Aqua Mist Bitty Big pack, but as I was getting that out, I noticed the paper pack that came from my Make It Market Shakers & Sprinkles Kit and noticed a perfect paper in there for creating my card.

I stamped out the Happy Birthday Message in each color and then die cut them with the coordinating Direct Messages Die and die cut my front panel with a stitched rectangle die.  I cut some Scotch 3D Foam Tape into narrow strips (I cut 3 from each length of foam tape) and adhered that to the back of the die cut messages.  I applied my front panel to a top folding card base made from Stamper's Select White Cardstock and placed that on the card front using Kokuyo Dot Runner and then misted that panel with shimmer spritz before I added the "Celebrate" die cut from the Birthday Cheer Dies.


That is it from me today.  Once I actually formulated my idea, this card came together very quickly!  I usually agonize over my blog hop project, but considering that I didn't even know what I was going to do when I got up this morning, it was fast!! I've linked the supplies I used below for your convenience (affiliate links may be used).  Be sure to stop over and check out all the projects at the Papertrey Blog.

Kokuyo Long Dot Runner Adhesive
Shop at:
SSS
PTI - Direct Messages Stamp Set
Shop at:
PTI
PTI Birthday Cheer Die Set
Shop at:
PTI
PTI Perfect Match Amethyst Allure Ink
Shop at:
PTI
PTI Perfect Match Berry Sorbet Ink
Shop at:
PTI
PTI Perfect Match Blueberry Sky Ink
Shop at:
PTI
PTI Perfect Match Hawaiian Shores
Shop at:
PTI
PTI Perfect Match Hibiscus Burst Ink
Shop at:
PTI
PTI Perfect Match Pure Poppy Ink
Shop at:
PTI
PTI Perfect Match Vintage Jadeite Ink
Shop at:
PTI
PTI Stamper's Select White Cardstock
Shop at:
PTI
Scotch 3M Foam Tape
Scotch 3M Foam Tape
Shop at:
SSS
Sheer Sparkle Shimmer Spritz
Shop at:
SSS
Teflon Bone Folder
Teflon Bone Folder
Shop at:
SSS

Friday, September 1, 2017

Simon Says "Anything Goes" & Tic Tac Toe Challenge #013

It's been a long time since I had a chance to play at the Tic Tac Toe Challenge (or very many challenges at all for that matter) and they have a new Challenge Graphic on their blog. The ladies at the challenge all seem to be Stampin' Up Demonstrators but when I checked the Challenge Rules, there is no requirement to use SU! products so I'm going for it this week or until they tell me otherwise.  I chose the diagonal line of Pink, Flowers and Gold for my card.

This has been the busiest summer that I remember for a long time - several years. My blog and participating in Challenges has taken a back seat to the class I decided to take this summer - Adobe Illustrator.  I just finished the class, although I need a lot more practice, and I just wanted to sit down and make a card because doing that makes me happy.  The Simon Says Stamp Wednesday Challenge for this week is Anything Goes, so this card is for both challenges. I'm really thankful that Simon doesn't have a requirement to use one of their exclusive products on the Blog Challenges.  I do try to use their products for the challenges as a general rule because I buy many of my products there.  Those products will be linked throughout this post.  While I was taking the class, I wasn't linking my products to anywhere, but I will be back to doing that now. as well as writing the "How To's" of my cards.

This card started with a Spellbinders Bookplate Label Die which hasn't been available in who knows how many years and the Papertrey Ink Beautiful Berries: Autumn Stamps and Dies.  The label die is one I got in 2006 at the Great American Scrapbook Convention at the Spellbinders Booth.  It both cuts and embosses and I haven't used it nearly as much as I'd like.  So I started by cutting that from Stamper's Select White Cardstock and then using a tan embossing pad, ran it through again to emboss it a little deeper.  I also misted the label with a very fine mist of water (just once) to help those fibers in the paper stretch a little more so they would make a nice embossed impression.  I left the paper in the die to finish drying while I completed a few other steps.

Next I die cut a few of each of the berry branches from the Beautiful Berries: Autumn Dies. Using the negative as my place holder in my Mini MISTI, I stamped the various layers of color using all Papertrey Inks in Dark Chocolate, Lovely Lady, Autumn Rose and Ripe Avocado. Each of the layers is double stamped for thoroughly saturated color which is one of my favorite things about using the MISTI.

A few years back, I got this Pink and White Damask Design Paper at my local scrapbooking store which has since closed. It is from American Crafts and I have no idea if they still carry it.  I wouldn't think so, but you never know. Anyhow, I have found that such a fancy design doesn't work well for a lot of things but once I did a quick layout placement of the elements, I decided it was perfect for this card.  I only had one 4.25 inch x 12 inch strip of this left, but I cut both using the MFT Blueprints#15 Stitched Rectangle Die.


Since I had already stamped extra berry branches, I cut another of the bookplate labels as well.  I figured I might as well make 2 cards while I was at it. I used a bottle of Boss Gloss Clear Embossing Ink from Stampendous that has a blotter top on the bottle to dab some on the openings in the die (see photo) and then using a stencil brush with Ranger Perfect Pearls Pigment Powder in Interference Red brushed the perfect pearls on there. That color is kind of a mauve-y pink when they are set.  Perfect Pearls have a binder in them so you only need to have a very fine mist of water to set them or you can use inexpensive hairspray.  I used my little mister bottle that I filled with water after I emptied the contents of the Tattered Angels Glimmer Mist from it. I like how fine the mist is for their bottles and I usually keep them. They are great if you want to make you own color mists or whatever.

Once I was sure the Perfect Pearls were set and dry, I used my powder tool on the labels and then stamped a sentiment with Versamark and heat embossed it in Simon Says Stamp Antique Gold Embossing Powder and then assembled the cards. The sentiment came from the Papertrey Ink Make It Market Garden Gate Kit which is NLA (No Longer Available ) but you could use any sentiment that will fit on your label or shape.


There's a lot of standard supplies that I use here and I haven't mentioned them for a while so I'm going to take a bit of time to do that today.  I use Papertrey Ink's Stamper's Select White Cardstock for my card bases unless I want a colored card base, which is pretty rare.  I love the smoothness of the White and it is #110 lb. heavy weight cardstock. It makes beautiful cards.  For my adhesive, I use Kokuyo Dot Runner Style Adhesive. I used to always use this adhesive because I was a scrapbooker and the ability to move something that was crooked was important to me.  However, I had been unable to find it for several years. Thanks to Jennifer McGuire and her ability to find things, it is a whole lot easier to get refills right now. Plus, they have come out with an extra long version which is what I use.  It contains 36 meters of tape runner which is just under 40 yards. Yes - Yards not feet.  I have two of the regular length and one of the longer length dispensers.  I didn't buy the regular length dispensers, they are the ones I had from before. I was down to my very last refill so I was pretty happy when Jennifer started using it and telling us where to get refills. I immediately bought the Longer Dispenser and several refills for it.  I have retired my Pink ATG.  I hate that thing but my best friend loves it, so I'm saving it for her. *Ü*

I also like to use Thin 3D Foam Squares and usually have several packages of these around.  I can use these to add a bit of dimension without it making the envelope too bulky to mail with only one stamp unless I get carried away.  I do buy the big roll of Scotch 3M Foam Tape but I try to use foam squares most of the time. I also make a lot of flat cards because almost all of what I make gets mailed.  For liquid glue/adhesive, I use Ranger Multi Medium Matte with a ScraPerfect No Clog Tip on it. I've also tried some of the less expensive versions of foam squares.  It could be me because I have Rheumatoid Arthritis, but they drive me nutty when I can't get the release paper off of them.  I would certainly encourage you to find and use what works for you.

Thank you so much for stopping by today!  I am happy to be back doing the thing I love and sharing that with all of you. As always, if you have a question, ask away and I will try to answer it for you. Happy September everyone!

This card won Team Pick at the Tic Tac Toe Challenge where it was entered.

Tuesday, March 14, 2017

Papertrey Ink 10th Anniversary Challenge: Transformation

When I saw what today's challenge is over at the Papertrey Ink Blog, I was thinking that clearly Nichole wasn't speaking to me when she came up with the challenge because I tear up and put into the trash cards I make that I don't like; or at least, card fronts.  I don't actually get it all the way to the whole card stage, but to keep myself from trying to salvage something I am not very happy with, I do rip it in half otherwise I will drive myself crazy trying to fix it. That doesn't happen very often but it does happen.  I know it wouldn't bother some people, but I am putting my name, my reputation and my style out there in the world and I don't want to post something I am not proud of. With all of that said, while I liked this first card, I wasn't 100% happy with my color choices from a few days ago during the Papertrey Ink Multiples Challenge. It was okay, but I felt I would have liked it better if I had used different colors. So that is the card I chose to transform today.

For the previous card, I started with a card base made from Smokey Shadow Cardstock. I used Hawaiian Shores Cardstock for the Cover Plate: Harlequin Die cut with a second pass on Vintage Jadeite Cardstock for the interior pieces. The sentiment is stamped on a strip of Smokey Shadow Cardstock and heat embossed the sentiment from Botanical Blocks in Hero Arts White Embossing Powder. This card looks fine and I can think of a few people who would really like it. It looks just fine, but I felt like it was really hard to tell what the background color is and I still think that's true.

For today I started with a card base made from Stamper's Select White and paired it with Dark Indigo, and Hawaiian Shores Cardstock.  I also did the pattern a bit differently than on the previous card.  There are so many options to choose from so I just sat down with the interior pieces and then inlaid them in different patterns until I had a design that I liked.  I adhered them with a bit of Ranger Multi Medium Matte.  For the previous card I popped the diamonds up on Thin 3D Foam Squares but I chose to keep this one mostly flat and pop up only the sentiment, again on Thin 3D Foam Squares. I used Double Ended Banners Dies to cut from the Dark Indigo Cardstock and heat embossed the Happy Birthday which is also part of the Botanical Blocks Stamp Set.


Yesterday's Challenge was to build a birdhouse using a template that Nichole designed a few years back so I am off to check out my construction skills.  Based on the fact that I used to make my own clothes, I'm somewhat optimistic.  Be sure to stop over at the Papertrey Ink 10th Anniversary posts on Nichole Heady's blog.  Tomorrow is release day and everything will be available to purchase at 10:00 p.m. ET.

Sunday, February 5, 2017

Muse Challenge #201

Hello there!  I'm glad you are here.  Today's card is one made for the Muse Challenge #201.  Valentyna is the Muse for this week and she created the card on the left.

For several weeks, I have been making Valentines for my friends and family and before that it was Christmas Cards.  This week we are supposed to have temps in the high 70's and I am ready to work with some beautiful flowers.  So for my card, I pulled out a favorite from Clearly Besotted called Beautiful Friend. I love this image of a branch from an Apple Tree and I used Valentyna's colors as my inspiration.

I started with a panel of 4.25 x 5.5 Canson Bristol Watercolor Paper and did some ink blending on it with a combination of Pale Peony and Lovely Lady Inks. Then I misted it with Iridescent Gold Glimmer Mist and set that part aside to dry.
Next I stamped the blooming branch in Versamark on another piece of Canson Bristol Watercolor Paper and heat set it with Simon Says Stamp Antique Gold Embossing Powder.  I cut a banner from Tag Sale: Quilted and stamped the birthday greeting from Boutique Borders: Birthday Stamp Set, again in Versamark and heat set it then laid it aside.

Using Distress Markers, I watercolored the blooms in Worn Lipstick, the leaves in Mowed Lawn and the branch in Gathered Twigs.  Once everything was dry, I die cut the background panel with the largest Simon Says Stamp Stitched Rectangle, and used the coordinating die for the flowering branch.  Using a card base made from Stamper's Select White, I adhered the background panel using my ATG dispenser.  For the banner and the branch, I used Thin 3D Foam Squares.  I had a few small hearts leftover from my Valentine's Day projects, so I put one of them on the left side of the banner which completed my Clean and Simple card.


I watercolored additional images of this branch as I made a card for a niece and I'm making several cards for one of my sisters-in-law this week so they'll be ready to go if I want to use them again.  I always try to make multiples so that I have extras for pulling together a quick card.  I leave them uncut until I decide on my design, keeping them in the Stamp Pocket with the stamp set.  It makes for a fast card if I need one in a hurry.

Thanks for stopping by today.  Be sure to check out the Muse Challenge Blog to get all the details on this challenge and to see the beautiful entries.

Wednesday, January 11, 2017

Winter Birthday Greetings


Hello!  It's a new week at the Simon Says Stamp Wednesday Challenge and my 2nd of 4 weeks as the Designer in the Spotlight. This week we are featuring Lawn Fawn Products with a Winter Birthday Theme. You don't have to use them to join in, but if you have some, we would love to see them used.

Lawn Fawn does such fantastic plaids and I love this Grey, Teal and White Lawn Fawn Perfectly Plaid Winter Petite Paper. This is a 6 x 6 paper pad that has been scaled down from the 12 x 12 version but if I was still making scrapbooks, I love the larger sized plaids as well.  There are gorgeous Christmas, Fall and Springtime plaids as well and you can see them here. Lawn Fawn also makes my favorite acrylic blocks which have finger grooves on the sides and an etched grid to assist in lining up your stamps.  Since the grid is etched, it won't wipe off as you clean your blocks.

For my card, I started with one of the patterns in the Lawn Fawn Winter Plaid Collection and chose my other colors, Simon Says Stamp Audrey Blue and Simon Says Stamp Slate Grey Cardstock, based on that. One of my favorite things to use for masculine cards is plaid paper.  In fact, I use very little patterned paper otherwise.  Most of the time if it's a plaid, then it will work for a guy.  My card could be used for either masculine or feminine except for one little embellishment that I put on it at the last minute, but we'll come back to that later. *Ü*

My card base is made from Simon Says Stamp Slate Grey Cardstock in a top folding A2 size.  Next I die cut an Avery Elle Postage Stamp Die from Simon Says Stamp Audrey Blue Cardstock.  This leaves you with 2 pieces - an outer frame and an inner rectangle.  I cut another one of these from the Winter Plaid Paper so that I could put the plaid rectangle on the inside of the Postage Stamp Frame.  I cut a piece of Fun Foam slightly smaller than the inner rectangle and attached that to the plaid rectangle using ¼ inch Scor-Tape.  I find that tape runner is a little bit difficult to use on Fun Foam so double sided adhesive is less frustrating for me.  You can use tape runner or whatever adhesive you have available. Next, I adhered the frame to the card base using Ranger Multi Medium Matte and followed that by attaching the inner rectangle also using Multi Medium Matte since I had it handy.  I have two bottles of this at all times sitting upside down in my jumbo cup that I keep my main tools in.  For ease of use, I have Scrap-Perfect No Clog Writing Tips on them.

 I die cut three of the Impression Obsession "Wishes" from Audrey Blue Cardstock to make a thicker embellishment.  In order to increase the intensity of the top layer, I inked it up a Mini Ink Blending Tool using Audrey Blue Ink a couple of times to deepen the color.  Using the Impression Obsession Wishes Stamp Set I stamped the "Sending Birthday" in Versafine Onyx Black Ink and heat set it with Simon Says Stamp Clear Embossing Powder.  I much prefer this method over using black embossing powder or even regular black ink.  I'm a little funny because it bugs me when my stamps get stained but Versafine, which is a pigment ink, does not stain. I suppose it might eventually, but so far, it hasn't. Simon Inks are so pigmented and rich in color, that they can really stain your stamps. That's just the nature of high quality photo-polymer but for that reason, I typically use Distress Inks or some of the other inks I have that don't stain as much.  Yes, I know I'm a goofball!


Once I had the card assembled, I felt that a crisp white snowflake would be just the right touch for this Winter Birthday Card so I cut an Eliza Snowflake from a scrap of crisp white cardstock and attached it by adding Ranger Multi Medium Matte around the innermost ring of the snowflake. Eliza is my favorite of all the Simon Says Stamp Snowflake Dies. After that I misted the whole front of the card with Tsukineko Sheer Sparkle Shimmer Spritz.  Since this card is for one of my daughters whose birthday is January 21st, I couldn't help but adhere a tiny little genuine Sworovski Crystal right in the center of the snowflake.  *Ü* Actually, I would have liked it a lot more if I'd had a bigger one to put on there.  

Thank you for spending a little time with me today on my blog and be sure to enter your project at the Simon Says Stamp Wednesday Challenge Blog link-up for your chance to win a $50.00 Gift Voucher from the Simon Says Stamp Store.


Tuesday, November 1, 2016

That's a Wrap!

This week for the Papertrey Ink Make It Monday #266, Lexi Daly showed us how to make our own wrapping paper from stamping supplies that we already have on hand.  I never even thought about doing that but I just downloaded the templates that Lexi had ready for us and gave it a try.  You can see her video here.

For my wrapping paper, I cut a piece of freezer paper to be 8.5 x 11 inches to fit over the diagonal template and to make it easy to see through.  Cardstock would be super difficult to wrap with, so freezer paper was an ideal solution.

For my paper, I used three of the sentiments from Betsy Veldman's Inspired Series - Inspired: Hope, Inspired: Jesus, and Inspired: Grace. Each of these stamp sets is a $5.00 set and similar in font size and proportion to each other.  I think it worked great for my wrapping paper.  For the colors I used Scarlet Jewel, Dark Indigo and Pine Feather.


I don't have anything to wrap up at this point in time, so I thought I'd make mine into an envelope for a 5 x 7 card.  I did make one mistake when stamping, but I was able to hide that when I converted the paper to an envelope.  It's really easy to make your own envelopes with a Scor-Pal and some Scor-Tape or any type of double sided adhesive.


I'd love to hear your thoughts on my Wrapping Paper turned Envelope and I can't wait to see what stamp sets others have used to create their wrapping paper.

Saturday, September 24, 2016

Simon Says... Gift It!

The Simon Says Stamp Wednesday Challenge Blog has a "Gift It" theme this week.  This was great because I wanted to try out a stamp set called Gifts of the Season that was released in September at Papertrey Ink.  There is a set of Coordinating Dies as well.  While it was released with the Christmas goodies, it can also be used for birthdays depending on how you do it.

One of the really fun things about this set is that you only need two stamps to do this whole stack of presents.  I took my idea from Betsy Veldman and stamped one of my layers in Versamark and then heat set it using Simon Says Stamp Antique Gold Embossing Powder. The ink I used here is Hibiscus Burst.  I adore Pink and Gold together in just about any form I can find it in.  I have several colors and styles of this gold foiled paper by Paper Studio (Hobby Lobby's brand).  The gold foiled polka dots of this one made such a fun background for my presents.  The banner is from Paper Clippings: Happy Birthday Details Dies.  I love it and use it as often as I can. The sentiment is an older die from Penny Black.  There's no special techniqes here, I stamped and die cut the stack of presents, and die cut the other elements. I used Simon Says Stamp Stitched Rectangles Dies to cut the mat for the card and everything is assembled to a top folding A2 card base made from Stamper's Select White Cardstock.


I'm currently trying to decide whether or not to use props in my photographs. Several of my favorite bloggers do and I often like the look they've captured but I don't want the props to be more important than the card, so I am still undecided. I also don't want to spend stamp & die money buying a lot of props, so I am trying to keep it simple and affordable.  That said, I did get a few fun ones for the upcoming holiday season. Lighting gets a bit trickier with the added elements as well, so y'all will have to share your thoughts on this.