Showing posts with label Holiday. Show all posts

Wednesday, November 1, 2017

The Card Concept {Rich Holiday}

Hello everyone! Every two weeks on Wednesday, The Card Concept posts a new challenge for you to participate in.  This week, our theme is Rich Holiday and we have this beautiful inspiration photo for you.  I know Christmas is still about 8 weeks away, but in our family, my husband and his siblings take turns hosting and this year is his sister Brenda's turn.  She lives in Arizona and didn't want to worry about travel during what could very possibly be blizzard or icy conditions.  That happened the last time she was hosting and there was ice and snow and no way for some of us to even make it home.  So this year, as Brenda is hosting again, we're gathering for the Family Christmas dinner at Thanksgiving.  As a card maker, I started making Christmas cards back in August so I'm really ready for Family Dinner in November. I've been working on things for my Sisters-In-Law and some of my grands to take to the dinner.  It's also the time of year when I take all the cards I have left from this year and let them select whatever they want.  I make a minimum of 4 cards each week and often more than that so there is always a lot for them to choose from.

For my card for this challenge, I wanted to use a new kit from Gina K Designs called Merry and Bright. This is actually my first kit from there, and I have to say, I have been highly impressed with the products from the inks to the paper and the stamps.  I ordered two ink cubes (Cherry Red and Fresh Asparagus) to try out the colors. Everything is extremely nice quality.  And the layering weight white cardstock is to die for.  It is so silky and stamps like a dream. It is #80 and similar to Neenah Solar White #80 cardstock.  My kit came with several sheets of 7 different color cardstocks and it's been great to get to try it out without having to buy whole packages. I did actually go back and order some of the cardstock to go with this kit specifically in colors I don't have from Papertrey Ink and I ordered two packages of the layering weight white just to have for stamping card fronts; also the Cherry Red, Fresh Asparagus, and Edible Eggplant. As much as I love Purple, I just don't use it as often as I thought I would.

For my card, I stamped a few of each size of poinsettias from the kit in Cherry Red and stamped the leaves in Fresh Asparagus onto Layering Weight White Cardstock. I left them dry for a half hour or so while I did a few other things and then die cut them with the coordinating dies. This is my third card from this kit so far and I made one similar to this last week so I had an idea of what I wanted to do for this card.  So I got all the elements die cut, stamped, heat embossed and ready to assemble.  For the center of the Poinsettias, I applied a generous amount of Ranger Multi Medium Matte and then put gold seed beads into it.  When that glue was dry, I flicked it on the back so that all the extra beads would come off and put them back into the container.

The label is actually an old die from Spellbinders called Bookplate.  Because it is older, you have to run it through a second time to get the embossing effect. I misted it on the back with one mist of water which helps the paper fibers to stretch.  Once I had that done, I made sure to let it dry completely, then used my powder tool before stamping the greeting (from the kit found here) in Versamark and heat set with Simon Says Stamp Antique Gold Embossing Powder.  Using the bookplate die as a stencil, I brushed the label with Versamark and then went over it with Gold Perfect Pearls.  It's very subtle and hard to see in the photo, but I like the effect.


After that I started assembling my card.   I made a top folding card base made from Stamper's Select White Cardstock and added first the gold foiled mat layer and then the Red Velvet panel on the top of that. Red Velvet Cardstock came in the Merry & Bright Kits as well.  Next, I added my sentiment label with Scotch 3M Foam Tape.  I had laid out my arrangement out ahead of time so I'd have a good idea of how I wanted to place everything.  I used Thin 3D Foam Squares to add the flowers and dot liner adhesive to adhere everything else to the card.  This is a very clean card with lots of "White" Space but still lots of layering and dimension.


Be sure to go to The Card Concept Challenge Blog and see all the beautiful inspiration from the other DT Members.  There are some stunning creations.

Tuesday, October 10, 2017

Sentiment Windows

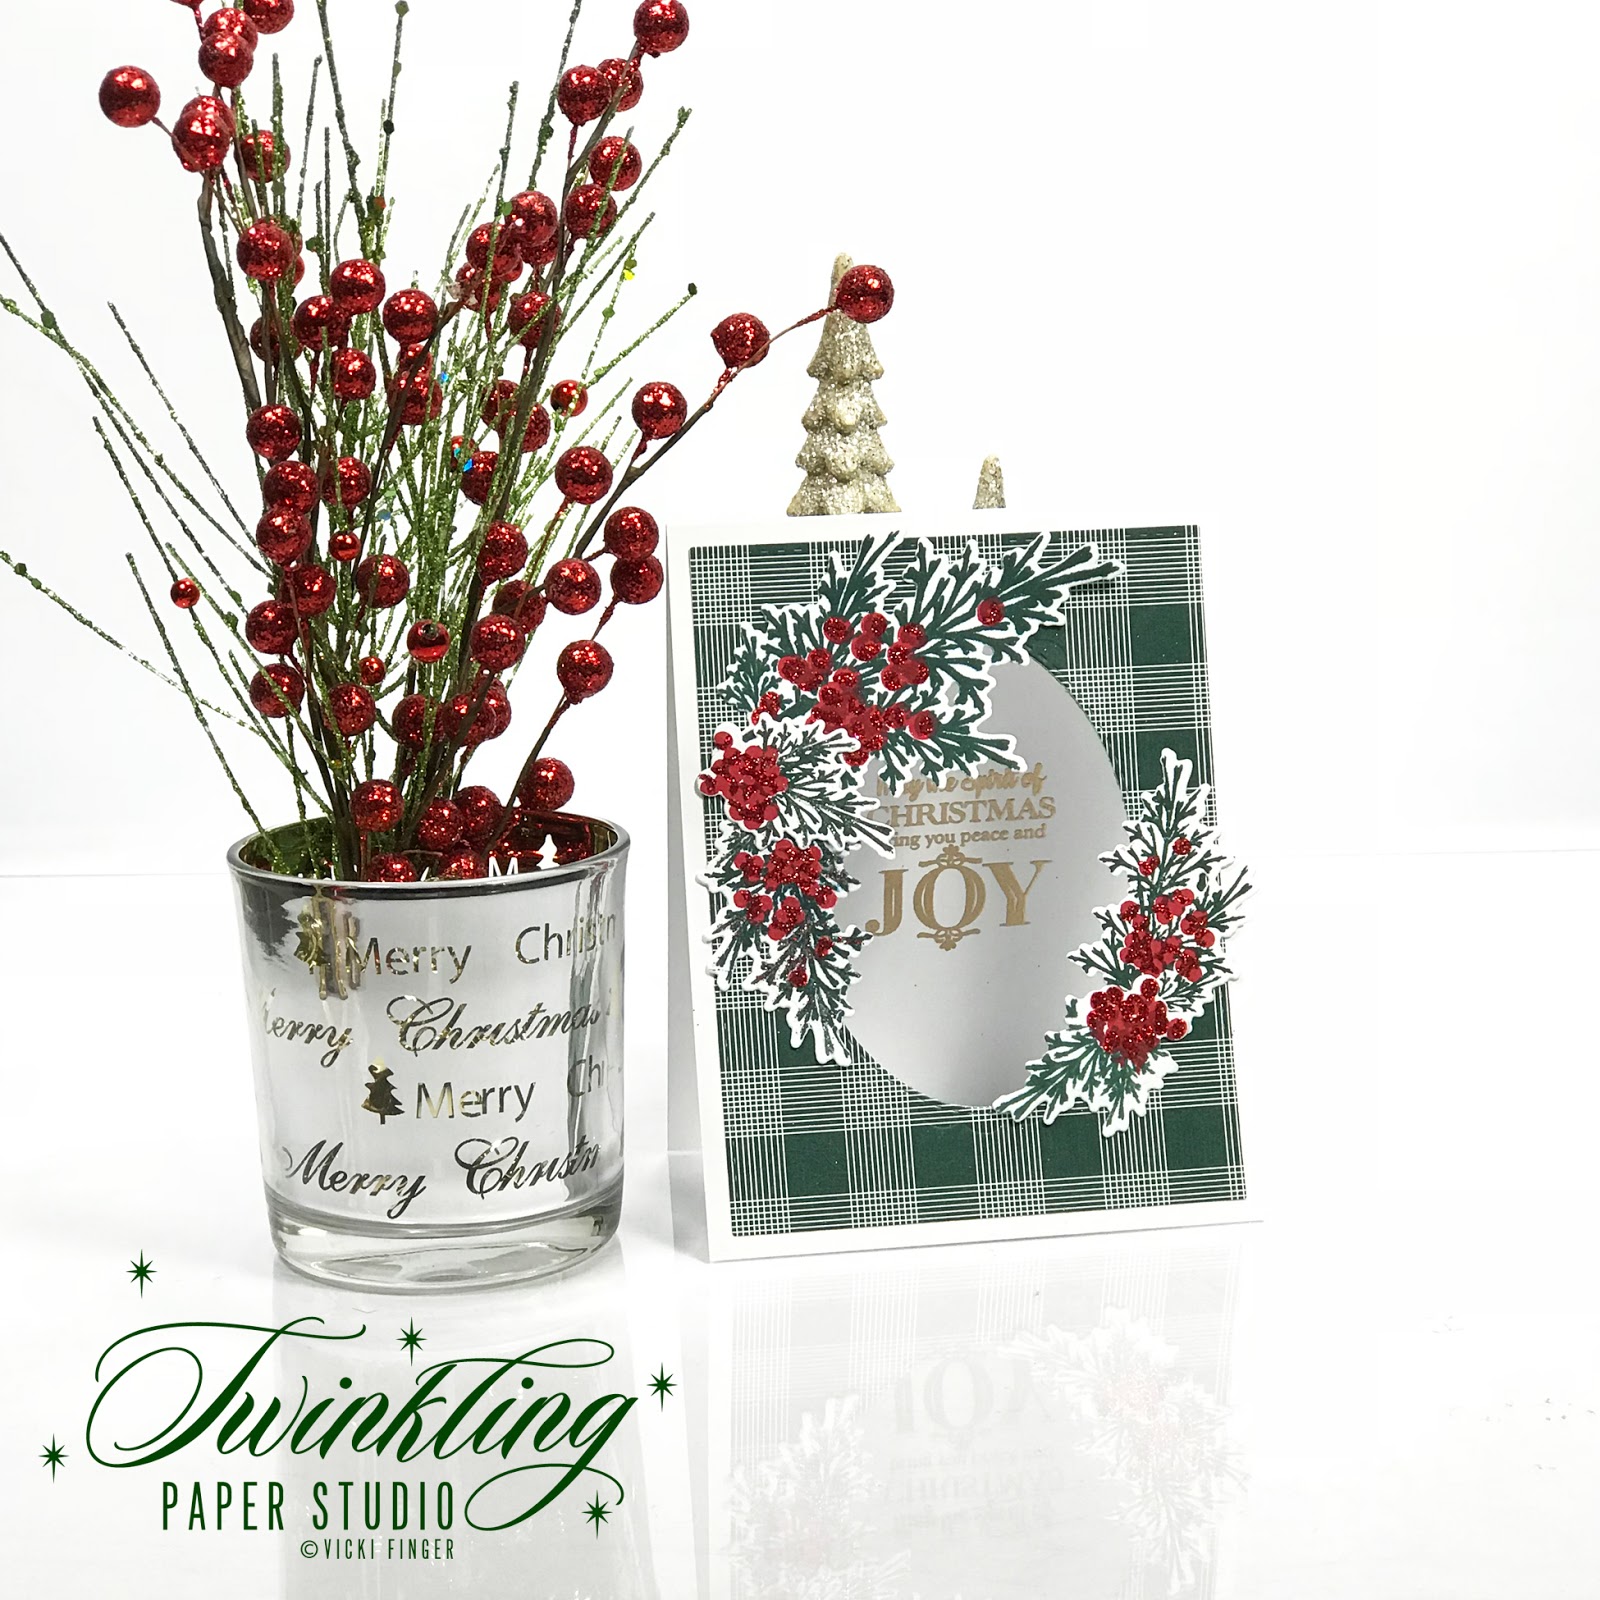
This week's Make it Monday from Papertrey Ink features Dawn McVey and shows us a technique that uses a sentiment window (video found here).  I had never really thought about doing this before, but I like it as the sentiment does double duty because it's visible from the outside and inside of the card.  It was super easy to do although I did mess up my first attempt by putting to many thick layers on my card front.  I liked the combination I had first, but I just couldn't get that third layer cut so I had to start over.  I'll save the other card for a different project. 

I started with a top folding card base made from Stamper's Select White Cardstock.  I cut a Pinefeather Bitty Big Plaid background panel using a stitched rectangle die. I am loving the prints in the Bitty Big Papers and I'm excited to see what colors we get this month. Then I used the oval die from Noted: Scalloped A2 Dies to cut the oval window in my card.  I decided to use some of the previously stamped Berry Branches from Betsy's Beautiful Berries: Winter that had been stamped in Pinefeather with Pure Poppy Berries. The shadows on the berries had been stamped in Scarlet Jewel but I covered that up with some red glitter and a quickie glue pen.  It was okay though because it gave me a guide for where to put the glue.


Next, I chose a sentiment from the "A Thrill of Hope" Stamp Set and using my card in my Mini MISTI, lined it up in the window so that it will show through on the front as well.  After using my powder tool on the inside of the card, I stamped the sentiment with Versamark and heat set it with Antique Gold Embossing Powder.  I arranged the berry branches around the open window, being careful not to get any adhesive on the area that would go through to the card base.  I didn't, but if you accidentally get some on there, you can deactivate the sticky by putting some powder on it or using an adhesive eraser to remove it.  I will probably mail this card so I used sticky dot adhesive on there rather than foam tape.

This was super fast and easy to pull together and I still have several sets of the berry branches ready to go in other colors so I am planning to make a few of them.  Thanks for stopping by.  Be sure to check out all the entries on Nichole Heady's Blog.

Wednesday, November 2, 2016

Simon Says Stamp Flickr Challenge #57

Each year right after Halloween, the grocery stores and nurseries start putting out their Poinsettias.  While I love the traditional red ones, it's the lovely pink ones that make me happy and speak to my heart with their beauty.

I watercolored this poinsettia from the Papertrey Ink Botanical Blocks IV using Worn Lipstick and Mowed Lawn Distress Markers with a water brush.  I used Sugar Pea Designs Zig-Zag Stitched Rectangle Dies, Hibiscus Burst Cardstock, Canson Bristol Watercolor Paper, Versamark, Simon Says Stamp Antique Gold Embossing Powder, Gold Foiled Cardstock, and of course the Simon Says Stamp Exclusive "believe" die.  I LOVE LOVE LOVE this die!  I'll be happy when the Simon Says Stamp Believe Stamp Set arrives but I had to wait to order until it was back in stock and it hasn't shipped yet.


Since the sentiment is "believe", I had to dig through some stuff and find some Jingle Bells.  They aren't silver bells like in the Polar Express Movie, but since I used gold accents on my card I saved the silver ones for another time. *Ü*

This card was created for the Simon Says Stamp Flickr Challenge #57 which is still "Anything Goes".  You can still play today or until 9:00 a.m. EST tomorrow!  Have a great day everyone!

Tuesday, November 1, 2016

That's a Wrap!

This week for the Papertrey Ink Make It Monday #266, Lexi Daly showed us how to make our own wrapping paper from stamping supplies that we already have on hand.  I never even thought about doing that but I just downloaded the templates that Lexi had ready for us and gave it a try.  You can see her video here.

For my wrapping paper, I cut a piece of freezer paper to be 8.5 x 11 inches to fit over the diagonal template and to make it easy to see through.  Cardstock would be super difficult to wrap with, so freezer paper was an ideal solution.

For my paper, I used three of the sentiments from Betsy Veldman's Inspired Series - Inspired: Hope, Inspired: Jesus, and Inspired: Grace. Each of these stamp sets is a $5.00 set and similar in font size and proportion to each other.  I think it worked great for my wrapping paper.  For the colors I used Scarlet Jewel, Dark Indigo and Pine Feather.


I don't have anything to wrap up at this point in time, so I thought I'd make mine into an envelope for a 5 x 7 card.  I did make one mistake when stamping, but I was able to hide that when I converted the paper to an envelope.  It's really easy to make your own envelopes with a Scor-Pal and some Scor-Tape or any type of double sided adhesive.


I'd love to hear your thoughts on my Wrapping Paper turned Envelope and I can't wait to see what stamp sets others have used to create their wrapping paper.