Showing posts with label Papertrey Ink Make it Monday. Show all posts

Thursday, November 1, 2018

Papertrey Ink Make It Monday #341

Hello everyone!  I have several projects to share with you that are a result of this week's Make It Monday #341, Painted Brushstroke Backgrounds by Dawn McVey.

I love this technique, but I don't have acrylic paint like what Dawn used, so I had to improvise.  I thought about going to buy some, but I decided to try using what I had on hand first and see if I could make it work.  I did, just not quite in the same way.  Acrylic paint dries very quickly and doesn't over saturate the paper so I needed something that worked in much the same manner.  I wasn't really able to retain any whitespace like Dawn did, but I am still really happy with my results and I am always tickled pink when I figure out a work around.

© Dawn McVey, 2018
I have lots of different watercoloring mediums on hand and selected one that if I wasted it, was not going to be a big deal.  You can find online or often at Hobby Lobby some Sargent Art Watercolor Magic which comes in a big 8 oz bottle.  The 2 bottles I have are Pearl (White) and Gold.  Both have the pearlized finish.  By adding drops of re-inker to the white and occasionally to the gold as well, I was able to create custom colors in Papertrey Shades.  I did not add any other liquid to the mix, only dampened my brush (1 of the brushes in the Tim Holtz/Ranger Pack) and removing most of the water from that, it gives a brush stroke look.  Because the solution was about the same consistency as Acrylic paint, this worked.  It's important to note, that I did NOT use watercolor paper for this, just white cardstock.  I did try one panel of watercolor paper, but it was unsuccessful.


These are just a few of the background panels that I have to work with after all the cards I've made.


This card and the one below are the same card.  The colors showed up differently depending on if they were facing the evening light last night or my camera flash.  I think that is a lot of what I really liked about these.  With the pearly white watercolor, it gave the backgrounds a ton of shimmer, shine and sparkle no matter what angle you are viewing it from.


The same card facing slightly toward the setting sun.   I like taking my pictures early in the morning, but I don't always have a choice.


This background was made using Blueberry Sky and Dark Indigo with the white watercolor.  I love how the white showed up as a silver color.  My daughter's Christmas Tree is White, Silver and Sapphire with white lights and I was trying to use those colors as experimentation for the banner I'll be making to hang on her fireplace.


Lately, I've been experimenting a bit with other white cardstock and while Stamper's Select white remains my top all-purpose card stock, for some things I like to use Cougar Digital White in the 100# weight.  It's not coated, but it is very, very silky smooth.  There is a big difference in the way it feels vs. the Stamper's Select White.  I still use PTI's Stampers Select White for all of my card bases and much of my stamping, but I do love the Cougar Super Smooth when I want really smooth cardstock for Copic coloring or other techniques from time to time.  This is one of those times.  It is Bright White and so super smooth!  It was perfect for this technique because after adding the brushstrokes to the paper, it was still silky smooth.  It actually held the brush strokes very well because the consistency was much thicker than normal watercolor.  I was also able to layer by letting the color dry each time and them coming back in with additional layers of white or gold.  To warm up the gold a bit, on a couple, I added Berry Sorbet to the Gold Watercolor and on some others a bit of Classic Kraft.  One results in a warmer gold while the other results in a more beige-y gold.


For my first card, I chose to use many of the same products as Dawn including Tag Sale #12 and Spruce & Sprigs. I also used the "Joy" die from Lizzie's Bold Borders: Flurries.  I nearly messed up my first card by using a liquid adhesive to apply the word so I got smarter on the next projects by running a strip of cardstock through the Xyron and then die cutting it.  That made it super fast and easy.  I'm thinking I definitely need to stock up on my 2.5-inch Xyron Refills.  I only have one spare at this time, so I'll need to do some couponing to get some additional refills.  I have several of the 1.5-inch on hand so I'm good there depending on the size of the sentiment I'm planning to use.

I die cut the front panel with the same stitched rectangle I almost always use.  It's the largest one from WPLUS9's Gift Card Layers dies and it cuts a full A2 panel with crisp, clean edges and stitching detail.

Once that was die cut, I cut Tag Sale #12 from that panel and adhered the negative to my cardbase.  I also die cut a piece of fun foam from the same die to go behind my "ornament" and provide a bit of dimension.  I used liquid glue to adhere those two pieces as it is really hard to apply any kind of tape runner to the foam.  Even score tape is a bit frustrating.  As always, I used Ranger Multi Medium Matte for my liquid adhesive.

I die cut multiples of the Spruce and Sprigs Elements from Stamper's Select White Cardstock and stamped them using my MISTI Stamping tool with primarily Papertrey Inks.  It's always good to have an extra die cut or two just for the purpose of stamping and making sure they line up right when you are using the negative as a place-holder.  I know I will use at least one of each during this process of lining things up right except for the rare times when I nail it the first time around.

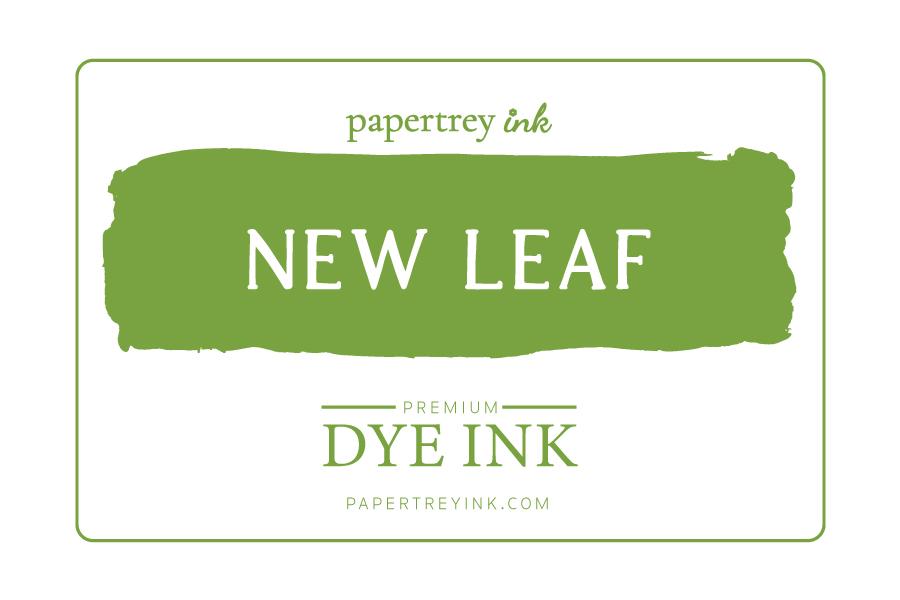
I stamped some of the holly leaves in Pine Feather while I stamped others in New Leaf.  I added a bit of depth and dimension by sponging in a darker color where the base of the leaves and the center line are.  I tried Pinefeather, Olive Twist, Ripe Avocado, and even Fresh Asparagus from Gina K Designs which is one of my favorites for this purpose.  I think you can choose based on what the primary color you used or want is.  I tried adding some Ripe Avocado to the Pinefeather and that didn't really do much by the time the ink dried.  So just play around to get a color combination that you like.


Now as you know, once I get started with a technique that I love, I have a hard time quitting.  When I saw how these brushstroke panels dried, I had to try them with Lizzie Jones' Bold Borders: Yuletide.  I absolutely love this die and I have tried it with several kinds of papers so I just had to try it with these!


I'd have a hard time picking a favorite color combination.  This was Vintage Jadeite with New Leaf and Gold Watercolor.


I used Red Metallic Sequins with gems in the centers for this card.  I love adding little gems to my cards and I have a good selection of sequins as well.


The colors I used for this were Dark Indigo, Vintage Jadeite, New Leaf and Gold with no additional color to change up the shade of gold.  Sapphire Metallic Sequins with Gems provided the finishing touch.  The holly leaves for these cards are from Pretty Pink Posh called Festive Holly Dies.  I like these because they have that same stitching details as the cover die.  I used the insert to cut my title from, again run through the Xyron before die cutting which is by far the easiest method of adhering.  Since the backgrounds are watercolor, the wet adhesives can damage the card's surface/finish.


This last card is probably my favorite because it is pink and purple with gold and bling!  All of the backers for the cover die are shimmer cardstock or shimmer vellum.  This particular one is the same color as Gina K's Plum Punch and I used Metallic Sequins as well for this card.

I hope you enjoyed my project for Make it Monday and all of the bonus cards I've shared with you here.

Wednesday, October 24, 2018

Papertrey Ink Make It Monday #340

Hi all!  I'm here with a quick post for this week's Make It Monday #340, Banneriffic by Michelle Leone.  Here is Michelle's beautiful banner project.  


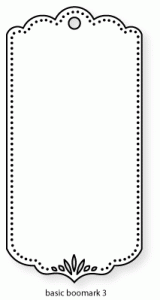
I took a somewhat different approach to create my banners because I don't have a banner die so I used PTI's Basic Bookmark #3 and then had to improvise a little for the tab portion.  

You know that I have a love for/weakness for foiled cardstock, most particularly in Gold and I bought several Mat Stacks last year on Cyber Monday at Michaels.  One in Gold and White, one in Silver & White and one in Rose Gold and White. They always have a few sheets of random patterns with Sayings or borders on them that are hard to use except in pieces.  I don't do actual paper scrapbooking anymore so I always challenge myself to try to find unique ways to use those sheets.

I started by cutting my paper vertically in 3 inch wide strips and then center the Basic Bookmark die and secure with some frog tape which is for delicate surfaces.  It's still pretty sticky, so I stick it to the palm of my hand first and then use it to hold my dies in place.  It's also less expensive than many alternatives.  I cut three more bookmarks from Stampers Select White so that each side had a clean front and back.  I glued them together and did my die cutting while those dried.  Once that was done, I took some of the scraps and mounted them to fun foam before adding that to the banner pieces.  It provided that little bit of extra dimension to pop up on the banners that you can see it in the photo below.


Next, I cut some Spellbinders Holly dies from plain Gold Foiled Cardstock, ran it through with an embossing sandwich to add the details and adhered them as embellishments to my banner pieces.  For the tab to run the cord through, I cut small stitched squares from the same gold foil and then scored and folded them in half.  I secured the back side to the banner piece with skinny Scor-Tape.  I ran the gold cord through and then folded the tab down using the same Scor-Tape.  I few jewels and sequins for the snowflakes and holly finished these off nicely.


I like these so much that I am hoping to get at least one more banner done with my scraps so my banner doesn't look quite as lonely as it does in the picture below.  I'd also really like to make one for my daughter's fireplace.  In case you don't know, the small little command hooks are great for this purpose and you can throw them away after Christmas without causing damage to your mantle or fireplace surround.


The Finger Family will be gathering at the Finger Farm for Christmas on Thanksgiving weekend in November, so I have been super busy making Christmas cards and hope to have little goody bags with a few cards in each for all of my Sister's-in-Law.  That is about a month away, so I still have to keep at it. They so enjoy this little tradition that I started a few years ago and even though I am not planning to attend this year, my husband will be going so I can send along the packages with him.

Check it out - I got 3 more pieces made today so my banner is a lot fuller.


The supplies I used are linked below (Affiliate Links Used) - Thank You for supporting my blog so that I can continue to bring you content.

Cuttlebug Die Cutting Machine
Shop at:
SSS
Kokuyo Long Dot Runner Adhesive
Shop at:
SSS
Marvy Jewel Picker
Marvy Jewel Picker
Shop at:
SSS
PTI Basic Bookmark #3
Shop at:
PTI
PTI Stamper's Select White Cardstock
Shop at:
PTI
Ranger Multi Medium Matte
Shop at:
SSS
Scor-Pal Scoring Board
Shop at:
SSS
Scor-Tape - 1/8th inch
Shop at:
PTI | SSS
Scrapbook Adhesives Thin 3D Foam Squares
Shop at:
SSS
Spellbinders Embossing Mat
Shop at:
SSS
Spellbinders Holly Jolly Dies
Shop at:
SSS
Teflon Bone Folder
Teflon Bone Folder
Shop at:
SSS
Tim Holtz Tonic Paper Trimmer
Shop at:
SSS

Wednesday, February 21, 2018

Make it Monday #312 Framing Sentiments & Images

I have a quick blog post today featuring this week's technique taught by Laurie Schmidlin over at the Papertrey Ink Blog.

Because I am crazy busy this week and have two blog hops coming on Sunday, I cheated just a bit by using flowers and butterflies that were already stamped and sitting on my desk.  Not to mention the fact that I try not to throw anything away unless I messed it up.

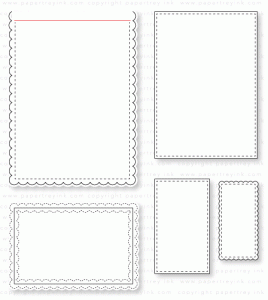
I only had to die cut my frames using 2 dies from the Noted: Vertical A2 Scalloped Die Collection out of  Stamper's Select White Cardstock (I used three so I could stack them for a thicker element), and I made a top folding card base from the same cardstock. I adhered my frames to the card base using Foam Tape.  Everything else was already stamped and die cut.

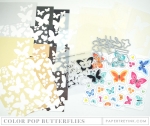
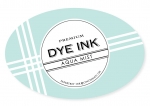
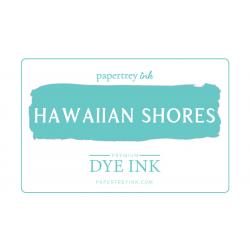
The colors I used for the Color Pop: Butterflies were Aqua Mist Cardstock and then I stamped the details with Hawaiian Shores and Tropical Teal.  For the floral image, I used Aqua Mist, Hawaiian Shores and Tropical Teal along with Antique Gold Embossing Powder.  Along with all of these elements, I have notes penciled on the back listing the colors I used in case I have to refer to them later.  Of course, these are in code -- a code that only I can decipher, but it works for me.  For example, the code on the butterflies is HS, TT while the bloom reads AM, HS & TT.  I have to do this because I primarily use two brands of ink and I wouldn't know one from the other just by looking in some cases. There are some similar colors in the other brand.  The leaves of the blooms were water colored using New Leaf Reinker.

I was surprised to see that Make It Market Mini Kit - Color Pop: Butterflies is being retired this year as it is only a year or two old.  I enjoy using my set and I had stamped these for one of the Papertrey Anniversary Challenges that was going on last week.  I never actually got around to putting a card together and entering that challenge so I wanted to use them today. The floral image is from Altenew.


As I was assembling my card today, I got all the way to almost the end and realized I had forgotten to add my sentiment!  So then it was a scramble to find one that I could stamp inside that frame without messing anything up.  This is just about my favorite one to use for any cards I send, so I'm thankful it worked out in this case.

You can see all the details of how to frame up your sentiments at the Papertrey Ink Blog where there are sure to be lots of beautiful cards to see in the link-up. Have a great rest of the day!  The supplies I've used are linked below for your convenience (Affiliate Links may be used).

Altenew Beautiful Day
Shop at:
ALT
Altenew Beautiful Day Dies
Shop at:
ALT
Cuttlebug
Cuttlebug
Shop at:
SSS
Kokuyo Long Dot Runner Adhesive
Shop at:
SSS
PTI Aqua Mist Cardstock
Shop at:
PTI
PTI Make It Market Mini Kit -  Color Pop Butterflies
PTI Make It Market Mini Kit - Color Pop Butterflies
Shop at:
PTI
PTI Noted: A2 Vertical Scalloped Die Collection
Shop at:
PTI
PTI Perfect Match Aqua Mist Ink
Shop at:
PTI
PTI Perfect Match Hawaiian Shores
Shop at:
PTI
PTI Perfect Match New Leaf Ink
Shop at:
PTI
PTI Perfect Match Tropical Teal Ink
Shop at:
PTI
PTI Stamper's Select White Cardstock
Shop at:
PTI
Ranger Multi Medium Matte
Shop at:
SSS
Scotch 3M Foam Tape
Scotch 3M Foam Tape
Shop at:
SSS
Tsukineko Sheer Sparkle Shimmer Spritz
Shop at:
SSS
Wink of Stella Shimmer Pen
Shop at:
SSS