Showing posts with label Versamark. Show all posts

Thursday, September 12, 2019

Outside the Box Challenge

I just found out on Tuesday Morning that Memory Box has a Challenge every month on their blog!  Who knew?  I was checking out some other blogs and came across a card that had a link to a current challenge called "Outside the Box".  It was then that I realized it was a monthly challenge over at Memory Box.  At this time, I don't have too many Memory Box Dies and to participate, you must have one.  So I quickly looked through my dies and figured out a quick card to make for this challenge.

The die I used for my card today is no longer available, so don't go looking for it in a store.  You might find one on e-bay or wherever.  But, it's been a few years since I got this specific die, so that would probably be your best bet.  Anyhow, this die is called Poinsettia Gift Die.

I started my card by creating a 5.5 x 4.25 inch top folding card base from pine colored cardstock.  Next, I die cut the largest Pierced Feature Frame: Rectangle from white shimmer cardstock.  Then I die cut the poinsettia gift die 2 times - once from shite shimmer cardstock and the other from Red Satin Cardstock.  I inlaid the petals into the opposite colored piece and then placed one vertically and the other horizontally so that it would look as if I had a wrapped present.  It takes a few minutes to do the inlay, but not much.  I had already attached the frame to the card with Scotch Foam Tape, but next time, I would attach the ribbons to the frame and then the frame to the card base.  I had to remove selective pieces of the foam tape to keep everything flat.  That's because I fly by the seat of my pants sometimes and I didn't plan that far ahead, but now I know.  *Ü*


After that, I cut a cute little tag from The Greetery Sentiment Suite Die and a little Sentiment from a Papertrey set to stamp and heat emboss on the tag.  Once I had everything assembled, I added some jewels to the card in the center of the poinsettia and the tiny flowers that are branching out.


Thank you so much for stopping by today.  I hope you enjoyed this fun little card as much as I did.  I'll try later in the day to get a better picture of the little gems in the sun so you can see the sparkle.


This was actually the best picture I could get today because the sun keeps going behind the clouds.  I'm not complaining because we really need the rain.  I think you can see the dimension a bit better here but not really the sparkle.  Trust me, those gems definitely sparkle!  

Saturday, December 2, 2017

Red Christmas

This week's Fusion Challenge is Red Christmas and since I love using Red at Christmas, I wanted to join in.  I use a lot more red during the holiday season.  In fact, more than the rest of the year combined. It always says "festive" and I enjoy it.  I particularly like vibrant reds and scarlet tones paired with gold or silver and I have a second card today using those colors.  Let's face it, I love metallics or shimmery papers and I use them as often as I can. When I started stamping a couple of years ago, I loved the look of heat embossing but I was terrible at it. I got mixed results and most of them time it didn't look that good.  Because I loved it so much, I kept trying until I figured out how to make it work for me.  I got very good at doing it and I rarely mess it up anymore thank heavens. My powder tool is Baby Powder with a fluffy brush.  I like the feel of it and it has worked for me way better than my EK Success Powder Tool or Powder Pouch.

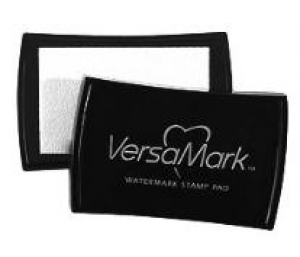
Between all the gold embossing I do and all the beads I've made for Christmas, I have used a lot of Versamark Refill although the majority of it has been for the beads.  I have a container of UTEE (Ultra Thick Embossing Enamel) that I've had for 2+ years that I have often wondered if I could ever use it all but with bead making, I have used almost the entire container.  When I got up on Monday morning (a.k.a. Cyber Monday), I had an e-mail from Michaels offering an extra 30% off of sale prices and free shipping for that day only, so I checked to see if they had Versamark Ink Pads and UTEE (my Versamark pads do get icky looking so I needed to replace a couple of them).  They did, so I got both for 30% off of the already half priced items and I didn't have to set foot out of the house. SCORE!  The problem with this is that I also saw some paper that I've become a fan off that wasn't available anywhere except in the actual store.

This past summer I went in to Michaels looking for a specific item and by chance found these cardstock stacks from a company called Craft Smith.  They have a big bunch of those on sale at Michaels for $5.99 right now so I did something I don't do very often - I drove into Tulsa after a couple of doctor appointments to see it in person. They had so many different ones and I dragged 5 of them home.  There was a particular one I wanted that they didn't have called "North Pole Gazette", but I found a suitable replacement called "Always Christmas".  This red and gold foiled paper was in this stack plus I got one in Rose Gold, Christmas Metallics (Gold, Silver and Rose Gold), and one Gold & White.  Did I mention that these were $5.99?  I could have brought many more home, but I didn't.

Specialty papers that have foil or metallics of any kind tend to run about $2.00 for a single sheet so I didn't think I could pass up a whole pad of those when they were only $6.00.  The Craft Smith brand tends to be thicker, heavier paper and one of the clerks told me it cuts better for her.  The paper is much smoother than most so it does cut cleaner.  I understood what she meant as I felt like I was constantly replacing my trimmer blades before even though I spent the extra money to get the titanium ones.  I can't stand raggedy looking cuts so I finally got a Tonic Personal Trimmer after I broke the handle off of my Creative Memories Personal Trimmer. That trimmer was never as good as the Tonic even when it was brand new.  I am surprised at how good this trimmer cuts every kind of paper and I plan to eventually get the larger version for my studio (after we move). I mostly cut everything with a die, so it isn't as big an issue as it use to be but I remember how it was a constant source of  irritation.  The smaller sized trimmer will cut up to 9 inches so I still have to use my big Fiskars trimmer for the longer sheets.

Getting back to my card, I got the Merry & Bright Stamp TV Kit that released last month I think it was. With my kit I ordered 2 of the cube ink pads to try them out; Cherry Red and Fresh Asparagus.  These inks stamp beautifully in one layer.  I do love the translucence of many dye inks but sometimes I want a better coverage without stamping multiple times. To get equal coverage in similar colors of my regularly used inks, I would have to stamp at least three layers. The red really stains but since Poinsettias are mainly pink or red, I guess it isn't a big deal. I know it doesn't affect the stamps, it's just my inner neat freak coming out.  In case you hadn't noticed, all red family inks stain, even many light pink inks.  They stain worse than black.  Now granted, I don't have a big variety of ink brands but I have tried several.

The inks I use most of the time are Papertrey and Altenew.  I have 48 colors in each of these brands.  I have Distress Inks in cubes and Distress Oxide inks in the colors that have been released so far but I only use those for techniques so I'm thinking of adding some of the Gina K Inks to my collection and moving my Distress Ink cubes to another area.  I also have several of the Tsukineko Brilliance Inks which are pigment (and Pearlized) and opaque and give a completely different look so I could store the Distress Inks with those as I have another container that is empty.  That would make enough room in my Ink Storage Chest that I use for all my ink cubes to add the Gina K Collection to my tools.  I am that impressed with these inks.  It all depends on what look you are going for.

This 7 drawer jewelry chest is what I use for my inks.  I primarily use ink cubes because the Rheumatoid Arthritis makes it difficult to manage the larger sized pads when I use my MISTI. I can control the ink application better in cases where I need to take the ink to the stamp versus the stamp to the ink.  That is most of the time.  I've even started using the Mini MISTI for the banners I tend to use for my sentiments.  My top drawer has a few Distress Inks in colors I almost never use along with the two Gina K Inks and this is where I'm thinking I will switch out the ink pads as I add a few Gina K Inks at a time.

I stamped these poinsettias, leaves and holly using the two Gina K Inks.  This was a single layer of ink.  I stamped the holly berries in the same Cherry Red but I decided to put Nuvo Drops over the top in the color Autumn Red.  See how smoothly those inks stamped?  It's pretty darn impressive and I am anxious to add a few colors at a time.


The Red and Gold Background paper was cut with the WPLUS9 Gift Card Layers Die which cuts the full A2 sized Stitched Rectangle.  I also used some of the Gina K Designs Heavy Base Weight White #120 Cardstock for my card base and the sentiment panel which was cut using the Gina K Designs Decorative Label Dies.  Her coordinating dies in this Merry & Bright Stamp TV Kit are also incredibly easy to line up and cut after you've stamped them.  I stamped the sentiment in Versamark and Heat Set it with Simon Says Stamp Antique Gold Embossing Powder, then stamped it again and heat set it again just to make the sentiment a bit bolder.  This is my favorite new trick learned from Jennifer McGuire this year.  I attached that to the background panel with Foam Tape.  I adhered the holly and poinsettia with foam tape as well.

I have several other projects coming up this next week and I hope you'll come back again to check them all out.  Thanks so much for stopping by! The supplies I've used are linked below for your convenience.

Simon Says Stamp Antique Gold Embossing Powder
Shop at:
SSS
Kokuyo Long Dot Runner Adhesive
Shop at:
SSS
WPLUS9 Gift Card Layers Designer Dies
Shop at:
SSS
Gina K Designs Stamp TV Kit - Merry & Bright
Shop at:
GKD
Versamark Ink
Versamark Ink
Shop at:
PTI | SSS
Wagner Heat Tool
Wagner Heat Tool
Shop at:
SSS
Scotch 3M Faom Tape
Scotch 3M Faom Tape
Shop at:
SSS
Tonic 6 Inch Personal Trimmer
Shop at:
SSS
Gina K Designs Cherry Red Ink Cube
Shop at:
GKD
Gina K Designs Fresh Asparagus Ink Cube
Shop at:
GKD
Gina K Designs Heavy Base Weight White Cardstock
Shop at:
GKD
Gina K Designs Decorative Label Dies
Shop at:
GKD
Nuvo Crystal Drops - Autumn Red
Shop at:
SSS

Sunday, April 2, 2017

Things with Wings

This week's Simon Says Stamp Monday Challenge is "Things With Wings". Normally, I would do something with Butterflies and I might still do that if I have time before the Challenge ends. But I've been anxiously awaiting the arrival of my Papertrey Ink order and that is the set I wanted to play with today.  I have a few girlfriends that fit the sentiment in this set so I couldn't make just one card but I ended up making three for today.  I think I will still need to make a few others but I wanted to get these posted for the Simon Says Stamp Monday Challenge.  I am also entering this up at the Curtain Call Challenge with their theme of "Speckled".

For all of the cards I have here today, I used the Papertrey Feather Finery Stamp Set with the Feather Finery Coordinating Dies and Limitless Layers - Ovals.  I also used Simon Says Stamp Stitched Rectangle Dies and a WPLUS9 Sunshine Layers Die.

The Feathers were stamped on to 44# Vellum and heat embossed with Simon Says Stamp Antique Gold Embossing Powder or Simon Says Stamp Gold Embossing Powder.  The card with the brown and soft white label is the regular Gold Embossing Powder.  I rarely use the two powders side by side, but I hope that in my pictures you'll be able to see the difference. I can, but I know what I'm looking for. My preference is still for the Antique Gold because it is a rich, warm gold.

Simon Says Stamp Gold Embossing Powder
On two of these cards, the background is Speckled because that is the challenge this week over at Curtain Call.  To make my speckles, I touch a drop of re-inker onto an acrylic block and added a drop of water to it to make my color.  Using my brush, I flicked the water off the edge of my acrylic block using a #2 Silver Black Velvet Round Brush which makes a very fine splatter on your cardstock below. The smaller the brush, the finer the splatter. Because this is a somewhat messy process, I have a shallow box that I lay the panels into when I am doing this with a paper towel underneath. For this first card, I used Dark Chocolate, Berry Sorbet and Sargent Art Gold Watercolor to create the splatter.

Simon Says Stamp Antique Gold Embossing Powder
On this second card, I created the spatter with True Black, Dark Chocolate and Gold Metallic. I also added a few more speckles using Irresistible Pico Embellisher in Gold. For each of these cards, I worked on the background panel and then adhered that to the card base made from Papertrey Ink Rustic White Cardstock.  I used Papertrey Ink's Limitless Layers 2¼ Ovals for stamping the sentiments onto and backed it with one of the ovals from the set. Each of the Limitless Layers sets has 4 exterior labels with an interior layer, that is a bit smaller. You can also use any of the pieces by themselves, but I wanted the layered look on these particular cards.  I recently got the Circles, Squares and Ovals Limitless Layers in the smaller sizes and I really like them. They are becoming "tool basics" for me in much the same way that banners and tags are, so I ordered the larger Ovals, Squares and Hearts last night to add to my tool box.


By stamping the feathers on the vellum, I could die cut after they were stamped and heat set. Since Vellum is transparent, it was easy to see to line them up.  I also did a few feathers that are stamped in ink and I did those by using the negative as a place holder with my MISTI tool.  I just didn't happen to use any of those for these cards.

The last card here uses Stamper's Select White Cardstock for my card base and the background panel is cut from Simon Says Stamp Audrey Blue Cardstock. The small oval is cut from a scrap of Simon Says Stamp Surf Blue Cardstock.

Everything here is super easy to do and duplicate.  I really like how the "speckles" came out on my background panels so I made a few more while I was at it.  I've done similar backgrounds to this before but with a different technique which resulted in larger spatters. Each way has their time and place in card-making depending on the look you want, so I will use this new way as well.

Supplies are linked in the post or you can find shopping links on the right hand sidebar.  If you have any questions, be sure to ask and I will get back to you right away.  Thanks so much for stopping by today.  I read and cherish each of the sweet comments you leave for me.  Happy Sunday Everyone! 

Sunday, February 5, 2017

Muse Challenge #201

Hello there!  I'm glad you are here.  Today's card is one made for the Muse Challenge #201.  Valentyna is the Muse for this week and she created the card on the left.

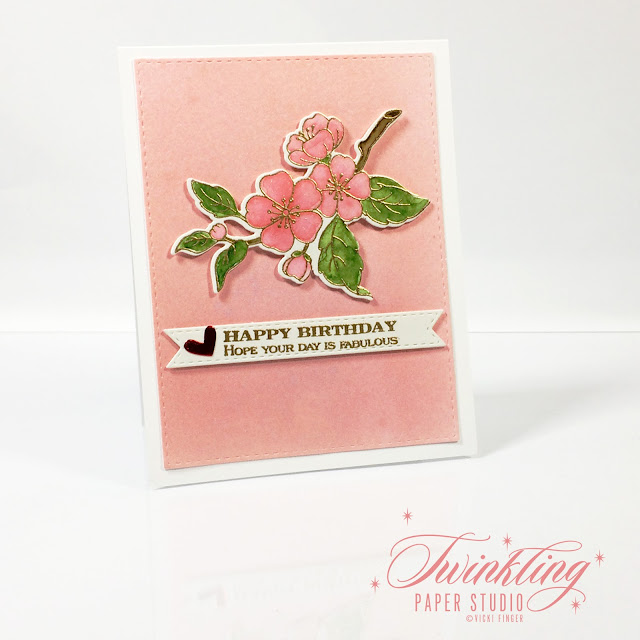
For several weeks, I have been making Valentines for my friends and family and before that it was Christmas Cards.  This week we are supposed to have temps in the high 70's and I am ready to work with some beautiful flowers.  So for my card, I pulled out a favorite from Clearly Besotted called Beautiful Friend. I love this image of a branch from an Apple Tree and I used Valentyna's colors as my inspiration.

I started with a panel of 4.25 x 5.5 Canson Bristol Watercolor Paper and did some ink blending on it with a combination of Pale Peony and Lovely Lady Inks. Then I misted it with Iridescent Gold Glimmer Mist and set that part aside to dry.
Next I stamped the blooming branch in Versamark on another piece of Canson Bristol Watercolor Paper and heat set it with Simon Says Stamp Antique Gold Embossing Powder.  I cut a banner from Tag Sale: Quilted and stamped the birthday greeting from Boutique Borders: Birthday Stamp Set, again in Versamark and heat set it then laid it aside.

Using Distress Markers, I watercolored the blooms in Worn Lipstick, the leaves in Mowed Lawn and the branch in Gathered Twigs.  Once everything was dry, I die cut the background panel with the largest Simon Says Stamp Stitched Rectangle, and used the coordinating die for the flowering branch.  Using a card base made from Stamper's Select White, I adhered the background panel using my ATG dispenser.  For the banner and the branch, I used Thin 3D Foam Squares.  I had a few small hearts leftover from my Valentine's Day projects, so I put one of them on the left side of the banner which completed my Clean and Simple card.


I watercolored additional images of this branch as I made a card for a niece and I'm making several cards for one of my sisters-in-law this week so they'll be ready to go if I want to use them again.  I always try to make multiples so that I have extras for pulling together a quick card.  I leave them uncut until I decide on my design, keeping them in the Stamp Pocket with the stamp set.  It makes for a fast card if I need one in a hurry.

Thanks for stopping by today.  Be sure to check out the Muse Challenge Blog to get all the details on this challenge and to see the beautiful entries.

Wednesday, November 23, 2016

Hello Lovely

I am jumping on here today with a quick post! This week's Simon Says Stamp Monday Challenge theme is Trio-Tastic.  You have to do something (anything) in threes. I've been really busy this week and with it being Thanksgiving, I'm really trying to get a few things accomplished. So far, I'm not having too much luck. I've been so into making Christmas cards that I have been longing to create something in some fresh "sunshine-y" colors.

I watercolored this beautiful image from the Concord & 9th Hello Lovely Stamp Set in Red and Blue the other day, but I really wanted to create one in these beautiful coral tones.  I'm strongly considering changing my favorite color to coral instead of pink.  I love this shade that Papertrey calls Berry Sorbet.  

This entire arrangement has been drawn for you so there is no masking required. Some people really like masking but I'm not one of them. I love heat embossing, but it's very hard to mask and heat emboss.  I've had success a few times, but not much because masks are sticky, so the embossing powder wants to stick where the mask was covering your image before.  It's a lot of hassle to get an embossed image that is clean so when I find one like this that the entire bouquet has been done for me - well, that's a winner in my book!  I don't mind taking time to watercolor, but masking?  Forget it!


Recently, I've been using a few props in my photos to add some interest but I think I am only going to be doing that for some holidays and special occasions in the future rather than trying to do it all the time. It's getting to be more about the props than about the focus of the blog or the photos and it's taking so much time to get the lighting right etc. that it's leaving me less time to create.  Since this isn't a photography blog but rather a paper crafting one, I think I'm going back to basics.  In fact, just knowing that and deciding it, makes me a lot happier.

This is a really simple card.  I stamped the image onto Canson Bristol Watercolor Paper with Versamark and heat embossed it using Simon Says Stamp Antique Gold Embossing Powder.  To watercolor it, I used a "trio" of colors - Mowed Lawn Distress Marker, with Light Carmine and Pink Zig Clean Color Real Brush Pens. The random gold splatters you see there are part of the stamp.  Once I had all the water coloring done and it was dry, I went over each of the blooms with my Wink of Stella Glitter Pen.  The blooms are just luminous in real life. I cut the panel with the largest Simon Says Stamp Stitched Rectangle Die and set it aside while I stamped my sentiment.

The sentiment comes from the Sugar Pea Designs Kindness Matters Stamp Set.  I cut one of the smaller Simon Says Stamp Stitched Rectangles from the same watercolor paper to stamp it on. Again, I used Versamark with the Simon Antique Gold Embossing Powder.  Once that was done, I mounted both to a top folding A2 card base made from Papertrey Ink Berry Sorbet Cardstock.  A few Gold Sequins from Pretty Pink Posh finished this Clean & Simple card off.

Thanks for stopping by today and if you'd like to leave a comment, I very much appreciate and enjoy reading them.

Monday, May 9, 2016

Shimmering Elegance

The Always Playing With Paper Challenge Blog gave us this gorgeous image to be inspired by this week.  The Simon Says Stamp Monday Challenge for this week is "Emboss It" I wanted to paint another card using my favorite butterfly from the Stampendous Pen Pattern Butterflies and Coordinating Dies. There are actually 3 different butterflies in the set, but I love this large graphic one.  I wanted something a bit different looking so I tried to combine a few different methods in my card; Stamping, Heat Embossing, Dry Embossing, Watercolor, DTP, Shimmer Spray and Die Cutting.  I needed three to play over at the CAS Mix Up Challenge
   
I started with a 4.25 x 5.5 inch piece of Canson Bristol Watercolor Paper then stamped the butterfly in Versamark and heat embossed it using Simon Says Stamp Antique Gold Embossing Powder.  I love this color because it's a warm rich gold than looks good with everything.  Using a #4 Silver Black Velvet Paint Brush, I painted the butterfly with a couple of Twinkling H20's in Ocean Wave and Egyptian Gold.  I chose that type of paint because it has a shimmer to it when dry. You could also add Perfect Pearls + Water Solution to any other coloring medium to get the same effect if you don't have Twinkling H20's. You can make it more or less shimmery by how much of the pigment powder you add to your water.

Once I had that painted, I set it aside to dry and grabbed a piece of A2 sized Stamper's Select White Cardstock. I ran that through my Cuttlebug machine using the Embossing Sandwich with a Taylored Expressions Embossing Folder called Leafy Vine.  I felt it was the perfect backdrop for the butterfly since mostly when you see butterflies they are around flowers or foliage of some kind.

To add a bit more interest to this background piece, I used Papertrey's Lemon Tart Ink and went Direct To Paper (DTP) with it.  Because the design is so close together, this worked very well at getting the color on the most raised areas.  Once I had that done, I spritzed it with some Glimmer Mist in Iridescent Gold and set it aside to dry. The spray mixes with all the color and makes it look so well blended. 


I wanted to add a bit more texture and dimension to the card front, so I cut three of the Poppy Stamps Massa Leaf Background.  I left these in the negative so that I could do some ink blending on them using a Ranger Mini Ink Blending Tool.  It helps to hold the positive in place without bending it which could have been tricky since the stems are so small. Once I had these inked up, I sprayed them with the same Iridescent Gold Glimmer Mist and set that aside to dry for a few minutes before I pulled the positive pieces from the negative place holder.  The butterfly in this set is so large and I knew I could only accommodate a small sized greeting so I cut the Simon Says Stamp Circle Smile Die from a scrap of gold foil cardstock.  I wanted the area behind it to be smooth so I used the ink blended negative scrap from the leafy branches to cut a positive circle to go behind the Smile die cut.  


I assembled everything to a 5.25 x 4 inch top folding note card using mostly Multi Medium Matte but I added a couple of strips of foam adhesive behind the butterfly's body and I used my ATG to adhere the background panel to the card base.  I used my Teflon Bone Folder to "curl" the top wings but I adhered the bottom wings to the card base directly with Multi Medium Matte.

My girlfriend and my daughter were both gaga over this card so I think I'll be making another one so I can send one to each of them.  Thank you so much for stopping by today.  Please feel free to leave a comment if you like.  I'm going to get busy painting another butterfly!