Showing posts with label Papertrey Ink Anniversary Celebration. Show all posts

Thursday, February 15, 2018

Papertrey Ink 11th Anniversary Celebration + Stripes Challenge

Papertrey Ink is still celebrating it's 11th Anniversary and there are still Challenges to participate in.  I have two cards today that I created from all the extra leaves and blooms I had stamped for the card I made on Monday.  I just love the leaves from Gran's Garden and the blooms as well.  I feel like I could incorporate the leaves into pretty much any floral design and some non floral designs.


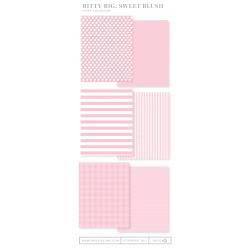
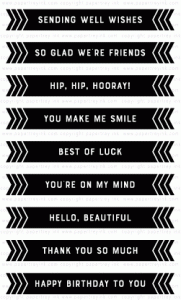
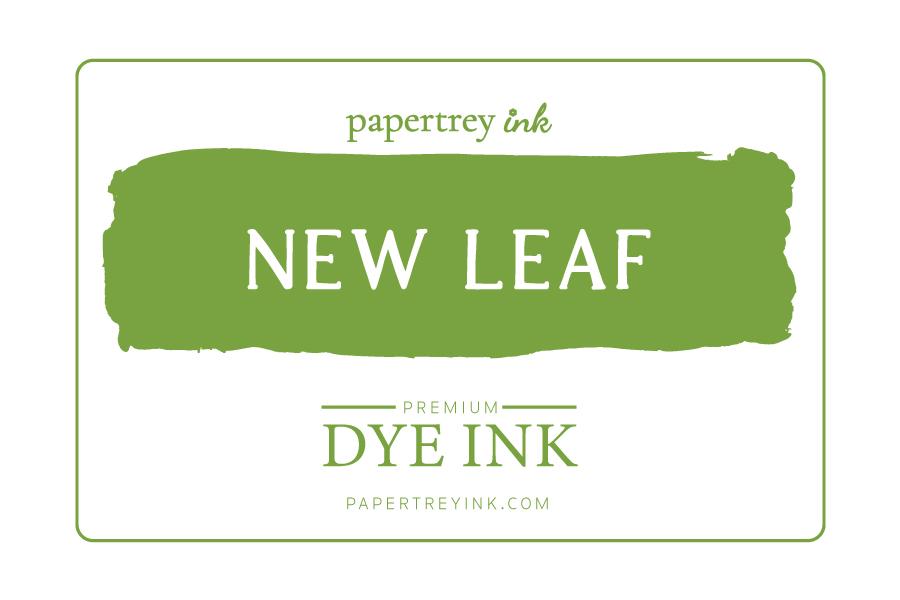
Monday's design would have worked well for yesterday's challenge but of course I didn't know in advance wheat the challenge would be.  That particular card has been mailed off, so I decided to create a couple more with my extras for the Day 5 Release Challenge - Stripes.  I wanted to use stripes again but I wanted a different look than the one I used here.  For starters, I used top folding vertical card bases. Again I used a piece of the Bitty Big in Sweet Blush. Honestly, Pale Peony is a much better match or name for that color.  It's a little too saturated to be called Sweet Blush as you can see by the flowers I stamped.  They were stamped in Pale Peony with Pure Poppy and are a perfect match to the striped paper.  I mounted the arrangement onto a Stamper's Select White Center Style: Feminine die cut.  This set of leaves were stamp in New Leaf Ink.  I attached the die cut with Foam Tape.  The sentiment came from Direct Messages Stamp and Die Collection.


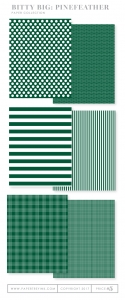
For the second card, I used Pinefeather and Ripe Avocado to stamp the leaves, Bitty Big Pinefeather striped paper, and die cut it with the Center Style: Feminine Die. I put fun foam behind the die cut. The blooms are the same as the first card; Pale Peony and Pure Poppy with Olive Twist centers.

That is going to be it for me today.  A two-fer is always good if you have extra pre-stamped die cuts laying on your desk or work area.  I've linked the supplies I've used below for your convenience.

Cuttlebug
Cuttlebug
Shop at:
SSS
Kokuyo Long Dot Runner Adhesive
Shop at:
SSS
PTI - Direct Messages Stamp Set
Shop at:
PTI
PTI Gran's Garden Dies
Shop at:
PTI
PTI Gran's Garden Stamp Set
Shop at:
PTI
PTI Perfect Match New Leaf Ink
Shop at:
PTI
PTI Perfect Match Pale Peony Ink
Shop at:
PTI
PTI Perfect Match Pinefeather Ink
Shop at:
PTI
PTI Perfect Match Pure Poppy Ink
Shop at:
PTI
PTI Pinefeather Bitty Big
Shop at:
PTI
PTI Sweet Blush Bitty Big Patterned Paper
Shop at:
PTI

Monday, February 12, 2018

Papertrey Ink 11th Anniversary Day 4 Challenge

I have a very fun and pretty card for you today featuring one of my favorite stamp sets designed by Dawn McVey, Gran's Garden for the Papertrey Ink Anniversary Day 4 Challenge. I love using this set to create a big floral bouquet and the leaves, well they are my favorites of any of my Papertrey Florals.  In fact, I think you could use them for almost anything!  I even went a little beyond the norm here by making a Bulk Mail Envelope using Papertrey's Bulk Mail Envelope Die.

On Thursday, February 8, 2018, Papertrey Ink revealed it's 2018 Anniversary set called Mixed Bouquet over on the Papertrey Ink Blog.  Several of the designers contributed a floral image for this set but as a previous and soon to be again Texas Girl, I do love the bluebonnet. The challenge issued that day was to use a Papertrey floral to create your card (or other project).

Last week was crazy busy for me and on Thursday we had to go to Texas and back. We left before dawn and were back home before 2:00 p.m. the same day.  I'm not too crazy about traveling anyway and especially that way, but it won't last forever.

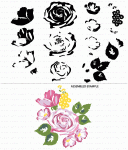
This card is for someone in particular who doesn't know me, so won't know what to expect and I want to impress her so I did the envelope as well.  I started by die cutting several of the shapes from Stamper's Select White Cardstock and saving the negative as my placeholder in my Mini Misti Tool.  It usually takes me one round to get precise placement for stamping but I lined up my leaves perfectly the first time around today.  I always cut a few extras just in case it takes more than one try to line them up right.  Today, it didn't, so I just kept stamping until all of the white die cuts were stamped.   I have a nice little pile of extras at the ready.  I just put those in the stamp pocket with the stamps and dies so when I need a quick card, I can just grab them out of there.

Truthfully, I rarely ever need a card that I don't have time to carefully select what I want to create.  But if I do, it's handy having a few extras in there while you already have all the stuff out.

For the first layer on the flowers, I used Pale Peony Ink with the second layer in Pure Poppy.  I was planning to use Summer Sunrise on the dotty interior pieces but I tried one and I just didn't like it so I switched over to the Olive Twist Ink that I used for the leaves. My color choices weren't very typical of what I like today and in fact, I was planning to stamp the foliage in New Leaf Ink.  I also tried Pinefeather, and Ripe Avocado Inks but in the end I liked the look of the dark Olive Twist Ink in contrast.  For the little flower pods, I stamped the first layer in Sweet Blush and then Pure Poppy for the second layer.


I used Bitty Big Patterned Paper in Sweet Blush for my background and for the Bulk Mail Envelope. Papertrey has a die for this and you can make an envelope from a single sheet of 8.5 x 11 cardstock or paper. You need to cut two so I cut one in my Cuttlebug and the other in my Gemini.  It was a lot easier in the Gemini because the pads are bigger.  There's a video for it on their YouTube Channel but it's really easy to put together using 1/8th inch Scor-Tape. All of the bitty big papers have two different sides; wide stripes with narrow stripes, little plaid with big plaid and bitty dots with big polka dots. Each pack has 24 sheets, 8 of each variety (Stripes, Dots, Plaid).  You just turn the paper over to use whichever side you want. As I was trying to arrange all of my pieces, I realized that I was going to need a top folding horizontal card base to accommodate my arrangement. Most of the time, I use Stamper's Select White Cardstock for all of my card bases. If I want a color, I will just cut one at that time rather than having any pre-cut colored card bases.

Once I had my arrangement place how I wanted it, I used the Press 'N Seal trick to pick up the entire arrangement.  I placed Ranger Multi Medium Matte on all of the foliage stems and then placed the arrangement back down on top of the card base.  I gave it a couple of minutes to really adhere and then I was able to pick up the blooms and place a foam square on the back side.  For the Hugs word on the card, I cut three layers stacking them up and then using an Ink Blending Tool carefully did the ink blending in an ombre style.

I mailed this off this morning with a few more cards in the package to Joanna Gaines of HGTV's Fixer Upper Fame. The Magnolia Journal is my one exception to the rule of no magazine subscriptions.  Most of the time they sit around and no one even reads them but "The Magnolia Journal" I read from cover to cover each month, usually about 30 minutes at a time while eating dinner.  In this month's issue, Joanna had an article on "The Art of Letter Writing" so I wanted to share with her the art of a handmade card.  If you haven't read the article, it's in the most recent issue (February 2018).

The supplies I've used are linked below (affiliate links may be used) for your convenience.

Cuttlebug
Cuttlebug
Shop at:
SSS
Gemini Full Size Die Cutting Machine
Shop at:
SSS
Kokuyo Long Dot Runner Adhesive
Shop at:
SSS
Mini MISTI Stamping Tool
Shop at:
SSS | GKD
PTI Big Hugs Die Set
Shop at:
PTI
PTI Bulk Mail Envelope Die
Shop at:
PTI
PTI Gran's Garden Dies
Shop at:
PTI
PTI Gran's Garden Stamp Set
Shop at:
PTI
PTI Perfect Match Olive Twist Ink
Shop at:
PTI
PTI Perfect Match Pale Peony Ink
Shop at:
PTI
PTI Perfect Match Pure Poppy Ink
Shop at:
PTI
PTI Perfect Match Sweet Blush Ink
Shop at:
PTI
PTI Stamper's Select White Cardstock
Shop at:
PTI
PTI Sweet Blush Bitty Big Patterned Paper
Shop at:
PTI
Ranger Multi Medium Matte
Shop at:
SSS
Scor-Tape - 1/8th inch
Shop at:
PTI | SSS
Scrapbook Adhesives Thin 3D Foam Squares
Shop at:
SSS

Tuesday, February 6, 2018

Papertrey Ink's 11th Anniversary - Day One Challenge

Today I have a really quick post for the Day One celebration of Papertrey Ink's 11th Birthday.  All of the activities began yesterday and will lead up to the Anniversary Sale and the Release Night Party on February 15th at 8:00 Central Time.  There will be several challenges and activities this month so be sure to check out the blog each day all month long to participate. 

Yesterday's challenge is a sketch challenge and you can see all of the sketches over at the Papertrey Blog. There are 10 different sketches to choose from and I had a hard time choosing just one.  The link up to participate is also in the same post.  
   
I chose Lizzie's Sketch using the new Farmer's Market Florals with a Cover Plate and simple sentiment.  Cover Plate: Twist has been one of my favorites since I first discovered Papertrey Ink a little over 2 years ago.  It's no wonder with the very Art Deco inspired design.  


For my card, I cut two of the cover plates and glued them together so that it would be a bit sturdier.  I added that to the top folding card base for that beautiful White on White look.  I cut a few of each of the elements from the Farmer's Market Florals Dies and then stamped them with the coordinating stamps.  It's the first time I've used these and they are a bit tricky to line up but that is something that just comes with practice and I don't have too much spare time today.

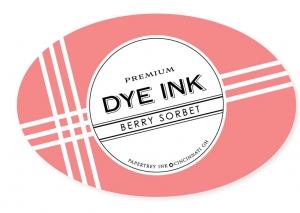
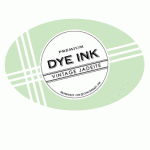
In fact, I took the easy road by using a sentiment that was already stamped, heat embossed and laying on my desk. To make it coordinate with the floral elements and not get lost on the white cardstock, I swiped my Vintage Jadeite Ink pad across it to make the colors match.  I used Sweet Blush with Pale Peony and Berry Sorbet for the roses, Sweet Blush for the smaller flowers and Vintage Jadeite with a touch of New Leaf for the foliage.

Be sure to stop over to the Papertrey Ink Blog and check out all the beautiful projects.  The supplies I've used are linked below for your convenience (Affiliate Links may be used).

Cuttlebug
Cuttlebug
Shop at:
SSS
Kokuyo Long Dot Runner Adhesive
Shop at:
SSS
PTI Perfect Match Berry Sorbet Ink
Shop at:
PTI
PTI Perfect Match New Leaf Ink
Shop at:
PTI
PTI Perfect Match Pale Peony Ink
Shop at:
PTI
PTI Perfect Match Sweet Blush Ink
Shop at:
PTI
PTI Perfect Match Vintage Jadeite Ink
Shop at:
PTI
PTI Stamper's Select White Cardstock
Shop at:
PTI
PTI Farmer's Market Florals
Shop at:
PTI
PTI Farmer's Market Florals Dies
Shop at:
PTI
PTI Cover Plate: Twist Die
Shop at:
PTI

Tuesday, March 14, 2017

Papertrey Ink 10th Anniversary Challenge: Transformation

When I saw what today's challenge is over at the Papertrey Ink Blog, I was thinking that clearly Nichole wasn't speaking to me when she came up with the challenge because I tear up and put into the trash cards I make that I don't like; or at least, card fronts.  I don't actually get it all the way to the whole card stage, but to keep myself from trying to salvage something I am not very happy with, I do rip it in half otherwise I will drive myself crazy trying to fix it. That doesn't happen very often but it does happen.  I know it wouldn't bother some people, but I am putting my name, my reputation and my style out there in the world and I don't want to post something I am not proud of. With all of that said, while I liked this first card, I wasn't 100% happy with my color choices from a few days ago during the Papertrey Ink Multiples Challenge. It was okay, but I felt I would have liked it better if I had used different colors. So that is the card I chose to transform today.

For the previous card, I started with a card base made from Smokey Shadow Cardstock. I used Hawaiian Shores Cardstock for the Cover Plate: Harlequin Die cut with a second pass on Vintage Jadeite Cardstock for the interior pieces. The sentiment is stamped on a strip of Smokey Shadow Cardstock and heat embossed the sentiment from Botanical Blocks in Hero Arts White Embossing Powder. This card looks fine and I can think of a few people who would really like it. It looks just fine, but I felt like it was really hard to tell what the background color is and I still think that's true.

For today I started with a card base made from Stamper's Select White and paired it with Dark Indigo, and Hawaiian Shores Cardstock.  I also did the pattern a bit differently than on the previous card.  There are so many options to choose from so I just sat down with the interior pieces and then inlaid them in different patterns until I had a design that I liked.  I adhered them with a bit of Ranger Multi Medium Matte.  For the previous card I popped the diamonds up on Thin 3D Foam Squares but I chose to keep this one mostly flat and pop up only the sentiment, again on Thin 3D Foam Squares. I used Double Ended Banners Dies to cut from the Dark Indigo Cardstock and heat embossed the Happy Birthday which is also part of the Botanical Blocks Stamp Set.


Yesterday's Challenge was to build a birdhouse using a template that Nichole designed a few years back so I am off to check out my construction skills.  Based on the fact that I used to make my own clothes, I'm somewhat optimistic.  Be sure to stop over at the Papertrey Ink 10th Anniversary posts on Nichole Heady's blog.  Tomorrow is release day and everything will be available to purchase at 10:00 p.m. ET.