 I have a very fun and pretty card for you today featuring one of my favorite stamp sets designed by Dawn McVey, Gran's Garden for the Papertrey Ink Anniversary Day 4 Challenge. I love using this set to create a big floral bouquet and the leaves, well they are my favorites of any of my Papertrey Florals. In fact, I think you could use them for almost anything! I even went a little beyond the norm here by making a Bulk Mail Envelope using Papertrey's Bulk Mail Envelope Die.
On Thursday, February 8, 2018, Papertrey Ink revealed it's 2018 Anniversary set called Mixed Bouquet over on the Papertrey Ink Blog. Several of the designers contributed a floral image for this set but as a previous and soon to be again Texas Girl, I do love the bluebonnet. The challenge issued that day was to use a Papertrey floral to create your card (or other project).
Last week was crazy busy for me and on Thursday we had to go to Texas and back. We left before dawn and were back home before 2:00 p.m. the same day. I'm not too crazy about traveling anyway and especially that way, but it won't last forever.
This card is for someone in particular who doesn't know me, so won't know what to expect and I want to impress her so I did the envelope as well. I started by die cutting several of the shapes from Stamper's Select White Cardstock and saving the negative as my placeholder in my Mini Misti Tool. It usually takes me one round to get precise placement for stamping but I lined up my leaves perfectly the first time around today. I always cut a few extras just in case it takes more than one try to line them up right. Today, it didn't, so I just kept stamping until all of the white die cuts were stamped. I have a nice little pile of extras at the ready. I just put those in the stamp pocket with the stamps and dies so when I need a quick card, I can just grab them out of there.
Truthfully, I rarely ever need a card that I don't have time to carefully select what I want to create. But if I do, it's handy having a few extras in there while you already have all the stuff out.
For the first layer on the flowers, I used Pale Peony Ink with the second layer in Pure Poppy. I was planning to use Summer Sunrise on the dotty interior pieces but I tried one and I just didn't like it so I switched over to the Olive Twist Ink that I used for the leaves. My color choices weren't very typical of what I like today and in fact, I was planning to stamp the foliage in New Leaf Ink. I also tried Pinefeather, and Ripe Avocado Inks but in the end I liked the look of the dark Olive Twist Ink in contrast. For the little flower pods, I stamped the first layer in Sweet Blush and then Pure Poppy for the second layer.
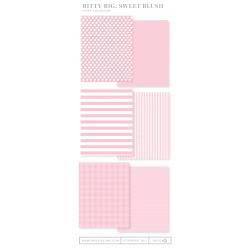
I used Bitty Big Patterned Paper in Sweet Blush for my background and for the Bulk Mail Envelope. Papertrey has a die for this and you can make an envelope from a single sheet of 8.5 x 11 cardstock or paper. You need to cut two so I cut one in my Cuttlebug and the other in my Gemini. It was a lot easier in the Gemini because the pads are bigger. There's a video for it on their YouTube Channel but it's really easy to put together using 1/8th inch Scor-Tape. All of the bitty big papers have two different sides; wide stripes with narrow stripes, little plaid with big plaid and bitty dots with big polka dots. Each pack has 24 sheets, 8 of each variety (Stripes, Dots, Plaid). You just turn the paper over to use whichever side you want. As I was trying to arrange all of my pieces, I realized that I was going to need a top folding horizontal card base to accommodate my arrangement. Most of the time, I use Stamper's Select White Cardstock for all of my card bases. If I want a color, I will just cut one at that time rather than having any pre-cut colored card bases.
Once I had my arrangement place how I wanted it, I used the Press 'N Seal trick to pick up the entire arrangement. I placed Ranger Multi Medium Matte on all of the foliage stems and then placed the arrangement back down on top of the card base. I gave it a couple of minutes to really adhere and then I was able to pick up the blooms and place a foam square on the back side. For the Hugs word on the card, I cut three layers stacking them up and then using an Ink Blending Tool carefully did the ink blending in an ombre style.
I mailed this off this morning with a few more cards in the package to Joanna Gaines of HGTV's Fixer Upper Fame. The Magnolia Journal is my one exception to the rule of no magazine subscriptions. Most of the time they sit around and no one even reads them but "The Magnolia Journal" I read from cover to cover each month, usually about 30 minutes at a time while eating dinner. In this month's issue, Joanna had an article on "The Art of Letter Writing" so I wanted to share with her the art of a handmade card. If you haven't read the article, it's in the most recent issue (February 2018).
The supplies I've used are linked below (affiliate links may be used) for your convenience.
 Cuttlebug Shop at: SSS |
 Gemini Full Size Die Cutting Machine Shop at: SSS |
 Kokuyo Long Dot Runner Adhesive Shop at: SSS |
 Mini MISTI Stamping Tool Shop at: SSS | GKD |
 PTI Big Hugs Die Set Shop at: PTI |
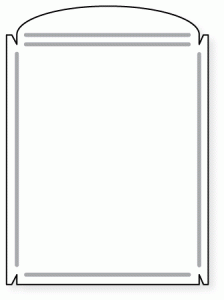 PTI Bulk Mail Envelope Die Shop at: PTI |
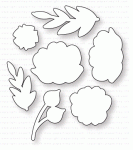 PTI Gran's Garden Dies Shop at: PTI |
 PTI Gran's Garden Stamp Set Shop at: PTI |
 PTI Perfect Match Olive Twist Ink Shop at: PTI |
 PTI Perfect Match Pale Peony Ink Shop at: PTI |
 PTI Perfect Match Pure Poppy Ink Shop at: PTI |
 PTI Perfect Match Sweet Blush Ink Shop at: PTI |
 PTI Stamper's Select White Cardstock Shop at: PTI |
 PTI Sweet Blush Bitty Big Patterned Paper Shop at: PTI |
 Ranger Multi Medium Matte Shop at: SSS |
 Scor-Tape - 1/8th inch Shop at: PTI | SSS |
 Scrapbook Adhesives Thin 3D Foam Squares Shop at: SSS |


What a beautiful set. I love those florals paired with the stripes.
ReplyDeleteYour card and envelope are lovely. You mentioned the Press 'N Seal trick, I may be in the dark ages, but I'm not aware of what this is, can you explain?
ReplyDeleteThanks