Today I sat down and got out some previously unused items for the Simon Says Stamp Monday Challenge "Start Afresh". The idea is to take something out of the package that hasn't been used before and see what you can make. For me, this meant I had time to play with a few things that I haven't had a chance to before now. A few months back I got several sets of the Altenew Cube Inks that come in Color Families. While I have used most of the colors at least once I hadn't done any layered stamping to see how well the colors go together.
For the stamping I did today, I used the three lightest shades of the families Rose Petal, Glacier Caves and Cool Summer Nights. I have 8 different sets of these cubes encompassing nearly every color group except yellows and greys. I have those colors in other brands of ink, but today was only about trying out the families of Altenew Inks. The containers I use for Distress Ink Cubes and Altenew Ink Cubes hold 32 colors each, so I'd have to add another container in order to expand either of those sets. This 5 drawer chest is on my wish list. I'm really good with the inks I have right now. I have some larger style pads but I love the ink cubes for using with my MISTI tool as I have a tendency to drop the larger size pads. They are also great to use for techniques and the Altenew Inks share many of the same characteristics as Distress Inks. They blend well and easily, they are great to use for watercolor techniques, and they are easily distressed by adding water via spray or droplets. I don't personally care for too much of that look but I like to keep my options open to include everything.
I want to spend just a few minutes talking about the Altenew Ink Cubes. These are, like many others out there, 1 x 1 inch raised felt ink pads. The biggest and most important difference for me is how incredibly well the Altenew Inks keep their lids on. They "snap" on tighter one way vs. the other, so if I don't feel I got that snap, I rotate it 90 degrees and do it again. I have never had an Altenew Ink Cube lid pop off (so far). Even Distress Inks lose their lids from time to time and if you don't notice right away, it can dry out your pad. I keep reinkers for my most used Distress Inks (Pinks and Purples) and also for all of my Papertrey Ink Cubes. Altenew's Reinkers come in individual colors or in the sets of four colors from the coordinating sets that can be bought together. It's a pretty significant investment of funds so I haven't done that yet but when I do, I'm pretty sure I will start with the Rose Petals family of colors given my love for pink. I really love how clear and transparent the Altenew Inks are as well. For me, different inks accomplish different things so you have to know what you are looking for. Simon Says Stamp Inks for example, are highly pigmented and give you deep rich color. Distress Inks require multiple layer stamping to get the deeper tones.
It's a little bit hard to figure out or narrow down your choices if you are just getting started with making cards. I chose the inks I wanted to try by asking lots of questions from some of my favorite designers. I also try to stick to one or two lines of inks. WPLUS9, Simon Says Stamp and Hero Arts Inks are all manufactured by the same company and have the same properties so it probably isn't necessary to buy all three lines. There are so many inks to choose from out there but a good place to start is by watching Jennifer McGuire's Ink Comparison Video here.
I also pulled out a December release stamp set called Fresh Bouquet along with the Fresh Bouquet Coordinating Die from Papertrey Ink. This may seem like a simple set but it is not to be underestimated. One of the great things about this stamp set is that it contains an outline image for the floral grouping and then individual layers for the various parts of the bouquet. If you're like me and love heat embossing, this set is genius. It was designed by Nichole Heady and I hope she'll be doing more of this style in the future. I love to watercolor but I don't always have the time to do it. This stamp set gives me the best of both worlds!
The bouquet on this card was created using the Rose Petals Inks in Rose Quartz and Puffy Heart and the berries were done in Lavender Fields which is part of the Shades of Purple Family with the leaves stamped in Forest Glades.
This bouquet was stamped in the Cool Summer Nights family using the Sea Glass, Ocean Waves and Dusk inks. Forest glades was again used for the greenery. For these florals, I die cut the bouquet first, then heat embossed the outline image using Versamark with Simon Says Stamp Antique Gold Embossing Powder. The sentiments are from Papertrey Ink's Big Basics Die Collection. All of the sentiments in this collection are large and impactful but you can pick and choose which ones work for you. The little hearts are from the Simon Says Stamp Mini Hearts Die. The card base is made from Simon Says Stamp Audrey Blue Cardstock with the Noted: A2 Scalloped Notecard Die.
Thank you so much for coming by today. I hope you enjoyed my observations on Altenew Inks and I'd love to see what you make. Your kind and encouraging comments are very much appreciated and I hope you'll take time to leave me one. Happy Friday everyone!
Friday, January 6, 2017
Wednesday, January 4, 2017
Simon Says Stamp "New Somethings"
I am so excited to be the Designer in the Spotlight for the month of January over at the Simon Says Stamp Wednesday Challenge Blog. Each Wednesday Morning this month (January 2017), I will be joining the Simon Says Stamp Wednesday Challenge Design Team on their blog featuring products available in the Simon Says Stamp Store. This is the first week of the month, so we will be featuring Simon Says Stamp Exclusive Products.
For my "New Year's" Card, I used Simon Says Stamp Snowflake Border Die, Simon Says Stamp Exclusive Lots of Snowflakes Stamp Set, Simon Says Stamp Stitched Rectangles Dies, Simon Says Stamp Audrey Blue Ink and Simon Says Stamp Audrey Blue Cardstock.
Starting with 2 pieces of 4.25 x 5.5 inch watercolor paper, and the Snowflake Border Die I ran both through my die cutting machine with an embossing sandwich rather than a cutting sandwich. I have a Cuttlebug Embossing Pad and a Spellbinders Embossing Pad. The Spellbinders is a bit thicker so I used the Cuttlebug Embossing Pad for this. This will make an impression on both pieces of the watercolor paper so that I can keep them lined up the same. Then putting the die back into the impression, I ran one panel through again, this time with a cutting sandwich so that it would give me two pieces. The impression also creates a place for the die cut to rest in when I adhere it. I also cut three of the snowflake borders from thick white cardstock, gluing them together with spray adhesive to make a nice thick embellishment. I covered the thick embellishment with an all over layer of spray adhesive and sprinkled Elizabeth Craft Designs Cool Diamond Silk Microfine Glitter all over it. I used my Teflon Bone Folder to burnish the glitter into the paper and set it aside to dry completely while I worked on the other parts of my card.
Using a Mini Round Ink Blending Tool, I ink blended all along the embossed area of the whole piece with Simon Says Stamp Audrey Blue Ink. Then taking just the wave panel from the other piece, I did a heavier concentration of color all along the edge to help it pop. I let that dry for several minutes and then stamped and embossed my greeting on the left side panel using Versamark with Ranger Gold Tinsel Embossing Powder. The greeting is from an older stamp set that I had gotten a few years ago, way before I ever started making or even thinking about making cards but it's also the only one I have for New Year's.
I attached that wave piece to the whole piece with temporary adhesive so that I could again, run both layers through the die cutting machine with the Simon Says Stamp Stitched Rectangles Dies in the largest size. It doesn't usually cut through both layers, but it makes enough of an impression on the bottom layer to be able to re-align the one that didn't cut the first time perfectly into the die and run it through again. I was very careful to make sure everything was lined up before I ran it through my cutting sandwich. I'm using the die to help me get exact placement for both cuts. You could of course, make a single layer card, but I wanted to add that bit of dimension to my card.
Next I glued the glittered embellishment to that bottom layer that is still in one piece using Ranger Multi Medium Matte. I snipped off the ends of the border to be even with the Stitched Rectangle Panel, and attached that to my card base made from Simon Says Stamp Audrey Blue Cardstock using my ATG Gun Then I attached the wavy piece with the sentiment to the whole piece. The panel to the left of the snowflake border is popped up on Thin 3D Foam Squares. You could use any kind of foam tape or a piece of fun foam cut to size. Some spritzes with Tsukineko Sheer Sparkle Shimmer Spritz to the whole front of the card finishes it off nicely. This is the reason I'm called the "Twinkling Paper Studio".
I attached that wave piece to the whole piece with temporary adhesive so that I could again, run both layers through the die cutting machine with the Simon Says Stamp Stitched Rectangles Dies in the largest size. It doesn't usually cut through both layers, but it makes enough of an impression on the bottom layer to be able to re-align the one that didn't cut the first time perfectly into the die and run it through again. I was very careful to make sure everything was lined up before I ran it through my cutting sandwich. I'm using the die to help me get exact placement for both cuts. You could of course, make a single layer card, but I wanted to add that bit of dimension to my card.
Next I glued the glittered embellishment to that bottom layer that is still in one piece using Ranger Multi Medium Matte. I snipped off the ends of the border to be even with the Stitched Rectangle Panel, and attached that to my card base made from Simon Says Stamp Audrey Blue Cardstock using my ATG Gun Then I attached the wavy piece with the sentiment to the whole piece. The panel to the left of the snowflake border is popped up on Thin 3D Foam Squares. You could use any kind of foam tape or a piece of fun foam cut to size. Some spritzes with Tsukineko Sheer Sparkle Shimmer Spritz to the whole front of the card finishes it off nicely. This is the reason I'm called the "Twinkling Paper Studio".
Thank you so much for stopping by today. I always really appreciate your kind and encouraging comments. Be sure to enter your project in the link up at the Simon Says Stamp Wednesday Challenge Blog for your chance to win a $50.00 Gift Voucher to shop at Simon Says Stamp! There will be so many beautiful projects to see at the link up as well. All of the supplies are linked at the Simon Says Stamp Store or there is a link in the side bar of this blog that takes you to the store. Tuesday, January 3, 2017
Birthday Greetings for Anything Goes
Hello and HAPPY 2017! My first post for the new year is a birthday card for the Anything Goes Challenge at the Simon Says Stamp Wednesday Challenge Blog. I actually have quite a few birthdays in January and I've been wanting to use this Concord & 9th Stamp Set called "Hello Lovely". You know how I love to watercolor and this bouquet is perfect for the technique. Someone else has already done the work of putting the bouquet together so no masking is required and I can heat emboss the outline using Simon Says Stamp Antique Gold Metallic Embossing Powder which you also know I love. *Ü*
I stamped 4 of this same card panel onto Canson Bristol Watercolor Paper and heat embossed them. I didn't need it this time but I often do this so I don't have to stop what I am doing to stamp another if I make a mistake. I like to watercolor on a clipboard because you have something to hold down the paper but you aren't having to tape off your project. I've also got a small cutting board with a handle that I can use, but I'm more comfortable with the clip board and they only cost 99¢ at your local dollar store. I have two of these and I use the other one for Copic Coloring. It has a sheet protector with my Hex Chart in it to refer to if needed when I am coloring. Sandy Allnock created the Hex Chart and you can get one at her website here. You get a colored one and an uncolored one to color in as you get Copic markers so you can see what you have and what you need.
I've been dying to make this card using some of my purple Distress Markers. For this card I used Wilted Violet, Seedless Preserves, and a touch of Milled Lavender along with some Picked Raspberry and Spun Sugar. The leaves were water colored with Peeled Paint and Mowed Lawn Distress Markers.
I cut a card base from Winter Wisteria Cardstock using the Papertrey Ink Noted: Vertical A2 Scalloped Note Card Die. I cut the painted panel with Simon Says Stamp Stitched Rectangles Die in the largest size, then realigned it to make it narrower and a better fit for the card base and attached it to the card base using my ATG Adhesive.
I didn't want to cover up the watercolor painting with a sentiment, so I die cut the Paper Clippings Birthday Details Banner from Stamper's Select Vellum and attached the Happy Birthday die cut to that. The Happy Birthday Die is one from Penny Black and is no longer available but there are lots of others out there to choose from. Once that was dry, I put some adhesive behind the letters on the vellum to attach it to the card front.
I hope you enjoyed my card for today. I have a few more to make and I think I will be creating some more using this same stamp set. Please come back again. I have another blog post going live tomorrow morning and I will be joining the Simon Says Stamp Wednesday Challenge team as the Designer in the Spotlight for January. I am so excited and I hope you'll be sure to stop over there and see all the projects!
I stamped 4 of this same card panel onto Canson Bristol Watercolor Paper and heat embossed them. I didn't need it this time but I often do this so I don't have to stop what I am doing to stamp another if I make a mistake. I like to watercolor on a clipboard because you have something to hold down the paper but you aren't having to tape off your project. I've also got a small cutting board with a handle that I can use, but I'm more comfortable with the clip board and they only cost 99¢ at your local dollar store. I have two of these and I use the other one for Copic Coloring. It has a sheet protector with my Hex Chart in it to refer to if needed when I am coloring. Sandy Allnock created the Hex Chart and you can get one at her website here. You get a colored one and an uncolored one to color in as you get Copic markers so you can see what you have and what you need.
I've been dying to make this card using some of my purple Distress Markers. For this card I used Wilted Violet, Seedless Preserves, and a touch of Milled Lavender along with some Picked Raspberry and Spun Sugar. The leaves were water colored with Peeled Paint and Mowed Lawn Distress Markers.
I cut a card base from Winter Wisteria Cardstock using the Papertrey Ink Noted: Vertical A2 Scalloped Note Card Die. I cut the painted panel with Simon Says Stamp Stitched Rectangles Die in the largest size, then realigned it to make it narrower and a better fit for the card base and attached it to the card base using my ATG Adhesive.
I didn't want to cover up the watercolor painting with a sentiment, so I die cut the Paper Clippings Birthday Details Banner from Stamper's Select Vellum and attached the Happy Birthday die cut to that. The Happy Birthday Die is one from Penny Black and is no longer available but there are lots of others out there to choose from. Once that was dry, I put some adhesive behind the letters on the vellum to attach it to the card front.
I hope you enjoyed my card for today. I have a few more to make and I think I will be creating some more using this same stamp set. Please come back again. I have another blog post going live tomorrow morning and I will be joining the Simon Says Stamp Wednesday Challenge team as the Designer in the Spotlight for January. I am so excited and I hope you'll be sure to stop over there and see all the projects!
Saturday, December 31, 2016
A Few Floral Favorites from 2016
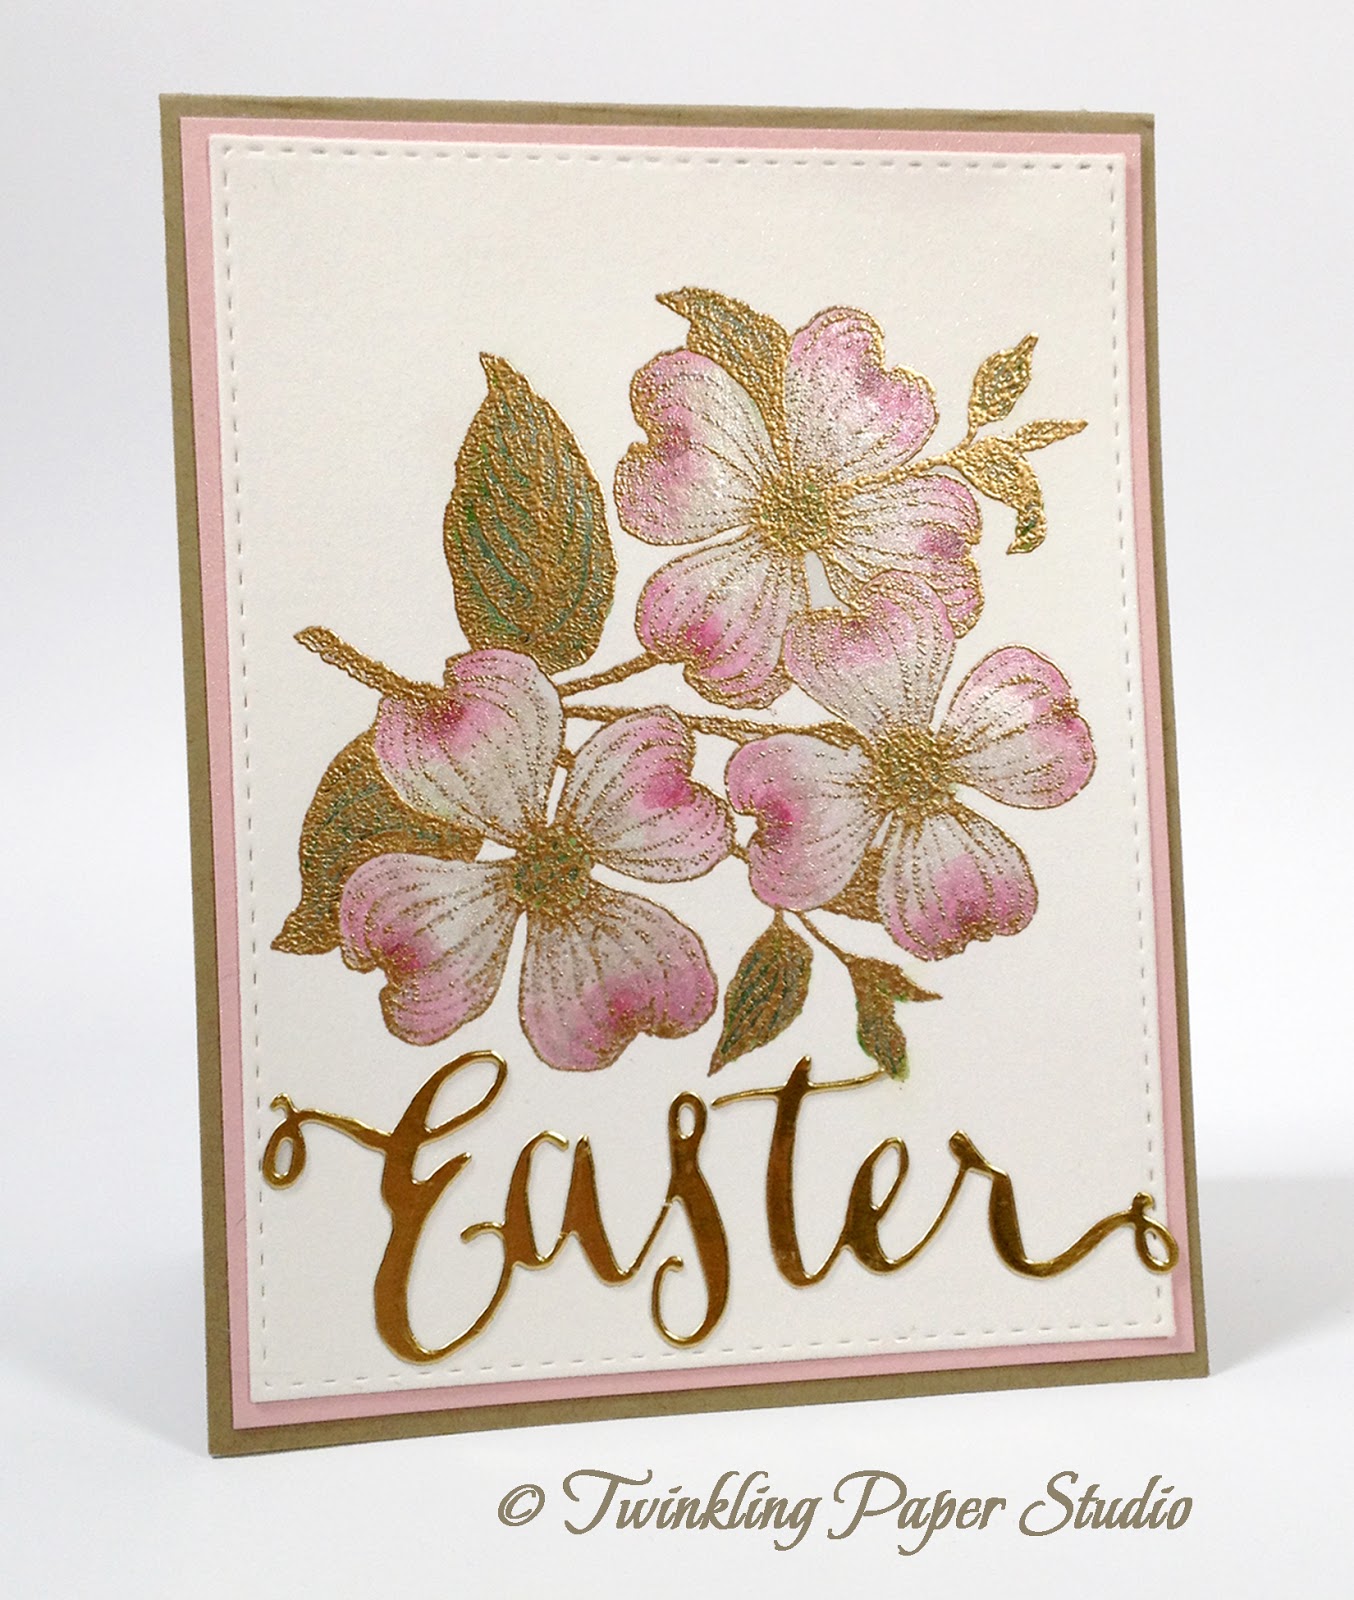
The next card in my line-up features my favorite flowering tree, the Dogwood. This is a wood block stamp from Impression Obsession that I have had for a number of years (10+). This was the first time I had used it. I love the Legend of the Dogwood and how it relates to Christianity.
I confess, I haven't yet mailed this card to anyone. I didn't finish it until after Easter so it is waiting for Easter 2017 to be sent out. The die cut "Easter" is from Simon Says Stamp.
Next up is a card I created using Altenew's Persian Motifs Stamp Set and Graceful Greetings from Papertrey Ink. Since I started making cards, I have learned that I have several favorite colors besides pink; aqua, teal, sugarplum, coral, etc. I also love heat embossing and gold embossing powder. My favorite gold embossing powder is Simon Says Stamp Antique Gold Embossing Powder. I painted this using Nicholson's Peerless Watercolors with some Perfect Pearls Pigment Powder in the water.
Next in the lineup is a card I sent to a Canadian friend and uses the Papertrey Ink Hands of Time Stamp Set with WOW! Metallic Gold Sparkle Embossing Powder; another favorite! I love ink blending and I used that technique for this card. The Awesome Die is from Waffle Flower Crafts and the little hearts are from a Simon Says Stamp Die called Mini Hearts Set.

Another 2016 favorite is the Altenew Beautiful Day Stamp and Coordinating Die Set. I used it for every kind of card but my favorite was to wish someone a really nice day or a Thinking of You type card. It is always so nice to get a card in the mail from a friend who lets you know they are thinking of you, especially for no particular reason. The "Perfect" Die is another from Waffle Flower Crafts. Even though I used the same basic supplies, each card has a different look. I love it when I can mix and match supplies from all different manufacturers to create the perfect card for the person I am sending it to. 
These are just a few of my favorite floral cards from 2016. There are many others. Beautiful Day and Tulip Time were my most used stamp sets in 2016 for good reason. They are incredibly beautiful and the coordinating dies make them just that much more stunning on your finished project.
I'd love to hear about your favorites from the year. I barely made it into Spring with this post so I'm thinking next year I need to break my favorites into about 3 posts during the last week of the year. Some of the Christmas cards I made were also among my favorites for the year, but I've been sick this week, so I never got to it.
I have several fun projects coming up this month as I am the Designer in the Spotlight for the Simon Says Wednesday Challenge every Wednesday in January. I hope you'll stop by to see my project each week.
I'm wishing you all the happiest possible New Year in 2017! Stay safe and make sure you carve out some crafty time int he new year as well.
This next card uses Papertrey Ink's Tulip Time Stamp Set and Tulip Time Coordinating Dies. This card was made for my friend Yana and I wanted to send her something that she wouldn't make herself. It uses a "go to formula" that Yana shared on her blog along with papers from Papertrey Ink (Berry Sorbet) and even a paper called Sea Glass that is from Creative Memories. Creative Memories papers aren't normally suitable for card making, but since this is only a mat layer, it was fine. Yana does a lot of how to videos on her blog and I wanted to thank her for sharing her knowledge and expertise with all of us card makers and crafters. As you can see, I love these Tulips and I used them many times over the course of the year. I'm looking forward to using them again in 2017.

These are just a few of my favorite floral cards from 2016. There are many others. Beautiful Day and Tulip Time were my most used stamp sets in 2016 for good reason. They are incredibly beautiful and the coordinating dies make them just that much more stunning on your finished project.
I'd love to hear about your favorites from the year. I barely made it into Spring with this post so I'm thinking next year I need to break my favorites into about 3 posts during the last week of the year. Some of the Christmas cards I made were also among my favorites for the year, but I've been sick this week, so I never got to it.
I have several fun projects coming up this month as I am the Designer in the Spotlight for the Simon Says Wednesday Challenge every Wednesday in January. I hope you'll stop by to see my project each week.
I'm wishing you all the happiest possible New Year in 2017! Stay safe and make sure you carve out some crafty time int he new year as well.
Thursday, December 29, 2016
Simon Says Anything Goes
![]() |
| by Marika Rahtu for Altenew |
If you've been coming to my blog for a while, you know that I am a huge fan of Marika Rahtu's! There's a link to her blog in my sidebar if you don't want to follow the link just now. I really miss seeing her around but she is very busy these days since she's returned to work after a few years off to be a stay-at-home-mom to her girls.
This past June, I took an online class at Altenew Academy called "Beautiful Details" which was taught by Marika. I loved the class but at the time I took it, I didn't really have a suitable stamp for "Lesson One: Artistic Flowers", so I am just now going back to it. One of the benefits of taking online classes is that you can go back and revisit any lesson at any time.
Marika has a way of looking at stamps and seeing something entirely different than what most people do, so I tried to look at my stamps in that same way to see what I had that could be used for this technique. This is Marika's gorgeous card made with a single stamp from the Painted Roses Stamp Set. I don't have this set, so I looked around at all my stamp sets to see what I had that was similar in size and shape. Marika (and I) created all the different colors by coloring onto our stamp and using 2-3 generations of stamping to create the various levels of color. I only have a couple of colors of Tombow Markers (1 black and 1 brown) so I used two different inks for my second card; Lilac Grace and Winter Wisteria. The first card base is made from Pale Peony Cardstock and the 2nd from Lilac Grace Cardstock. I'm still wanting to try this method with Zig Clean Color Real Brush Pens, Altenew Inks, and Distress Markers as well but I'll have to do that another day.
For my artistic (impressionistic) flowers, I used a couple of the leaf stamps from WPLUS9's Pretty Peonies Stamp Set. I think you could also use leaves or layers from other stamp sets such as Altenew Painted Flowers or Altenew Watercolor Wonders, but I found that I like the elongated leaves of the set I used for this. I had to stamp several more times than Marika did, but I'm okay with that. I also don't have a Copic Multi Liner like Marika used, so I just used the fine point ends from other markers. On the first card, I used Nuvo Crystal Drops in Glossy Black and for the 2nd card I used three different colors of purple sequins.
My third card once again uses the Black Tombow Marker and the Glossy Black Nuvo Crystal Drops. If you don't have a black Tombow Marker, you could use black ink or a coupe of shades of black and grey inks. I had a lot of fun playing with this technique and I have a few other colors and stamps I'd like to try it with as well. Each of these front panels has been cut with the largest Simon Says Stamp Stitched Rectangles Die before mounting on to a card base. By inking the sentiment multiple times (using a MISTI) with the ink color I wanted to use and then pouring clear embossing powder over the top, I was able to heat emboss to get a bolder look for my greeting.
I hope I've inspired you to look through your stamp sets and see what shapes you have that can create the look of a flower or branch. If you don't have markers, just stamp in a variety of color using ink pads. Also, you can check out Marika's class called "Beautiful Details" at Altenew Academy. At $8.95 for the class, I think it is a whole lot of bang for your buck!
Thank you so much for stopping by today to spend a bit of time with me. I love reading your kind and encouraging comments, so don't hesitate if you'd like to leave one.
Monday, December 26, 2016
Papertrey Ink December 2016 Blog Hop
This month on the Papertrey Ink Blog Hop, Nichole gave us this beautiful image as inspiration for our projects. I love the bright punch of colors after working with mostly darker jewel tones in the last few months while I made all of my Christmas Cards. However, it was actually the medallions that inspired my project to begin with and then it snowballed from there. *Ü* I had my own little wrapping party for a few small gifts, making my own gift bags from Scrapbook Paper and Wrapping Paper.
I've actually been meaning to make these Paper Medallions for a while but the inspiration image was just what I needed to kick start my project. To make my medallions, I started with two strips of the gold foiled paper 11 x 1.5 inches wide and then scored them at the half inch marks all along the length and repeated that to get a nice sharp crease.
I used my stainless steel stylus/rub on tool for making these particular creases using this particular paper. The foiled paper is from the Hobby Lobby Be Bold, Be Bright Paper pack. It's not cardstock, but it's heavier than most patterned paper. I still have tons of this paper left from the initial pad of 84 sheets and most of the time I'm only using a quarter of a sheet for a card. The stylus came several years ago with a set of rub on's from American Crafts. It makes the scoring lines really nice and folding the accordion strips easy to do. It's probably the only time I prefer it over a teflon bone folder. Once you have your strips creased and folded you can glue the ends together making a loop. If you aren't sure what I mean, you can see a video tutorial from Betsy Veldman here. I don't think I could possibly explain it in a way that makes it understandable so just watch the video. It's only about 4 minutes long, so a short one for sure. My strips of paper are longer than the ones Betsy used, but the concept is the same. It just depends on how full you want your medallions to be and I don't have the Snowflake Medallion Die. You can also use border punches to make your edges lacy looking. Since I wanted the What The Doodle Snowflake to be the focus of my medallions, I didn't use a border punch. The inspiration image uses stars but the snowflake is symmetrical and works well for this. The nice thing about this technique is that any paper works - even inexpensive copy paper works to make the pleated part of the medallions. I used a hot glue gun to assemble the medallions and even to put the gold cord on the back to hang them with. They can be used for a decoration and/or they can be recycled as well for other packages or another year. You could even put the hanger over the top of a bottle of wine or sparkling juice as a decoration.
I also assembled my own gift bags using Scrapbook Paper and Wrapping Paper, but you could even use the comics out of the Sunday Paper. It's nice to be able to make custom sized gift bags or glassine bags using supplies I already have on hand. There's a ton of videos on YouTube for how to do this as well although most stamp companies have glassines available for purchase. The glassine bag pictured here is made from some fancy vellum that I have but most people use plain old waxed paper from the dollar store. Since I don't scrapbook anymore, it's nice that I can use some of my supplies in this way although I need to remember to use this vellum on cards too.
If you'd like to try making your own gift bags or glassine bags, I'd recommend that you experiment with a bit of scrap paper first to find out how it creases and folds when you have multiple layers of paper. Scrapbook paper is pretty heavy to make most gift bags, but wrapping paper is typically too lightweight to work well. I had a couple of rolls of heavy wrapping paper and that worked the best for Gift Bags. I used a combination of ribbon and gold elastic cord to make the hangers for these and I preferred the elastic cord. I picked it up at Hobby Lobby for a dollar or two and I used hot glue to hold it on the backside between a pleat. You could use these on any kind of gift bag, gift card or even a regular gift that has been wrapped. They were super easy and fun to make.
Thank you so much for stopping by to see my project today. Be sure to stop over at Papertrey Ink Blog to see all the entries that are being added to the link up. Much of the fun of this monthly event is seeing how each person interprets the inspiration image.
I've actually been meaning to make these Paper Medallions for a while but the inspiration image was just what I needed to kick start my project. To make my medallions, I started with two strips of the gold foiled paper 11 x 1.5 inches wide and then scored them at the half inch marks all along the length and repeated that to get a nice sharp crease.
I also assembled my own gift bags using Scrapbook Paper and Wrapping Paper, but you could even use the comics out of the Sunday Paper. It's nice to be able to make custom sized gift bags or glassine bags using supplies I already have on hand. There's a ton of videos on YouTube for how to do this as well although most stamp companies have glassines available for purchase. The glassine bag pictured here is made from some fancy vellum that I have but most people use plain old waxed paper from the dollar store. Since I don't scrapbook anymore, it's nice that I can use some of my supplies in this way although I need to remember to use this vellum on cards too.
If you'd like to try making your own gift bags or glassine bags, I'd recommend that you experiment with a bit of scrap paper first to find out how it creases and folds when you have multiple layers of paper. Scrapbook paper is pretty heavy to make most gift bags, but wrapping paper is typically too lightweight to work well. I had a couple of rolls of heavy wrapping paper and that worked the best for Gift Bags. I used a combination of ribbon and gold elastic cord to make the hangers for these and I preferred the elastic cord. I picked it up at Hobby Lobby for a dollar or two and I used hot glue to hold it on the backside between a pleat. You could use these on any kind of gift bag, gift card or even a regular gift that has been wrapped. They were super easy and fun to make.
Thank you so much for stopping by to see my project today. Be sure to stop over at Papertrey Ink Blog to see all the entries that are being added to the link up. Much of the fun of this monthly event is seeing how each person interprets the inspiration image.
Tuesday, December 20, 2016
Simon Says ... Gift It
This week on the Simon Says Stamp Wednesday Challenge, the theme is "Gift It". We were gone out of town until yesterday afternoon so I need to finish up this post today as there will be a new challenge tomorrow!
Last week at Jennifer McGuire Ink, she made a "Color Me" Card Kit and I loved the idea so I wanted create one of my own. You could use this as a Get Well Soon basket with tissue, throat lozenges, etc. but mine is just for my daughter who loves to color. She has nice Prismacolor Pencils and really enjoys coloring so I'm going to tuck this set of note cards into her stocking when we travel to their house later this week.
I started my kit by stamping the Ranunculus and Dahlia Bouquet Stamps from WPLUS9 Design Studios onto Stamper's Select White Cardstock using Versafine Onyx Black Ink and Simon Says Stamp Clear Embossing Powder over the top. I used the Lia Griffith's "Hello" Stamp Set from Hero Arts for the greetings, also stamped in Versafine with Clear Embossing Powder. I cut each of those panels with the Simon Says Stamp Stitched Rectangles Die in the largest size.
Next I made eight Noted: Scalloped A2 Vertical Card Bases from True Black Cardstock and attached the black and white panels to them and put 8 white envelopes with them. This way the recipient can use the coloring medium of their choice which might be markers, crayons or colored pencils. My daughter has Prismacolor Pencils and I know she will enjoy adding a personal touch to these cards. For my example card, I used Copic Markers but you could use Zigs, Polychromos or any type of coloring medium that you already have. Since my card bases are black, I also put a white stitched rectangle panel on the insides. Each card is only waiting to be colored and then it can be mailed. If you like the black and white sketch look, you could even send them as is.
I hope you enjoyed this project! Thanks for stopping by and taking a look at my blog post for today. It's a short week for me this week and I definitely need to get a move on as I've got lots of other challenges that I hope to participate in before we head out again for some more Christmas Festivities.
Last week at Jennifer McGuire Ink, she made a "Color Me" Card Kit and I loved the idea so I wanted create one of my own. You could use this as a Get Well Soon basket with tissue, throat lozenges, etc. but mine is just for my daughter who loves to color. She has nice Prismacolor Pencils and really enjoys coloring so I'm going to tuck this set of note cards into her stocking when we travel to their house later this week.
I started my kit by stamping the Ranunculus and Dahlia Bouquet Stamps from WPLUS9 Design Studios onto Stamper's Select White Cardstock using Versafine Onyx Black Ink and Simon Says Stamp Clear Embossing Powder over the top. I used the Lia Griffith's "Hello" Stamp Set from Hero Arts for the greetings, also stamped in Versafine with Clear Embossing Powder. I cut each of those panels with the Simon Says Stamp Stitched Rectangles Die in the largest size.
Next I made eight Noted: Scalloped A2 Vertical Card Bases from True Black Cardstock and attached the black and white panels to them and put 8 white envelopes with them. This way the recipient can use the coloring medium of their choice which might be markers, crayons or colored pencils. My daughter has Prismacolor Pencils and I know she will enjoy adding a personal touch to these cards. For my example card, I used Copic Markers but you could use Zigs, Polychromos or any type of coloring medium that you already have. Since my card bases are black, I also put a white stitched rectangle panel on the insides. Each card is only waiting to be colored and then it can be mailed. If you like the black and white sketch look, you could even send them as is.
I hope you enjoyed this project! Thanks for stopping by and taking a look at my blog post for today. It's a short week for me this week and I definitely need to get a move on as I've got lots of other challenges that I hope to participate in before we head out again for some more Christmas Festivities.
Wednesday, December 14, 2016
Papertrey's December 2016 Create Along With Us
![]() |
| Laurie Willison's "Feel Better" Ensemble |
About a month ago, I had ordered some of the Papertrey Ink Tag Stock which is 160# to use with my Wine Bottle Tag Die. This is some heavy duty stuff. In fact, I made two other tags that aren't shown here and have already put them on a couple of bottles of Christmas "Cheer" (think Eggnog) that we'll be giving this coming weekend at one of our Christmas gatherings.
I was surprised at how well the Tag Stock takes ink. It was just as easy as when I use watercolor paper. I made a total of 5 tags in all using Lovely Lady, Plum Pudding and Hawaiian Shores Inks for the ink blending. Each tag was misted with Iridescent Gold Shimmer Spritz after the ink blending and allowed to dry (or hurried along with a heat tool) before I could do my stamping. I grabbed my Mini Misti for these, just to get the alignment correct since I was doing multiples. I stamped the sentiment in Versamark and heat embossed it with a gold embossing powder.
Thank you so much for stopping by my blog and checking out my project. You can follow the link back to the challenge and see all the great projects. Your kind and encouraging comments always really make my day and I thank you for that.
Sunday, December 11, 2016
Hoping Your Holidays Sparkle

Today's project is for the Simon Says Stamp Wednesday Challenge, the Simon Says Stamp Flickr Challenge #60, and the Muse Challenge #195. The theme at Simon Says Stamp this week is Ice Inspiration and Muse provided us with this lovely card to inspire our projects.For my card I started with a 4.25 x 5.5 inch panel of Canson Bristol Watercolor Paper. I love to use this for most of my card front panels because of how well it works for so many techniques such as the one I used here, Ink Blending. The blend is far superior to anything I could do on cardstock, no matter how high the quality is. The Bristol Paper is smoother and takes color very well in addition to being able to stand up to the shimmer mist. I started by using the Simon Says Stamp Snowflake Border Die to impress or emboss the design into my card stock. You can do this by using an Embossing Sandwich in your die cutting machine. It will emboss rather than cut. I also die cut three of the borders from Stamper's Select White Cardstock so that I could I put those together, stacking one on top of the other using a bit of spray adhesive between each layer. I keep a shallow box in my studio for just this purpose so I don't spray adhesive all over. This makes for a nice thick embellishment. Once I had that done, I gave it another coat of spray adhesive and sprinkled Nuvo Pure Sheen Glitter in the color Diamond all over it and set it aside to dry while I continued on my project.
Taking my embossed front panel, I did ink blending using Cracked Pistachio and Mermaid Lagoon Distress Inks all along the embossed area, letting it blend out very softly. Next, I die cut the panel with the largest Avery Elle Postage Stamp Die which gave it the decorative edge, but I kept the paper in the die while I took it to my desk and adhered the center panel to the frame using a bit of Micro-pore tape. You can use Washi Tape, Scotch Tape or whatever. Micro-pore is what I had handy. I just wanted to keep the center rectangle with the frame for this card. Next I used the Simon Says Stamp Snowflake Border Die on an extra rectangle to cut the top wavy piece so that I could pop it up on foam tape for added dimension. I'm going to have to think of a better way to explain this. I guess I should have taken some pictures along the way. It's just an extra interior rectangle piece from another project and I used it for the underneath piece so that I could pop up the top layer that had the ink blending on it. Clear as mud I'm guessing. I'm planning to use this technique again soon on another project and I will try to take pictures along the way so you can see what I mean. I wasn't sure it would work while I was making this card, but in real life, it is just gorgeous. You may be able to see it better in this image.
Once I had that done, I heat embossed my sentiment from the Sparkle & Shine: Holiday Additions Mini Stamp Set with Ranger Gold Tinsel Embossing Powder and assembled the card onto a top folding card base made from Simon Says Stamp Audrey Blue Cardstock. This is one of my absolute favorite colors. The front of the card got all all over spritzing with Tsukineko Sheer Shimmer Spritz and then I was able to set the glittered die cut snowflakes right into the impression that I had previously made using the embossing sandwich. If I would have kept it one layer, it would have fit down inside and been flush but it pops up because I had the extra layers for thickness. I finished it off with a few turquoise sequins!
Thank you for stopping by to see my project today and especially if you take time to comment on my post. I have a very busy few weeks ahead with the holidays and family, but it's my goal to still have at least 3 new posts per week until I leave for CHA in January. It's just a month away now and I am getting super excited.
Tuesday, December 6, 2016
Make It Monday #269
Edited: I am popping back in with an edit to this project. The more I looked at it, the more I felt it needed something more. *Ü*
The Copic shading around the snowflake adds so much dimension but I couldn't help but add one of the snowflakes embossed in Ranger Gold Tinsel Embossing Powder. I hope you like this change as much as I do.
This week over at the Papertrey Ink Make it Monday #269, Betsy Veldman showed us a technique for embossed and outlined images. This reminds me of a watercolor class I took last year where we added the most depth around the outside of the images. The effect is identical, making your images pop off the page. This effect is achieved by using a Copic Marker around the outside of heat embossed images, then a bit of ink blending on top of that in a coordinating color. I used all the same colors and products as Betsy did; What The Doodle Snowflake, Copic Marker in BG13, Hero Arts White Embossing Powder, Hawaiian Shores Cardstock, Tropical Teal Ink with a Mini Ink Blending Tool. I finished it off with a few Sparkling Clear Sequins from Pretty Pink Posh.
The die is from the Sparkle & Shine Words Dies and was one of the first things I purchased from Papertrey Ink. I also used the new Noted: Scalloped A2 Vertical Die to cut my card base. This die is so fantastic and is achieved in 2 passes through your die cutting machine.
I experimented with a few other colors as well and did one in Winter Wisteria Cardstock using a C3 Copic Marker which is a cool grey. Neutral Grey tones work well for adding depth of color to any kind of images if you don't have a good match in a more specific color. I happen to like cool greys vs. warm ones. There are some great examples using other kinds of stamps at the Papertrey Link-up so be sure to check it out. I'm also linking this up at The Paper Players Challenge #324.
I hope you enjoyed this quick and easy card and give it a try yourself. Be sure to follow the link above to see Betsy's Tutorial. Thank you so much for stopping by today!
The Copic shading around the snowflake adds so much dimension but I couldn't help but add one of the snowflakes embossed in Ranger Gold Tinsel Embossing Powder. I hope you like this change as much as I do.
This week over at the Papertrey Ink Make it Monday #269, Betsy Veldman showed us a technique for embossed and outlined images. This reminds me of a watercolor class I took last year where we added the most depth around the outside of the images. The effect is identical, making your images pop off the page. This effect is achieved by using a Copic Marker around the outside of heat embossed images, then a bit of ink blending on top of that in a coordinating color. I used all the same colors and products as Betsy did; What The Doodle Snowflake, Copic Marker in BG13, Hero Arts White Embossing Powder, Hawaiian Shores Cardstock, Tropical Teal Ink with a Mini Ink Blending Tool. I finished it off with a few Sparkling Clear Sequins from Pretty Pink Posh.
The die is from the Sparkle & Shine Words Dies and was one of the first things I purchased from Papertrey Ink. I also used the new Noted: Scalloped A2 Vertical Die to cut my card base. This die is so fantastic and is achieved in 2 passes through your die cutting machine.
I experimented with a few other colors as well and did one in Winter Wisteria Cardstock using a C3 Copic Marker which is a cool grey. Neutral Grey tones work well for adding depth of color to any kind of images if you don't have a good match in a more specific color. I happen to like cool greys vs. warm ones. There are some great examples using other kinds of stamps at the Papertrey Link-up so be sure to check it out. I'm also linking this up at The Paper Players Challenge #324.I hope you enjoyed this quick and easy card and give it a try yourself. Be sure to follow the link above to see Betsy's Tutorial. Thank you so much for stopping by today!
Monday, December 5, 2016
A Thrill of Hope
I have a card today for the AAA Card Challenge #79 with a theme of Christmas. For those of you who may not know it, CAS means Clean & Simple. All of the AAA Card Challenges are for CAS cards. I'll also be linking this up over at the Simon Says Stamp Wednesday Challenge with their theme of "Anything Goes".
Yesterday I was finishing up the last of my Christmas Cards (I think), I still had quite a pile of "parts & pieces" left so I pulled a few things from the pile and made a couple more cards. This particular card is for the pastor and his family who live across the street from us.
I had previously done a bit of soft ink blending on the tags from the WPLUS9 Love Showers Die Set. Those were cut out of Canson 140# Watercolor Paper which takes ink blending very well. The sentiment is from Papertrey Ink's A Thrill of Hope Stamp Set and was stamped with Versamark and heat embossed with Ranger Gold Tinsel Embossing Powder. After that the tag was spritzed with Tsukineko Sheer Sparkle Shimmer Spritz.
For the mat, I did a lot of gold splatter using Sargent Art Gold Watercolor on Scarlet Jewel Cardstock and set it aside to dry while I figured out the rest of my design. This design is so clean and simple that it really needed a touch of something. Going back to my pile of parts and pieces, I grabbed some of the Spellbinders Jolly Holly leaves, (which had also been cut out from splattered paper) and added them to my card. A few Satin Red Sequins made up the berries on the holly. I die cut the mat using the largest Simon Says Stamp Stitched Rectangle Die and assembled the card using ATG with Ranger Multi Medium Matte for the sequins and holly.
Yesterday I was finishing up the last of my Christmas Cards (I think), I still had quite a pile of "parts & pieces" left so I pulled a few things from the pile and made a couple more cards. This particular card is for the pastor and his family who live across the street from us.
I had previously done a bit of soft ink blending on the tags from the WPLUS9 Love Showers Die Set. Those were cut out of Canson 140# Watercolor Paper which takes ink blending very well. The sentiment is from Papertrey Ink's A Thrill of Hope Stamp Set and was stamped with Versamark and heat embossed with Ranger Gold Tinsel Embossing Powder. After that the tag was spritzed with Tsukineko Sheer Sparkle Shimmer Spritz.
For the mat, I did a lot of gold splatter using Sargent Art Gold Watercolor on Scarlet Jewel Cardstock and set it aside to dry while I figured out the rest of my design. This design is so clean and simple that it really needed a touch of something. Going back to my pile of parts and pieces, I grabbed some of the Spellbinders Jolly Holly leaves, (which had also been cut out from splattered paper) and added them to my card. A few Satin Red Sequins made up the berries on the holly. I die cut the mat using the largest Simon Says Stamp Stitched Rectangle Die and assembled the card using ATG with Ranger Multi Medium Matte for the sequins and holly.
I really like how this turned out. Although you can't see the ink blending very well in this photo, it looks beautiful in real life. I wanted the card to be about the sentiment more than the decor. It is the reason for the season after all. This was quick and simple to do but still makes an impact.
Thank you so much for stopping by today. I have lots of projects on my desk right now so I hope you'll stop by again soon. I have a new project 3 - 5 times each week.
Saturday, December 3, 2016
Simon Says Stamp Flickr Challenge #59
I have been enjoying playing in the Simon Says Stamp Flickr Challenges since I discovered it earlier this summer. Heidi and the crew at Simon Says Stamp always have a gift certificate for each of the challenges which run bi-weekly. I won one of them a few weeks ago. There's also no limit as to how many times I can enter each challenge as long as I am meeting the other qualifications of a new project and using some of the Simon Says Stamp branded Stamps or Dies. So it's kind of a nice change of pace. The theme this week is for Christmas/Holiday and heaven knows I've been doing plenty of those, but I have a few more for friends to do. My family cards have all been done and mailed out, but I still have several friends I want to make one for.
Today, I needed to make some cards for the men in a friend's life that she wants to give them for Christmas. For this first group of cards, I used the Simon Says Stamp "Look For the Miracles" Stamp Set. I know it isn't a Christmas set but, after all, Christmas is all about miracles so I think this sentiment works well for this style.
I started by splattering some gold metallic watercolor and some white pearl watercolor all over a half sheet length of Night of Navy Cardstock (my last sheet by tapping my brush onto the handle of another one to make the splatter. I do this in a shallow box lid to contain the mess and set it aside to dry overnight usually. The size of your brush determines the size of your spatter. My most commonly used brush is my #8 Silver Black Velvet Brush and my #4 Silver Black Velvet Brush.
I also found some metallic watercolor online that I am enjoying very much and I wanted to share my find with you. So last year around this time I invested in a set of Finetec Mica Gold Watercolors. I love them and I have used them several times but no one seems to carry the little refill pans you need once the pans are empty and two of mine are nearly gone. The refills are made, but I haven't found them at all my usual places. This means that I don't use them as often as I want because it is not something that's going to be easy to replace and I am hoping I don't have to buy the full set again.
The other day, I ran across some Metallic Gold and Metallic Pearl White Watercolors in 8 ounce bottles. The price point was low (around $8.00), especially for the amount of product you get. You can mix it with a bit of water or use it straight from the bottle. This means I can use all the Gold Spatter I want on my projects, so be forewarned that I am sure it will be in use often around here.... now that I don't have to hoard it anymore. *Ü* The Brand is Sargent Art and I found mine on Amazon.
Back to my card. I splattered Gold Watercolor Paint on the navy cardstock, let that dry over night, then splattered it again with the White Watercolor Paint and let that dry all morning. Next I stamped the sentiment from the "Look for the Miracles" Stamp Set in Ranger Gold Tinsel Embossing Powder and heat set it. Next I got several of the Snowflakes from the Papertrey Ink "What the Doodle Snowflake" Stamp set and stamped them randomly around the rest of the background and heat embossed them using the same Gold Tinsel Embossing Powder. I did cut the panel with the largest Simon Says Stamp Stitched Rectangle Die and mounted it to a top folding card base made from Papertrey Ink Classic Kraft cardstock.
That is it for today! Thanks so much for stopping by to check out my blog. I really appreciate all of the kind and encouraging comments you leave. I have several other projects finished so I will be back very soon!
Today, I needed to make some cards for the men in a friend's life that she wants to give them for Christmas. For this first group of cards, I used the Simon Says Stamp "Look For the Miracles" Stamp Set. I know it isn't a Christmas set but, after all, Christmas is all about miracles so I think this sentiment works well for this style.
I started by splattering some gold metallic watercolor and some white pearl watercolor all over a half sheet length of Night of Navy Cardstock (my last sheet by tapping my brush onto the handle of another one to make the splatter. I do this in a shallow box lid to contain the mess and set it aside to dry overnight usually. The size of your brush determines the size of your spatter. My most commonly used brush is my #8 Silver Black Velvet Brush and my #4 Silver Black Velvet Brush.
I also found some metallic watercolor online that I am enjoying very much and I wanted to share my find with you. So last year around this time I invested in a set of Finetec Mica Gold Watercolors. I love them and I have used them several times but no one seems to carry the little refill pans you need once the pans are empty and two of mine are nearly gone. The refills are made, but I haven't found them at all my usual places. This means that I don't use them as often as I want because it is not something that's going to be easy to replace and I am hoping I don't have to buy the full set again.
The other day, I ran across some Metallic Gold and Metallic Pearl White Watercolors in 8 ounce bottles. The price point was low (around $8.00), especially for the amount of product you get. You can mix it with a bit of water or use it straight from the bottle. This means I can use all the Gold Spatter I want on my projects, so be forewarned that I am sure it will be in use often around here.... now that I don't have to hoard it anymore. *Ü* The Brand is Sargent Art and I found mine on Amazon.
Back to my card. I splattered Gold Watercolor Paint on the navy cardstock, let that dry over night, then splattered it again with the White Watercolor Paint and let that dry all morning. Next I stamped the sentiment from the "Look for the Miracles" Stamp Set in Ranger Gold Tinsel Embossing Powder and heat set it. Next I got several of the Snowflakes from the Papertrey Ink "What the Doodle Snowflake" Stamp set and stamped them randomly around the rest of the background and heat embossed them using the same Gold Tinsel Embossing Powder. I did cut the panel with the largest Simon Says Stamp Stitched Rectangle Die and mounted it to a top folding card base made from Papertrey Ink Classic Kraft cardstock.
I made three cards in this style and then I switched it up by creating the same design on a Bazzill Whirlypop panel with Hero Arts White Embossing Powder and only Metallic White Pearl splatter. To stay with the slightly lighter colored theme, I heat embossed the snowflakes in WOW! Metallic Platinum Sparkle Embossing Powder and mounted that to a top folding card base made from Stamper's Select White Cardstock.
That is it for today! Thanks so much for stopping by to check out my blog. I really appreciate all of the kind and encouraging comments you leave. I have several other projects finished so I will be back very soon!
Friday, December 2, 2016
CAS on Sunday & Simon Says Stamp Wednesday Challenge
I've got a card today for the Simon Says Stamp Wednesday Challenge with an "Anything Goes" theme for this week as well as the CAS on Sunday Challenge with a "Christmas" theme.
Sometimes, in the everyday business of creating, we forget all of the tools we have at our disposal. I know that my embossing folders sit in a basket on the shelf in my closet (behind closed doors usually) and I tend to forget they are there. I need to remember to bring them out more often as it is a really quick way to add texture and dimension to a project without a lot of fuss or mess. Some of the newer embossing folders are 3D although I still use both kinds.
I'm making a few cards for a friend's family and I wanted to make a really special one for her parents' card. I know her mom loves purple and I wanted to use the Spellbinders Poinsettia Dies to make their card. I originally did some ink blending on watercolor paper using Seedless Preserves Distress Ink but when I went to add the angled band across the front, I didn't like it that the papers weren't the same, so I cut another poinsettia in this gorgeous thistle colored shimmering cardstock. This paper is some I got several years at a scrapbook store in Whitesboro, TX. I love this particular shade of purple so I've been hoarding what I have left but it was the perfect paper for the card I was creating today. And while I tried several different colors of card bases, I didn't really like any of them except the white. I needed to add some visual interest to the card base so I reached for my neglected embossing folders. This particular one is the We R Memory Keepers Next Level Gemstone Embossing Folder. I love the different facets or planes this folder creates on my plain white cardstock. These come two to a package with two different designs and are 6 x 6 so that you can run your card bases either direction which is always fantastic for me because I make so many top folding vertical cards.
I added shimmer mist to the green cardstock for the leaves so everything would be shimmery. The poinsettia dies cut four layers so you just have to adhere one on top of the other and finish off the center with the embellishment of your choosing. Pearls are always a classic choice for me. To give a little bit of dimension, I cut Thin 3D Foam Squares in half and put that just under the tips of the petals on the largest layer. I used Ranger Multi Medium Matte to adhere the center of the poinsettia to the card base. Additionally, I added one of the Thin 3D Foam Squares under each tip of the leaves and a drop of Multi Medium Matte at the center where I tucked the leaves in under the bloom.
Next I cut a piece of Gold Glitter Paper 1.5 inches wide and then another piece of the purple shimmer paper 1.25 inches wide so that just a narrow border of the gold glitter would show on each side of the band. I stamped the sentiment from the Concord & 9th Holy Night Stamp Set. I attached the band to the card on a diagonal using 1/4" ScorTape.
This turned out to be one of my favorite Christmas cards I've made this year. The detail of the white card base might not be very visible in this photograph, but it is definitely there when you see it in person. Thanks so much for stopping by today! I'll be back soon with another card.
Subscribe to:
Posts (Atom)