Showing posts with label Masculine Christmas. Show all posts

Sunday, December 3, 2017

Color Throwdown #471

Today's card is for The Color Throwdown Challenge #471 where we are to use Grey, Gold, Black, and White for this challenge. Normally, I wouldn't think to put these colors together but when I saw the inspiration photo it reminded me (for a still unknown reason) of this really unusual Christmas paper that I have which has gold foil on a grey background.  I thought it would work great for this challenge!  The Simon Says Stamp Wednesday Challenge is Anything Goes This Week and they are featuring Tim Holtz Products so I will also be linking up over there.  I keep thinking of a few more folks that I would like to send a holiday card to and that is what most of the challenges are right now, so it's working great for me to keep making them.


I always enjoy doing techniques but right now I am  focusing on making my cards using some of the beautiful foiled papers I have in my supplies.  I do love my gold and they make it so easy to pull a card together quickly for the most part.


For this card, I selected the foiled background paper and built the design around that for this challenge.  The color of the paper is a perfect match to Papertrey Ink Soft Stone Cardstock but I wanted more contrast that that without being too dark so I also cut a mat for that paper from SU! Smoky Slate Cardstock which is a medium grey color.  My card base is made from Papertrey Ink True Black Cardstock.

I wanted to give the impression that one of the trees was in front of (or closer) than the other so I used the Tim Holtz Woodland Dies and cut 4 layers from True Black Cardstock and glued them one on top of the other, then ran a 4.25 inch piece of gold cardstock through my Xyron 5" Creation Station Sticker Maker.  I die cut the sticky paper using the same Woodlands Dies.  This was a lot easier that trying to add dots of glue and is more affordable than using Stick-It adhesive sheets.  I personally don't have that much success with Stick It because I can't seem to get the release paper off.  I still have some Xyron Refills on hand and I'm thinking I might start using it more again.  I used to use it all the time for scrapbooking.  It definitely works better if you make your paper sticky and then die cut it.  Most of the time, Ranger Multi Medium Matte is okay, but it was easier to do it this way for so many layers and such intricate die cuts.  I used glue for the black ones but I was happy that I had done the Xyron for the gold layers.


The sentiment was stamped in Versamark onto a scrap of white cardstock and heat set with Simon Says Stamp Antique Gold Embossing Powder three times to make it really stand out and pop.  I adhered it with Thin 3D Foam Squares.

This is a clean and simple card with a lot of visual impact and the colors would make it a great choice for a masculine Christmas Card.  It is elegant without being too fussy.  This paper came from the DCWV Cranberry Christmas Mat Stack found at Michaels.  You can see it all online here but it is only available in stores at this time.

Thanks so much for stopping by.  The supplies I used are linked below for your convenience.

Simon Says Stamp Antique Gold Embossing Powder
Shop at:
SSS
Simon Says Stamp Maliblue
Shop at:
SSS
Simon Says Stamp Stitched Rectangles Dies
Shop at:
SSS
Scrapbook Adhesives Thin 3D Foam Squares
Shop at:
SSS
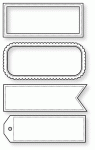
Papertrey Ink Keep it Simple Frames
Shop at:
PTI
Versamark Ink
Versamark Ink
Shop at:
PTI | SSS
Wagner Heat Tool
Wagner Heat Tool
Shop at:
SSS
Ranger Multi Medium Matte
Shop at:
SSS
Papertrey Ink True Black Cardstock
Shop at:
PTI
Tim Holtz Woodlands Thinlits
Shop at:
SSS

Wednesday, November 22, 2017

A Season of Cheer

Today's card is for my first time participating in the Concord & 9th Challenge, Where Creativity Meets,  that can be found here:  http://www.wherecreativitymeetsc9.com/.  I don't have very many Concord & 9th products so I normally don't even look at the challenges, but I had ordered this set of dies last week and they came yesterday, so I wanted to make a card to send to my brother, Eric.

One of the things I really like about these dies is that they aren't too feminine but they also aren't over the top masculine so they will work for either gender.  I was actually working on a project kind of late last night for a blog hop that is coming up this weekend and that got totally off track as I was working because I thought of what a great card this would make for my brother so I just rolled with it and this is what came out.

I started with a 7 x 5 top folding horizontal card base made from Vintage Cream Cardstock.  Next, I pulled out this sheet of fancy wood grain designer paper that I found last time we went to Dallas. It's cream colored and the wood grain is done in gold foil. It says "I'm Classy" without being overly fussy.  I die cut that panel with the Spellbinders 5 x 7 Matting Basics A in the largest size and also embossed with the tan Spellbinders Embossing Mat it to keep that frame around the edge. I actually didn't realize the details this added to my cardstock for a while but now I use the embossing mat all the time. I adhered it with my Kokuyo Long Dot Runner Adhesive. Next, I added a strip of plaid paper across the upper part of the card that has a little bit of gold foil in the design and then die cut all the dies from the Season of Cheer Die Set using Metallic Gold Cardstock from Gina K Designs. I adhered those pieces with Ranger Multi Medium Matte. This gold is a different shade than any other I have and I would say it is more of an Antique Gold color, than actual gold.  It has a deep, rich, warm tone and I think it is perfect for this masculine looking card.  So far, all the dies from that set are still attached to each other and I don't think I will take them apart but you never know.

I love the little banners that are part of the set because you can leave the letters in them or take them out, whichever way you like.  You could even cut them in other colors and stick them back in the banner.  I kept mine in place by running a piece of 1/8th inch score tape on the back side to keep them from falling out. Using the same cardstock, I die cut both of the pine branches from Tim Holtz Holiday Greens Thinlits Die Set a couple of times and then arranged them on my card front and attached them with more Multi Medium.  For the finishing touch, I added some Red Berries to the pine branches.


Thanks so much for coming by today and spending a few minutes with me.  I've linked all of the supplies for you below.  In case you didn't realize it before now, I did no stamping on this card.  I simply die cut all of the pieces using my Cuttlebug and assembled my card.  Since I added the berries to the card, I will use a padded mailer to send this card.  I really like the look of the Season of Cheer die and I plan to use it for some of my other cards as well. I'll also be entering this card at the Case This Sketch Challenge Blog.

Kokuyo Long Dot Runner Adhesive
Shop at:
SSS
Concord & 9th Season of Cheer Dies
Shop at:
SSS | C+9
Papertrey Ink Perfect Match Vintage Cream Cardstock
Shop at:
PTI
Gina K Designs Pure Luxury Gold Metallic Cardstock
Shop at:
GKD
Tim Holtz Holiday Greens Thinlits
Shop at:
SSS
Spellbinders Matting Basics Set A
Shop at:
SSS
Nuvo Crystal Drops - Red Berry
Shop at:
SSS
Cuttlebug Die Cutting Machine
Shop at:
SSS
Ranger Multi Medium Matte
Shop at:
SSS
Spellbinders Embossing Mat
Shop at:
SSS

Saturday, December 3, 2016

Simon Says Stamp Flickr Challenge #59

I have been enjoying playing in the Simon Says Stamp Flickr Challenges since I discovered it earlier this summer.  Heidi and the crew at Simon Says Stamp always have a gift certificate for each of the challenges which run bi-weekly.  I won one of them a few weeks ago.  There's also no limit as to how many times I can enter each challenge as long as I am meeting the other qualifications of a new project and using some of the Simon Says Stamp branded Stamps or Dies. So it's kind of a nice change of pace.  The theme this week is for Christmas/Holiday and heaven knows I've been doing plenty of those, but I have a few more for friends to do.  My family cards have all been done and mailed out, but I still have several friends I want to make one for.  

Today, I needed to make some cards for the men in a friend's life that she wants to give them for Christmas.  For this first group of cards, I used the Simon Says Stamp "Look For the Miracles" Stamp Set.  I know it isn't a Christmas set but, after all, Christmas is all about miracles so I think this sentiment works well for this style.

I started by splattering some gold metallic watercolor and some white pearl watercolor all over a half sheet length of  Night of Navy Cardstock (my last sheet by tapping my brush onto the handle of another one to make the splatter.  I do this in a shallow box lid to contain the mess and set it aside to dry overnight usually.  The size of your brush determines the size of your spatter.  My most commonly used brush is my #8 Silver Black Velvet Brush and my #4 Silver Black Velvet Brush.

I also found some metallic watercolor online that I am enjoying very much and I wanted to share my find with you.  So last year around this time I invested in a set of Finetec Mica Gold Watercolors.  I love them and I have used them several times but no one seems to carry the little refill pans you need once the pans are empty and two of mine are nearly gone.  The refills are made, but I haven't found them at all my usual places. This means that I don't use them as often as I want because it is not something that's going to be easy to replace and I am hoping I don't have to buy the full set again.

The other day, I ran across some Metallic Gold and Metallic Pearl White Watercolors in 8 ounce bottles. The price point was low (around $8.00), especially for the amount of product you get.  You can mix it with a bit of water or use it straight from the bottle. This means I can use all the Gold Spatter I want on my projects, so be forewarned that I am sure it will be in use often around here.... now that I don't have to hoard it anymore. *Ü* The Brand is Sargent Art and I found mine on Amazon.

Back to my card.  I splattered Gold Watercolor Paint on the navy cardstock, let that dry over night, then splattered it again with the White Watercolor Paint and let that dry all morning.  Next I stamped the sentiment from the "Look for the Miracles" Stamp Set in Ranger Gold Tinsel Embossing Powder and heat set it. Next I got several of the Snowflakes from the Papertrey Ink "What the Doodle Snowflake" Stamp set and stamped them randomly around the rest of the background and heat embossed them using the same Gold Tinsel Embossing Powder.  I did cut the panel with the largest Simon Says Stamp Stitched Rectangle Die and mounted it to a top folding card base made from Papertrey Ink Classic Kraft cardstock.


I made three cards in this style and then I switched it up by creating the same design on a Bazzill Whirlypop panel with Hero Arts White Embossing Powder and only Metallic White Pearl splatter. To stay with the slightly lighter colored theme, I heat embossed the snowflakes in WOW! Metallic Platinum Sparkle Embossing Powder and mounted that to a top folding card base made from Stamper's Select White Cardstock.  


That is it for today!  Thanks so much for stopping by to check out my blog.  I really appreciate all of the kind and encouraging comments you leave.  I have several other projects finished so I will be back very soon!