Showing posts with label The Challenge. Show all posts

Thursday, July 27, 2017

The Challenge #93

Hello and Happy Thursday!  It's time for a new challenge at The Challenge over on the Always Playing With Paper Blog! This week is Challenge #93 and it is a Keyword Challenge which means you can use one or more of the words from the graphic to incorporate into your card.

For my card this week I kept things simple for the most part.  I started by stamping the Simon Says Stamp Rebecca Lace Background Stamp onto Watercolor Cardstock in Versamark and heat embossing it in Simon Says Stamp Antique Gold Embossing Powder.  I prepped my surface beforehand very well by brushing baby powder all over the card front.  Because this stamp is very intricate, this step is more important than usual.  In fact, I even messed mine up a little bit but it's probably not noticeable to the average person.  I use a Wagner Heat Tool. I previously used a heat tool from Darice but the Wagner Heat Tool gets much hotter, much faster and that means less warping of my paper if I'm not having to hold it on my paper as long.  It took me a bit of time to get used to it and not scorch my paper if that tells you how hot it gets. *Ü* The Wagner Heat Tool does not have the protective cap on it so be careful if you get one.

The newest release of Distress Oxide Inks came yesterday and I had spent some time yesterday morning after the dentist and before my hair appointment doing several of these heat embossed backgrounds so that I would hopefully have time to play with the new inks. I only had time to play with this one color so far as my last few weeks have been very busy.  Knowing that Seedless Preserves is my favorite color in Distress Inks, you know I had to try out the Seedless Preserves in Distress Oxide first!  The Distress Oxide Ink Pads are available in individual pads or your can buy the bundle. You can lighten or intensify the ink color by how much or how little ink and then again by how much or little water you add into the mix.  For this card, I barely added any water because I wanted to retain the true purple color.  If I wanted to have a chalk or suede look, I would have used more water. The water causes the oxidation in this ink formulation. I'm not into the random drops, splatters or mists of water to "Bleach" out or distress the color so I did not do that.  I like it once in a while but not all the time. It's got to be right for the project.  I did use a touch of Tsukineko Sheer Sparkle Shimmer Mist after the ink was dry which is a water based product.  But I kept the mist high above so it would not leave drops.

Next I used the WPLUS9 Gift Card Layers Die to cut the background panel and the Concord & 9th Floral & Flutter Dies to cut a single butterfly for gold floiled cardstock.  I heat embossed the "Happy Birthday" sentiment from the Papertrey Botanical Blocks Stamp Set onto a banner cut from Papertrey Ink Tag Sale: Quilted dies.  I try to make sure I always have banners cut in white, black and watercolor cardstock so I don't have to stop in the middle of a project to cut one out. It's easier to cut several at a time than to have to dig it out each time I want to use it.  I assembled everything to a top folding white card base made from Papertrey Ink's Stamper's Select White Cardstock.  All of Papertrey's Card Stock is 110 lb and super smooth.  It's my favorite.


You probably didn't notice it at first but the background design is done in a circle incorporating a 3rd keyword into my card.  I love using background stamps to make my card front any color I want.  I'm going to be testing this particular one out again soon for a niece's wedding coming next month.  Be sure to stop over and see all of the Design Team's Inspiration for you at the blog.

Lesley Croghan (Challenge Creator)

Don't forget to check back each week on Thursday to see a new challenge posted. We hope you'll find time to play along.  

Thursday, July 20, 2017

The Challenge #92

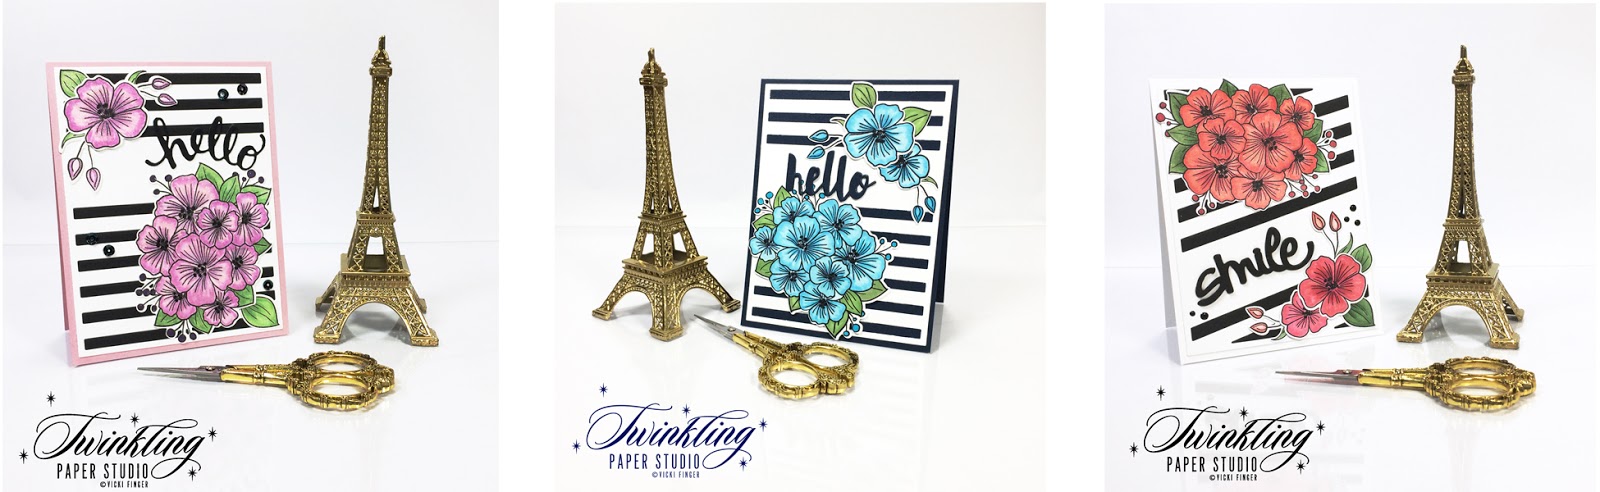
It's time for a new challenge at Always Playing With Paper's The Challenge! For my card, I chose Black and White with Pink which is a favorite color combination.  The delicate rose pinks with the bold graphics of the black and white background is a bit unexpected.

I have a tendency to pull stamps and dies out for any ideas I have for upcoming projects and challenges. They might be stamps that are new or just some that haven't been used for a while. it seems like I always have several on my desk. I've used black and white quite a bit in the last few weeks so I will post some of the other projects I've created at the bottom of this post so that you can get ideas for any projects you might want to do. I know that for me, I get inspired each time I see how someone else used a particular set. For this card, I used the Simon Says Stamp Bouquet of Thanks Bundle from the One of a Kind Release.


I made a top folding card base made from Stamper's Select White  Next, I cut the My Favorite Things Diagonal Stripe Cover Up Die. I cut one from True Black and one from Stamper's Select White.  I put each of the cover ups face down on my work surface and lay the opposite color stripes into place and tape it with a bit of micro-pore tape on the back side so that when I flip it over for my card, it all stays in place. When you finish both of the ones you've cut, you have 2 front panels ready to go. I used all Papertrey Ink Cardstock with the exception of Audrey Blue which came from Simon Says Stamp. The colored card stocks I used are linked and listed below.

All of the colored images were done with Copic Markers except the heart was just cut from Black, White and Autumn Rose Cardstock.  Today's card used three shades of "pink" in the RV Color Family, RV63, RV52 and RV000.  I stamped with Simon Says Stamp Intense Black Ink on X-press It Copic Blending Card which I love. I'm finding it to be much less work to get a blend when I use this specialty paper to do my coloring on.  It is the silkiest paper I have ever used by a lot and takes much less effort than my #110 lb cardstock. I was a bit worried about how it would stand up to die cutting, but it has not been an issue at all.  I cut each sheet of 8.5 x 11 inch paper into 4 pieces and then stamp as needed. I used the companion die for the Bouquet of Thanks to die cut it. To finish off my card today, I used Nuvo Crystal Drops in Ebony Black Gloss and Glossy Accents over the die cut word.  For some of the other cards below, I used Liquid Pearls, Nuvo Crystal Drops or some even sequins. I have some black iridescent sequins that are a favorite. I'm not sure where I got them as I have had them for a long time. It's always nice to have a few choices. *Ü*


Card 1: Stamper's Select White, True Black and Lavender Moon with the Avery Elle Floral Bouquet Stamps and Dies.
Card 2: Dark Indigo and Stamper's Select White with the Avery Elle Floral Bouquet Stamps and Dies.
Card 3: True Black and Stamper's Select White with the Avery Elle Floral Bouquet Stamps and Dies.

Card 6: True Black, Stamper's Select White and Autumn Rose with the Caprice Heart.

The die cut greetings are from several sources; Hero Arts for the first Hello, Simon Says Stamp for the Painted Hello and Miss You, Little Yellow Bicycle for the Smile, Friend from Mama Elephant, and Thanks from Simon Says Stamp.

I hope these cards will give you lots of ideas for how you can incorporate another color into your black and white palette. Create a new project and link up over at The Challenge to show us your card.  You can also check out the other design team members here:


Have a great rest of the week and I hope you'll come back soon.  This is always a popular theme so there will be lots of inspiration to see in the next week!

Thursday, July 13, 2017

The Challenge #91

This week at The Challenge we have a sketch up for you! I have only recently been doing Sketch Challenges but I am enjoying using them as my starting place for my cards.  I hope I never get stuck in a rut but sketches are a great way to be inspired by a fresh approach to card making.  The Challenge on the Always Playing With Paper Blog has a sketch challenge about once a month.  This allows me to use the same products in a different way than I might have previously. Let's face it, stamps and dies are a significant investment of both time and money, so I want to stretch mine as far as I can.  
I wanted to use a combination of Green and Navy for my card so I started by water coloring the panel using Lucky Clover Distress Ink. Using a No. 8 Round Silver Black Velvet Brush, I wet the panel in a circular pattern and then added a heavy concentration of color and let it move with the water.  I put a few drops of reinker on an acrylic block to get this heavy concentration.  I left it alone (as much as is humanly possible for me) so I could get those hard, fringed edges. Once the watercolor was dry I hit it with some Tattered Angels Iridescent Gold Shimmer Mist and let it dry completely before die cutting the panel with the Gift Card Layers Die from WPLUS9.  The largest die in this set cuts a full A2 sized stitched rectangle panel.  


I cut the widest and 2nd widest strips from the My Favorite Things Horizontal Stitched Strips Die out of Dark Indigo and Gold as well as the "Celebrate" die from Gold Foiled Cardstock. Next I stamped the "You Did It" phrase from the Birthday Cheer Stamp Set onto the Dark Indigo strip using Versamark and heat set it with Antique Gold Embossing Powder.  I adhered the Dark Indigo layer to the gold layer using tape runner and the word die using Ranger Multi Medium Matte. A strip of fun foam was placed beneath the horizontal strip to attach it to the card. Using the banner from the Tag Sale: Quilted Die, I folded it so that two ends would show underneath the horizontal strips as in the sketch. I assembled it all to an A2 Top Folding Card Base made from Stamper's Select White Cardstock.  I added a few Pretty Pink Posh Metallic Gold 6mm Sequins to add the finishing touch.

Be sure to stop over at the Always Playing With Paper Blog and see all of the projects from the design team.  As always, there is some fantastic inspiration among my teammates.  We hope you'll be able to join is this week!

Thursday, June 22, 2017

The Challenge #88

Hello Everyone!  It's time for a new challenge at The Challenge on the Always Playing With Paper Blog and we have a fun one this week. Lesley created several keywords words for us to choose from and we can use one or a combination of several.  I used a few for my card.

I recently got a couple of stamp sets with the dies from The Ton. I have to say, Effie sure knows how to do a gorgeous bouquet of flowers. I love Anemones and how many colors they come in.  The particular stamp set I used for this card is Anemone Bouquet.  The flowers are all arranged for you and the vase is a separate stamp. This was perfect for what I had in mind because I wanted to stamp my vase onto Vellum and color on the backside to make it seem as if there is water in the vase. This worked out perfectly.  I stamped the bouquet and the vase in in Versamark and heat set it with Simon Says Stamp Antique Gold Embossing Powder. This is my most used Embossing Powder and I keep a large amount of it in a container next to my heat tool.


I colored everything using a water brush and Distress Markers in Picked Raspberry, Seedless Preserves and Mowed Lawn.  For the back of the vase, I applied color directly from my Hawaiian Shores Ink Cube.  I actually liked this bouquet better before I put Wink of Stella on the flowers but that will just be a lesson for next time.  Don't get me wrong, I love the shimmer but I guess I like it better diluted a little bit.  I have one Wink of Stella Clear Glitter Brush Pen that I added water to when there was not much left in there and I keep adding a little bit of shimmer from another pen's barrel with a lot of water.  Otherwise, it is sooooo shimmery that you can't see the detail of the watercolor because the light is bouncing off of it.  I hadn't realized before just how much shimmer they put in that glitter brush pen until today.  I normally use a shimmer spritz over the whole thing but today I didn't.

When the watercolor was dry,  I die cut the bouquet and the vase with the coordinating dies and mounted it to a panel of Aqua Mist Cardstock cut with a Simon Says Stamp Stitched Rectangle which was then mounted to a top folding card base made from Stamper's Select White using Kokuyo Adhesive.  This was my favorite adhesive for many years when I was scrapbooking but I had been unable to find it for several years.  I was sparingly using my last refill of it when Jennifer McGuire found it again and Simon Says Stamp started carrying it as well as Amazon.  The cool thing is that they now have an extra long roll.  In fact, they have an extra long dispenser, a regular and a mini.  I hope I never have to go back to using my Pink ATG Gun.  It's here if I want it, but only as a last resort.  *Ü*

Thank you so much for stopping by today!  Be sure to stop over to all the stops and see the Design Team's Projects for inspiration and then be sure to add your project to the link up.  For products from The Ton, they are only available at The Ton Online Store in the US.  If you live in another country, contact them to find your nearest retailer.

Thursday, June 15, 2017

The Challenge #87 - Colors

Today I have a fun card for The Challenge!  This is Challenge #87 and uses fun, bright colors. You can always find the current challenge by going to Lesley's Blog, Always Playing With Paper.

It's no secret that I love butterflies of all kinds and this Papillon Bundle from The Stamp Market is a favorite because of the details you can add.  To stamp the butterflies, I did the largest layer of the butterfly in Brilliance Pearlescent Coral Pigment Ink for the base layer and let that dry for just a couple of minutes before I went on to the detail stamping.  So that there would be a deep enough contrast in color from the coral, I used Papertrey Ink's Raspberry Fizz Ink for the wing details. Because the color was stamped on top of the Pearlescent Coral, that shimmer shows through on the die ink portions as well. Lastly, I stamped the butterfly body with Papertrey Ink's True Black.  To do this, I use my Mini Misti with a die cut negative to hold the butterfly in place.  It makes it super simple.  I've also been know to put a piece of Post-It tape on the back side which aids in holding the die cut in place on very intricate and detailed dies.  It's really not necessary on this particular die cut.

For the striped panel, I used the MFT Striped Sentiment Cover Up and cut one from each cardstock color.  The cardstock colors I used here are Papertrey Ink's Stamper's Select White, Vintage Jadeite, Hibiscus Burst and Berry Sorbet. By alternating the colors on the inlay, I was able to get three additional striped backgrounds for future use.  To inlay the stripes, I laid the cardstock face down, inserted the stripes, and then used a bit of masking tape on the back side to hold them in place.

I stamped the Label Sentiment (Altenew's Label Love) in Versafine Onyx Black and heat embossed it with Simon Says Stamp Clear Embossing Powder.  The Waffle Flower "Awesome" was die cut from a scrap of Black Chalkboard Cardstock that I got a few years back from Stampin' Up!


The Design Team has lots of examples to inspire you to create your own project and play along! Be sure to check it out over at Lesley's blog, Always Playing With Paper.  Thanks for stopping by today!  I appreciate you taking a few minutes of your time to check out my card!

Here are the other designers you'll want to check out:


Thursday, June 1, 2017

The Challenge #85

Hello everyone!  Like you all, I am so happy that Lesley is back to running The Challenge Blog since having her sweet little girl! I joined The Challenge last fall as a designer but not too long after that Lesley had to take a break due to complications with her pregnancy.  Now, The Challenge is back with a new Challenge each week on Thursday Morning.  Our first challenge back is an inspiration challenge and we can't wait to see what you do with it!

I always struggle a bit with anything rainbow and this card was no exception until I found a way to make it my own.  I started with a panel of Gold and White Linen Cardstock from a Papertrey Ink assortment that I picked up in their January 2017 sale. I always try to buy a few gold and white designer papers because I can customize the white to be any color I want using a variety of methods, from ink blending to Copic Markers. Getting a perfect match is no problem at all so if I like the design, I buy it knowing I can change it to suit my needs. This is what I did here using Copic Markers in the Red Violet to Violet Shades starting with R55, R25, RV09, V05, V06 and V09. Simon Says Stamp has most, if not all, of the sketch markers available individually.  I've had most of my markers for many years but have purchased a few there to fill in my collection.  I die cut the three balloons from Papertrey Ink's Balloon Bash Dies using another small patterned white and gold paper, then colored them using RV25, RV09 and V09.  I went over all of the stripes with Wink of Stella Clear Shimmer Pen. There's a few Gold and White Papers that don't take alteration well, so I always do a little test area before I go all in on a whole sheet of paper. Most of them can be changed.

For the Balloon strings I used some gold wired cording I have leftover from Christmas.  You can also use Gold Thread and Gold Embroidery Floss. I've used both of those options previously with success.  I stamped the Altenew Label Love "Happy Birthday" sentiment 3 different ways, then heat set it to see which one I wanted to use. I used Versamark Ink with Ranger Black Sparkle Embossing Powder, Black Versafine Ink with Simon Says Stamp Clear Embossing Powder and Versamark with Fine Detail Black Embossing Powder.  In the end, I chose the one embossed with Sparkle Black.  I don't normally use any type of black embossing powder because it is hard to get cleanly embossed image, but with all the gold on this card, the Black Sparkle just looked the best. I know you can't really see the sparkle in the photo, but I promise it's there.


I die cut the rainbow panel with the WPLUS9 Gift Card Layers Die and attached it to a top folding card base made from Stamper's Select White Cardstock.  Next I adhered the balloons using some Thin 3D Foam Squares.  Pulling the strings as straight as I could get them, I put a bit of Ranger Multi Medium Matte behind the knot and stacked a few acrylic blocks on top to keep it from moving while the glue dried. The end result is a clean and simple design with a feminine feel. Please join us at The Challenge and see all of the great projects from Lesley and the Design Team.

Saturday, October 15, 2016

The Challenge #82

Hello!  This week is my first as a designer over at the Always Playing With Paper Blog and The Challenge #82.  With Fall settling in here in the southern part of the United States, the temperatures are cooler but the inspiration image made me think of late summer naps at a little beach cottage. Can't you just imagine one of these over-sized Wood Palette chairs covered with those pillows for a great place to take a nap or even to read a book?  I keep telling my husband that when he retires in a few more years that he is going to have to take up some crafty furniture-making kinds of hobbies.  I have a crib at my daughter's house to make into a bench and we have three enormous pergolas over our back patio and it would be awesome to have one of these jumbo chairs out there!

I really love the designs on the pillows with their "seashore" theme but I don't have any stamps or dies resembling that so I used some flourishes for my decor.

Starting with a piece of Spring Rain Cardstock, I dry embossed the front of the card base with a SU! Wood Grain Embossing Folder.  Next I used a 2 inch square from the My Favorite Things Stitched Square Stax Dies to cut out the four squares representing the pillows in Papertrey Ink's Hawaiian Shores & Vintage Jadeite along with Simon Says Stamp's Surf Blue and Bazzill Whirlypop Card Shoppe Cardstock (also from Simon's). I cut 3 of the My Favorite Things Leaf Filled Flourishes from Stamper's Select White to use for the decorative trim on the pillows. This flourish is no longer available but there are some similar ones available here. I glued those pieces onto the squares using Ranger Multi Medium Matte and then snipped off the excess from the back side of the squares.

The "Dream" sentiment is from Little Yellow Bicycle and was cut from Stampers Select White cardstock and inked up with Simon Says Stamp Island Blue Ink. The banner is from the Paper Clippings: Birthday Details Dies and is one I keep out all of the time.


I was really wishing I had gotten the Papertrey Ink What The Doodle: Waves stamp set so I could use it on these pillows, but I didn't so I had to try to convey the same feeling using something I already had.  Thanks so much for stopping by today and leaving a kind or encouraging comment for me. Each one means so much.  I look forward to seeing your interpretations of the inspiration over at The Challenge #82.

Wednesday, March 16, 2016

Create Along With Us - March 2016


For one of the cards I created today, I was inspired by a few sources. The first one is Kay Miller from the Papertrey Ink Design Team featuring new March Release items. She made this gorgeous card and the colors were so appealing that I just had to include a bright green and blue on my card.  Once I saw The Challenge #64's Color Scheme over at Always Playing With Paper, I went with it.

I started by stamping the butterfly image  onto Canson Bristol Watercolor Paper in Versamark and heat embossing it with Ranger Gold Tinsel Embossing Powder. This Pen Patterned Butterfly is from Stampendous and it came with a set of masks for each of the three butterfly images in this set.  There are also coordinating dies found here.  After I did the heat embossing, I placed the mask over the image and created the soft blue background using a Mini Ink Blending Tool with Simon Says Stamp Maliblue Ink trying to keep the most intensity near the immediate area surrounding the butterfly.  Once I had that completed, I colored in the Butterfly using my Zig Clean Color Real Brush Pens in May Green, Persian Blue, Cobalt Blue and Deep Blue (Navy) for the body and the spots on the wings.  Let me add here, that the Japanese seem to have a couple of their colors mixed up from what I am used to. What they call Cobalt is what I would call Persian Blue and what they call Persian Blue, I would call Cobalt.  There's a few other colors that don't seem the same as what I'm used to so I'm glad I have all my caps swatched.

Once the butterfly was dry, I used my powder tool on the upper right side to make sure there was no moisture left and stamped and heat set the greeting which is part of the Tulip Time Stamp Set from Papertrey Ink.  I just love that font!


Once that was all dry, I still felt it was missing something so putting a drop of reinker with a mist of water, I picked up some of that and created the navy spatter.  I let that dry and then added some spatter using Martha Stewart's Liquid Gilding in Gold and let that dry.  It dries quickly but has some pretty significant fumes and should only be used outdoors.  And it's best to use a throw away kind of paint brush unless you want to have to get a cleaner from your hardware store. Just do whichever one works for you.  It's a very pretty touch.  I could have used my Finetec Mica Gold Watercolors, but I wanted to try the Liquid Gilding.

When everything was dry, I cut a top folding card base from Papertrey Ink Vintage Jadeite Cardstock and a mat from Audrey Blue Cardstock from Simon Says Stamp which has turned out to be the exact same color as Hawaiian Shores from Papertrey.  I assembled it all together and got inspired to make a second card in the same design but different colors.

For this one I used the Zig Clean Color Real Brush Pens in Light Carmine, Deep Violet, Purple and Light Violet.  Purple is more along the lines of what I would call Magenta and is one of only 4 colors I added to my set of 36 pens.  I also added Persian Green, Light Sugared Almond Pink, and Emerald Green.  I added this watercolor panel to a top folding note card made from Papertrey Ink Berry Sorbet Cardstock which seems to be my current favorite color.  Both of the cards are bright and springy and will make someones day a bit brighter.


I'll be entering the top card into the Always Playing With Paper Challenge #64 as well as the Create Along With Us March 2016 Papertrey Ink Challenge. There are lots of challenges this week and next week has a challenge and blog hop for Papertrey Ink so I'll be back soon with my next project.  I hope everyone is getting to enjoy some gorgeous Spring weather today!