Wednesday, March 28, 2018

Simon Says Stamp Wednesday Challenge featuring Stampendous


Hello!  I'm back with my post for this week's Designer in the Spotlight at Simon Says Stamp Wednesday Challenge Blog.  This week our theme is "Anything Goes" and we are featuring products from Stampendous. You don't have to use Stampendous products to enter the challenge, but if you have some, we would love to see them used. This is my last week in the Designer Spotlight and it has been a treat to get to create alongside some of my favorite ladies! Thank you so much for having me along this month. You've left such sweet comments for me here on my blog and I really appreciate it.   


Simon Says Stamp generously provides a $50.00 Gift Voucher each week for each of their blog challenges. Winners are selected from all of the entries by Random Draw each week.  Thank you, Heidi, for providing that each week.

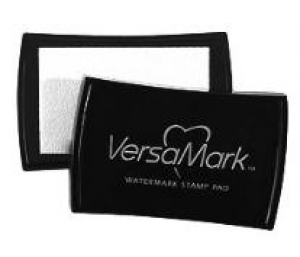
For my card, I started with a piece of Arches Hot Pressed Watercolor Paper and heat embossed my images using Versamark and Simon Says Stamp Antique Gold Embossing Powder.  When I buy the pads of watercolor paper, I take them to Kinkos and have them cut into 4.5 x 6 inch panels so they are a little bit larger than the size I need when making a card. I like to die cut my background panels for that super crisp and clean cut so the smaller size makes it easy.

Whenever you do heat embossing of your outline images, this creates a channel for the water to flow in. Easy-peasy!  I worked in a Jewelry Store many years ago where we sold lots of loose diamonds and created custom mountings for engagement, wedding and dinner style rings.  Many of the smaller stones were set into a channel to keep them contained and water works the same way.  I'm just creating a little gold channel when I heat emboss.  You can use any color of embossing powder that you like.  I just happen to like this one the most.  I go through about 6 jars of it a year. I do a lot of heat embossing and the most important thing is to use some kind of a powder tool first!

For all of my watercoloring today, I wanted something easy, so I smooshed a bit of Distress Ink onto an acrylic block and picked it up with a water brush to color my images.  For the Lilacs, I used Seedless preserves and the darker blooms just have additional layers of color on them and the same is true for the leaves and butterfly.  The leaves were done with Mowed Lawn Distress Ink and the butterfly with Peacock Feathers Ink.  This is an easy way to color without the stress of trying to use "real" watercolors in the correct technical manner.

Once all of the painting was finished and dry, I went back in with my Tonic Aqua Shimmer Pen and gave some shimmer to all of the images, especially the butterfly and let it dry again. Once it was dry, I die cut all of the images with the coordinating dies.  I cut a stitched rectangle using the WPLUS9 Gift Card Layers Stitched Rectangle Die to cut a white background panel and did a bit of ink blending with some Tumbled Glass Distress Ink.  I used a combination of Thin 3D Foam Squares, Scotch 3D Foam Tape and Ranger Multi Medium Matte to adhere the elements to the background panel and I put a piece of fun foam behind that panel to give a little bit more dimension.  I really considered adding for sequins or confetti but in the end, I liked the simpler image much better.


For the sentiment, I used the Simon Says Stamp "oh hello there" die to die cut the sentiment, but just used the word "hello".  I love the handwriting of this die (Kristina Werner's I'm sure) and it's one that I use often to send cards to friends.

Thank you so much for stopping by today to see my card!  I appreciate all of the kind and encouraging comments.  I've linked the supplies I've used below for your convenience (Affiliate Links may be used at no additional cost to you).


Arches Hot Pressed Watercolor Paper 9 x 12 #140
Shop at:
SSS
Cuttlebug Die Cutting Machine
Shop at:
SSS
Distress Ink Mini Cube - Mowed Lawn
Shop at:
SSS
Distress Ink Mini Cube - Peacock Feathers
Shop at:
SSS
Distress Ink Mini Cube - Seedless Preserves
Shop at:
SSS
Kokuyo Long Dot Runner Adhesive Refill
Shop at:
SSS
MISTI Stamping Tool
MISTI Stamping Tool
Shop at:
SSS
Ranger Multi Medium Matte
Shop at:
SSS
Scotch 3M Foam Tape
Scotch 3M Foam Tape
Shop at:
SSS
Scrapbook Adhesives Thin 3D Foam Squares
Shop at:
SSS
SSS Antique Gold Embossing Powder
Shop at:
SSS
Stampendous Lilac Die Cut Set
Shop at:
SSS
Stampendous Lilac Stamp Set with Stencil
Shop at:
SSS
Teflon Bone Folder
Teflon Bone Folder
Shop at:
SSS
Tonic 6 Inch Personal Trimmer
Shop at:
SSS
Tonic Aqua Shimmer Pen
Shop at:
SSS
Versamark Ink
Versamark Ink
Shop at:
SSS
Wagner Heat Tool
Wagner Heat Tool
Shop at:
SSS
WPLUS9 Gift Card Layers Designer Dies
Shop at:
SSS

Sunday, March 25, 2018

Papertrey Ink March 2018 Blog Hop

Hello everyone!  This is my second post for the day so if you are looking for the Keeping Christmas Inspiration Hop, keep scrolling down.

We are officially in the season of Spring, thank heavens!  I don't remember ever wanting Spring to come as much as I have this year.  The cold really bothered me this year although normally, I just look at Winter as the only way to get to Spring; a necessary evil so to speak.  This past Winter was just brutal as far as temperatures for living as far south as we do.  Thank goodness we don't live in the North!

The image on the left is the inspiration for the March 2018 Papertrey Ink Blog Hop. I love this photo with all of the Tulips, Daffodils, and Narcissus (the ones with the small trumpets are Narcissus). They are so pretty and I can almost conjure their smell from memory.  I love that they are sitting in a bird's nest because for me, that's another symbol of Spring.  I love it when I hear those first chirps from baby birds each year because it signals the arrival of the season. When I was trying to decide which direction I would go for the blog hop today, the colors were part of the inspiration for my card.

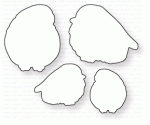
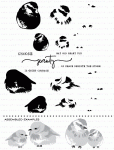
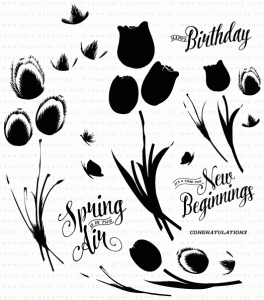
As is often my habit, I recently sat down with a new to me (and also fairly recently released) stamp set called Brushed Birds.  I cut several of each die from Stamper's Select White Cardstock so that I could sit and see how it stamps.  Anytime I get a new layering set, this is what I like to do.  It takes a few rounds of practice usually to see how all of the layers line up to create the image.  I keep these already stamped items in the stamp pocket with the stamp set after I do my trial run which makes it pretty handy if I need to pull a card together quickly.

Those are what I pulled out today to put my card together.  When I initially stamped them I was trying a few different sponging techniques by stamping in one color and sponging on a bit of another when I stamped the base layer.  I thought they turned out very well, so I kept them for use when I was finished with all of the other projects that were due before now.  So most of the stamping was already complete when I started on this card.

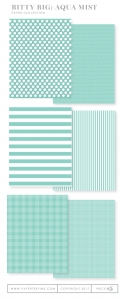
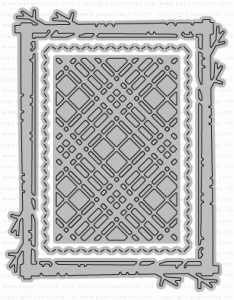
I also had a piece of Aqua Mist Bitty Big Patterned Paper sitting on my desk from another project.  I ended up not using it for that project, but it was still laying there when I pulled these sweet birds out of the stamp pocket and since it was one of the colors I used, I knew it would be perfect to go with my project today.  That made quick work out of the first two portions of pulling my card together.  I don't have a birds nest stamp or die, but I figured I could use something like a tree to place my birds in.  I pulled out my Mix & Mat: Plaid die cut which cuts this sweet birch tree kind of frame.  You can use all three layers together which is what I did here.  The nice thing about all of the mix and mat frames is that you can switch all the parts around with any other frame in the Mix & Mat series.  I used it today as it came.  I had already snipped the die apart on the interior part so I just had to hold it with a bit of washi tape to run it through my machine.  This die is pretty intricate and I haven't had much luck getting a clean cut through my regular die cutting machine, so I didn't even try it today - I just ran it through my Gemini and got a perfectly clean cut the first time through.  YAY!


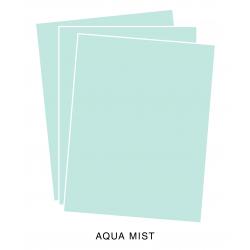
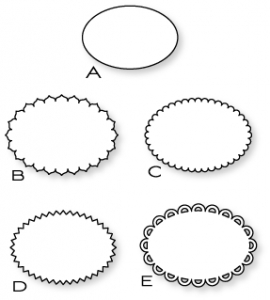
I cut the piece of Bitty Big Paper with my largest stitched rectangle die and adhered that to my card base.  Next I took some Scotch 3M Foam tape and cut it length wise to make a narrower strip and put that on the back side of the frame, then placed it on the card front.  I used an oval from Limitless Layers: Ovals and a piece of Aqua Mist Cardstock to stamp the sentiment using a greeting found in Tulip Time. The birds were adhered using various thicknesses of foam squares and the sentiment was also adhered with thin foam tape and just a bit of it was tucked up under the baby bird.  Then I adhered one last little baby bird in the bottom left corner of the card.

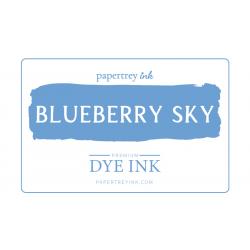
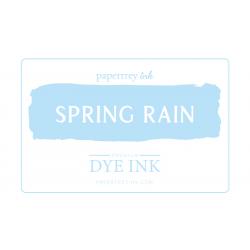
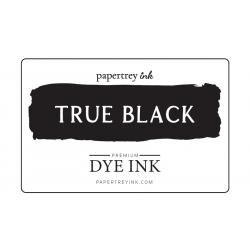
My birds were all stamped with Aqua Mist for the base layer, a bit of Spring Rain was sponged onto the same stamp with a Mini Round Ink Blending Tool and stamped again.  The detail layer was stamped in Blueberry Sky and the eyes and feet were stamped using True Black.

As you might have already noticed in this picture, I couldn't leave well enough alone and decided to add some Tonic Nuvo Crystal Drops in Navy Blue to my finished card.  I wanted something else to help tie in the Blueberry Sky Ink I had used for the markings on the birds.

Thank you so much for stopping by today!  Be sure to stop over at the Papertrey Ink Blog to see all of the beautiful entries at the link up for the Blog Hop.  The supplies I've used are linked Below for your convenience (Affiliate Links may be used at no additional cost to you).

Gemini Full Size Die Cutting Machine
Shop at:
SSS
Kokuyo Long Dot Runner Adhesive
Shop at:
SSS
PTI Aqua Mist Bitty Big Prints
Shop at:
PTI
PTI Aqua Mist Cardstock
Shop at:
PTI
PTI Brushed Birds Die Set
Shop at:
PTI
PTI Brushed Birds Stamp Set
Shop at:
PTI
PTI Limitless Layers 2¼ Ovals
Shop at:
PTI
PTI Mix & Mat: Plaid
Shop at:
PTI
PTI Perfect Match Aqua Mist Ink
Shop at:
PTI
PTI Perfect Match Blueberry Sky Ink
Shop at:
PTI
PTI Perfect Match Spring Rain Ink
Shop at:
PTI
PTI Perfect Match True Black Ink
Shop at:
PTI
PTI Stamper's Select White Cardstock
Shop at:
PTI
PTI Tulip Time Stamp Set
Shop at:
PTI
Scotch 3M Foam Tape
Scotch 3M Foam Tape
Shop at:
SSS
Scrapbook Adhesives 3D Foam Squares
Shop at:
SSS
Scrapbook Adhesives Thin 3D Foam Squares
Shop at:
SSS
Teflon Bone Folder
Teflon Bone Folder
Shop at:
SSS
Tim Holtz Mini Round Ink Blending Tool
Shop at:
SSS
Tonic Nuvo Crystal Drops Navy Blue
Shop at:
SSS

Keeping Christmas

Hello everyone!  Thank you so much for stopping by today to check out the monthly Keeping Christmas Blog Hop that a group of us hold on the 25th of each month, January through November.  This monthly hop is the brain child of Kelly Lunceford and Lesley Croghan and the members of the team are former teammates from The Challenge.  Our goal is to show you how to build your stash of card (or tags) a few at a time all through the year.  We try to include all of the steps, tips and tricks to help you get it done and to know that it is do-able so you don't get overwhelmed.  Hop along and be sure to visit each blog. There is a lot of inspiration and ideas to get your creative juices flowing! 


Vicki Finger (You are Here)

For today's project I made gift tags rather than a card that you can use with some homemade cookies, sweet breads or other treats as well as putting it on an actual gift package.  I like to use removable adhesive when adhering it to a package.  All you have to do is rub it away with your finger.

At this time, my schedule is very tight because of building our new home in another state.  I spend a good portion of my day making selections in paint, fixtures, and a whole lot of other stuff.  You just can't imagine how many choices there are to make and there are so many choices to choose from and then there's the traveling back and forth every two weeks. Sometimes we only stay for an hour or two then turn around and come back home (200+ miles each way).  We are getting a lot closer now and hopefully we are about 5 weeks out from our move in.  Anyway, all of this is to say I don't have a lot of time these days either.

Sometimes we (or at least I) make things harder than they need to be.  So this time around I focused on coming up with a simple idea for my project. Something that would look nice but wouldn't be long or complicated. I wanted to create some tags and I have a few dies that work very well for this.  A lot of the time, tag dies are small and I usually like a larger one.  But I happen to have two in my stash that are quite a bit bigger and both of them come from WPLUS9 Design Studio.  I have the Christmas Tag Die Set and the Love Showers Die Set.  Both of these have nice sized tags in them.  The Love Showers Tag is approximately 3.25 x 4.5 and the Christmas Tag is approximately 2.75 x 4.5.  I chose the Love Showers Tag for this project.

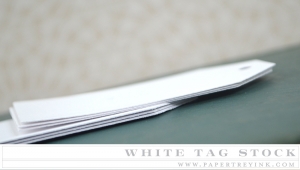
I started by die cutting 4 of the tags from Papertrey Ink Tag Stock.  This is a heavy weight #160 cardstock that is awesome for tags.  I also cut 4 from some Christmas Paper that came in a big mat stack.  I adhered them together with the right side facing out and the wrong sides adhered together.  I used Kokuyo Adhesive Runner for this.  It's my favorite dry adhesive.


Next I cut four of the "Christmas" words from Gold Foiled Cardstock, 4 of the banners from Scarlet Shimmer Cardstock and 8 of the poinsettias, 4 each in the two smallest size from the same Scarlet Shimmer Cardstock.  I felt this color was the best choice for the deep tones in the patterned paper.

Next I started assembling all of the various pieces together.  I glued two poinsettias together using Ranger Multi Medium Matte right in the center.  Shimmer cardstock can be a bit slick, so I have learned to glue it and set it aside to dry for 5-10 minutes while I do other things.   I knew that I wanted to put little pearls in the center of the blooms, but the only color I have is white, so I took an E57 Copic Marker to give them their golden hue. Be sure to let them dry for a few minutes as well.  Once they were dry, I placed them in the center of the blooms with Ranger Multi Medium Matte and set them aside again. I wanted some of the pine-y looking branches like the paper, so I did cut 4 of the pine boughs from the Tim Holtz Holiday Greens dies out of gold foiled cardstock.  I knew they would be too big, but I figured I could cut it down to what I needed.

I adhered the banner to the tags at an angle so the die cut word would fit across it. Then I arranged all the elements of one tag until I had placement that I liked and repeated it three more times to finish the tags.


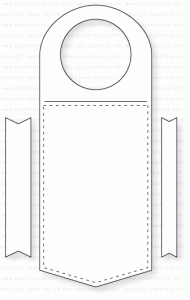
By using one of the really pretty papers that I have, it made really quick work of the tags.  There was a minimum of embellishment needed for a really elegant look.  In fact this was so easy, that I decided to make some Bottle Tags while I was at it.  Some folks choose not to drink any kind of alcohol, but I can't think of anyone who objects to a little sparkling juice or sparkling cider, especially at the Holidays.

Again, I immediately thought of my designer papers to make quick work of this task.  Most of the designer papers I have are 12 x 12 so it would have been easy to get at least 5 tags from one sheet.  I have a large scrap to use for more tags or cards.

For this group of tags, I cut 4 Wine Bottle Tags from the same #160 Tag Stock as well as 4 of them from the designer paper.  If you are new here, then I should probably mention that I have a love for metallic or foiled papers, gold in particular, so I always have some in my supplies.

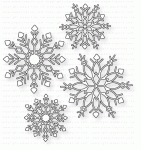
I adhered the designer paper tags to the tag stock tags.  In this same batch of designer papers was another sheet that was various stripes of pattern making up a whole sheet but I wanted just the stripe that says "Believe"  so that I could cut them apart and use them on my tags. There were 4 across the page, evenly spaced (I measured ahead of time to make sure) and I also wanted to pull in  larger snowflake like the designer paper.  I chose to use gold cardstock and the two smaller snowflake dies from Silver White Winters Die Set.

The little jewels sparkle! 
These snowflakes are very intricate and I had a lot of trouble getting them to cut cleanly in my Cuttlebug during the holidays, so I didn't even attempt it this time.  I just took them to my Gemini Die Cutting Machine and cut 2 of each.  I didn't even have to make a 2nd pass for them to cut beautifully.  These probably would have cut very well in my Sidekick, but mine are both packed up already. I have the old ones that are red and I am looking forward to having room on my desk after the move to have one out at all times for easy access, saving the larger scale die cutting for one of the larger machines.  I finished assembling all of the elements and added a little gemstone in the center of each snowflake. Normally I wouldn't put a blurry picture here on my blog but see how the little jewels catch the light? Multiply that times about 1000 in real life!  With the foiled papers and the jewels, it makes a very simple but elegant tag in very short order.


I like to do all of this in stages so I don't get overwhelmed at how much there might be to do.  I cut all the tag stock tags, then all of designer paper tags, then all the snowflakes, etc.  That way when I sit down to assemble them, I have everything I need at hand.  I can sit and do it while listening or occasionally even looking at the television and that makes it go fast and easy.

I've linked the supplies I've used below for your convenience (Affiliate Links may be used).

Cuttlebug
Cuttlebug
Shop at:
SSS
Gemini Full Size Die Cutting Machine
Shop at:
SSS
Kokuyo Long Dot Runner Adhesive
Shop at:
SSS
PTI Scarlet Shimmer Cardstock
Shop at:
PTI
PTI Silver White Winters Dies
Shop at:
PTI
PTI White Tag Stock #160
Shop at:
PTI
PTI Wine Bottle Tag II
Shop at:
PTI
Queen & Co White Pearls
Shop at:
SSS
Ranger Multi Medium Matte
Shop at:
SSS
Spellbinders Layered Poinsettias
Shop at:
SSS
Teflon Bone Folder
Teflon Bone Folder
Shop at:
SSS
Tim Holtz Holiday Greens Thinlits
Shop at:
SSS
Tonic 6 Inch Personal Trimmer
Shop at:
SSS
WPLUS9 Christmas Tag Die Set
Shop at:
SSS
WPLUS9 Love Showers Die Set
Shop at:
SSS