 Hello everyone! Thank you so much for stopping by today to check out the monthly Keeping Christmas Blog Hop that a group of us hold on the 25th of each month, January through November. This monthly hop is the brain child of Kelly Lunceford and Lesley Croghan and the members of the team are former teammates from The Challenge. Our goal is to show you how to build your stash of card (or tags) a few at a time all through the year. We try to include all of the steps, tips and tricks to help you get it done and to know that it is do-able so you don't get overwhelmed. Hop along and be sure to visit each blog. There is a lot of inspiration and ideas to get your creative juices flowing!
Vicki Finger (You are Here)
For today's project I made gift tags rather than a card that you can use with some homemade cookies, sweet breads or other treats as well as putting it on an actual gift package. I like to use removable adhesive when adhering it to a package. All you have to do is rub it away with your finger.
 At this time, my schedule is very tight because of building our new home in another state. I spend a good portion of my day making selections in paint, fixtures, and a whole lot of other stuff. You just can't imagine how many choices there are to make and there are so many choices to choose from and then there's the traveling back and forth every two weeks. Sometimes we only stay for an hour or two then turn around and come back home (200+ miles each way). We are getting a lot closer now and hopefully we are about 5 weeks out from our move in. Anyway, all of this is to say I don't have a lot of time these days either.
Sometimes we (or at least I) make things harder than they need to be. So this time around I focused on coming up with a simple idea for my project. Something that would look nice but wouldn't be long or complicated. I wanted to create some tags and I have a few dies that work very well for this. A lot of the time, tag dies are small and I usually like a larger one. But I happen to have two in my stash that are quite a bit bigger and both of them come from WPLUS9 Design Studio. I have the Christmas Tag Die Set and the Love Showers Die Set. Both of these have nice sized tags in them. The Love Showers Tag is approximately 3.25 x 4.5 and the Christmas Tag is approximately 2.75 x 4.5. I chose the Love Showers Tag for this project.
I started by die cutting 4 of the tags from Papertrey Ink Tag Stock. This is a heavy weight #160 cardstock that is awesome for tags. I also cut 4 from some Christmas Paper that came in a big mat stack. I adhered them together with the right side facing out and the wrong sides adhered together. I used Kokuyo Adhesive Runner for this. It's my favorite dry adhesive.
Next I cut four of the "Christmas" words from Gold Foiled Cardstock, 4 of the banners from Scarlet Shimmer Cardstock and 8 of the poinsettias, 4 each in the two smallest size from the same Scarlet Shimmer Cardstock. I felt this color was the best choice for the deep tones in the patterned paper.
Next I started assembling all of the various pieces together. I glued two poinsettias together using Ranger Multi Medium Matte right in the center. Shimmer cardstock can be a bit slick, so I have learned to glue it and set it aside to dry for 5-10 minutes while I do other things. I knew that I wanted to put little pearls in the center of the blooms, but the only color I have is white, so I took an E57 Copic Marker to give them their golden hue. Be sure to let them dry for a few minutes as well. Once they were dry, I placed them in the center of the blooms with Ranger Multi Medium Matte and set them aside again. I wanted some of the pine-y looking branches like the paper, so I did cut 4 of the pine boughs from the Tim Holtz Holiday Greens dies out of gold foiled cardstock. I knew they would be too big, but I figured I could cut it down to what I needed.
I adhered the banner to the tags at an angle so the die cut word would fit across it. Then I arranged all the elements of one tag until I had placement that I liked and repeated it three more times to finish the tags.
By using one of the really pretty papers that I have, it made really quick work of the tags. There was a minimum of embellishment needed for a really elegant look. In fact this was so easy, that I decided to make some Bottle Tags while I was at it. Some folks choose not to drink any kind of alcohol, but I can't think of anyone who objects to a little sparkling juice or sparkling cider, especially at the Holidays.
Again, I immediately thought of my designer papers to make quick work of this task. Most of the designer papers I have are 12 x 12 so it would have been easy to get at least 5 tags from one sheet. I have a large scrap to use for more tags or cards.
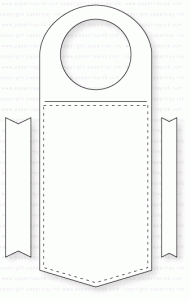
For this group of tags, I cut 4 Wine Bottle Tags from the same #160 Tag Stock as well as 4 of them from the designer paper. If you are new here, then I should probably mention that I have a love for metallic or foiled papers, gold in particular, so I always have some in my supplies.
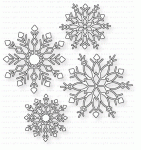
 I adhered the designer paper tags to the tag stock tags. In this same batch of designer papers was another sheet that was various stripes of pattern making up a whole sheet but I wanted just the stripe that says "Believe" so that I could cut them apart and use them on my tags. There were 4 across the page, evenly spaced (I measured ahead of time to make sure) and I also wanted to pull in larger snowflake like the designer paper. I chose to use gold cardstock and the two smaller snowflake dies from Silver White Winters Die Set.
 |
| The little jewels sparkle! |
I like to do all of this in stages so I don't get overwhelmed at how much there might be to do. I cut all the tag stock tags, then all of designer paper tags, then all the snowflakes, etc. That way when I sit down to assemble them, I have everything I need at hand. I can sit and do it while listening or occasionally even looking at the television and that makes it go fast and easy.
I've linked the supplies I've used below for your convenience (Affiliate Links may be used).
 Cuttlebug Shop at: SSS |
 Gemini Full Size Die Cutting Machine Shop at: SSS |
 Kokuyo Long Dot Runner Adhesive Shop at: SSS |
 PTI Scarlet Shimmer Cardstock Shop at: PTI |
 PTI Silver White Winters Dies Shop at: PTI |
 PTI White Tag Stock #160 Shop at: PTI |
 PTI Wine Bottle Tag II Shop at: PTI |
 Queen & Co White Pearls Shop at: SSS |
 Ranger Multi Medium Matte Shop at: SSS |
 Spellbinders Layered Poinsettias Shop at: SSS |
 Teflon Bone Folder Shop at: SSS |
 Tim Holtz Holiday Greens Thinlits Shop at: SSS |
 Tonic 6 Inch Personal Trimmer Shop at: SSS |
 WPLUS9 Christmas Tag Die Set Shop at: SSS |
 WPLUS9 Love Showers Die Set Shop at: SSS |


What fabulous projects! I love both sets of tags! These will definitely come in handy! I'm so excited about your new home as well!
ReplyDeleteWhat lovely tags!!! I adore the colors you used!!
ReplyDeleteJust gorgeous, Vicki, and quick to make! Good luck with your new home, I know you will enjoy it when you are finally there for good.
ReplyDeleteI love all of the new ideas!
ReplyDeleteOh, these tags are all so elegant! I might just hang them on my tree and never give them away! :)
ReplyDeleteOh my...so many wonderful holiday tags. So beautiful and elegant.
ReplyDelete