Showing posts with label Fall Colors. Show all posts

Thursday, October 3, 2019

Memory Box Challenge Inspiration featuring Grand Maple Frame

Hello, Everyone!  I'm here today with a blog post for you to give a bit of inspiration for the Memory Box Current Challenge, "Leaves".

I love to make fall leaves from some watercolor cardstock that has been loosely watercolored and allowed to dry.  I have multiple color mediums to choose from including some Daniel Smith Watercolors, along with other artist-grade mediums to choose from but, for the completely transparent color that I prefer, I love to use re-inkers with a bit of water and a large #12 watercolor brush.  This 6 well porcelain dish is also a lot smaller than any of my other choices so it pretty much a no brainer for my needs.  I would encourage you to do what works for you. 
Some types of watercolors can be kind of "milky" looking so I like to put a drop or two of reinker into my little porcelain dish with a few drops of water.  You can make it less pigmented by adding more water to the mix.  I have an empty spray bottle that I put a new label on so that it says its Water.  I keep meaning to get one of those little dropper bottles, but I also keep forgetting to order when I am already ordering something else.  When I do this type of project where I'm just letting the water travel and blend and mix with other colors, I like to work on my glass mat which is 20 x 26 in size and put a paper towel underneath my paper to help contain most of the mess.


For me, fall color is all about the deep magentas, reds, corals, golden yellows and bright pinks.   I love to mix those with a bit of Sargent Art Watercolor Magic in Metallic Gold that is easy to find at Walmart, Hobby Lobby, Amazon and a variety of other sources.  I have the 8-ounce bottle that I got a few years ago and I still have more than half the bottle left.  I especially love mixing gold into nearly all of my artwork.  It only takes a drop to add a metallic touch to many of your colors.  And you can use it by itself as well.  It's a pretty bright yellow color but you can deepen the color by adding a bit of reinker in Kraft or Dark Chocolate for more of an Antique Gold color.  Just keep mixing it in one drop at a time, until the color deepens to your desired shade.  This works with pretty much any earthy colors.  I use this watercolor for a variety of things in my studio, so it's a must-have item for me.

I took a few pictures here so you can see my process.  For demonstration purposes, I used Canson #140 Watercolor paper which has a pretty heavy texture.  In this case, that's a good thing as it leaves lots of little divots for the shimmer mist to settle into rather than sliding off with the water.

This is how it begins, lots of colors and lots of water.  I use the wide flat brush to add plain water to the paper and the #12 Round Brush to add the color.  As the paper curls up, the colors run and blend together.  You can see from the paper towels in both of these photos, that the paper towel gets very grungy!  Once the color has dried, I hit it with a liberal amount of shimmer mist.  Then I take the dirty paper towel and replace it with a clean one


You can see how much water is here; and how much water and color run off the sides of the paper.  Once it's dry and I hit it with Shimmer Mist, I move it momentarily, wipe my glass work surface and then put a clean paper towel under it while the shimmer mist has a chance to dry.  In this case, it happened to be overnight.


Another item that is a must-have in my studio is Sparkle Shimmer Mist from Tsukineko/Imagine Crafts.  My favorite is the Sheer Gold but I also like the Sheer Sparkle Shimmer Mist as well.  I use more gold than sheer, but I like to have the option for whatever I'm working on at the moment.  Since I took these photos at night, it's impossible to capture all of the golden goodness that is on this watercolored panel.  Hopefully, you'll be able to see it better in my end product.  and I'll try to take a better picture once the sun is up.  My husband leaves at 4:00 a.m. and today is trash day, so he wasn't too quiet, so I got up as he was leaving.

Next, I used the Grand Maple Frame Die and die cut one from Gold Cardstock and one from the watercolor background.  I made a card base using Stardream  Metallic Flame Cardstock from PaperPapers.com.  These cardstocks work perfectly with the elegance of the Memory Box Dies.  I bought a bunch of different colors last May and I am so glad I did as I have a lot of colors to work with and they are fantastic with Memory Box's Elegant Dies.


I kept most of the die cut together and intact, but I wanted to use the watercolor paper to inlay for the color on the leaves.  This was very quick to do as there are only a few very small pieces at the tips of the leaves.  Everything else is a larger size and is easy to fit.  I used Post It Tape on the backside, but then as I was switching out the pieces, I used Ranger Multi Medium Matte to hold them in place.

I was a little bit unsure about the corners of the actual frame, but in the end, I popped out the corner pieces, then put the rest on foam tape so that the card color comes through.  I tried those corners with inlay as well but preferred to let the cardstock color show through.

I stamped the greeting from the Memory Box Fern & Berries Stamp Set using Versafine Black Onyx and heat setting it with Clear Embossing Powder.  I used my Basic Rectangles Dies to cut the sentiment and the next size up to cut the gold layer for the sentiment.


This card was actually very quick to make, but because folks like to see the process, that took quite a bit more time so I could have those images for you as well.  I love how this card turned out and I have an extra panel just sitting here waiting to be made into another card like it.  Since I give cards to my Sisters-In-Law each year at Christmas, I need all I can get.


I loved how this particular watercolor piece turned out and I couldn't bear to get rid of any more of it than necessary.  I die cut it with 2nd largest Basic Rectangles Die but I didn't inlay the watercolor pieces this time. I just popped the pieces our of the frame so that you could see the watercolor background panel.  It was a lot faster to make this way.  It gives the frame that filigree look that Memory Box is so famous for!


I got in really close so that hopefully you can see all the gold in with the color.

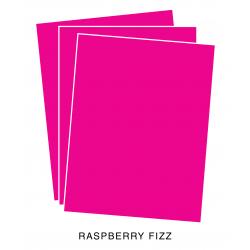
The second watercolored piece has quite a bit more gold in it, so I spent a little time playing with the various cardstock colors to see which one I wanted to pair it up with it.  In the end, I chose to pair it with Raspberry Fizz Cardstock to let the Pinks really pop!  I think I'm channeling my inner Dawn McVey here. *Ü*


I hope you enjoyed my inspiration for this month's Memory Box Challenge. The supplies I've used are linked below for your convenience.


Affiliate Links may be used at no additional cost to you.

I2P - Reinker - Berry Sorbet
Shop at:
PTI/ITP
I2P - Reinker - Dark Chocolate
Shop at:
PTI/ITP
I2P - Reinker - Harvest Gold
Shop at:
PTI/ITP
I2P - Reinker - Orange Zest
Shop at:
PTI/ITP
I2P - Reinker - Pure Poppy
Shop at:
PTI/ITP
I2P - Reinker - Raspberry Fizz
Shop at:
PTI/ITP
I2P - Reinker - Scarlet Jewel
Shop at:
PTI/ITP
Kokuyo Long Dot Adhesive
Shop at:
SSS
Memory Box - Fern & Berries Stamp Set
Shop at:
SSS | MB
Memory Box - Grand Maple Frame Dies
Shop at:
SSS | MB
Memory Box - Rectangle Basics Set
Shop at:
SSS | MB
MSP- Original MISTI Stamping Tool
Shop at:
SSS
PP.Com - Cougar White Digital Smooth - #110, 200 pack
Shop at:
PPC
PP.Com - Curious Metallic Nude Cardstock
Shop at:
PPC
PTI/I2P Raspberry Fizz Cardstock
Shop at:
PTI/ITP
Ranger Multi Medium Matte
Shop at:
SSS
Scotch 3M Foam Tape
Scotch 3M Foam Tape
Shop at:
SSS
SSS - Clear Embossing Powder
Shop at:
SSS
Tim Holtz Tonic Paper Trimmer
Shop at:
SSS
Tonic 6 Inch Personal Trimmer
Shop at:
SSS
Versafine Black Onyx Pigment Ink
Shop at:
SSS
Wagner Heat Tool
Wagner Heat Tool
Shop at:
SSS
MSP - Mini MISTI
MSP - Mini MISTI
Shop at:
SSS

Tuesday, September 26, 2017

Sentiments & Quotes

Anyone that I've been good friends with for a while, knows that I am a girl who loves quotes, especially those that speak to my heart. I've used them often in my scrapbooks through the years and I'm always on the lookout to add a new one to my collection. So when I saw that Double D Challenges was having a Sentiment/Quote theme this time around, I had to join in. In fact I have a few that I'd love to play with but I might only have time for one so I wanted to do something that also fit in with Challenge #16 at The Heart Desires using Fall colors. I love the combination of Scarlet and Brown in the fall. The colors are deep and rich and just automatically feel regal and beautiful. If you add a touch of gold into that, it's sure to be a winner. 

For my card, I started with a top folding card base made from Vintage Cream Cardstock. I die cut a piece of  brown shimmer cardstock (DCWV) for the background panel with the MFT Blueprints 15 Stitched Rectangle Die from the set. I adhered that to my cardbase with Kokuyo, which is a sticky dot runner. After using my powder tool on a piece of Stamper's Select Vellum, I stamped the sentiment in Versamark and heat set it with Simon Says Stamp Antique Gold Embossing Powder. It's important to let your heat tool warm up for about 30 seconds before you melt the embossing powder so that your Vellum will not warp.  I found this stamp at Hobby Lobby and it is their brand, Stampabilities.  I was impressed with how well it stamped.  

To cut the layers, I used a much older set of Cookie Cutter Dies from QuicKutz that I think were called frames. I don't have them labeled and I don't remember for sure but I've had them for about 10 years now. The layer behind the vellum is a Scarlet Shimmer that I already had in my stash and the layer behind that is Die Cuts With A View's "Dear Jane" Mat Stack which is a nod to Jane Austen's "Pride & Prejudice".  It's a beautiful collection of papers but it's sometimes hard for me to find a way to use the designs because of the size of many of the patterns and the Victorian Style they are, but they were perfect for this card. Several of the sheets in this stack have gold foil on them. 

Additionally, I cut four of the Spellbinders Corner Flourishes (NLA) and added them to the corners of my card front. To adhere the vellum piece to the Scarlet Shimmer, I put Stick-It Adhesive behind the entire piece. Next I cut a piece of Black Fun Foam in the same size to go behind the Scarlet Shimmer paper so that I could pop that element up a bit. You could also use Black Foam Tape like the kind available from Scrapbook Adhesives or Ranger but I forgot I had some until I had already cut the black foam. 

This is my best imitation of a style that my friend, Yana, creates for Spellbinders often. She creates the most beautiful, layered and dimensional cards. I considered adding tiny pieces of foam tape behind the corner brackets, but since I am actually mailing this card to someone, I decided just to use Ranger Multi Medium Matte to make sure they were held securely. Thank you so much for stopping by today. There are sure to be lots of inspiring cards at the Double D Challenge so be sure to check them out as well as the challenge at The Heart Desires. See you soon!

Wednesday, October 26, 2016

Inspired By All The Little Things

We have a young man in our subdivision who just started his own business called Candry's Car Care which is a car interior detailing business. Now I have to say, I really like it when an enterprising young man starts his own business at the age of 12.  I want to encourage him if I can.  So I left my car yesterday after school for him to detail.

I am not usually hauling around young children or eating in my car or that kind of thing, but I'm lucky if my hubby washes my car - forget detailing the interior.  I actually did remember that the last time I had warranty work done on it, they did vacuum it, but that is a far as it went and that had been at least a year.

When I went over to get my car last evening, Candry showed me everything he had done.  It was a job very well done indeed and I wanted to make a Thank You note to send him as encouragement for doing such an outstanding job.  All the floor mats had been removed and vacuumed under, the carpeted floor mats had been vacuumed, the seats were cleaned and treated with leather cleaner, all the vents had been cleaned, etc.  Even the inside windows had been cleaned.  Really, he paid so much attention to detail that I feel like I have a new car!

On the Inspired By All The Little Things Challenge this week, they have the beautiful image of fall leaves as our inspiration and I thought it would be a great choice for a young man.  I had actually made some of the leaves several days ago for another project and ended up not using them, so I did have them ready to go. I like to do ink blending in stripes of color on watercolor paper well misted with Shimmer Mist to help all the colors blend and smooth out.  I die cut several of the leaves using the MFT Falling Leaves Die Set which has the embossed details as well as the outline that is achieved in one pass through a die cutting machine.

I cut an oval from the Copper Crinkle Paper to form the shape of my "wreath" and then placed the leaves around that shape.  I cut three layers of the Mama Elephant "thanks" die from gold foiled cardstock and glued them, one on top of the other, for a thicker embellishment. I used Elmer's Craft Bond, which is a spray adhesive, with a shallow box so I can keep it contained.  I put the wreath onto a Pure Poppy panel that had been cut with a Simon Says Stamp Stitched Rectangle Die and then adhered it all to a top folding horizontal card base using my "new" ATG dispenser.


My ATG has been giving me fits for the last few refills.  When I called 3M/Scotch about the tape refills to see if there had been issues with some of it, they told me there had been an issue with some of the dispensers and offered to send me a new one plus a shipping label to return the duddy one to them.  That came a couple of days ago and I have to say, it is a definite improvement. Only time will tell if it really makes a difference, but I'm hopeful. I also noticed that they used a different refill than the one I had been getting so I made a note of the correct one.

Be sure to stop by Inspired By All The Little Things and check out all the beautiful interpretations of the inspiration photo.