Showing posts with label Memory Box Dies. Show all posts

Friday, March 6, 2020

Memory Box Wild Rose Stem Stamps & Dies


Hello there and welcome to my blog!  I'm also up at Outside The Box, (the Memory Box Blog) today, so be sure to stop by either place.  Today, I am featuring the newly released Wild Rose Stem Stamps and Dies.  I love wild roses although, in reality, they are a pale pink or rose color.  The great thing about what we do is we can make them any color we want.

This color wasn't my intent when I started but it kind of snowballed into this.  My primary objective was just some pale pink.  I recently signed up for a watercolor class.  I haven't started my homework or classwork yet, but I've been "collecting" a couple of tubes of Daniel Smith Watercolors a couple at a time over the last year or so, and I have about 26 colors right now.  They have over 300 colors, so I am just getting some basics and some neutrals and will mix colors.  I have two or three of each color family and a neutral buff and a couple of greys.  I'm also learning how to mix colors as part of a Facebook Group I'm in.  So this kind of started as one project and turned into class practice only a couple of layers into it. I switched from Watercolor Pencils to Daniel Smith Watercolors after that.


I used a little Sap Green on the leaves but my focus today was on the petals and getting a much better look than I have previously.  I'm very happy with this first attempt although I can see many things I will do differently next time.  This is a great image for practice as the petals are large and you can create your own depth.  I can tell you that I will add deeper shadow layers on my next try.  It does look so different after it dries.  I used Quinacridone Purple and Quinacridone Pink for the petals.


I love the look of watercolor and I really want to get better at it so, I've been "collecting" information, thoughts, and experiences of friends who are successful in this endeavor.  This is my first try at this particular method and I am so excited to do more.  For the little stamen on the wild roses, I used Plum Shimmer Fairy Sugar (a new product) to make the deep purple dots.


After I watercolored the blooms, I die cut it with the coordinating die and grabbed the new Springtime Bouquet Patterned Paper Pad to decide which paper I wanted to use to put my card together.  I'm a sucker for stripes, especially this more narrow version, and the lovely pastel colors make me think of Spring which is hopefully right around the corner here in North Texas.  I used a piece of Winter Wisteria Cardstock to die cut one of the Matinee Rectangles to use as a label.  I also really love the font and style of this Poppy Stamps Sentiment Stamps Set called "Springtime Fun".  Poppy Stamps is also a Memory Box Company.  I love elegant and this font suits me to a "T"!

As usual, I heat embossed my image and my sentiment with Versamark and Antique Gold Embossing Powder from Simon Says Stamp.  Using a blending brush, I went all around the outside edges with the matching ink to darken the edges.  I just love how this card turned out and how much my watercolor improved.

I still enjoy learning and trying new techniques to share with you all as much as possible. Time is not always my friend.  But watercolor has my whole heart and I will continue to practice and improve. If you look for my friend, Emily Midgett, from Sixth Street Sundries, she is the person teaching this class and I have had several lightbulb moments and I'm only two days in with no practical applications except this.  I think I might finally get pretty decent at this.  Thank goodness, it's a self-paced course so you have lifetime access.

If you have any questions, please let me know in the comments and I will do my best to answer any questions.  Emily's class is available through Altenew Academy and I think it runs around $9.00, which is well worth it for anybody's dollar.  I love being able to go back and review classes, especially in a case where it's something that isn't in my normal wheelhouse, but I really want to succeed.  You have to keep trying, practicing, and reviewing.  Being able to go back to the video at any time is awesome!  Don't give up if it's something that you really want to do.


Affiliate Links may be used at no additional cost to you.

 
Memory Box Matinee Rectangle Layers
Shop at:
SSS
Memory Box Springtime Bouquet Patterned Paper
Shop at:
SSS
Memory Box Watercolor Paper
Shop at:
SSS
Memory Box Wild Rose Stem Stamps & Dies
Shop at:
SSS
Poppy Stamps Springtime Fun
Shop at:
SSS | MBC

Friday, December 6, 2019

Memory Box's Grateful Autumn Stamp Set


Hello, Everyone!  Vicki here with you today, sharing a card I made last week for today's post using the Memory Box Grateful Autumn Stamp Set.  In case you haven't noticed, Black Watercolor Paper is all the rage right now.  I saw Kristina Werner working on some with her Pearlescent Watercolors and decided I had to try that out.  A couple of years ago, I got the Finetec Pearlescent Watercolors from Simon Says Stamp during a Steals & Deals Weekend.  I have never been too happy with my personal results from them on regular watercolor paper, so when I saw Kristina using them on black, I had to order some of that paper, right away.  I have the Legion Stonehenge Black in 10 x 14 so I cut one sheet down into 4-5 x 7 pieces.  You can find it on Amazon here.  

Before my paper even arrived at my house (2-day delivery), I saw another video on YouTube using this paper again. Mine arrived the very next morning - early for a change - since I had so many other packages.  Once I had a bit of time to play, I really loved the results on the Black with the Pearlescent Watercolors and decided I just had to try it on these beautiful fall leaves from Memory Box.  I'm not an "artist" by any stretch of the imagination, but I can do Watercolor for Card Makers.  It's a class offered by Online Card Classes - co-owned by Kristina Werner and Jennifer McGuire.  I took the class about 3 or 4 years ago.  Someday, I might want to pursue it more in-depth, but for what I do, this class was great.  You can sign up anytime, and you will always have access to the classes you take there.  


I started by prepping my black watercolor paper with a liberal dusting of powder tool.  I like using talc-free baby powder with a fluffy brush for this.  The little pouch is too chalky feeling for me and the little brush tool doesn't hold up to use, so this has been my solution for about 4 years now.  You can also use cornstarch if you want to find something that you already have at home.  This is the most important part of heat embossing.  Otherwise, you end up with little bits of embossing powder where you don't want it to be.


For my images, I used Versamark with Simon Says Stamp Antique Gold Embossing Powder.  It's my favorite as it isn't a bright yellow.  Use whatever you have even if it's clear embossing powder. I just happen to like and use a lot of gold in my work.


Next, I used a wet on wet technique for the watercolor.  Starting with a large brush, I wet each leaf, one by one.  Using the Pearl Gold color, I started adding in little bits of color at the base of the leaves and worked out.  Then using a size 4 round brush, I started at the tip of the leaves and added Red Pearl color and worked my way in toward the base.  Then I used Orange Copper for the center area with a bit more water and just let the color travel and settle how it wanted to.  I worked my way around each of the leaves, and let it dry almost completely before adding in the Amethyst, just kind of dabbing here and there with my brush.  I am so happy with the way this looks and that it looks as if I actually know what I am doing with my watercolors.


I let it dry overnight and then cut it with the Rectangle Basics in the 2nd largest size. I also cut a mat for behind it from a shimmer cardstock called Garnet Plum that I get from PaperPapers.com.  I chose the sentiment I wanted and prepping the surface again in the area where I wanted to heat emboss, I stamped with Versamark and then heat set the Antique Gold Embossing Powder.


I use a microfiber cloth to remove the excess powder from the surface and I give the cloth one mist of Water to help remove it.  It is a very fine mist, and I'm careful not to tear the paper.  I attached the watercolor piece to the mat piece and then that to a white card base.  I added the three little gold hearts and some sequins in a similar plum color then a little gem in the center.  I have no idea where I got the sequins, but I'm going to have to start looking for some more soon as I am nearly out. I call this color "Sugarplum" and along with pink, it's one of my absolute favorites.  I love how these fall leaves turned out, especially on the black paper.  It was surprisingly easy to do.  In fact, for me, the hardest part is walking away to let it dry and not mess with it too much as I have control issues. *Ü*

If you've been visiting my blog, you may have noticed that I have been heavily into Christmas and Holiday Cards, so I was glad for a chance to take a break and do something a little different.  I hope you enjoyed my card today!  Thanks for stopping by!

Affiliate Links may be used at no additional cost to you.

Finetec Pearlescent Watercolors
Shop at:
SSS
Kokuyo Long Dot Adhesive
Shop at:
SSS
Memory Box - 30086 Rectangle Basics Set
Shop at:
SSS | MB
Memory Box - Grateful Autumn Stamp Set
Shop at:
SSS
MSP- Original MISTI Stamping Tool
Shop at:
SSS
PP.Com - Cougar White Digital Smooth - #110, 200 pack
Shop at:
PPC
Ranger Multi Medium Matte
Shop at:
SSS
ScraPerfect No Clog Tip for Ranger Multi Medium Matte
Shop at:
SSS
Silver Black Velvet Size 2
Shop at:
SSS
Silver Black Velvet Size 4
Shop at:
SSS
Silver Black Velvet Size 6
Shop at:
SSS
SSS Antique Gold Embossing Powder
Shop at:
SSS
Teflon Bone Folder
Teflon Bone Folder
Shop at:
SSS
Tim Holtz Tonic Paper Trimmer
Shop at:
SSS
Versamark Ink
Versamark Ink
Shop at:
SSS
Wagner Heat Tool
Wagner Heat Tool
Shop at:
SSS

Sunday, November 24, 2019

Twelve Days of Holiday Cards - Day Seven + Giveaway


Welcome to Day Seven of the Twelve Days of Holiday Card Series!  Today's project features a very simple but elegant card for you.  I'm also up on the Memory Box Blog today, so be sure to stop over there to see all the projects that my teammates and I have been sharing with dies from their Holiday 2019 Release.


This card uses the Scribble Holly Trio Outlines dies with some very old Creative Memories Patterned Paper.  I was a long time Creative Memories Consultant - like 20 years, so you know I have a lot of paper from back then. Most of it is not really suitable for card making because it isn't heavy enough and I'm normally not much for a patterned paper.  However, when I was looking through my scrap stash today, I came across this scrap that I've been saving and I thought it was just perfect for my card.  I'm pretty sure this was from a collection called Reminisce Noel but I don't know if I am remembering that correctly or not.   I would consider this a collage style of paper and I wish I had more of it, but I only have scraps left by now. You can see a little of the shimmer mist here, but I kept it very subtle. 


I started by die cutting the Scribble Holly from Gold Cardstock and an Olive Shimmer.  For Die Cut Inlay techniques, it doesn't get any simpler than this.  I just popped the green parts out and moved them to the inside of the gold ones.  I love how the gold outlines add so much without taking over the whole card.


There are dies that cut the whole inside of the leaves, but I don't have them and I don't feel that I need to have them.  As I said, it was simply a matter of popping out the gold and popping in the green.  I hope that when people receive my cards, their first thought is "oh, how pretty", but their second thought is that they really appreciate the details and thought that went into the card.

I used some deep red gems that I've also had for several years for the berry cluster. I have a zippy bag on my desk that contains all of my bling collected through the years.  Since I primarily use little crystals or pearls, I don't get into the bag often, but this was just the thing needed to give a little pop of color and dimension to this card.


I used the Brush Merry Christmas Die for my Sentiment.  This is one of my favorites as I really like dies that have the whole saying in them. I usually run my cardstock through my Xyron and then die cut it which is what I did here.  Once I place the sentiment down, I put the die over the sentiment and pop out the dot for the "i" (called the "tittle") with my craft pick so that I have it placed correctly.  This makes it super easy to get it in the correct spot.  As always, I used Rectangle Basics Dies to cut my layers for the backgrounds.  This is a super quick card to make if you want something that is fast that you can easily make multiples of.

Thank you so much for stopping by today!  Be sure to leave a comment for your chance to win one of the Daily Prizes during this special series.  I'll be back tomorrow for Day Eight of the series.

Affiliate Links may be used at no additional cost to you.

Gemini Junior Die Cutting Machine
Shop at:
SSS
GKD - Connect Glue
GKD - Connect Glue
Shop at:
SSS | GKD
Kokuyo Long Dot Adhesive
Shop at:
SSS
Memory Box - 30086 Rectangle Basics Set
Shop at:
SSS | MB
Memory Box - Brush Merry Christmas Die
Shop at:
SSS
Memory Box - Scribble Holly Trio Die
Shop at:
SSS
Xyron Sticker Maker - 2.5 Inch
Shop at:
SSS

Saturday, November 23, 2019

Twelve Days of Holiday Cards - Day Six + Giveaway


Welcome to Day Six of my first ever Holiday Card Series!  We are halfway through the Twelve Days of Holiday Cards Series!  I have something a bit different for you today.  I wanted to use a non-holiday die to create a Holiday Card.  This card is somewhat abstract, so I hope you'll enjoy it and I have extra cards to show the versatility of this die.

I have been eyeing the Prismatic Triangle for a while now because I knew it would be great for a guy card.  I'll have one to share later in this post.  But when you look at it with an "Outside the Box" perspective, in my mind's eye, it reminds me of Christmas Trees.  I know, call me kooky, but I'm telling you, that's what I see.  And anytime I can find a dual purpose for a die, that's a win-win in my book.


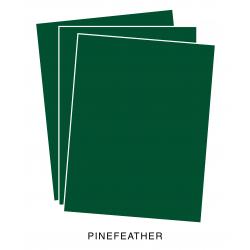
This die is one of the beautiful layering dies from Birch Press Designs.  I started by cutting a few of Layer C from Pine Feather Cardstock so that I could stack them and have a nice solid base to work from.  For the 2nd layer (Layer B) I die cut just one from Green Shimmer Cardstock and adhered that on top of the dark green layer.  This is the middle layer.  Then I cut a third layer (Layer A) from Gold Foil Cardstock.  Most of the time I use glue for this, but this layer is very fine so I ran this layer through my 5-inch wide Xyron Sticker Maker.


Whenever you use a Xyron, it's important to trace all around the design, inside and outside, before you removed the cellophane type layer so that when you pull that top piece off, you don't have a bunch of extra stringy adhesive stuff clinging to your die-cut.  I use an embossing stylus to do this.  Once that was done, I added that layer to the top of my die-cut embellishment.  Originally, I had planned to add green glitter cardstock inlay, but it just didn't look right when I tried it out.  I didn't have the right shade of green.  I tried several different cardstock colors and finally ended up with Gold Glitter looking the best. So rather than doing inlay on this card, I cut a background panel from the 2nd largest Rectangle Basics Die and the largest one in Pinefeather Cardstock for the double mat.  This is certainly eye-catching with all that glitter!


To bring this card to my idea of abstract Christmas Trees, I need to add the little stars to the top of the trees.  I have iridescent stars in two different sizes and tiny little gold stars as well.  For the tallest tree, I glued three of the largest star together to make it a bit thicker.  Then I added a single layer to the other two trees.  Next, I added a smaller iridescent star to the middle of the largest star and let that dry.  Finally, I added a tiny little gold star to the very center of the second layer which gives you a layered, dimensional effect. I got extra close in this photo so that hopefully you can see.


I have three other examples for you.  This first one is super abstract with Purple as the color scheme.  Since we're from Kansas, we have lots of K-State loving family members, so one of them will get this card!  Probably the one who actually still lives in Manhattan, Kansas.


Then because I wanted to show that this die could be used for men or women, I made some other examples of regular cards for you.


Guys love geometrics, so I tend to not really think about women liking them.  However, one of my sisters in law, used to cut the little flowers and rosettes off her underwear when she was little and still prefers non-flowery cards, so I think she could really appreciate this card style.  The background panel is just some textured cardstock that has been sprayed with shimmer mist.  The texture really traps and holds in the shimmer and makes it very visible.


And last, but not least, a traditional guy card how I envisioned it from the beginning when I first saw the die. I used some foiled background paper, making sure my Rectangle Basic Die was lined up on all four sides. 


I used a special paper for the black called Curious Skin in black.  This cardstock is absolutely matte black.  It would be a great one to use for a Chalkboard look.  Since guys are into metallics, but so much into sparkle, I wanted it to be very black.


And a final view of the guy card.  I have a couple of birthdays coming up and I plan to make another 1 or 2 of this style in other colors.  I definitely have to make one for my grandson in January using some kind of red, black, and silver combination!  I had some stickers from a card kit that I got some time last year.  I put foam tape on the back to pop the sentiment up a bit for the extra dimension.

Thanks for stopping by today to check out my Holiday card using a non-holiday die.  Be sure to leave a comment to be eligible for today's prize drawing.  Be sure to come back for all Twelve Days of Holiday Cards that will be featured from November 18th - November 29th, 2019.

Affiliate Links may be used at no additional cost to you.

Birch Press Design - Prismatic Triangle Complete Set
Shop at:
SSS
Crystal Katana Tool
Crystal Katana Tool
Shop at:
SSS
Gemini Junior Die Cutting Machine
Shop at:
SSS
GKD - Connect Glue
GKD - Connect Glue
Shop at:
SSS | GKD
GKD Heavy Base Weight White Cardstock
Shop at:
GKD
Memory Box - 30086 Rectangle Basics Set
Shop at:
SSS | MB
PP.Com - Cougar White Digital Smooth - #110, 200 pack
Shop at:
PPC
PP.Com - Curious Metallic Peacock
Shop at:
PPC
PTI Pinefeather Cardstock
Shop at:
PTI/ITP
Ranger Multi Medium Matte
Shop at:
SSS
Scotch 3M Foam Tape
Scotch 3M Foam Tape
Shop at:
SSS
ScraPerfect No Clog Tip for Ranger Multi Medium Matte
Shop at:
SSS
SSS Glitter Cardstock Assortment
Shop at:
SSS
SSS Gold Glitter Paper
Shop at:
SSS
Teflon Bone Folder
Teflon Bone Folder
Shop at:
SSS
Tim Holtz Tonic Paper Trimmer
Shop at:
SSS
Xyron Sticker Maker - 2.5 Inch
Shop at:
SSS