
 This week's Make it Monday from Papertrey Ink features Dawn McVey and shows us a technique that uses a sentiment window (video found here). I had never really thought about doing this before, but I like it as the sentiment does double duty because it's visible from the outside and inside of the card. It was super easy to do although I did mess up my first attempt by putting to many thick layers on my card front. I liked the combination I had first, but I just couldn't get that third layer cut so I had to start over. I'll save the other card for a different project.
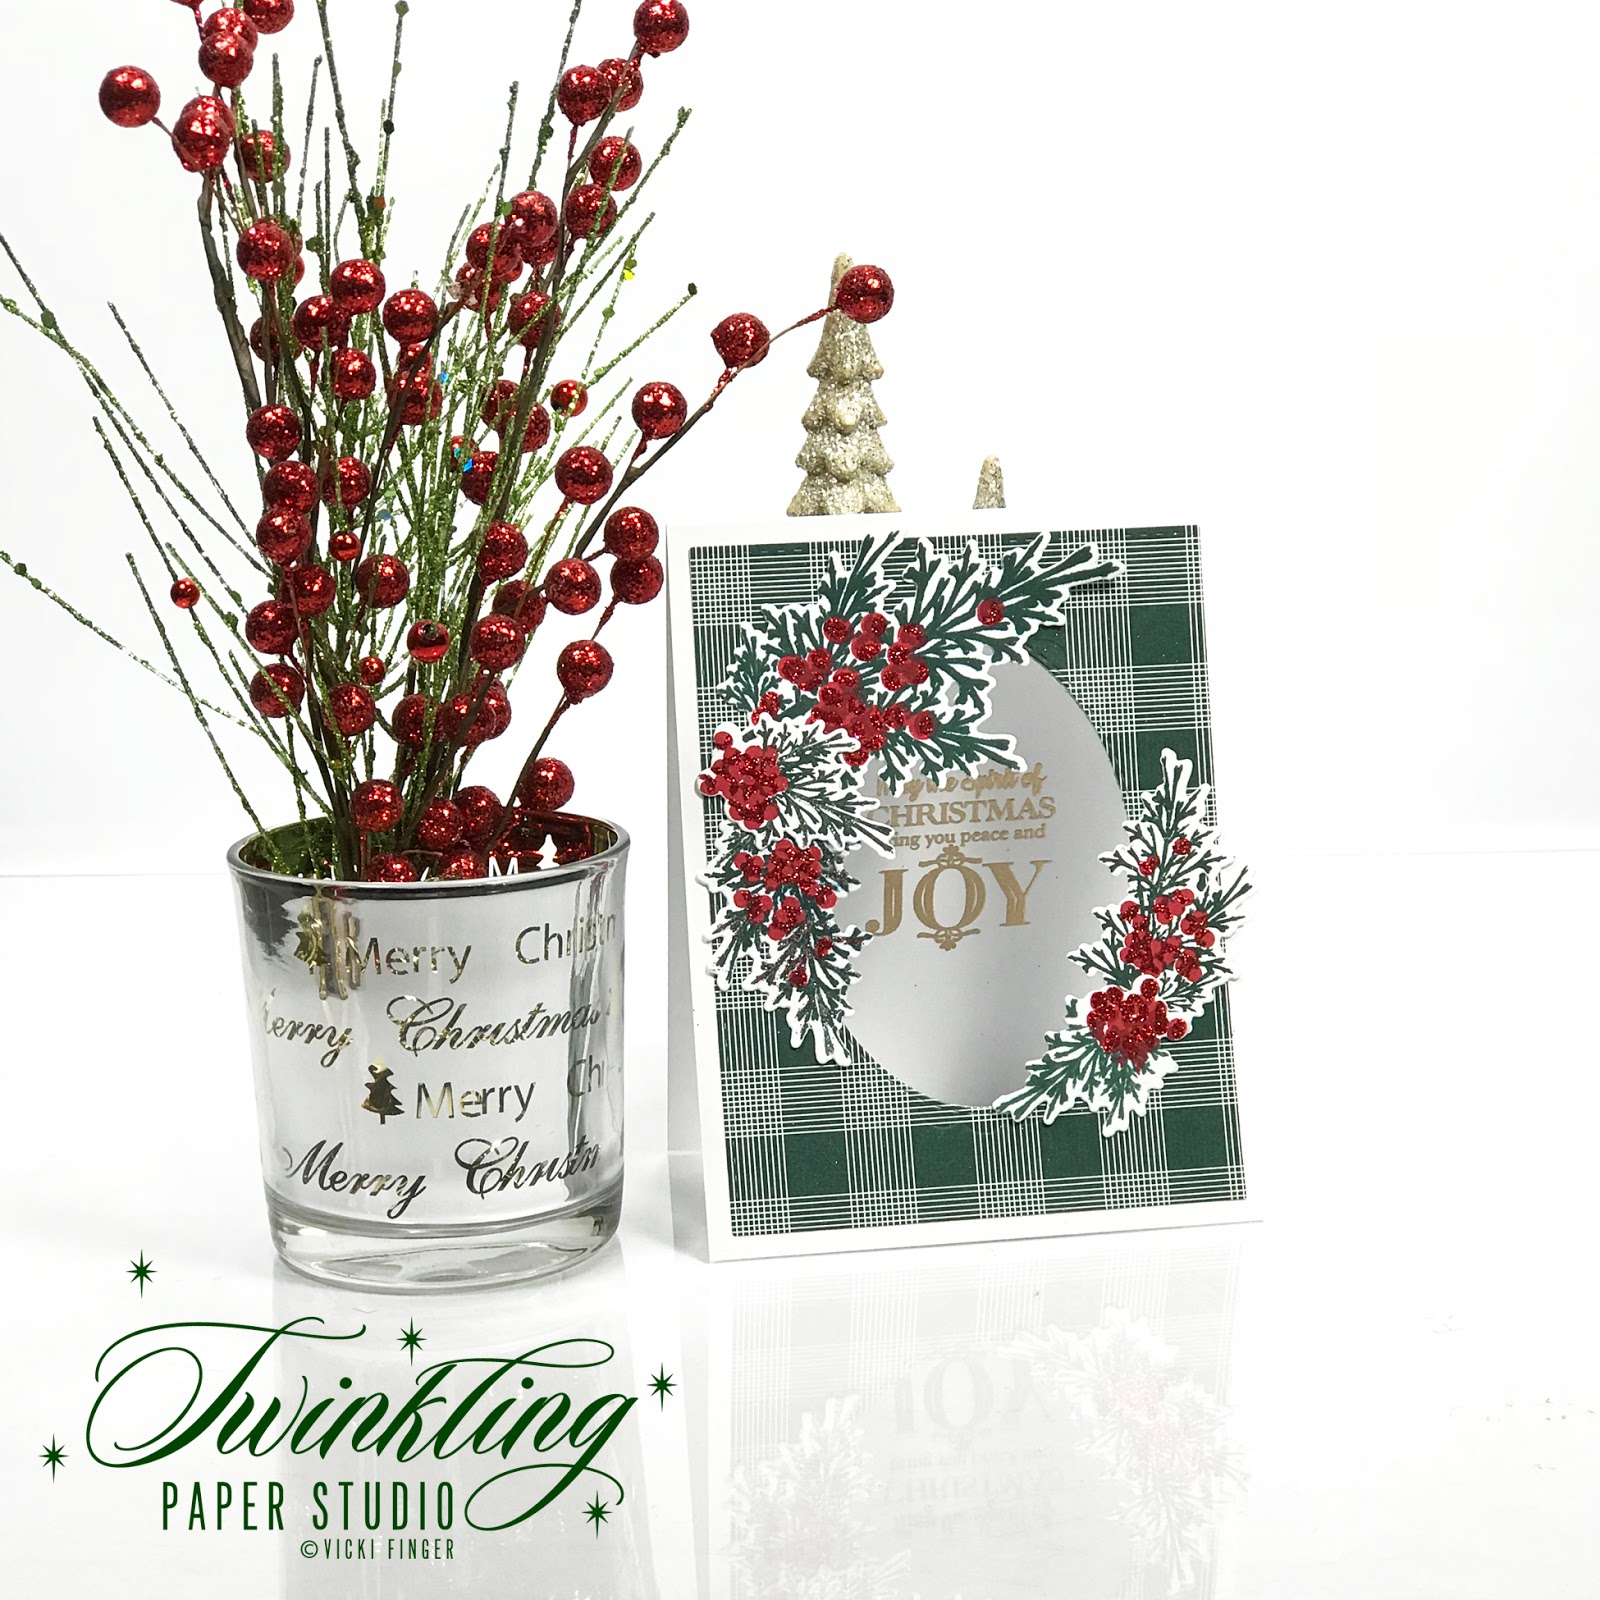
Next, I chose a sentiment from the "A Thrill of Hope" Stamp Set and using my card in my Mini MISTI, lined it up in the window so that it will show through on the front as well. After using my powder tool on the inside of the card, I stamped the sentiment with Versamark and heat set it with Antique Gold Embossing Powder. I arranged the berry branches around the open window, being careful not to get any adhesive on the area that would go through to the card base. I didn't, but if you accidentally get some on there, you can deactivate the sticky by putting some powder on it or using an adhesive eraser to remove it. I will probably mail this card so I used sticky dot adhesive on there rather than foam tape.
This was super fast and easy to pull together and I still have several sets of the berry branches ready to go in other colors so I am planning to make a few of them. Thanks for stopping by. Be sure to check out all the entries on Nichole Heady's Blog.
Oh, what a lovely Card! The beautiful berries look terrific over your window. Great Colors also...
ReplyDeleteYour berries look beautiful on the Pinefeather plaid and with the gold embossed sentiment! I can't look at any of PTI's new pattern paper after buying so much of it earlier this year! lol
ReplyDeleteI didn't buy too much. Only 3 packs and I love the new packs so I'm glad I wanted.
DeleteThis is so pretty!! I really like the berries framing your embossed sentiment!
ReplyDeleteLove the way you framed the window, Vicki. Your berry swags are gorgeous in those colors, and with the hit of glitter, so festive! Loving the new pattern paper too.
ReplyDeleteWOW...this turned out absolutely GORGEOUS!! I kind of had the same idea as you but with reds instead of the greens, but absolutely LOVE how elegant yours turned out! LOVE the gold embossed sentiment with the green...SOOO pretty! And I think I'm as hooked on that Winter Berry set now as much as you...so fun to play with!! Lovely, lovely card Vicki!! :0)
ReplyDeleteJust lovely, Vicky!
ReplyDeleteA beautiful Christmas card in traditional colors!
ReplyDeleteGorgeous! Love the colors, patterns, and embossing!
ReplyDeleteHmm, somehow I missed seeing this card before! It's very striking with the plaid and the oval window with berry branches. I do like pinefeather, and I'll enjoy using the new patterns in that color. Congratulations on being featured in the PTI Nov. newsletter today!
ReplyDelete