Wednesday, December 20, 2017

Altenew Class of 2017 Inspiration Challenge - October

Hello everyone!  I'm taking another chance to play in the final Altenew Year in Review Inspiration Challenge for this year (2017) and this month I chose to be inspired by the colors in the October Challenge hosted by Lydia Evans. Lydia designed the Build-A-Flower Ranunculous set seen in her project below so it seemed fitting that she used that set in her Inspiration Challenge. I don't actually have that set but it's been in my shopping cart and on my wish list for months. The Build-A-Flower Sets all have a 6 x 8 Stamp Set with a large layering bloom and the coordinating die for $35.00.  That's a really incredible buy although the only way to get them is in the set; they aren't sold separately.


To start my card, I chose Beautiful Day which is my favorite and most of reached for Altenew Stamp Set.  I stamped and heat embossed several of the bloom outlines and leaf outlines in Versamark and eat set them with Simon Says Stamp Antique Gold Embossing Powder onto Canson Bristol Watercolor Paper.  I wanted more than I thought I would need because I'm making a set of cards as a gift for someone.  Once I had the heat setting finished, I started stamping the layers. Using the Altenew Red Cosmos Collection of Inks I chose the lightest shade of Frosty Pink Ink, the next layer in Coral Berry and the last layer in Ruby Red.

For the leaves, I used Frayed Leaf for the first color and Forest Glades for the Detail Layer.  You can't buy any of the Altenew Ink Cubes separately, but you can buy the refills and the larger oval pads individually.

I like to hit all of my stamped pieces with some shimmer mist and let that dry before I die cut everything in my Cuttlebug.  I primarily use two types of shimmer spray; Tattered Angels Glimmer Mist in Iridescent Gold and Tsukineko Sheer Sparkle Shimmer Mist.  Simon Says Stamp carries the Tsukineko Brand but I buy my Tattered Angels directly from Canvas Corp Brands.


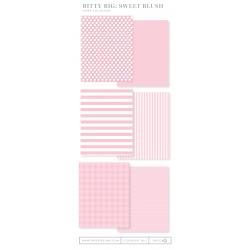
I wanted to use a bit of patterned paper behind my floral cluster so I die cut a stitched rectangle of Sweet Blush Bitty Big Paper for the background.  The sentiment is also from the Beautiful Day Stamp Set and is one of my favorites to use on a "Thinking of You" type card.  How can a day be bad if someone sends a card to you that says that?  I don't think it is possible.  I adhered everything to a top folding white card base.

This is fast and easy card making.  Once you've done the heat embossing, it is easy to line everything up for stamping the various layers.  I hope you've enjoyed my take on the October 2017 Altenew Inspiration Challenge.  The supplies I've used are linked below where possible.

Altenew Beautiful Day
Shop at:
SSS | ALT
Altenew Beautiful Day Dies
Shop at:
SSS | ALT
Altenew Beautiful Day Stamp & Die Bundle
Shop at:
ALT
Altenew Green Fields Ink Collection (Cubes)
Shop at:
SSS | ALT
Altenew Green Fields Reinkers
Shop at:
ALT
Altenew Green Fileds Oval Collection
Shop at:
SSS | ALT
Altenew Red Cosmos Ink Collection (Cubes)
Shop at:
SSS | ALT
Altenew Red Cosmos Oval Collection
Shop at:
SSS | ALT
Altenew Red Cosmos Reinkers
Shop at:
ALT
Kokuyo Long Dot Runner Adhesive
Shop at:
SSS
PTI Stamper's Select White Cardstock
Shop at:
PTI
PTI Sweet Blush Bitty Big Patterned Paper
Shop at:
PTI

Tuesday, December 19, 2017

Make it Monday #307 - Faux Stained Glass

This week's Make it Monday Technique for Papertrey Ink is Faux Stained Glass presented by Laurie Schmidlin.  I've actually done this one other time but not in quite the same way as this time.

It's the week before Christmas and everyone is so busy, me included.  I wanted to participate but not take too much extra time this week since I have lots of other things going on.  So I wanted to use a few of those extra pieces that I tend to have on my desk along with the Papertrey Products I was using.

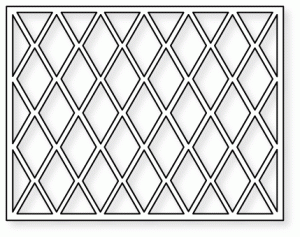
I started by die cutting the Cover Plate: Harlequin from Stamper's Select White Cardstock.  Next I cut a piece of Stamper's Select Vellum to go behind this for my "window" glass.  I cut this piece to just a smidgen smaller than 4.25 x 5.5 so that there would be no chance of it showing out the sides. I glued the front panel onto the vellum using a dot of liquid adhesive at each intersection of the lines.  Using Copic Markers in RV25, BG18 and G14, I colored in the diamonds totally at random.  I colored each one going the same direction and just in a single layer of color.  When those dried, I repeated that to get a deeper color.

In Laurie's video, she die cut two fun foam panels with her cover plate to use as the thickness for behind the main panel.  I did try this, but because the design of  the cover plate I chose has very thin lines, Fun Foam just didn't work out.  Therefore, I cut three additional panels of Stamper's Select White Cardstock to make the stack behind the front panel.  If you adhere it directly to the card base, it would not look like stained glass so I carefully glued the three frames, one on top of the other and then attached my front panel to that thick frame using tape runner.  Since the vellum was already glued in place, I didn't think it was necessary to use a liquid adhesive and just used my Kokuyo Dot Runner on top of the stacked frames.  That way, no adhesive showed once I laid the top piece down.  I then attached that panel to a Top Folding Horizontal Card Base. I die cut the Big Basics: Merry Christmas from Gold Foiled Cardstock and used some Holly leaves that I already had stamped and jeweled with Tonic Nuvo Drops in Gloss Carnation Pink.  These Holly Leaves are from the Gina K Designs Merry & Bright Stamp Set and are a bit larger than the Papertrey Ink Enclosed: Bell Holly Leaves which I thought fit better with the larger greeting.  These were stamped in Fresh Asparagus and Dusty Rose.


That finishes my card for today's post.  The supplies I've used are linked below for your convenience (affiliate links may be used at no cost to you).

Copic Marker Apple Green G14
Shop at:
SSS
Copic Marker Dog Rose R25
Shop at:
SSS
Copic Marker Teal Blue BG 18
Shop at:
SSS
Cuttlebug Die Cutting Machine
Shop at:
SSS
Gina K Designs Dusty Rose Ink
Shop at:
SSS | GKD
Gina K Designs Fresh Asparagus Ink
Shop at:
SSS | GKD
GKD Merry & Bright Stamp Set
Shop at:
GKD
Kokuyo Long Dot Runner Adhesive
Shop at:
SSS
Nuvo Crystal Drops - Gloss Carnation Pink
Shop at:
SSS
PTI - Big Basics: Merry Christmas
Shop at:
PTI
PTI - Cover Plate: Harlequin
Shop at:
PTI
PTI Stamper's Select Vellum (#44)
Shop at:
PTI
PTI Stamper's Select White Cardstock
Shop at:
PTI
Ranger Multi Medium Matte
Shop at:
SSS

Wednesday, December 13, 2017

Happy New Year!

Hello there!  I am popping in today with a fast and easy card for Inspired by All The Little Things Challenge this Week. I love the graphic nature of the inspiration image and that is one of the things I've learned about myself as I started making cards a little over two years ago.  I love really clean and crisp bold lines.  If you would have asked me before, I would have said my preference was for scrolls and flourishes.  I do like those once in a while, but I am most drawn to bold graphics and strong geometric shapes.

As I scrolled down through the Design Team Inspiration images, I saw this card by Wanda Cullen of Cullen-ary Creations and I let out a little giggle because I was already planning to use the same patterned paper as she did. This is from My Mind's Eye Fancy That Paper Collection.  I still see one of these in a 6 x 6 paper pad at Michaels once in a while. I have several sheets left but this is my next to the last one from this pattern.

I wanted to use the same paper, but do it in a different way than she had.  I did this by trimming a panel of this paper that was 4 x 6 inches.  I took the remaining 2 inches of paper, rotated it around 180 degrees and then using tape runner I overlapped it to match up the gold foiled lines. Then I die cut that panel down with Stitched Rectangle from the WPLUS9 Gift Card Layers die which cuts it to a perfect 4.25 x 5.5 inch panel. As long as your paper is thin enough (this is text weight), it cuts through both layers at the same time and eliminates me having to line it up after I cut. I attached it to my card base made from Papertrey Ink True Black Cardstock using my Kokuyo Long Dot Runner Adhesive.

I wanted my sentiment to be indicative of the same occasion as the Inspiration Image, so I die cut my favorite Spellbinder Bookplate Label (NLA) from Papertrey Vintage Cream for the sentiment which came from a Close To My Heart Set called Snowhaven. I've had this for several years and it is no longer available, but it's the only stamp I have for New Years and I really like it.  I stamped it in Versamark and heat set it with Simon Says Stamp Gold Embossing Powder.  I attached that with some 3D Foam Tape.


Once I got it all put together, I thought it needed some embellishment so I added some Nuvo Crystal Drops in Glossy Black and Copper Penny.

Thank you so much for stopping in today to see my card.  I hope you'll come back often.  The basic supplies I've used are linked below for your convenience.

Simon Says Stamp Antique Gold Embossing Powder
Shop at:
SSS
Kokuyo Long Dot Runner Adhesive
Shop at:
SSS
WPLUS9 Gift Card Layers Designer Dies
Shop at:
SSS
Versamark Ink
Versamark Ink
Shop at:
PTI | SSS
Wagner Heat Tool
Wagner Heat Tool
Shop at:
SSS
Papertrey Ink Vintage Cream Cardstock
Shop at:
PTI
Cuttlebug Die Cutting Machine
Shop at:
SSS
Tonic Nuvo Crystal Drops - Copper Penny
Shop at:
SSS
Papertrey Ink True Black Cardstock
Shop at:
PTI
Scotch 3M Faom Tape
Scotch 3M Foam Tape
Shop at:
SSS
Teflon Bone Folder
Teflon Bone Folder
Shop at:
SSS
Nuvo Crystal Drops Glossy Ebony Black
Shop at:
SSS

Monday, December 11, 2017

Altenew Inspiration Challenge

This month's Inspiration Challenge at Altenew is called "Class of 2017" and we can choose any of the year's 11 other challenges as our inspiration.  I chose the August 2017 Inspiration for my card.  It has been a while since I have had a chance to participate in the Altenew Challenge although it is one of my favorites.  The fun part is that I can enter as many times as I like and I plan to enter a few more times before the month is over. I hope I will have time to do at least 1 other card.

I struggle sometimes with making a card using colors not found in nature and this is one of those cards.  I love the colors but you would not find this color in nature on this flower.  I'm not sure there are any flowers this color anywhere, but I know I haven't seen everything.  I just like using pretty colors when I am making a card for my Mother-In-Law and I try to send her different things than I have previously sent.  My Sisters-In-Law, Brenda and Vickie, say she really enjoys looking at them and having them read to her.

I chose this color in part because I wanted to play along in the Altenew Challenge this month and also because I wanted to make something with this gorgeous teal and gold foiled paper that I have. This came from one of the Craft Smith Paper Pads that I got at Michaels on a Black Friday Special.  The whole collection is very tropical and lush but I will always be drawn to anything that has an Art Deco feel to it.  I love Art Deco and I have really been enjoying watching the Property Brothers At Home doing the renovations on Drew and Linda's home. I chose this paper as my starting point but I also had Altenew Beautiful Day on my desk.  I have used this set so often that I had accidentally torn the two most used stamps in the collection trying to peel them off an acrylic block so I had recently ordered a replacement set (on a Cyber Monday Deal).  Because I love this set so much, I wanted to make sure I ordered a replacement set, so both were sitting on my desk waiting to be swapped out.  I used my old set one more time to do this card.  At some time, Altenew might decide to discontinue this set, but I don't see it happening anytime in the foreseeable future; it's just too popular.

I started by stamping the bloom outline and the leaf outline in Versamark and heat setting it with Simon Says Stamp Antique Gold Embossing Powder.  For all of the stamping on this card, I used the Altenew Sea Shore Ink Collection which are all of these beautiful shades of teal; Mountain Mist, Volcano Lake, Lagoon and Emerald.  These are available in the larger ink pads, but I have all of my Altenew Inks in Cubes.

I love the whole ink cube idea because it allows me to choose more than one brand of ink for my projects and also because the RA makes it difficult to hold on to the larger pads. Each brand and type of ink performs differently so you just have to know what you expect as far as performance and try one or two of them before you buy a whole set.  I tried a couple of the pink and red families of colors before I got more.  I love the colors and they are different than the other brands I have.  Plus the cubes come in collections that are already color coordinated for you for any layering images you might be stamping.  In this case, I did not have to do any double or triple stamping to get the color I wanted.  Just a single stamping although I did use the MISTI just in case. Because this set is so well loved, the ink sticks to the photo-polymer very well.  I'll have to break in a new set of stamps now but I'm glad to have a replacement set.  Thankfully, I hadn't messed up any of the dies.  You can also purchase the Beautiful Day Stamp & Die Bundle in the Altenew Shop which gives you a bit of a discount as of the writing of this post.


In Erum's beautiful card, she didn't say what ink colors she used and for my card I took a lot of liberties with the golden chartreuse color and just made mine gold.  I did not use any brown but we are to use the image as a starting point and go from there.  We don't need to copy it exactly.  I always find Erum's work just incredibly beautiful.

Thank you so much for coming by today to see my card.  I hope I've inspired you to think outside of the box a bit and try an unusual color scheme on a project of your own.  I linked the supplies I've used below for your convenience.


Stamper's Select White Cardstock
Shop at:
PTI
Simon Says Stamp Antique Gold Embossing Powder
Shop at:
SSS
Kokuyo Long Dot Runner Adhesive
Shop at:
SSS
Versamark Ink
Versamark Ink
Shop at:
PTI | SSS
Wagner Heat Tool
Wagner Heat Tool
Shop at:
SSS
Ranger Multi Medium Matte
Shop at:
SSS
Teflon Bone Folder
Teflon Bone Folder
Shop at:
SSS
Altenew Sea Shore Ink Cube Collection
Shop at:
SSS | ALT
Altenew Beautiful Day
Shop at:
SSS | ALT
Altenew Beautiful Day Dies
Shop at:
SSS | ALT