Showing posts with label Spellbinders Dies. Show all posts

Friday, December 1, 2017

Make it Monday #305 - Love of Layers

This week's Papertrey Ink Make it Monday Tutorial #305 is "Love of Layers" by Laurie Schmidlin and shows us how to add lots of layers and texture to our projects. I am a big fan of Laurie's work and to get to see her process was a treat for me.  Laurie showcased her layers by adding ink to her die cuts and by using foam tape.  I love this look but I don't do it often because I know it might not fit in my envelope after and it can add to the cost of postage.  However, given the season, I was all in for this challenge. I  try to keep a few 6 x 9 padded mailers on hand for just such an occasion.


My card started with a top folding card base made from Stamper's Select White Cardstock.  I've been so anxious to use Brilliant Baubles so I die cut a few of each shape I planned to used and stamped them using my MISTI so that I could double or triple stamp for better color saturation.  I'm participating in the Merry Monday Christmas Challenge # 267 with this card and their colors dictated my color scheme; Hawaiian Shores and Green Parakeet with White/Silver or Vellum.

For the next layer, I wanted the texture of Linen Cardstock but I added lots of sponging around the outside after die cutting and embossing the panel. You can't really tell in photos, but it is there.

I have been using the Gemini quite a bit on some of my larger dies or those that can be embossed because even with a tan or grey embossing pad, it cannot come close to the level of detail from the Gemini. I also noticed that Simon Says Stamp is planning to carry these machines in both the regular and junior sizes but they aren't available yet. It does take a bit of practice to figure out the sandwiches and I encourage you to keep your manual handy to check recipes because I accidentally cut through my rubber embossing mat and had to order a new one.  The thing is, because it is so thin, you wouldn't think it could do anything, but the embossing is second to none.  I'm still using my Cuttlebug for most of my die cutting, but if it is one that can be embossed, I'm hauling it into my kitchen right now because that's the only place I have room to set up the Gemini. Don't get me wrong, I think it has a smaller overall footprint than the Cuttlebug but I have a system in place for this house that needs to stay in place until we move next spring.  Since our kids are grown and gone, it isn't an issue to leave it sitting on one end of my kitchen island.

I had stamped all of my ornaments last night so they were completely dry before I hit them with some Iridescent Gold Glimmer Mist and set some little jewels in place. After I sponged the ink onto the linen cardstock paper, I also misted it.  With the texture, the shimmer mist kind of settles in some of the deepest corners of that paper and really catches the light in real life.  I mounted that directly to my card base with my favorite Kokuyo dot runner.

Next I cut the next size smaller in the hemstitch rectangles from Hawaiin Shores Cardstock but without the hemstitched detail layer this time.  It just cuts a plain regtangle when you do it that way but I really like the crisp, die cut edges.


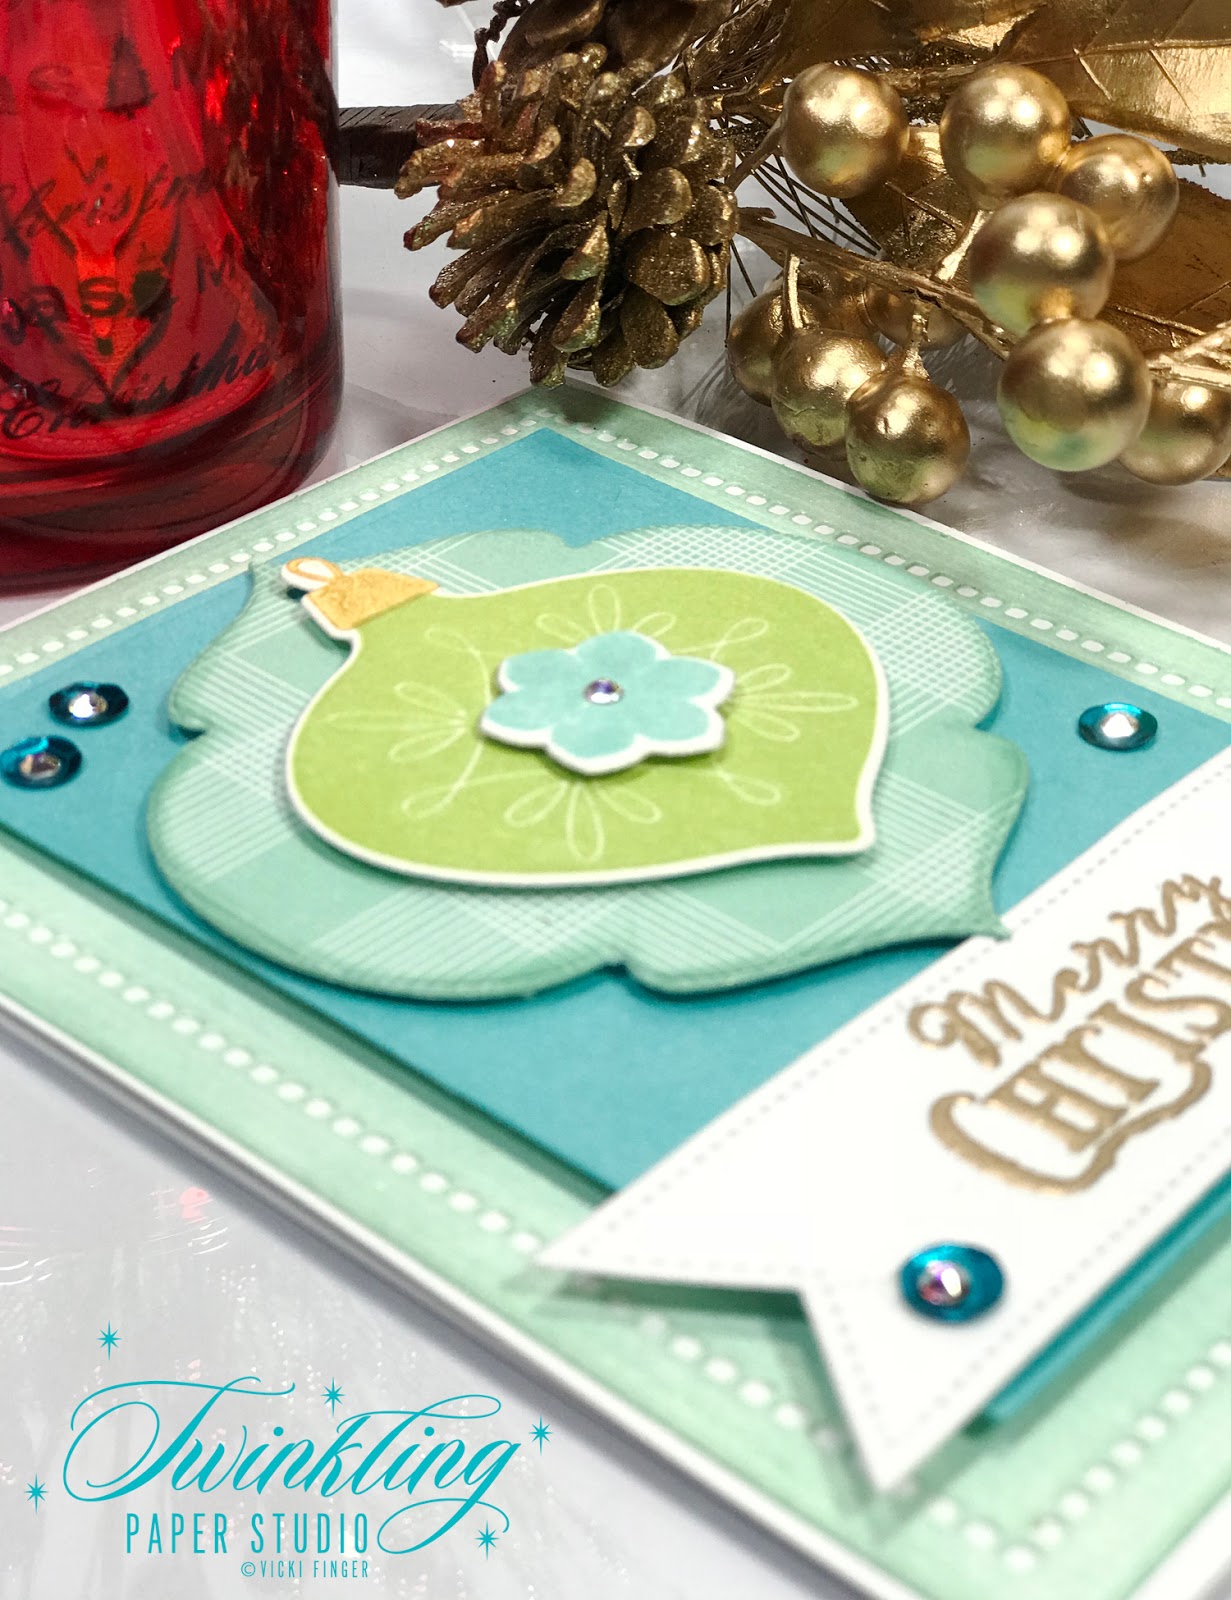
Using a piece of the larger Bitty Big Plaid in Aqua Mist adhered to a piece of Papertrey Ink #160 Tag Stock I die cut Tag Sale #12.  If I need to do this again, it would have been much easier in the Gemini vs. my Cuttlebug.  I had to run it through a few times to get it to cut the hanger part completely.  After cutting that, I inked up the very outside edges with a Mini Ink Blending Tool in Aqua Mist Ink.  That just helps to separate that layer from the background layer. I attached that with foam tape.  Next came the ornament that I had stamped in Green Parakeet with another layer of foam tape.  I also stamped one of the small flowers from the set in Hawaiian Shores and added a little gem to that.  The banner is from Keep It Simple Frames and is stamped with the "Merry Christmas" greeting from Beautiful Berries: Winter in Versamark and heat set with Simon Says Stamp Antique Gold Embossing Powder.


Once I had this card all finished, all the layers assembled and, of course, all the photos taken and edited, I decided it needed a little pop of color from some sequins. I adhered them using Ranger Multi Medium Matte and then added a little gem in the center of each sequin.

Thanks so much for stopping by today.  You can find the supplies I used linked below.

Stamper's Select White Cardstock
Shop at:
PTI
Simon Says Stamp Antique Gold Embossing Powder
Shop at:
SSS
Kokuyo Long Dot Runner Adhesive
Shop at:
SSS
Papertrey Ink Hawaiian Shores Cardstock
Shop at:
PTI
Papertrey Ink Beautiful Berries: Winter
Shop at:
PTI
Papertrey Ink Keep it Simple Frames
Shop at:
PTI
Wagner Heat Tool
Wagner Heat Tool
Shop at:
SSS
Cuttlebug Die Cutting Machine
Shop at:
SSS
Ranger Multi Medium Matte
Shop at:
SSS
Papertrey Ink White Tag Stock #160
Shop at:
PTI
Papertrey Ink Tag Sale #12
Shop at:
PTI
Perfect Match Green Parakeet
Shop at:
PTI
Perfect Match Hawaiian Shores
Shop at:
PTI
Papertrey Ink Brilliant Baubles
Shop at:
PTI
Papertrey Ink Brilliant Baubles Dies
Shop at:
PTI
Spellbinders Hemstitch Lace Dies
Shop at:
SSS
Fresh Snow Linen Cardstock
Shop at:
PTI
Gemini Full Size Die Cutting Machine
Shop at:
SSS
Aqua Mist Bitty Big Prints
Shop at:
PTI
Perfect Match Aqua Mist
Shop at:
PTI

Monday, November 13, 2017

White on White Challenges

Good Morning, Everyone! Today I have a project for a few challenges. I will be participating in the Inspired By All The Little Things with a gorgeous photo to inspire us, The Paper Players Challenge with a color challenge theme of White on White and the Tic Tac Toe Challenge using the center row across of Die Cut, Free, & Leaf. I've actually been watching for a White On White Challenge to come from somewhere and I felt pretty lucky today that I get to make 1 card for more than one challenge this time around. It doesn't happen very often. I can regularly combine one project with 2 challenges but I've only ever done one card with 3 challenges a few other times.


I saw quite a few white on white challenges this time last year so I've had in my mind for the last few weeks what I would create if I saw another one.  Part of the trick of doing white on white is texture so that each layer has something it offers that is different from the other layers.  For my card, I knew I wanted to use my Poinsettia Dies from Spellbinders to create my card which both cuts and embosses the die cuts. I wanted something that would emboss well so I chose #140 Watercolor Paper which is thicker and heavier than my normal white cardstock.  I took three A2 sized panels and misted them with Iridescent Gold Glimmer Mist from Tattered Angels.  I buy mine directly from Canvas Corp. I also did an A2 panel of Linen Cardstock at this time so it would have time to dry before I die cut it for my background panel.  Because those two papers are such different textures, it adds that interest when you see it in real life.  I also used a couple of the Tim Holtz Sizzix Holiday Greens Dies for some extra foliage.  

Once everything was dry I started die cutting all of my pieces beginning with the Spellbinders Hem Stitched Rectangle in the largest size.  This cuts the panel to be about 1/8th inch smaller than your card base.  I embossed it as well to give it that extra bit of detailing on the panel.  I mounted that to my card base made from Gina K Designs Heavy Base Weight White Cardstock.  I got several colors of this card stock when I ordered my Stamp TV Merry & Bright Kit last month which was a fun way to try out some of the colors.  I really love the #80 Layering Weight White and the #100 Heavy Base Weight White depending on what I am using it for.  It is the absolute smoothest, silkiest white cardstock I've used. It isn't as heavy as Stamper's Select White from Papertrey Ink, but I know there will be occasions where I want to use it and this was one of those times. The color is a little different than Stamper's Select White as well and I felt it was a better match to the not so stark white of the watercolor paper and the Papertrey Ink Fresh Snow Linen Cardstock I was using.  I like to have options so that I can choose the best fit at the time. Only the White Cardstock is a different feel.  The rest seems comparable to the Papertrey Ink Cardstock I am already using and that I have been very happy with.  I'm not one to think I have to have all of the inks in all of the colors and all of the brands, (you could go broke trying) so I want my ink to match my cardstock and Papertrey Ink's Perfect Match Ink and Cardstock system is fantastic and I am planning to stick with it. 


I took all my die cuts and started assembling the poinsettia blooms and the foliage and laying it out on my card.  I used Ranger Multi Medium Matte to adhere the flowers together using the top two layers for the smaller bloom and the top three layers for the larger bloom.  There is also a 4th and larger layer but I felt that was too big for my card. I used some pre-arranged little pearl clusters for the center of the poinsettias attaching them with Ranger Multi Medium Matte as well. They come with sticky dots on the back but Multi Medium holds much better, even through the mail. Then I started assembling my card.  I adhered the Hemstitched Rectangle to a top folding white card base using my Kokuyo Tape Runner.  For the foliage I used Multi Medium Matte with an acrylic block sitting on the top for a few minutes to give it time to adhere.  Then I added the poinsettia blooms.  Once I had everything attached, I used my Wink of Stella Clear Shimmer Pen over the flower and foliage that was showing. Even though I had spritzed with shimmer spritz, this really added a lot more shimmer to the flowers although you may not be able to see it in the picture.  My current Wink of Stella seems to have a particularly high concentration of shimmer in it.  

After that I die cut the tag from the Keep It Simple Frames Dies little tag banner from some of the leftover watercolor paper scraps.  I chose the Merry Christmas greeting from Beautiful Berries: Winter Stamp Set and heat embossed that with Antique Gold Embossing Powder and then repeated it for a double heat embossed sentiment. I used the Mini MISTI for this.  Jennifer McGuire did this technique a week or two ago and I love the difference it makes in my embossing so you'll be seeing this technique often.  For the final touch, I wanted to put a brad or something in the hole on the tag.  I chose a Christmas Tree brad (it was silver when I started) and covered it with Versamark and then gold embossing powder and heat set it.  I let that cool and then did a second coat on that as well.  


I absolutely love how this card turned out and I am really happy to get to enter it in a few places this week!  This card predominantly consists of die cutting so it went very fast.  You could do lots of die cutting and then sit and assemble the flowers how you want them. I added extra layers to the ones I've created here, but you definitely don't have to. I did because I knew I wanted to go all out for this card.  You could also use larger single pearls or Liquid Pearls or Tonic Nuvo Drops for the flower centers which will also make assembly go fast.  If you have white pearls and want them to be a different color, use an alcohol based marker to change the color (such as a Copic marker).

To get a larger version of the images, right click and "open in a new tab" and it will bring up a larger image for you to see.  Thank you so much for stopping by today!  We have about 11 days left before we go for the Finger Christmas in November Dinner and I have several more projects in mind to share with you so I hope you'll come back often.  

Saturday, April 15, 2017

Bokeh Backgrounds

Tracey McNeely is our Muse over at The Muse Challenge #211 this week and she used a rainbow of colors along with the Altenew Halftone Circles Stamp Set. I'm not sure why, but this made me think of a Bokeh Background so that is what I made.

I started with a panel of Canson Bristol Watercolor Paper and ink blended a background using Cracked Pistachio, Salty Ocean and Mermaid Lagoon Distress Inks. It was done very randomly with no rhyme or reason to how I did it.  I used the Studio L2E Bokeh Builder Stamp Set from Simon Says Stamp plus some "guts" from some Stampin' Up stamps that I kept.  That is where the large circle came from.  The rest are in the Bokeh Builder Stamp Set.  You should always start with the largest circle and work your way to the smallest. Also, there will be fewer of the large circles and they should increase in number as your circles get smaller.  I hope that makes sense. I used Brilliance Moonlight White Pearlescent Ink to stamp all the circles since it would dry faster than White Pigment ink plus I helped it along a bit with my heat tool *Ü*.  Making a Bokeh Background was one of the first techniques I tried when I started making cards 18 months or so ago and I was pretty tickled when it worked how I thought it would.  I think that gave me the confidence to try other techniques even though sometimes they fail.  I also still love the dreamy look.

For the butterfly, I layered the solid image behind the open image.  I used a scrap of vellum to cut it that had been inked up with Altenew's Ocean Waves Ink for another project that you can see here.  I put a touch of Wink of Stella in all the openings to give the butterfly that shimmer that is so often present when you see a butterfly in real life.

The leaves are a Spellbinders Die called Romantic Vines that I found at my Hobby Lobby Store yesterday and used my 40% off coupon for.  I've actually never seen anything there before that was "new" to me and I loved this on sight. I loved it even more after I cut it the first time and saw that I didn't have to make a 2nd pass in my die cut machine to get the embossed detail. A single pass for cutting anything is always good.


It's been a while since I've had time to participate in the Muse Challenge.  If you came from there, thanks for stopping by to see my card and thanks to those who come by regularly.  I hope you'll all come back again another time.