 This is pretty straight forward stamping onto die cuts using a negative as my placeholder with my MISTI tool. The poinsettias are from the Gina K Designs Merry & Bright Stamp TV Kit which came with more stamps and was a huge value for the dollar. Those kits are currently sold out, but I'll include a link at the end of this post so you can keep checking back. I used Papertrey Perfect Match Inks in Lovely Lady, Hibiscus Burst, and New Leaf for my stamping. For the background, I used a piece of Pink Shimmer Cardstock (sent to me by my friend, Cindy) which I die cut first with a Stitched Rectangle Die from WPLUS9's Gift Card Layers Die and then dry embossed with a simple border design all the way around using an embossing folder. There isn't a style or pattern name on this folder and I know it hasn't been available for some time although it originally came from Stampin' Up way back when. I think you'll be able to see the design better in some of the other photographs such as the one just below.
I wanted just a touch of texture and with the border all the way around, it makes a sort of frame for my blooms. In reality, poinsettias are all leaves. The blooms are leaves but for the sake of simplicity, I'll just call them blooms here. Pink ones are my favorites. The little banner is cut from the Keep It Simple Frames Dies and stamped with a Sentiment that came from the Beautiful Berries: Winter Stamp Set. I stamped it using Versamark and heat embossed twice using Antique Gold Embossing Powder from Simon Says Stamp. It is my go to Gold Embossing Powder. It's a warmer gold tone that regular gold embossing powders and works with the colors I like to use. I might use regular gold embossing powder a couple of times a year but the rest of the time I use this one.
I also wanted to keep this design simple because I'm going to enclose a little gift with the card which you can see in the picture. I've been waiting for a chance to share all the paper beads I've been making. From daughters to granddaughters and friends to sisters-in-law, I think I have a bracelet made for each one of them.
A month or so ago, Gina, of Gina K Designs, did a video tutorial showing how to make paper beads. You can find that tutorial on YouTube here. This is a fantastic thing to do with paper scraps. If you've been coming here for very long at all, you know I love gold foiled cardstock, especially if it is gold and a color and most of all if it is gold and pink. I can't bear to throw away those scraps and now I have a perfect use for them - paper beads. I'll tell you right up front here that these pink and gold beads were not created from scraps, but rather from a sheet of pink and gold paper in a design that was quite large - too large to be used for a card. I decided to cut it up for paper beads and I thought I'd share my experience with you here.
When I started, I tried several different widths of strips. Gina shows you how to cut your own in her video so that part was easy. And Papertrey has a die that will cut the strips for you, but I found that I wanted mine to be longer and narrower than the strips that die cuts. I tried several sizes from about 3/8ths of an inch to an inch wide and everything from 6 to 12 inches in length. You'll have to try a few to find what your individual preference is but my preference for the paper is ½ inch x 8.5 inches. The half inch beads are a good size for bracelets as the bigger beads don't work well for something that is going around your wrist. Other factors to consider when you are starting beads is the thickness of your paper. If I were planning to use a paper that was think, I would likely do 12 inch long strips. You can find a quilling tool online or probably any kind of hobby or craft store. I ended up getting one from a lady that Gina recommended who makes her own tools but not until I had done a few to make sure I wanted to continue to make beads. I have made several hundred in the past month and I probably won't make any again until next year. In fact, I still have about 200 beads to coat still for this year, but I wanted to give you some tips for doing that as well. These are just a few things that I learned as I was making beads that I hope will help you if you wish to give it a try.
I really enjoyed this process because I could sit with my husband while I rolled beads and watch TV (well, half watch -- half listen). I would just put them in a little dish so I could coat them later in my studio. Again, Gina already did the hard part by making a video showing you how to roll and coat your beads but because I plan to give the bracelets I made to several young ladies, I wanted them to be a bit sturdier. I also wanted them to be really smooth and shiny which meant I had to do additional coats of Ultra Thick Embossing Powder. Size 4 aluminum knitting needles are just the right size to do that with. Again, be sure to check out Gina's YouTube video to see how this is done.
What I found, was that I got a better result if I heated the embossing powder and melted it, then rolled the bead again right away and melted that coat. Then I set it aside to cool before I added a third and 4th coat of UTEE. Since I was doing so many beads at the same time, this requires a bit of patience but I found that by the time I did five beads, the first one was cool and I could go back and add the additional coat or two of embossing powder. Then when I got to the end of those five beads again, I could take them off the knitting needle and set it in my dish. So I could do about 5 at a time and then I could move on to the next set of 5. Some things to keep in mind are how quickly you add the coats of embossing powder. If you try to do all 4 coats at once, then your paper tends to change color so be sure to slow it down. I found it a lot easier to wait a few minutes in between or else the coating would be so hot that it would melt and drip. I use a Ken Oliver Craft Mat on top of the little table my heat tool is to catch anything stray - any time, not just when I am doing beads. It's just a precaution to keep anything from getting on furniture or carpet. MS affects your balance and coordination and I can be a klutz, so I learned many years ago to protect my surfaces. You also have to be very careful not to hold the heat tool on the embossing powder for too long because you can burn it, causing it to turn yellow instead of being clear.
This is the pile of beads and resulting bracelets that I've made so far. I ordered small spacer beads in silver and gold from Amazon and strung them on Elastic Cord also from Amazon or you can get it at your local hobby store. I didn't know if I could ever use all of the Ultra Thick Embossing Powder that I have and now I actually think I'll have to get more before next year's beads. I like to be busy and this lets me do that while also enjoying a little television time. A big thank you to Gina K for showing us how she makes her beads. It was a great guideline for me to figure out how to achieve the look I wanted. My favorite beads are 1/2 inch wide, made from 8 inch long strips of paper and have 4 coats of embossing powder on them. These beads are all made with paper that has either gold or silver foil running throughout the design, but of course, the pink ones are my favorites.
These beads won't stand up to doing dishes or taking a shower with it on, but they are definitely water resistant and will be a lot of fun for my friends and family to wear, knowing that each bead was hand rolled and created by me.
Thank you so much for sticking with me today for this very long post. My husband had to put a new video card in my computer this week and it took a while before I realized that I needed to recalibrate the color. I will have to look on a different device to see if I think I've got the color right so if it looks odd to you, please send me a note to let me know. I'm linking my supplies for you here but the paper, I already had.
 Stamper's Select White Cardstock Shop at: PTI |  Kokuyo Long Dot Runner Adhesive Shop at: SSS |  WPLUS9 Gift Card Layers Designer Dies Shop at: SSS |  Papertrey Ink Pink Shimmer Cardstock Shop at: PTI |
 Perfect Match Lovely Lady Ink Shop at: PTI |  Perfect Match Hibiscus Burst Ink Shop at: PTI |  Perfect Match New Leaf Ink Shop at: PTI |  Scrapbook Adhesives Thin 3D Foam Squares Shop at: SSS |
 Gina K Designs Stamp TV Kit - Merry & Bright Shop at: GKD | 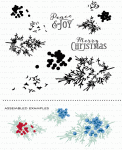 Papertrey Ink Beautiful Berries: Winter Shop at: PTI |  Papertrey Ink Keep it Simple Frames Shop at: PTI | 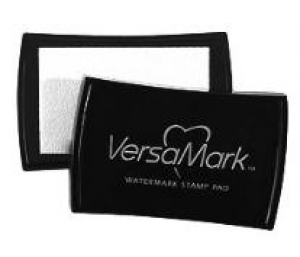 Versamark Ink Shop at: PTI | SSS |
 Ranger Ultra Thick Embossing Powder Shop at: SSS |  Wagner Heat Tool Shop at: SSS |


Beautiful!
ReplyDeleteYour card is so pretty and those BEADS!!!! Fabulous! Thanks for joining us.
ReplyDelete