For Lexi's ornaments she used Limitless Layers Hearts to make her ornament, but I knew that if my order got here in time, I wanted to use the new Tag Sale #12 to create my ornament. I am so excited for this addition to the Tag Sale dies as I think it is perfect for ornaments. From the beginning, I saw it as an ornament rather than a tag.
For my ornament, I started by cutting one ornament from Heavy Duty (#160) Tag Stock and another from the foiled Cardstock I wanted for the front side of my ornament. To keep the look of this neat from the front or back, I glued them together back to back. Then I started deciding how I would embellish the ornament besides just a photo. The Tag Sale Die comes with a few circles for the interior, but I was using some fancy wood grain metallic paper that was left from another project I made, so I knew I wanted the ornament to be upscale as well. So I pulled out a favorite die from and 2014 Stamp-A-Faire Kit called Renaissance that has a die that I love to use anytime I want to highlight a circle shape. It is made in a style that represents a Rose Window that you might see in a great cathedral such as Notre Dame. Rose Windows are particularly part of Gothic Architecture but are seen in lots of other types as well. I love this little die and knew I wanted to use it for the center picture area of my ornament as an accent.
Because my paper had gold foil on it, I die cut the Rose Window Die from Gold Foiled Cardstock. I like the way this die looks with a solid color behind it, so I die cut a circle from Vintage Cream Cardstock that matched my metallic wood grain paper and that I was planning to die cut my sentiment from. I put a piece of cream colored ribbon through the hole to make a hanger for the ornament.
The hardest part of this card, was deciding what papers would look good with all the elements I used and It took me a while this time. Kind of as a last resort I went to look at some of the gold vellum I have that I got several years ago from Stampin' Up and came across some that I bought last summer and had completely forgotten about. It was a pack of 5 sheets, all the same design, with all of these fun gold foiled stars on it. I wanted a color underneath it so I die cut A2 panels of Hawaiian Shores and the Vellum with a stitched rectangle die. By adding that stitched line, it gave me a place to put the skinniest little bit of dot runner into that line on the Hawaiian Shores panel and lay the vellum on top. You can't see the adhesive at all. I attached that to a top folding card base made from Stamper's Select White Cardstock. I should have used Vintage Cream but it was too late by then as I already had the front piece glued down.
To attach the ornament to a card, I put a strip of Removable Adhesive on the card front and added the ornament to that so that when the ornament is removed, there isn't adhesive all over the back. Removable Adhesive is a handy thing to have around - it's perfect for holding the negative in place in your MISTI when you want to stamp as well. I still use a bar magnet with the negative, but it's a smaller, thinner one.
Just in case you are curious (like I am), the photo on my ornament is me with my oldest granddaughter, Kaylan, who started college this fall. I'm thinking I need to keep this and make her a different one. *wink*
Thank you so much for coming by today to see my project. I'm going to link up this project over at Word Art Wednesday. I hope you're having a great week and I'm looking forward to seeing all the ornaments over at the Link Up.
 Stamper's Select White Cardstock Shop at: PTI |
 Kokuyo Long Dot Runner Adhesive Shop at: SSS |
 Papertrey Ink Hawaiian Shores Cardstock Shop at: PTI |
 WPLUS9 Gift Card Layers Designer Dies Shop at: SSS |
 Papertrey Ink Perfect Match Vintage Cream Cardstock Shop at: PTI |
 Cuttlebug Die Cutting Machine Shop at: SSS |
 Ranger Multi Medium Matte Shop at: SSS |
 Papertrey Ink White Tag Stock #160 Shop at: PTI |
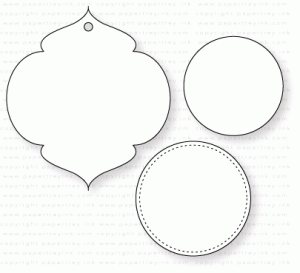 Papertrey Ink Tag Sale #12 Shop at: PTI |
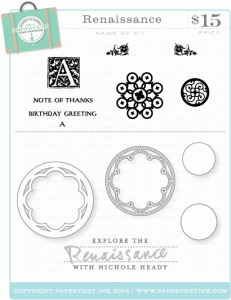 SAF 2014 - Renaissance Kit Shop at: PTI |


What a beautiful ornament Vicki...I love all the added details you used to make this so special! And I can understand how you might want to keep this one for yourself...what a beautiful picture of you and your granddaughter! I'm sure she'll understand if you make her another one! :0)
ReplyDeletegorgeous ornament and card!! i love all the gold and especially the detail of the rose window die. i also say keep this one and make another lol! thanks for playing make it monday!!
ReplyDeleteWhat an amazing and precious creation. It will surely be a keepsake to cherish for a long time. Thanks so much for sharing this with us. I always enjoy having you play along with us.
ReplyDeleteBlessings,
Karen Letchworth
Word Art Wednesday