Thursday, December 28, 2017

Altenew Class of 2017 Inspiration Challenge Continued

Hello there!  Today I have another card for this month's Altenew Inspiration Challenge which is to choose a previous month from 2017 and use it as our inspiration.  This will be my third card for the challenge which makes me feel a bit better since I really didn't get to participate too much this year.  I guess the timing never worked out with everything else I was doing.

As I've mentioned previously, Beautiful Day, from Altenew, is my absolute favorite Altenew Stamp Set and might even be my all time favorite. It's definitely the set that has seen the most use. I have other sets from Altenew that I love but Beautiful day was my first purchase from them and it was love at first sight. I love to stamp them in some or all of the layers or watercolor them. Today's card involved a bit of both. My inspiration for this card was from the June 2017 Inspiration Challenge pictured here. This card is for a friend using a background stamp she designed so I wanted to combine it with Beautiful Day, whose blooms always make me think of Wild Roses rather than Peonies.

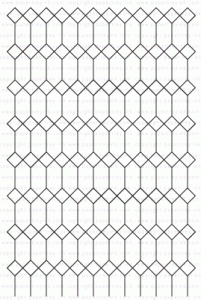
For my card, I started by stamping the background onto Canson Bristol Paper using Papertrey Ink's Cover-Up: Diamonds with Versamark Ink, heat setting with Antique Gold Embossing Powder, and then adding some loose watercolor using Lavender Moon, Sweet Blush and Vintage Jadeite Re-inkers. I also gave that background a generous amount of Iridescent Gold Glimmer Mist (Tattered Angels) and let it dry overnight. It wasn't that it needed to dry overnight; I just never got back to it yesterday.  It was good to leave it for that long to get an accurate idea of what colors I wanted to use for the blooms. It can be hard to tell when the paper is really wet. Because this warps my paper, I flatten it back out my giving it a light mist of water and then running it through my die cut machine face up with an embossing pad and a clean plate on top.  I started by stamping and heat embossing all of my elements in Versamark onto Canson Bristol Paper and heat setting with the same Antique Gold Embossing Powder that I used for my background.  Since I was planning to use lots of water and shimmer mist, this works the best.  


Now hindsight being what it is, I wish I would have stamped that lightest layer with Lilac Grace Ink but I actually forgot about that color until I was completely finished assembling this card. I used Lavender Moon for the lightest layer, then Winter Wisteria for the 2nd Layer and Plum Pudding for those deepest shadow layers. The thing I really love about Lavender Moon is the kind of Mauve color that is not fully pink or purple.  It makes it a great candidate to work with either color.  For the leaves I stamped the full layer in Vintage Jadeite and the detail layer in New Leaf.  For the filler images, I used Vintage Jadeite and Lavender Moon Re-inkers with a water brush.  I have a mister bottle that has just water in it and once good spritz of this makes the paper damp enough to let the color spread out smoothly rather than having a harsh edge or line of color.  It's just my preference for this style of card.

I die cut my background using the WPLUS9 Gift Card Layers Die and adhered that to a top folding card base made from Stamper's Select White Cardstock. I like to use my Teflon bone folder to help smooth this out and make sure it is well adhered. Next I die cut all of the floral elements with the Beautiful Day Coordinating Dies then arranged them on my card base. When I had them arranged how I liked, I used a piece of  Press-N-Seal over the top to pick up and flip over my arrangement.  I put a strip of Kokuyo dot runner on the back of each piece I had access to then laid it back down on my card front.  Once I pressed each element into place, I pulled back the Press N Seal. Then I went back with some Ranger Multi Medium Matte to anything that had movement left in it. That happens a lot when you have lots of layers. I even used a narrow little strip of Foam Tape under a few pieces where I thought there should be a bit of dimension and the sentiment banner as well.  I love how the sentiment from Beautiful Day fits on my Papertrey Ink Number The Stars Banner Die and I use it this way almost every time.  I did not cut my sentiment apart to stamp this way; this is how it was originally designed and it's a perfect fit.

I know you can't really see the shimmer on everything, but it's there.  In fact, that shimmer is what causes the glare that makes it hard to photograph. Even though I ended up using somewhat different colors than in the Inspiration Image, I love how this turned out. Since the person I am giving the card to loves Pink as I do, I know she will enjoy this colorful presentation of blooms.  I added a few green and purple sequins for that finishing touch.

I want to give you a little tip while I am remembering to share this with you.  Sometimes, when your card gets very front heavy with lots of beautiful layers, your card might not want to stand upright. You can help balance the weight by adding a cardstock insert for the inside sentiment.  Even a lighter weight cardstock helps quite a bit.  I don't like to stamp the sentiments directly onto my cardbase in case I make a mistake but I know it uses more cardstock to do it my way and I'm okay with that.

Believe it or not, I still have a few months of Altenew Inspiration Challenges that I hope to get to before the end of the month.

Altenew Beautiful Day
Shop at:
SSS | ALT
Altenew Beautiful Day Dies
Shop at:
SSS | ALT
Altenew Beautiful Day Stamp & Die Bundle
Shop at:
ALT
Canson Bristol Paper
Shop at:
SSS
Cuttlebug Die Cutting Machine
Shop at:
SSS
Kokuyo Long Dot Runner Adhesive
Shop at:
SSS
Press 'N Seal
Press 'N Seal
Shop at:
SSS
PTI Cover Up: Diamonds
Shop at:
PTI
PTI Perfect Match Lavender Moon Ink
Shop at:
PTI
PTI Perfect Match Plum Pudding Ink
Shop at:
PTI
PTI Perfect Match Winter Wisteria Ink
Shop at:
PTI
PTI Stamper's Select White Cardstock
Shop at:
PTI
Ranger Multi Medium Matte
Shop at:
SSS
Scotch 3M Foam Tape
Scotch 3M Foam Tape
Shop at:
SSS
Spellbinders Embossing Mat
Shop at:
SSS
SSS Antique Gold Embossing Powder
Shop at:
SSS
Teflon Bone Folder
Teflon Bone Folder
Shop at:
SSS
Tsukinko Sheer Sparkle Shimmer Spritz
Shop at:
SSS
Versamark Ink
Versamark Ink
Shop at:
PTI | SSS
Wagner Heat Tool
Wagner Heat Tool
Shop at:
SSS

Wednesday, December 20, 2017

Altenew Class of 2017 Inspiration Challenge - October

Hello everyone!  I'm taking another chance to play in the final Altenew Year in Review Inspiration Challenge for this year (2017) and this month I chose to be inspired by the colors in the October Challenge hosted by Lydia Evans. Lydia designed the Build-A-Flower Ranunculous set seen in her project below so it seemed fitting that she used that set in her Inspiration Challenge. I don't actually have that set but it's been in my shopping cart and on my wish list for months. The Build-A-Flower Sets all have a 6 x 8 Stamp Set with a large layering bloom and the coordinating die for $35.00.  That's a really incredible buy although the only way to get them is in the set; they aren't sold separately.


To start my card, I chose Beautiful Day which is my favorite and most of reached for Altenew Stamp Set.  I stamped and heat embossed several of the bloom outlines and leaf outlines in Versamark and eat set them with Simon Says Stamp Antique Gold Embossing Powder onto Canson Bristol Watercolor Paper.  I wanted more than I thought I would need because I'm making a set of cards as a gift for someone.  Once I had the heat setting finished, I started stamping the layers. Using the Altenew Red Cosmos Collection of Inks I chose the lightest shade of Frosty Pink Ink, the next layer in Coral Berry and the last layer in Ruby Red.

For the leaves, I used Frayed Leaf for the first color and Forest Glades for the Detail Layer.  You can't buy any of the Altenew Ink Cubes separately, but you can buy the refills and the larger oval pads individually.

I like to hit all of my stamped pieces with some shimmer mist and let that dry before I die cut everything in my Cuttlebug.  I primarily use two types of shimmer spray; Tattered Angels Glimmer Mist in Iridescent Gold and Tsukineko Sheer Sparkle Shimmer Mist.  Simon Says Stamp carries the Tsukineko Brand but I buy my Tattered Angels directly from Canvas Corp Brands.


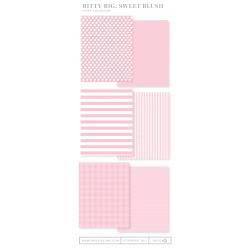
I wanted to use a bit of patterned paper behind my floral cluster so I die cut a stitched rectangle of Sweet Blush Bitty Big Paper for the background.  The sentiment is also from the Beautiful Day Stamp Set and is one of my favorites to use on a "Thinking of You" type card.  How can a day be bad if someone sends a card to you that says that?  I don't think it is possible.  I adhered everything to a top folding white card base.

This is fast and easy card making.  Once you've done the heat embossing, it is easy to line everything up for stamping the various layers.  I hope you've enjoyed my take on the October 2017 Altenew Inspiration Challenge.  The supplies I've used are linked below where possible.

Altenew Beautiful Day
Shop at:
SSS | ALT
Altenew Beautiful Day Dies
Shop at:
SSS | ALT
Altenew Beautiful Day Stamp & Die Bundle
Shop at:
ALT
Altenew Green Fields Ink Collection (Cubes)
Shop at:
SSS | ALT
Altenew Green Fields Reinkers
Shop at:
ALT
Altenew Green Fileds Oval Collection
Shop at:
SSS | ALT
Altenew Red Cosmos Ink Collection (Cubes)
Shop at:
SSS | ALT
Altenew Red Cosmos Oval Collection
Shop at:
SSS | ALT
Altenew Red Cosmos Reinkers
Shop at:
ALT
Kokuyo Long Dot Runner Adhesive
Shop at:
SSS
PTI Stamper's Select White Cardstock
Shop at:
PTI
PTI Sweet Blush Bitty Big Patterned Paper
Shop at:
PTI

Tuesday, December 19, 2017

Make it Monday #307 - Faux Stained Glass

This week's Make it Monday Technique for Papertrey Ink is Faux Stained Glass presented by Laurie Schmidlin.  I've actually done this one other time but not in quite the same way as this time.

It's the week before Christmas and everyone is so busy, me included.  I wanted to participate but not take too much extra time this week since I have lots of other things going on.  So I wanted to use a few of those extra pieces that I tend to have on my desk along with the Papertrey Products I was using.

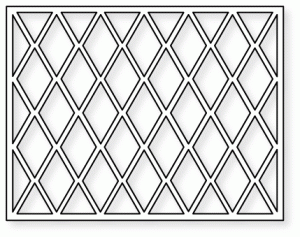
I started by die cutting the Cover Plate: Harlequin from Stamper's Select White Cardstock.  Next I cut a piece of Stamper's Select Vellum to go behind this for my "window" glass.  I cut this piece to just a smidgen smaller than 4.25 x 5.5 so that there would be no chance of it showing out the sides. I glued the front panel onto the vellum using a dot of liquid adhesive at each intersection of the lines.  Using Copic Markers in RV25, BG18 and G14, I colored in the diamonds totally at random.  I colored each one going the same direction and just in a single layer of color.  When those dried, I repeated that to get a deeper color.

In Laurie's video, she die cut two fun foam panels with her cover plate to use as the thickness for behind the main panel.  I did try this, but because the design of  the cover plate I chose has very thin lines, Fun Foam just didn't work out.  Therefore, I cut three additional panels of Stamper's Select White Cardstock to make the stack behind the front panel.  If you adhere it directly to the card base, it would not look like stained glass so I carefully glued the three frames, one on top of the other and then attached my front panel to that thick frame using tape runner.  Since the vellum was already glued in place, I didn't think it was necessary to use a liquid adhesive and just used my Kokuyo Dot Runner on top of the stacked frames.  That way, no adhesive showed once I laid the top piece down.  I then attached that panel to a Top Folding Horizontal Card Base. I die cut the Big Basics: Merry Christmas from Gold Foiled Cardstock and used some Holly leaves that I already had stamped and jeweled with Tonic Nuvo Drops in Gloss Carnation Pink.  These Holly Leaves are from the Gina K Designs Merry & Bright Stamp Set and are a bit larger than the Papertrey Ink Enclosed: Bell Holly Leaves which I thought fit better with the larger greeting.  These were stamped in Fresh Asparagus and Dusty Rose.


That finishes my card for today's post.  The supplies I've used are linked below for your convenience (affiliate links may be used at no cost to you).

Copic Marker Apple Green G14
Shop at:
SSS
Copic Marker Dog Rose R25
Shop at:
SSS
Copic Marker Teal Blue BG 18
Shop at:
SSS
Cuttlebug Die Cutting Machine
Shop at:
SSS
Gina K Designs Dusty Rose Ink
Shop at:
SSS | GKD
Gina K Designs Fresh Asparagus Ink
Shop at:
SSS | GKD
GKD Merry & Bright Stamp Set
Shop at:
GKD
Kokuyo Long Dot Runner Adhesive
Shop at:
SSS
Nuvo Crystal Drops - Gloss Carnation Pink
Shop at:
SSS
PTI - Big Basics: Merry Christmas
Shop at:
PTI
PTI - Cover Plate: Harlequin
Shop at:
PTI
PTI Stamper's Select Vellum (#44)
Shop at:
PTI
PTI Stamper's Select White Cardstock
Shop at:
PTI
Ranger Multi Medium Matte
Shop at:
SSS