Showing posts with label Simon Says Stamp Store. Show all posts

Tuesday, June 12, 2018

SSS Beautiful Flowers

Simon Says Stamp Beautiful Flowers
Hello there!  I am so happy and excited to be moved (mostly) and I am ready to get back to card making.  I am pretty irritated with myself this morning because I had a whole blog post done and accidentally deleted it when I went to put my affiliate links in.  A new post is not going to write itself so I just have to chalk it up to experience and move on.

Since we are in a new subdivision, there aren't any mailboxes yet and we're having to pick our mail up at the post office.  I was excited when I went to get last week's mail yesterday and in there was my order from Simon Says Stamp!  I could hardly wait to get home and ink it up but there were a lot of other things requiring my attention yesterday so it was late in the day before I got to ink it up.  I need to get back to those things soon so I have to be brief here - or at least try to be brief.

This week's Simon Says Stamp Flickr Challenge #99 is Coloring in honor of  Kathy Racoosin's 30 Day Coloring Challenge.  This is her 10th Challenge that she is hosting.  Kathy says that even if she only has 5 minutes to color each day that it makes her feel better and that's how she started these challenges a few years back.  I actually think I came on to the scene after those started so I didn't even know about them for a while.  The current challenge is on through the entire month of June, so check it out and join in if you like.

My particular coloring of the Simon Says Stamp Beautiful Flowers Stamp Set was inspired by a rose that my mom had when I was little called "Peace".  You can check it out on Wiki if you like here.  You can see other derivations of this rose there as well or by googling Peace Rose Images.  The particular derivation I like is called "Chicago Peace".  I actually painted this from memory before I thought to google the images and I am pretty happy with my results.  I could have added a bit more pink to the edges of the petals but I love how the rose goes from deep rich yellow to coral to pink all in one bloom.  There's also a recent release of the Peace Rose Forever Stamp. 

I heat embossed the bouquet using Simon Says Stamp Antique Gold Embossing Powder.  I kept my coloring very simple using my Zig Clean Color Real Brush Pens in Bright Yellow, Olive Green and Dark Green.  I think I could actually have used a fifth color in Pink, but I am going to leave well enough alone for this time.  I'm really happy with how mine came out.


This card is for a friend of mine who celebrates her birthday today.  We met each other 34 years ago as our husbands are great friends and have been for even more years.  She knows we've been moving so she isn't expecting a card and it will definitely be late but she'll still enjoy it and appreciate it.   That is kind of the story of my life this month as I think I've missed quite a few birthdays during this process.

Just for your information, this is a 5 x 7 card.  I couldn't bear to cut off any of the beautiful design to make a smaller card, so I didn't! 

I am thrilled with my new studio space and even have a logo on the way to put on the door so folks will quit asking if it's my "craft room".   The men kind of roll their eyes as if there's no way they'd let their wife have such a room.  I'm still trying to figure out my arrangement of furniture and I can't do it 100% until all of it is here.  My bookcase is the main thing I am missing right now and to be honest, I'm not sure there is anywhere it will fit. I hope it does or else I have to figure out something else.

By the way, this photo was taken at 4:30 a.m.  You can see in the background that it is night outside.  How awesome is it that I can take photos with no flash because of the lighting I put in my studio space?  That was the plan but sometimes plans don't work out so I was excited!  If you're wondering why I was up so early, it's because the dogs woke me up needing to go to the bathroom.  My sweetest little girl, Holly, licks my face until I wake up. When I tried to ignore her and go back to sleep, she kept licking me so I won't fall back asleep until I let her out.  That was the end of my sleep for today. 

I have the latest Altenew Build-A-Flower Release to play with this week and some old favorites that I want to visit so I'll be back soon. 

Thank you so much for stopping by today.  The supplies I've used are linked below for your convenience (Affiliate links may be used).

Cuttlebug Die Cutting Machine
Shop at:
SSS
Finetec Mica Watercolors - Golds
Shop at:
SSS
Gemini Full Size Die Cutting Machine
Shop at:
SSS
Kokuyo Long Dot Runner Adhesive
Shop at:
SSS
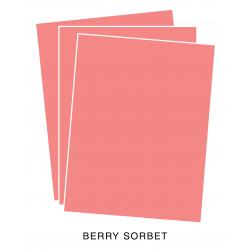
PTI Berry Sorbet Cardstock
Shop at:
PTI
Spellbinders 5 x 7 Matting Basics A
Shop at:
SSS
Spellbinders Embossing Mat
Shop at:
SSS
SSS Antique Gold Embossing Powder
Shop at:
SSS
SSS Beautiful Flowers 6 x 8 Stamp Set
Shop at:
SSS
Teflon Bone Folder
Teflon Bone Folder
Shop at:
SSS
Tim Holtz Tonic Paper Trimmer
Shop at:
SSS
Versamark Ink
Versamark Ink
Shop at:
SSS
Wagner Heat Tool
Wagner Heat Tool
Shop at:
SSS
Zig Clean Color Real Brush Markers - 48 Set
Shop at:
SSS

Wednesday, March 14, 2018

Photo Inspiration at Simon Says Stamp Wednesday Challenge


Hello! I am back for another Simon Says Stamp Wednesday Challenge March Designer In the Spotlight Post. This week we are featuring Your Next Stamp products for our theme of Easter Inspired. You don't have to use Your Next Stamp products to enter the challenge, but if you have some, we would love to see them used.

Simon Says Stamp generously provides a $50.00 Gift Voucher each week for each of their blog challenges. I actually won one of these right after Christmas and got to splurge on a purchase. That was a lot of fun!  Thanks again to Heidi for providing that each week.

We have this beautiful inspiration image and colors to inspire us this week.  My card uses the Hoppy Friends Stamp Set from Your Next Stamp along with a few other Simon Says Stamp Products and a bit of no-line coloring.

This is my first attempt at a no-line coloring look so I started by putting the image in my Mini MISTI and stamping it onto X-Press It Blending Cardstock which is made specifically for use with Copic or other alcohol markers.  It is silky smooth and I find it much easier to achieve the look I want with much less work vs. using a heavy cardstock. I stamped in Barely Beige Ink which is perfect for a no line coloring look.  I'm not typically a fan of images that have been stamped in black and colored in, so I wanted to try this ink out today.  I got this color for this specific purpose but I haven't tried it before now. I could tell right away that it would be perfect for this technique. You can also use light colored Distress Inks to help those lines fade completely away.
I have a moderately sized collection of Copic Markers but I knew that my Warm Greys would be just the ticket to go with the Barely Beige Ink so I pulled them out.  I ended up using only two markers with a very light touch of Colorless Blender for the bunnies.  Most of the bunnies were done with the W-1 Marker using a short flicking stroke to mimic their fur.  Occasionally I would use W-3 to add in a bit of darker color. For the inside of the ears and the tiny noses, I used two different colors; R11 for the bunny on the right and RV10 for the one on the left.  Like people, I assume they all have different tones in their natural coloring. I tried to start at the top of the head and work my way inward, much in the same way their hair would  naturally grow.  I've never actually had a rabbit for a pet so I did it the way my small dogs have it.  I'm assuming it would be similar on all animals so if my bunnies look like Yorkies, you'll know why.  Ha ha!  I have two Yorkies and we get them groomed every 6 weeks so they have the cute little teddy bear faces.

I just kept flicking in short strokes until eventually I filled up all the blank white space.  Then I went back in and added a bit more shading with the darker marker and then blended that back out with the W-1 Marker. Because I was flicking instead of coloring, it maintained some of the white and lightest tones for a natural look.  I hope it looks natural anyhow!  I am not a certified Copic Colorist and I have only minimal skills, but I was really pleased with how these little cuties came out. They aren't meant to be accurate, they are only meant to be cute!

Once I had the coloring finished, I used some Stitched Square dies from MFT to cut the bunnies out and a coordinating mat in Simon Says Stamp Cotton Candy Cardstock.  I mounted that to a background panel of  Simon Says Stamp Lavender Cardstock. I cut another Stitched Rectangles from Simon Says Stamp Surf Blue Cardstock and made a card base from Simon Says Stamp Mint Cardstock. I die cut two white and one gold "Easter" and adhered them together and then to the card with Ranger Multi Medium Matte. I stamped the "happy" sentiment on a scrap of white cardstock with Versamark and heat embossed it using Simon Says Stamp Antique Gold Embossing Powder and put a narrow strip of foam tape on the left hand side and adhered that to my card.  I added a few touches of Nuvo Dew Drops in Rosewater and Key Lime for a finishing touch.


I hope you'll be inspired by our challenge graphic and join us over at the Simon Says Stamp Blog. Don't forget, you could win a $50 Gift Voucher! Be sure to stop by next week as we are featuring Altenew!
Thank you so much for stopping by today.  The supplies I used are linked below for your convenience (Affiliate Links may be used at no additional cost to you).

Copic Marker - R11 - Pale Cherry Pink
Shop at:
SSS
Copic Marker - W1 - Warm Grey
Shop at:
SSS
Copic Marker - W3 - Warm Grey
Shop at:
SSS
Copic Marker RV10 - Pale Pink Pastel
Shop at:
SSS
Copic X-Press It Blending Cardstock - 10 Sheets
Shop at:
SSS
Kokuyo Long Dot Runner Adhesive
Shop at:
SSS
MFT Stitched Square Stax
Shop at:
SSS
Mini MISTI Stamping Tool
Shop at:
SSS
Scrapbook Adhesives 3D Foam Squares
Shop at:
SSS
Simon Says Stamp Barely Beige Ink
Shop at:
SSS
SSS Antique Gold Embossing Powder
Shop at:
SSS
SSS Cotton Candy Cardstock
Shop at:
SSS
SSS Easter Wafer Thin Die
Shop at:
SSS
SSS Lavender Cardstock
Shop at:
SSS
SSS Mint Cardstock
SSS Mint Cardstock
Shop at:
SSS
SSS Stitched Rectangles Dies
Shop at:
SSS
SSS Surf Blue Cardstock
Shop at:
SSS
Tonic Nuvo Jewel Drops - Key Lime
Shop at:
SSS
Tonic Nuvo Jewel Drops - Rosewater
Shop at:
SSS
Versamark Ink
Versamark Ink
Shop at:
SSS
Wagner Heat Tool
Wagner Heat Tool
Shop at:
SSS
Your Next Stamp Hoppy Friends
Shop at:
SSS

Monday, May 1, 2017

Queen Alexandra Poppies for the Simon Wednesday Challenge

I've had some computer problems this weekend so I got a bit of downtime while hubby was checking everything out.  I had stamped this panel with Versamark and Heat Embossed it using Simon Says Stamp Antique Gold Embossing Powder several weeks ago to watercolor when I had a chance. I decided Friday Night would be a good time to paint this for the Simon Says Stamp Wednesday Challenge with a theme of Anything Goes.  This stamp is called "Poppy Gems" from Penny Black.  Simon Says Stamp carries a huge selection of Penny Black stamps and I have a few of the floral images. I love Queen Alexandra Poppies (the Pink ones you can see right below).

I always associate Poppies with Bossy Joscie now as she plants poppies each year and her Instagram always says the pictures are taken at Flower Road Farm which is such a happy sounding name, don't you agree? I first saw a Queen Alexandra Poppy in my mom's back yard quite a few years ago.  I don't know if they are annuals or perennials. I used to know about lots of flowers and usually had some planted but my hubby has a habit of mowing over them so I gave up several years ago trying to have any in my yard.  He planted a couple of Dahlias for me a year or two back, but even those got mowed over when they were barely up out of the ground, so I gave up. That's probably why I do so many floral cards, because I miss having them in my own yard to look at.


To do my watercolor I used two Zig Clean Color Real Brush Pens in Light Pink and Deep Green with a water brush. As always, watercolor is about the layers so I just added in the color one layer at a time and deepened it where I needed to on the additional layers. Like anything else we do, it takes a bit of practice and I have no idea if the method I use is technically correct, but I'm okay with that.  I just enjoy the process of building the color layer by layer.  I'm getting better about respecting some of the white or lighter space in my colors but I still need a lot of practice. I can't tell you how to do this type of card, I can only tell you what I used and what I did.

A big part of watercolor is knowing your mediums and how they react with water.  Get some inexpensive watercolor paper and just try it. Canson Bristol Watercolor Paper is my favorite and I buy the pads of it at Hobby Lobby with a coupon usually.  Sometimes I get it on Amazon but I always take it to Fed Ex and have it cut down into card sized panels.  I also do this with my Stamper's Select White.  I cut one pack in half to make top folding horizontal cards and then I take 3 packs to have them cut in half vertically to make top folding vertical cards. This saves me a lot of time so that I don't have to stop what I'm working on to make a card base.  I use White Card bases 90% of the time.  I still always have at least one pack of paper that is uncut in case I want to make a larger card but that almost never happens. Probably any big box office supply store will be able to do this for you, so check around.

The banner is from the Papertrey Ink Tag Sale Quilted Die Set and I sat and made several up on black and white cardstock the other day while hubby was on my computer.

This is all I have for now but thank you for stopping by and I love it when you take time to leave an encouraging comment.