It's the week before Christmas and everyone is so busy, me included. I wanted to participate but not take too much extra time this week since I have lots of other things going on. So I wanted to use a few of those extra pieces that I tend to have on my desk along with the Papertrey Products I was using.
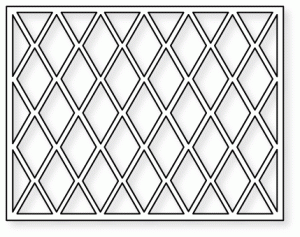
I started by die cutting the Cover Plate: Harlequin from Stamper's Select White Cardstock. Next I cut a piece of Stamper's Select Vellum to go behind this for my "window" glass. I cut this piece to just a smidgen smaller than 4.25 x 5.5 so that there would be no chance of it showing out the sides. I glued the front panel onto the vellum using a dot of liquid adhesive at each intersection of the lines. Using Copic Markers in RV25, BG18 and G14, I colored in the diamonds totally at random. I colored each one going the same direction and just in a single layer of color. When those dried, I repeated that to get a deeper color.
In Laurie's video, she die cut two fun foam panels with her cover plate to use as the thickness for behind the main panel. I did try this, but because the design of the cover plate I chose has very thin lines, Fun Foam just didn't work out. Therefore, I cut three additional panels of Stamper's Select White Cardstock to make the stack behind the front panel. If you adhere it directly to the card base, it would not look like stained glass so I carefully glued the three frames, one on top of the other and then attached my front panel to that thick frame using tape runner. Since the vellum was already glued in place, I didn't think it was necessary to use a liquid adhesive and just used my Kokuyo Dot Runner on top of the stacked frames. That way, no adhesive showed once I laid the top piece down. I then attached that panel to a Top Folding Horizontal Card Base. I die cut the Big Basics: Merry Christmas from Gold Foiled Cardstock and used some Holly leaves that I already had stamped and jeweled with Tonic Nuvo Drops in Gloss Carnation Pink. These Holly Leaves are from the Gina K Designs Merry & Bright Stamp Set and are a bit larger than the Papertrey Ink Enclosed: Bell Holly Leaves which I thought fit better with the larger greeting. These were stamped in Fresh Asparagus and Dusty Rose.
That finishes my card for today's post. The supplies I've used are linked below for your convenience (affiliate links may be used at no cost to you).
 Copic Marker Apple Green G14 Shop at: SSS |  Copic Marker Dog Rose R25 Shop at: SSS |  Copic Marker Teal Blue BG 18 Shop at: SSS |  Cuttlebug Die Cutting Machine Shop at: SSS |
 Gina K Designs Dusty Rose Ink Shop at: SSS | GKD |  Gina K Designs Fresh Asparagus Ink Shop at: SSS | GKD |  GKD Merry & Bright Stamp Set Shop at: GKD |  Kokuyo Long Dot Runner Adhesive Shop at: SSS |
 Nuvo Crystal Drops - Gloss Carnation Pink Shop at: SSS |  PTI - Big Basics: Merry Christmas Shop at: PTI |  PTI - Cover Plate: Harlequin Shop at: PTI |  PTI Stamper's Select Vellum (#44) Shop at: PTI |
 PTI Stamper's Select White Cardstock Shop at: PTI |  Ranger Multi Medium Matte Shop at: SSS |


oh this is so festive and fun, LOVE IT! Thanks for sharing.
ReplyDeleteWonderful holiday card, Vicki! Love your colors and especially, “Merry Christmas” die-cut in gold.
ReplyDeleteVery pretty - technique is awesome for a Christmas Card
ReplyDeleteJust lovely Vicki. Cheers.
ReplyDeleteI love that cover plate and what a pretty card! Your design is very pretty.
ReplyDeleteLovely, lovely card Vicki! And great idea to just cut more of the cover plate from cardstock rather than the fun foam...I'll have to remember that tip! Someone is definitely going to smile when they receive this card!! :0)
ReplyDeleteBeautiful card Vicki! Your stained glass background looks stunning! Love the gold sentiment! Hope you and your family have a Merry Christmas!
ReplyDeleteGorgeous holiday card, Vicki! Love your gold die-cut sentiment...really pops against the BG.
ReplyDeleteStunning card, Vicki! I love the bold sentiment and see you managed to get in the gold, so beautifully!
ReplyDeleteYour card is beautiful--wonderful use of the technique & I love your color choices! Funny--my entry is 1/2 done & I used the hexagon cover plate.
ReplyDeleteLove your card, Vicki!! I think using paper instead of foam works quite well for the more intricate coverplates! Great tip!
ReplyDeleteOh how beautiful is this Vicki! Love the holly and colors. Merry Christmas to you and your family !
ReplyDeleteI used paper too, and I love fun foam but I had too many small cuts .
ReplyDeleteHow lovely and such a fun Christmas card!
ReplyDeleteBeautiful, Vicki! No time for me to participate but I love what I’ve seen created. Merry Christmas!
ReplyDelete