
Since the intent of these tags is to actually put them on gifts at some point in time, I wanted to make sure that they were sturdy enough to survive that. I needed all of the tags to be generic, so I sat and looked through pretty much every stamp set I have to find the stamps for each of them. I didn't want any two styles to look too similar although the ribbon elements are mostly alike and I also didn't want greetings that were too personal. So I really looked hard and with a critical eye to come up with these. It was harder than you might imagine. I have other generic greetings such as "Hello" or "Happy Hello", etc. but why would you need a gift tag for that? Just sayin', *wink*.
I use a lot of solid color card stock and don't normally buy too many printed papers so that was one of the biggest challenges for me. I pulled out every printed paper pack I have and was happy that I had something for each of the five ideas I came up with. As you all know, printed paper tends not to be very thick so each tag is two layers thick with heavy 80# or higher card stock for the back layer. I used Ranger Multi Medium Matte to glue them together, putting the back side of the die cuts together so that they would have the nicest possible finish front and back. I put the adhesive on one side, then matched it up with the other side. Once I had them lined up I pressed gently all the way around with my bone folder. I made sure to let the adhesive dry before attempting to put any ribbon through the hole.
A SU! Consultant that I know had made these ornament tags for a sideline. I thought they were so beautiful and she shared how she had given them the two toned look. I already had the coordinating set of stamps and dies which is probably what drew my eye initially. I used Marina Mist and Pacific Point for my two tones. You simply use a sponge or sponge dauber (what I used) to go over the center section in a darker ink before you stamp it. This results in a beautiful color blend. The matching dies have the little ornament topper and I cut mine with some silver metallic paper scraps. I love this set and I had used it before on a previous post entitled, "Audrey Blue".

The ribbon I used for these is Lost Lagoon from Stampin' Up. The little jewels are Bitty Sparkles from Close To My Heart. To get the double layer on the ornaments, you have to fold your cardstock and cut through both layers with your die, making sure that the very top of the ornament is above the fold line so that it remains in one piece. You can't use heavy cardstock for this. Trust me on this because I tried! It will not go through your die cutting machine. I have several single thickness versions of this ornament because I stamped them on my Bazzill Marshmallow before I realized I couldn't cut the double thickness in my Cuttlebug. I figured I might as well make little ornaments out of them so I have them saved for another day.
The rest of the tags are pretty straight forward designs with heat embossing. I have lots of ribbon in my stash and it was nice to use some of it up again. I founded a scrapbooking, border set making swap group in 2004 or 2005 so, and I had lots of ribbon from back then. The group is no longer active, but we do stay in touch with each other as best we can considering were are all over the 4 corners of the United States. I definitely need to sit down and sort through all of the ribbon. I loaned it to somenone who just tore through it, so everything is all tangled up until I do that.
The burgundy/orange tags are made from Basic Grey Indian Summer Collection in "Russet" and stamped and heat embossed with a SU! Hostess set called "Nature's Wonders" that I got way back in 2002. I heat embossed them with Ranger Ultra Fine Detail Gold Embossing Powder. The "for you" sentiment came from the Clearly Besotted "Merci Beaucoup" Stamp Set. You could also use the one in the Winnie & Walter "The Big, the Bold and You" set if that's the one you happen to have. If you are coordinated, you could stamp the leafy image and the sentiment before you take the heat tool to it. I am not that coordianted and did all the leaves and then all the sentiments. *Ü* I inked up all the edges using a Cat's Eye "Chianti" colored ink pad.

The "Happy Birthday" tags were made from a SU! Designer series paper pack, but I have no idea which one. I was just happy to find this paper that had confetti looking dots all over it in my stash. The greeting came from a Close To My Heart Set called "Joyful Birthday Occasions". These edges were inked up with Tsukineko Delicata Golden Glitz Pigment Ink.

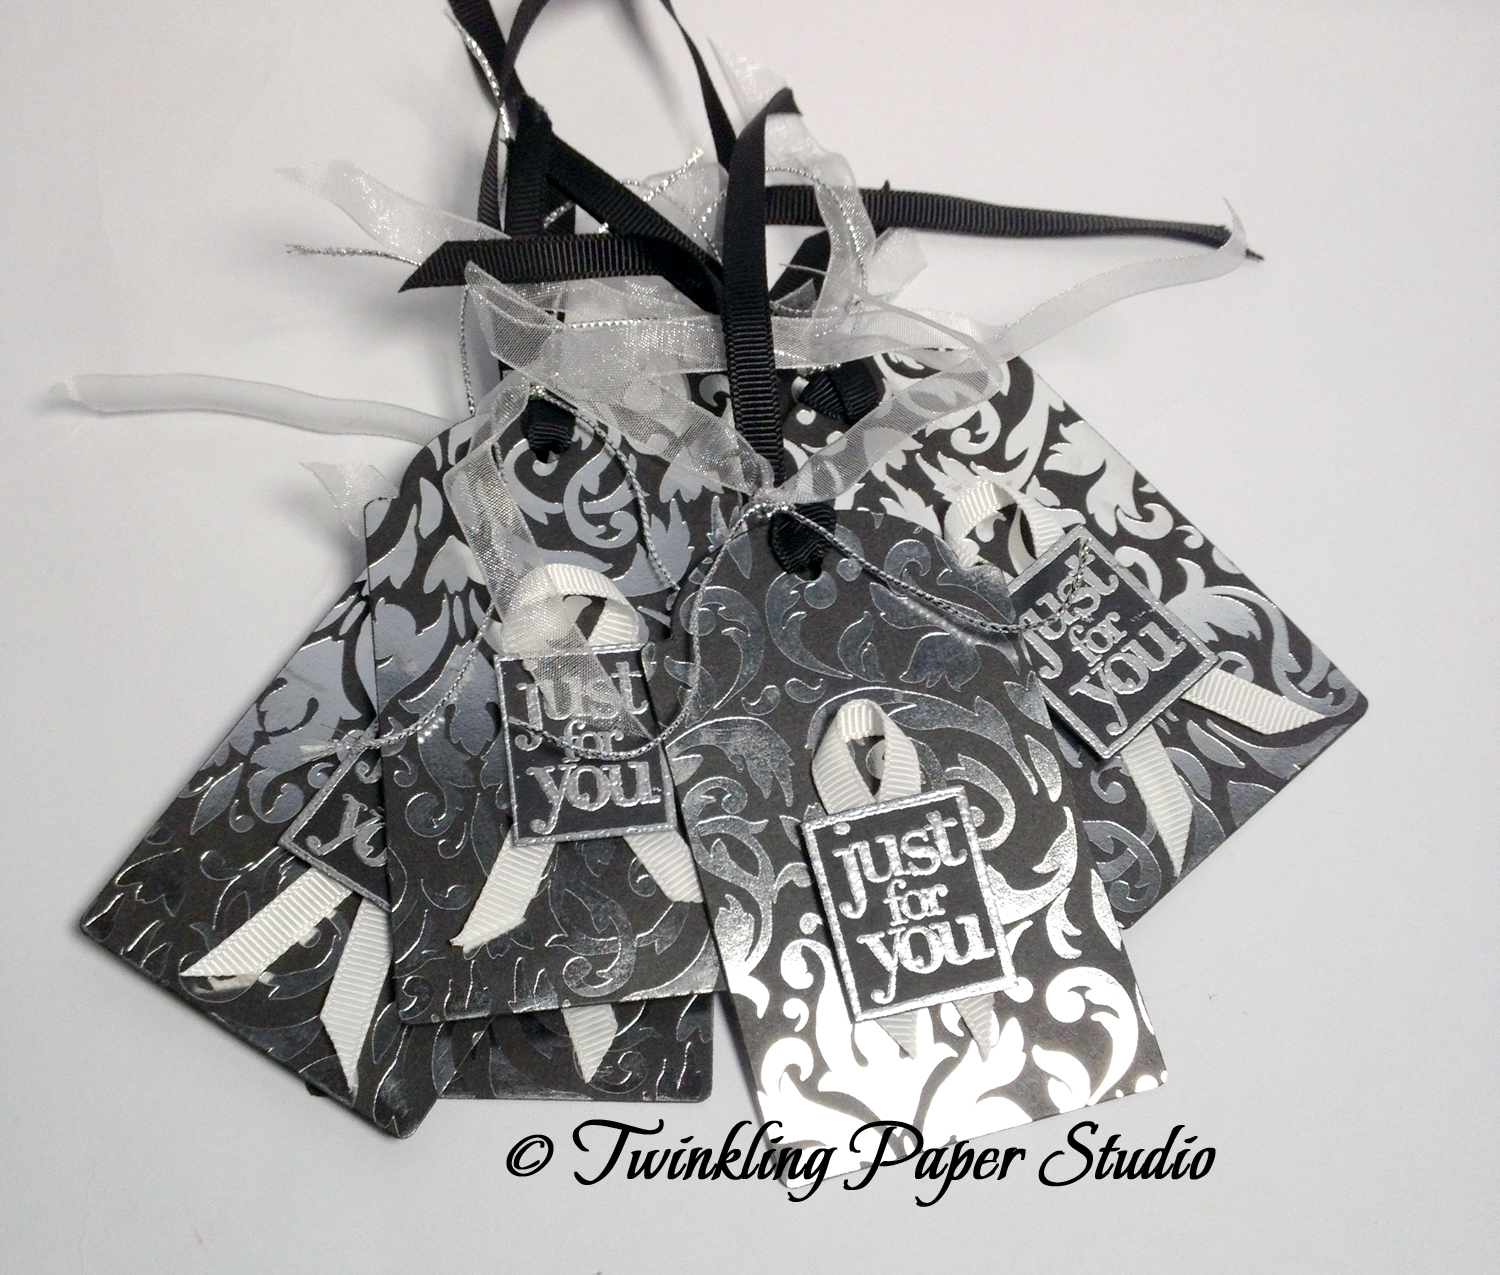
The previous two tags used Whisper White and Very Vanilla for the 2nd layers. For this next set, I used this silver and black metallic paper that I got at Hobby Lobby and used black cardstock for the 2nd layer. The black grosgrain and silver organza ribbon make for a very lush looking tag. The "just for you" sentiment came from an old Fiskars or Inkadinkado Stamp set. I used Judikins Fine Detail Silver Embossing Powder and I mounted the greeting with Foam Squares. I inked the edges using Versafine Black Onyx this time. The printed metallic paper has a white core that I didn't want to show. However, the metallic parts of the paper resist the ink so you have to wipe it all down with a tissue before it gets anything else inky during drying time.
This last tag used two coordinating American Crafts Papers that I had purchased at my LSS earlier this year. Sadly, they closed their store this past August. The back layer is a matching blue & white horizontal stripe. I used white and Lost Lagoon Ribbon for these tags with the silver cord.

I chose not to use eyelets in these tags. I had silver eyelets, but not gold in this size. I was careful to make sure I put adhesive around the holes when I was adhering them to each other and not to pull the ribbon tight enough to tear the paper tags. The stamp set is another SU! Hostess Set called "Hello There" that I got sometime in the past few years. It a cling mount set is the reason I know this. I'm definitely developing a preference for clear photo polymer stamps, but I'm still not that great at lining up multiple layering sets together. I used a scallop punch from Stampin Up to punch out these sentiments and adhered them with foam squares as well. I tried several different embossing powders for this group including white, pool party, clear glitter, sapphire blue and silver.
This post finishes up this 3 day project. I know that the sister-in-law who asked me to make these tags for her co-workers will be tickled when she finds out I made one of each for her also. She has a lot of appreciation for the handcrafted cards and tags I create. She told me yesterday that she thinks they are beautiful and she wants to share that. Gosh, that sure made my day!
I'll be linking this post up over on the Simon Says Stamp Wednesday Challenge Blog. Thanks so much for stopping by today. I hope you'll leave me a comment or ask any questions you might have. Have a great evening!
All of these are beautiful--but my favorite in this group is the black and silver combo!! What nice gifts those will be, and how nice for your sis-in-law to want to share your talent!
ReplyDeleteThe black and silver are Fayne's favorites and mine also.
DeleteWhat a gorgeous Christmas card, I love this festive design.
ReplyDeleteThanks for playing along with Simon Says Stamp Wednesday Challenge.
Hugs,
Caryn xxx