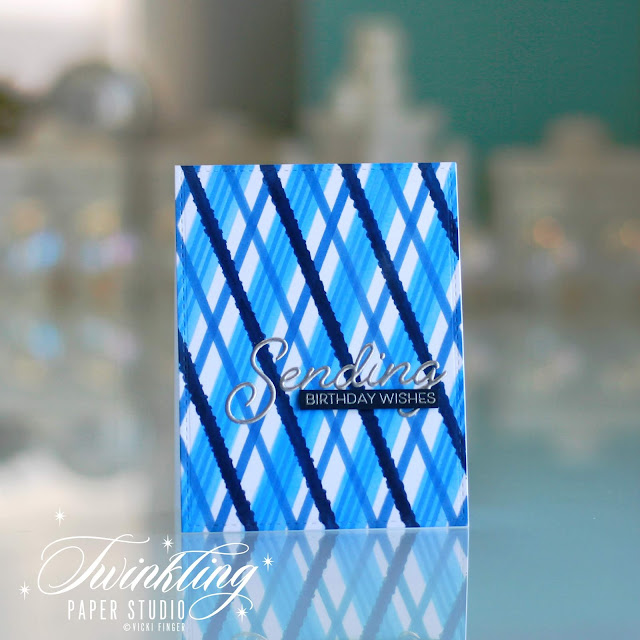
Hello everyone! I am back today with another project for my Altenew Educator Level II Certification Classes. This class was all about Magical Marker Techniques. I always love it when I find a new way to use products that I already have and this class showed lots of ways to use Alcohol Based Markers. My particular project was done using Alcohol Markers with Stencils to get a really bright and vivid background for my card. As always, there are a few birthdays coming up soon and I needed a masculine card in particular for this occasion. I need a feminine one as well, but I'll have to work on that another day.
For today's project, I started by using a 4.25 x 5.5 panel of Cougar Digital White Cardstock which is a #100 weight. It is super smooth and I love how bright the white is. I also like Xpress-It Blending card, but it is much thinner and I wasn't sure how well it would die cut for a background panel, so I stuck with the Cougar Digital White Cardstock.
I also pulled out my notebook that I keep all of my stencils in and had a look through to see what I could use with my markers to make a masculine background. I just slip them down inside a page protector with a label stating the manufacturer and how many stencils are in the particular set. In this case, I chose the Perfect Plaid Stencil Collection from Papertrey Ink.
I sat down with my drawer of blue markers and a scrap of cardstock to see which colors I would use and to make sure the tones all worked well together. I used B32 - Pale Blue for the widest stripe, B23 - Phthalo Blue for the skinny three striped line, B24 - Sky for the single middle width stripe and finally B39 - Prussian Blue for the darkest stripe. In some cases, I rotated the stencil 90 or 180 degrees to get the reverse look to create the plaid. I love how bold and bright this turned out and I think I will be getting more uses out of my stencils from now on. I enjoy using them, but I don't often reach for them automatically. I keep them in an easily accessible place so they are handy, but they aren't right at my fingertips like many of my other supplies are such as inks. I love the look though, so I know you'll be seeing more of them in the future.
Once my background was colored in with my markers, I let it dry completely before heat embossing the "Sending" sentiment directly onto the panel. I actually triple heat embossed this with silver embossing powder so that it would stand out more from the background. Using a strip of Dark Indigo Cardstock, I stamped the "Birthday Wishes" sentiment onto that using the same silver embossing powder and adhered it with a skinny strip of foam tape. This is a super clean and simple look (even with the busy background) and also very graphic which guys always seem to really love.
Isn't this just a fun and graphic look for a card and imagine all the possibilities with all the various markers available for this look. There are also multiple ways to rotate the stencils for a variety of different looks.
I hope you all have a great day and come back soon to see my next project. I'm getting adjusted to less daylight in the winter months and also the light in the sky is coming from different angles than it did over the summer so I have shorter windows for photographing my images. But, I'm working it out. I just really like to have as much natural light as possible and not use flash, so it's taking a little bit of adjustment. Mid-morning continues to be my favorite time with the best light.
Thanks so much for stopping by today! I hope you'll come back soon.


How handsome is this birthday card with your copic-marker background! Your DIY stripey design is so eye-catching and unique! I really like the silver-embossed sentiment in this! GREAT touch! Thanks so much for entering your beautiful work in Altenew AECP assignment Gallery. Beautiful colors and design. Well done!
ReplyDelete