Thursday, October 25, 2018

Keeping Christmas - Be Merry & Joy


It's time for the monthly Keeping Christmas Blog Hop that we hold on the 25th of each month, except in December.  We will be sharing Christmas Creations with tips and tricks on the 25th of each month. The idea behind this is to create a few Christmas Cards or tags each month so we don't have to panic to get all of our cards made for December 2018. Kelly Lunceford is our host as always.  We always share tips and tricks to help you get things done.  I've pretty much made 4 - 6 cards each time I sit down to do my card for this hop, so I have a hefty supply of Christmas Cards on hand for this coming Holiday Season.

Vicki Finger (You are Here)

For my main two projects today, I put a slightly different spin on a couple of cards for a few of the men in my life; a brother-in-law and a brother.  So I made a few Christmas cards with more of a masculine spin.  

I started by looking through my foiled card stock and also my patterned papers that had foil or metallic on them and choosing more masculine colors.  You know I'm a sucker for some foiled patterned paper and I picked up several different ones last year at Michael's during their Cyber Monday Sale.  Both of the papers I selected use backgrounds that are dark tones - Navy and Dark Grey.  Both happened to have Copper foil accents.  I had made a couple of these earlier in the week, but there was one thing I didn't really like about them and so I changed it up a bit for these two cards.  

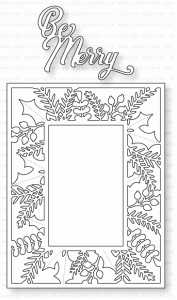
I die cut 2 of the Papertrey Ink Bold Borders: Yuletide from Copper Foil Cardstock.  Then I cut 2 panels from the Foil Patterned Papers at 4 1/8th by 5  3/8ths.  That way there aren't any edges sticking out but you can rest assured that your background fully fits behind your die cut without any gaps. Just using a simple pattern behind the die cut gives so much texture to a very simple card.  But on the ones I made previously, I used the same cardstock for the interior panel and I knew it would look better if the background was more of a solid behind the sentiment so I changed that part up on these cards.  

The interior of the grey card is cut from PTI Smokey Shadow Cardstock while the other is a more solid sheet from the same pack.  I used the scraps from the 6 x 6 patterned paper and some of the foiled cardstock to die cut the Festive Holly Leaves from Pretty Pink Posh from both so that I could have a few leaves to add to the card.  For quick and easy cards, using Cover Plate dies is super easy and requires no stamping.  As you see, you can still make a beautiful card with a more masculine vibe or even a more traditional one like this one I posted about 10 days ago in the Create Along With Us Challenge at Papertrey Ink.   I used Satin Red Sequins with gems in the center for the Holly Berries on this particular one.  


For the more masculine cards, I tried a couple of different things as far as the berries.  For the dark Navy and Copper card, I used Nuvo Drops in Copper Penny but mine are a strange consistency so for the Smokey Shadow and Copper, I used the dies that came with the Festive Holly Dies for the berries.  I didn't like the plain ones, so I added a tiny touch of Golden Sunset for the highlight on the berries.


I'm pretty selective about the cover plate dies that I buy because they are more expensive, but I still feel like Papertrey Ink has the best value for the dollar and this is a cover plate that I can use over and over again.  In fact, I also bought this month's Bold Borders: Flurries Die and I plan to make a few more cards with it when I receive it.  I love seeing all the different ways to use the Cover Dies during the Papertrey Challenges and I often see things that I might never have thought to try.  I'm trying to hold out for the new cover plate die until it arrives but I will probably be using that one for next month's Blog Hop.

Here's a few more I made in this same style.


I would have liked these better with a solid center panel, but they are still pretty cool with the text or pattern in the foil background panels.  I think I will reserve the ones with gems for friends who are female.     

If you aren't sure about using the Liquid Pearls or Crystal Drops, be sure to play with them on a piece of scrap paper first.  I like to put my bottle upside down and whack it on my table a couple of times to get the drops down to the tip.  Then make a circle as full as you want and then pull straight up.  It does take a little bit of practice, but once you get the hang of it, they are easy to do.  It's also a good idea to check the consistency of your drops before you try to put any on your card.  I feel like the copper penny ones I did first weren't any good so I scraped them off and tried manipulating my bottle a little bit to get a better mix.  You know how you are supposed to roll nail polish between your palms rather than shaking it?  Well, that's the technique I used to get a better consistency in my bottle.  It's like mine weren't mixed up well plus I had a clog in the tip, so better to practice a few first on scratch paper.  Experience always teaches us something. I'd rather not learn when actually putting them on my card though.  

Just to show you what other colors can do, here's a few more cards made using other alternative colors for cards:


The two light blue cards actually have subtle differences.  One uses Silver Shimmer Cardstock and the other uses grey but has silver foiled Holly Leaves and Sentiment.  The word "JOY" is from the October 2018 PTI Bold Borders: Flurries.  I LOVE that font!  For those cards I die cut two of the Bold Borders: Yultetide and rotated one of the 180 degrees.  This gives that layers effect.

Thank you so much for stopping by today.  I hope this gives you some ideas for a few fast but very elegant cards.  You can do all the die cutting and then sit and assemble while you watch (a.k.a. listen) to the TV, listen to music or an audiobook.  

We'll be back next month for the final projects of 2018 and we hope you'll join us again.  


Affiliate Links Used Whenever Possible
Cuttlebug Die Cutting Machine
Shop at:
SSS
Kokuyo Long Dot Runner Adhesive
Shop at:
SSS
Marvy Jewel Picker
Marvy Jewel Picker
Shop at:
SSS
PPP Festive Holly Die
Shop at:
SSS
PTI Bold Borders: Yuletide
Shop at:
PTI
PTI Scarlet Jewel Cardstock
Shop at:
PTI
Ranger Multi Medium Matte
Shop at:
SSS
Scor-Pal Scoring Board
Shop at:
SSS
Scrapbook Adhesives Thin 3D Foam Squares
Shop at:
SSS
Teflon Bone Folder
Teflon Bone Folder
Shop at:
SSS
Tim Holtz Tonic Paper Trimmer
Shop at:
SSS
Tonic 6 Inch Personal Trimmer
Shop at:
SSS
Tonic Nuvo Crystal Drops Metallic Copper Penny
Shop at:
SSS
Tonic Nuvo Glitter Drops Golden Sunset
Shop at:
SSS

Wednesday, October 24, 2018

Papertrey Ink Make It Monday #340

Hi all!  I'm here with a quick post for this week's Make It Monday #340, Banneriffic by Michelle Leone.  Here is Michelle's beautiful banner project.  


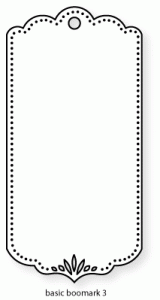
I took a somewhat different approach to create my banners because I don't have a banner die so I used PTI's Basic Bookmark #3 and then had to improvise a little for the tab portion.  

You know that I have a love for/weakness for foiled cardstock, most particularly in Gold and I bought several Mat Stacks last year on Cyber Monday at Michaels.  One in Gold and White, one in Silver & White and one in Rose Gold and White. They always have a few sheets of random patterns with Sayings or borders on them that are hard to use except in pieces.  I don't do actual paper scrapbooking anymore so I always challenge myself to try to find unique ways to use those sheets.

I started by cutting my paper vertically in 3 inch wide strips and then center the Basic Bookmark die and secure with some frog tape which is for delicate surfaces.  It's still pretty sticky, so I stick it to the palm of my hand first and then use it to hold my dies in place.  It's also less expensive than many alternatives.  I cut three more bookmarks from Stampers Select White so that each side had a clean front and back.  I glued them together and did my die cutting while those dried.  Once that was done, I took some of the scraps and mounted them to fun foam before adding that to the banner pieces.  It provided that little bit of extra dimension to pop up on the banners that you can see it in the photo below.


Next, I cut some Spellbinders Holly dies from plain Gold Foiled Cardstock, ran it through with an embossing sandwich to add the details and adhered them as embellishments to my banner pieces.  For the tab to run the cord through, I cut small stitched squares from the same gold foil and then scored and folded them in half.  I secured the back side to the banner piece with skinny Scor-Tape.  I ran the gold cord through and then folded the tab down using the same Scor-Tape.  I few jewels and sequins for the snowflakes and holly finished these off nicely.


I like these so much that I am hoping to get at least one more banner done with my scraps so my banner doesn't look quite as lonely as it does in the picture below.  I'd also really like to make one for my daughter's fireplace.  In case you don't know, the small little command hooks are great for this purpose and you can throw them away after Christmas without causing damage to your mantle or fireplace surround.


The Finger Family will be gathering at the Finger Farm for Christmas on Thanksgiving weekend in November, so I have been super busy making Christmas cards and hope to have little goody bags with a few cards in each for all of my Sister's-in-Law.  That is about a month away, so I still have to keep at it. They so enjoy this little tradition that I started a few years ago and even though I am not planning to attend this year, my husband will be going so I can send along the packages with him.

Check it out - I got 3 more pieces made today so my banner is a lot fuller.


The supplies I used are linked below (Affiliate Links Used) - Thank You for supporting my blog so that I can continue to bring you content.

Cuttlebug Die Cutting Machine
Shop at:
SSS
Kokuyo Long Dot Runner Adhesive
Shop at:
SSS
Marvy Jewel Picker
Marvy Jewel Picker
Shop at:
SSS
PTI Basic Bookmark #3
Shop at:
PTI
PTI Stamper's Select White Cardstock
Shop at:
PTI
Ranger Multi Medium Matte
Shop at:
SSS
Scor-Pal Scoring Board
Shop at:
SSS
Scor-Tape - 1/8th inch
Shop at:
PTI | SSS
Scrapbook Adhesives Thin 3D Foam Squares
Shop at:
SSS
Spellbinders Embossing Mat
Shop at:
SSS
Spellbinders Holly Jolly Dies
Shop at:
SSS
Teflon Bone Folder
Teflon Bone Folder
Shop at:
SSS
Tim Holtz Tonic Paper Trimmer
Shop at:
SSS

Sunday, October 21, 2018

Altenew Educator & A Tribute Post for Melissa Dawn Lane

Today's card has special significance for me.  I found out on Friday that Melissa Dawn Lane of Honey Bee Lane (not to be confused with Honey Bee Stamps) passed away unexpectedly on October 2nd, leaving her husband and four children to cope with the enormous loss.  Melissa was a part of the Stamplorations Design Team as well as being on other Challenge design teams in the industry.  She was kind and encouraging to everyone in the industry and outside of that as well.  Melissa loved Butterflies and often featured them in the cards she made.  Stamplorations has a tribute page here for Melissa where you can submit a project in her honor between now and October 31st.  The page will remain as a tribute to her, but the linky and the mailing address will be removed. 

I was a fan of Melissa's work because she frequently joined in the challenges at the Simon Says Stamp Blog where I join in as often as possible.  Her style was pretty clean and simple.  Melissa was also an avid photographer and you can see a lot of her photography on her Instagram accounts here:  https://www.instagram.com/honeybeelanecards/ and here for a peek into her home life: https://www.instagram.com/mainepromisedlandfarm/.

My post today is also for the Altenew Educator Certification Program, "Color Your Day" class.  For a few months, I have had these butterflies sitting on my desk in my "to use" group.  I can think of no better occasion than to make a beautiful card for Melissa's family.  I hope the butterflies that Melissa so loved will make them smile.

I stamped several of the butterflies from the SSS Beautiful Day Stamp Set in Versamark on a sheet of 5 x 7 Fabriano Artistico Extra White Hot Pressed Watercolor Paper and heat set them with Simon Says Stamp Antique Gold Embossing Powder.  I'm pretty sure this Fabriano paper is going to become a favorite for watercolor even though I didn't do any traditional watercoloring on it.  I chose to use an analogous color scheme but in this class, we learned about using a color wheel for Analogous, Complimentary and even Triad color schemes.  I have another family in color schemes that I call Duochrome.  "Duotone" is a type of photographic image that was very popular in the days before color film was so easily accessible by photographers of all levels. It includes black and white and sepia toned prints.  In cardmaking, I like to use this technique with a metallic and 1 additional color.  I have an example of this technique coming up on the 25th of this month.

I used Daniel Smith Watercolors but I wanted a very pigmented color so there's not much water mixed in with it.  For the Purple color, I mixed Quinacridone Purple with Quinacridone Pink.  For the turquoise color, I mixed Ultramarine Turquoise with Phthalo Blue.  I used two shades for the Leaves, Deep Sap Green and the same color mixed with a bit of Aureolin for the lighter green shade.

Since my husband is only home on the weekends, I spend a lot of my weekend time with him and once I finished coloring in the butterflies, I let the images dry overnight and then hit them with a bit of shimmer mist this morning.


I had a background that I had made during the AECP "Irresistible Inking Techniques" class that I wanted to use for the background so I die cut that panel and made a card base from Aqua Mist Cardstock.  I used a brayer with a watered down solution of ink to make the background.  I've linked that blog post for you. I like that it's a nice soft color with a very subtle texture.  For Easy Mailing, I kept the card fairly flat but I did use some thin foam tape under the butterflies to make them pop a little bit and added a bit of bling.


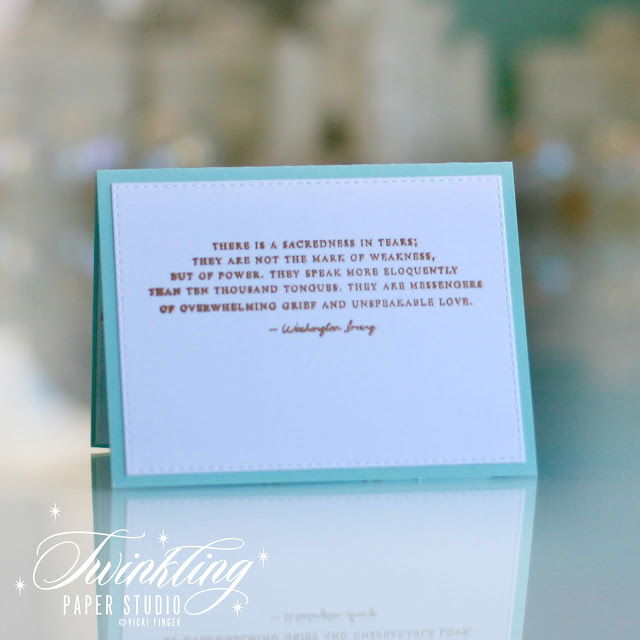
For the inside sentiment, I chose one from the "Wings of Hope" set that Tasnim and I collaborated on for Altenew.  It's a quote from Washington Irving and one I found myself recalling often after my brother's murder in 2014.  The year 2014 was a terrible year of loss for me personally.  There were several deaths of close friend's family members, a family member of my own, and I know that Melissa's family will have moments where they will struggle to hold back the tears.  I want to let them know that it's okay to cry.  It happens less often as the years pass, but sometimes there are still things that will bring them bubbling to the surface.

I hope you all were privileged enough to know Melissa through her paper crafting and card making.  Melissa, you will be missed!  I'm not including a link supply list for this post as I feel it would be in very poor taste, but I've named the products I used and you can find them easily if you'd like to.

I am sending lots of love and hugs to Melissa's family and friends at this tough time in their lives.  If you'd like to send a card to Melissa's family, you can send them to Shery Russ of Stamplorations at the address linked at the Stamplorations Blog before October 31st.  After that time, the address will be removed. 

Please add a butterfly stamp or die to the envelope so Shery will know it's for Melissa's family and she will send them on.

Wednesday, October 17, 2018

Papertrey Ink October 2018 Create Along With Us

Hello everyone!  I am getting to spend a lot of time in the studio this week so I have a card for this month's Create Along With Us as Papertrey Ink.  We're supposed to use something that inspired us as the starting place for our project.  In my case, Everything inspired me so I decided to make a few Christmas cards using a method that I haven't used in a while.

When I first started making cards, I was not a very good stamper and so I made cards using mostly die cuts with card stock.  Along came the Misti and now I'm a pretty great stamper but sometimes I just don't want to do any stamping.  Half the purpose of great dies is being able to make quick cards in a short amount of time and so I used a method I like to call Double Metallics.

For my project for today, I wanted to use the beautiful Bold Borders: Yuletide Cover Die designed by Lizzie Jones and just let it take me wherever I wanted to go.  As often happens, I had gold foiled cardstock on my table where my die cutting machine sits.  I also have a selection of other metallic cardstock and foiled prints in my supplies.  I am a "metallic" lover.  This never rang truer than when I was selecting colors for our new house.  The colors that I chose seem to all have something metallic in the name; Samovar Silver, Stainless, Pewter, Platinum, Brushed Nickel and so on.  The only thing that was a normal color name is all our white trim.  I'm pretty sure this reverts back to my days of working in a jewelry store.  I like all metals and if you pop a little color in there, well that is just the icing on the cake for me.

I pulled a sheet of Gold Foiled Cardstock, die cut it with the die and pulled a foiled print that I like with only a few pieces left and looked at them together.  You know that I have foiled cardstock in my stash because I'm just a shiny, sparkly, blingy kind of girl that way!  I liked it, but I knew I would have to tie all the elements together for it to work.


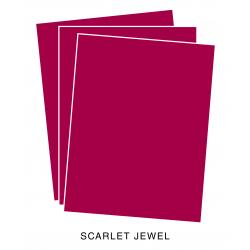
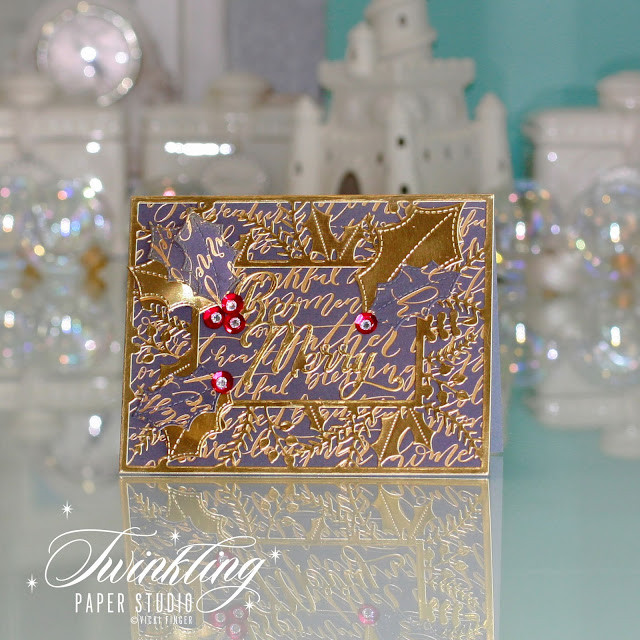
I created a card base from Scarlet Jewel Cardstock.  I also die cut the center rectangle from Scarlet Jewel to inlay for the center panel.  I cut a piece of the foiled paper just slightly smaller than the die to 4 1/8th  by 5 3/8ths. It works best when you are adhering the gold foiled piece if it is not quite as large then You don't have to worry about any wonky edges popping out where you don't want them. I also used some of the gold foiled cardstock to die cut some Holly Leaves from Pretty Pink Posh to match the stitched leaves in Lizzie's design.  I actually made two similar cards but the other one has Holly leaves die cut from the patterned paper instead of the gold.  I love both of them. For the Holly Berries, I used Red Satin Finished Sequins with a jewel in the center of them.  Honestly, that bit takes the longest in putting the cards together.  You have to pick up each little sequin and each little jewel and glue them together and it can get tedious but I love the end result, so I think it is worth the time it takes.

There will be lots of beautiful projects along the hop, so I hope you'll stop by to see everyone's projects and leave them a little love in the form of a comment.

Affiliate Links Used Whenever Possible

Cuttlebug Die Cutting Machine
Shop at:
SSS
Kokuyo Long Dot Runner Adhesive
Shop at:
SSS
Marvy Jewel Picker
Marvy Jewel Picker
Shop at:
SSS
PPP Festive Holly Die
Shop at:
SSS
PTI Bold Borders: Yuletide
Shop at:
PTI
PTI Scarlet Jewel Cardstock
Shop at:
PTI
Ranger Multi Medium Matte
Shop at:
SSS
Teflon Bone Folder
Teflon Bone Folder
Shop at:
SSS
Tim Holtz Tonic Paper Trimmer
Shop at:
SSS
Tonic 6 Inch Personal Trimmer
Shop at:
SSS