Thursday, January 25, 2018

Papertrey Ink January 2018 Blog Hop

Hello!  It's the 25th of the month which means it's time for the January 2018 Papertrey Ink Blog Hop.  I'm actually doing two blog hops on the 25th of every month now which is why this is my second post of the day!  Keep scrolling down to get to the previous Keeping Christmas Blog Hop post.

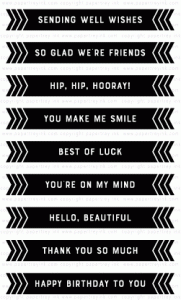
Today's Blog Hop inspiration picture made me think "birthday" so that is the direction I took for my card.  I also tried to use a rainbow of bright colors like in the photo.  Because I wanted to use so many colors, I decided right off that I was going to use Direct Messages, a set designed by Lizzie Jones.

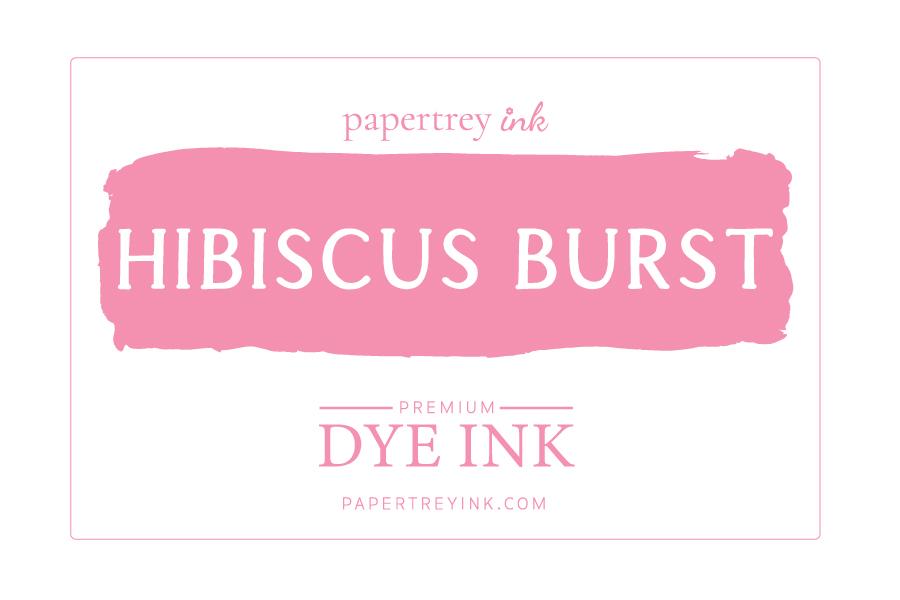
To begin, I selected 7 colors of ink to stamp with that would be similar in depth and value, so sort of mid-tones.  Not the darkest or the lightest.  I did actually stamped a lighter pink to begin with but you couldn't read it so I switched to this brighter version.  In order, the colors I selected are Hibiscus Burst, Berry Sorbet, Pure Poppy, Vintage Jadeite, Hawaiian Shores, Blueberry Sky and Amethyst Allure. Once I selected my ink colors, I looked through my patterned papers to see what I might have that coordinated with so many colors.  My first instinct was to use a stripe from the Aqua Mist Bitty Big pack, but as I was getting that out, I noticed the paper pack that came from my Make It Market Shakers & Sprinkles Kit and noticed a perfect paper in there for creating my card.

I stamped out the Happy Birthday Message in each color and then die cut them with the coordinating Direct Messages Die and die cut my front panel with a stitched rectangle die.  I cut some Scotch 3D Foam Tape into narrow strips (I cut 3 from each length of foam tape) and adhered that to the back of the die cut messages.  I applied my front panel to a top folding card base made from Stamper's Select White Cardstock and placed that on the card front using Kokuyo Dot Runner and then misted that panel with shimmer spritz before I added the "Celebrate" die cut from the Birthday Cheer Dies.


That is it from me today.  Once I actually formulated my idea, this card came together very quickly!  I usually agonize over my blog hop project, but considering that I didn't even know what I was going to do when I got up this morning, it was fast!! I've linked the supplies I used below for your convenience (affiliate links may be used).  Be sure to stop over and check out all the projects at the Papertrey Blog.

Kokuyo Long Dot Runner Adhesive
Shop at:
SSS
PTI - Direct Messages Stamp Set
Shop at:
PTI
PTI Birthday Cheer Die Set
Shop at:
PTI
PTI Perfect Match Amethyst Allure Ink
Shop at:
PTI
PTI Perfect Match Berry Sorbet Ink
Shop at:
PTI
PTI Perfect Match Blueberry Sky Ink
Shop at:
PTI
PTI Perfect Match Hawaiian Shores
Shop at:
PTI
PTI Perfect Match Hibiscus Burst Ink
Shop at:
PTI
PTI Perfect Match Pure Poppy Ink
Shop at:
PTI
PTI Perfect Match Vintage Jadeite Ink
Shop at:
PTI
PTI Stamper's Select White Cardstock
Shop at:
PTI
Scotch 3M Foam Tape
Scotch 3M Foam Tape
Shop at:
SSS
Sheer Sparkle Shimmer Spritz
Shop at:
SSS
Teflon Bone Folder
Teflon Bone Folder
Shop at:
SSS

Keeping Christmas

Happy New Year!! A New Year is sometimes about making promises and commitments to yourself to make changes. This first Keeping Christmas Blog Hop is in honor of that. I am honored to join all of my team members from "The Challenge" as we move to this new format of a monthly inspirational blog hop called "Keeping Christmas" which is the brainchild of Kelly Lunceford and Lesley Croghan! We will be sharing Christmas creations with tips and tricks on the 25th of each month.  The idea behind this is to create a few Christmas Cards each month so we don't have to panic to get all of our cards made for December 2018.  Kelly Lunceford will be hosting this monthly hop.
Vicki Finger (You are Here)

For the cards I created today, I started with a 4.25 x 5.5 inch panel of Gina K Designs Layering Weight White Cardstock and my MISTI Stamping Tool. You could use any kind of stamp positioning tool that you might have. Because I wanted to create Multiples, I did 4 but I could have done 8 or 12 just as easily with a pretty minimal addition of time.  I wanted to use the Altenew Majestic Mistletoe Stamp Set so I grabbed the first layer.  This particular set builds an image rather than layering the same image with coordinating colors to add depth.  For the cards I made here, I used 4 layers and the layering guide included in the packaging.  For the first layer, I used Papertrey's New Leaf Ink to quickly stamp the four panels.  Next I used Gina K Fresh Asparagus Ink for the second layer and Papertrey Pinefeather Ink for the 3rd layer of the greenery.  For the berry layer, I knew I wanted to use some Nuvo Drops to get that added dimension of the berries, but I wanted to make sure I got them in just the right places so I stamped the berries using Papertrey's Soft Stone Ink (a very light grey shade) just to use as a guideline for placing the Nuvo Drops. There is a 5th layer that stamps the little stem on the berries, but I planned to use Nuvo Drops for that bit of dimension as well.

Once the greenery was stamped, I treated all of the panels with my powder tool to get ready for the heat embossing. Using Versamark Ink, I stamped my sentiment and heat embossed it with Simon Says Stamp Antique Gold Embossing Powder.  Once I completed that, I die cut each panel with the largest Simon Says Stamp Stitched Rectangle Die. It's important to die cut the panel before you add any Nuvo Drops because they will flatten when going through your die cutting machine. (Yes, I can tell you this from personal experience.) Then using the largest die from WPLUS9's Gift Card Layers Dies I cut four panels of Gina K Designs Metallic Gold Cardstock. This is a thick, heavyweight cardstock that is metallic but not shiny like foil or mirror cardstock is and is a pretty perfect match to Simon's Antique Gold Embossing Powder. I adhered the front panels to the background panels using Kokuyo Dot Runner Adhesive.

Next I created 4 horizontal card bases from Gina K Designs Heavy Base Weight White Cardstock. This is the silkiest most luxurious card stock that I've ever used and I have tried a lot of them. I adhered the card fronts to the card bases and then applied Nuvo Crystal Drops in Ivory Seashell in all the little areas indicated by the Soft Stone Ink.

I set those aside to dry for a few hours and then went back and added a tiny little touch for the stems using Nuvo Glitter Drops in Golden Sunset.  Be sure to let your cards sit overnight before putting them with envelopes or popping them into the mail to ensure that the drops are completely dry so they will stay dimensional.


The supplies I've used are linked below for your convenience (Affiliate Links may be used). 

Altenew Majestic Mistletoe Stamp Set
Shop at:
SSS | ALT
Cuttlebug
Cuttlebug
Shop at:
SSS
GKD Fresh Asparagus Ink
Shop at:
SSS | GKD
GKD Gold Metallic Cardstock
Shop at:
GKD
GKD Heavy Base Weight White Cardstock
Shop at:
GKD
GKD Layering Weight White Cardstock
Shop at:
GKD
Kokuyo Long Dot Runner Adhesive
Shop at:
SSS
MISTI Stamping Tool
MISTI Stamping Tool
Shop at:
SSS | GKD
Nuvo Crystal Drops Ivory Seashell
Shop at:
SSS
Nuvo Glitter Drops Golden Sunset
Shop at:
SSS
PTI Perfect Match New Leaf Ink
Shop at:
PTI
PTI Perfect Match Pinefeather Ink
Shop at:
PTI
SSS Stitched Rectangles Dies
Shop at:
SSS
Teflon Bone Folder
Teflon Bone Folder
Shop at:
SSS
Versamark Ink
Versamark Ink
Shop at:
PTI | SSS
Wagner Heat Tool
Wagner Heat Tool
Shop at:
SSS
WPLUS9 Gift Card Layers Designer Dies
Shop at:
SSS

Wednesday, January 24, 2018

Case This Sketch #255!

I have a quick card today for this week's Case This Sketch Challenge #255. Actually, I have three, but only one follows the sketch so I will start with that one. *Ü* Anytime I get a new layering stamp set, it's good to sit down and stamp several to get the hang of how it lines up and have a bit of practice. There will pretty much always be a few duds so this way, I get them out of the way first thing before I mess something up that is actually on a card front.  I'm pretty sure this is why I nearly always use a card panel to work on rather than a whole card base that might get messed up.  To make things easy for myself, I keep a stash of cards bases and card panels pre-cut so I can just grab a few and go. I take my cardstock to Fed Ex/Kinko's and have them cut.  They can slice through a whole stack and this saves me a ton of time.  For these cards, I did something a bit different so I wanted to share it with you what I did.

Craftsmith Dark Floral
I was sitting on the floor of my studio yesterday, looking through a collection of papers that I have called "Dark Floral" by Craftsmith.  This is one of those Hot Buys that I got at Michaels on Cyber Monday for $5.99.  Every time I glanced at the stamp set sitting on my desk, I thought of those papers so I decided to grab them and see if I could stamp some elements in colors that coordinated. That's why I was sitting on my floor.  Most of my paper is in crates that come up waist high, but I have about 6 or 7 of these collections that wouldn't fit, so I have them in a container on the floor where I keep my Stampin' Up Cardstock.  The thing about these papers is that they are meant for scrapbooking rather than card making, but if I really like something, I will find a way to make it work.  Some of the designs in these packs really aren't the right scale for card making, but they are so nice that I wanted to be able to use them somehow and I don't really scrapbook anymore. I decided to piece them together strategically to get what I wanted.  I've done this one other time to really give a unique twist to something I was working on and you can see that post here. Some of the designs go completely across a page and others are divided into half sheet sizes while yet others are done in 6 by 4 rectangles.  Nothing is sized for card making the way I do it since the cards I make are A2 sized. The colors in these papers are too pretty not to use and some of the elements (a.k.a. the gold foil) are right up my alley.

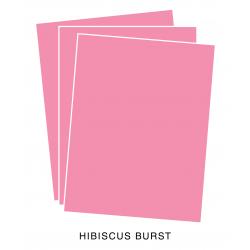
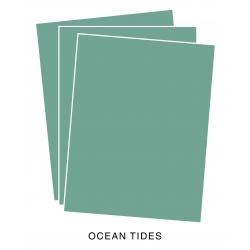
I love the rich tones and I wanted to stamp in matching colors so I die cut several elements from white cardstock and started practicing using the Rose Builder Stamp and Die Set from WPLUS9 Designs. I also cut some of the blooms from Hibiscus Burst Cardstock and leaves from Ocean Tides Cardstock.  I just love these roses and Dawn designed them with that hand drawn look that I love.  For this first card I mirrored the sketch.  I used the Honey Bee Large Thanks Die cut with Gold foiled cardstock, then matted it with black cardstock so it would show up against the stripes on the background.  To give it a bit more dimension, I cut skinny little strips of black fun foam, added 1/8th inch score tape to the back of it behind the letters and glued that to my card base with Ranger Multi Medium Matte. The black fun foam I have is extra thick, so it really popped that sentiment up and I will need to use a padded envelope for mailing.


I started by stamping all of the white roses first; the base layer in Lovely Lady, the next layer with Hibiscus Burst, the third layer in Autumn Rose and the final detail layer is Scarlet Jewel, all Papertrey Inks. For the Hibiscus Burst roses, I skipped the first layer of ink and stamped the 2nd, 3rd and 4th layers in the same ink colors. I couldn't decide if I wanted the white border or no white border so I did some both ways and I actually used all of the ones I stamped to create a total of four cards. I wanted something eye catching and memorable for a special thank you card I needed to send and when I got to the point of assembling the cards, I didn't want to have to stop and stamp more roses or leaves. The leaves are super easy. I stamped the white leaf die cuts with Stormy Sea Ink and the detail layer in Ocean Tides. For the leaves that were cut from Ocean Tides Cardstock, I stamped the base layer in Ocean Tides for that tone on tone look and the detail layer in Smokey Shadow, again all Papertrey Inks.  Using grey inks is a great way to add in some detail if you don't have the right color.  Since I was trying to match the cardstock, I didn't use the traditional greens that I normally would.


Once I had everything stamped, I started piecing my backgrounds together.  I took a strip from one section and paired it with a strip from another to get a panel slightly larger than the size of an A2 card so that I could die cut it to have those crisp edges. This let me have several different but similar backgrounds for my cards.  I had enough roses to make 4 cards and I have enough left to make at least one more. 


Even though this is the simplest card, I think it is my favorite of the group.  I had to do some really creative piecing to get just the word beautiful on the card but it came out perfectly.

The basic supplies I've used are linked below for your convenience (affiliate links may be used). 


Cuttlebug
Cuttlebug
Shop at:
SSS
Hero Arts Hello Stamp & Cut
Shop at:
SSS
Honey Bee Stamps Large Thanks Die
Shop at:
SSS
Kokuyo Long Dot Runner Adhesive
Shop at:
SSS
PTI Hibiscus Burst Cardstock
Shop at:
PTI
PTI Ocean Tides Cardstock
Shop at:
PTI
PTI Perfect Match Autumn Rose Ink
Shop at:
PTI
PTI Perfect Match Hibiscus Burst Ink
Shop at:
PTI
PTI Perfect Match Lovely Lady Ink
Shop at:
PTI
PTI Perfect Match Ocean Tides Ink
Shop at:
PTI
PTI Perfect Match Scarlet Jewel Ink
Shop at:
PTI
PTI Perfect Match Smokey Shadow Ink
Shop at:
PTI
PTI Perfect Match Stormy Sea Ink
Shop at:
PTI
PTI Stamper's Select White Cardstock
Shop at:
PTI
PTI True Black Cardstock
Shop at:
PTI
Ranger Multi Medium Matte
Shop at:
SSS
Teflon Bone Folder
Teflon Bone Folder
Shop at:
SSS
Tonic 6 Inch Personal Trimmer
Shop at:
SSS
WPLUS9 Rose Builder Coordinating Stamp & Die Set
Shop at:
SSS
WPLUS9 Rose Builder Dies
Shop at:
SSS
WPLUS9 Rose Builder Stamp Set
Shop at:
SSS