Today's project is for the Easy Ink Blending Techniques Class which is part of my Altenew Educator Certification Program. I love Ink Blending and I did a couple of layers of that with some stamping and paint splatter for today's card.
I actually made a card for this class already, but I felt the need to give it to someone right away and then remembered that I hadn't photographed it yet. So it's a good thing I had some roses and leaves already stamped to pull a new project together. This project uses the Build-A-Flower Rose Bundle. On the previous one I made, it was hard to see the ink blending, so it worked out okay to make a new one. For the blue roses, I used Ocean Waves, Aqualicious, Teal Cave, Galactic Stream, Dusk and Desert Night in that order for the blue blooms.
I started today's project by ink blending on a piece of Canson Bristol Cardstock. I like to use this because it is very easy to blend on and also because I like to add shimmer mist to everything, so it can take the water better than regular cardstock does. I started every so gently in the center of the panel and worked my way out in a circular motion. Next I blended Aqualicious in just the outside circular area to give a little more depth. I always feel that ink blending adds another layer of depth to the card without actually adding another actual layer making it more expensive to mail, so love it. I work on a large glass mat that is 24 x 18 so I have plenty of area to work in without getting ink everywhere. When you start in the center, it really isn't an issue but if I was going all the way to the edge, I would have a piece of printer paper underneath.
In the class, Amy Lee did a technique where she did emboss resist and then added in some splatter and I like this look so I want to incorporate a bit of that into my piece. I used Ocean Waves Re-Inker for the first layer of splatter. Then I wanted to add a really bold color so I used Desert Night Re-Inker. I just put one tiny drop of color onto an acrylic block, dip a long bristled brush into a bit of water and essentially remove all of the excess on the side of the water container, and that makes it fluid enough to create the spatter by tapping on the brush handle. I used a Silver White Paintbrush is Size 4 for this. Once I had the two colors of blue splatter, I heat set it and then mixed a bit of pearl white paint in a pretty thick mixture so that it would be a little more dimensional. I heat set that and then die cut the front panel with a stitched rectangle die. Of course, I added a layer of Shimmer Mist to the panel.
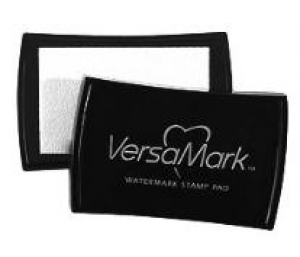
I heat set that layer as well before I added a sentiment from the same stamp set using Versamark with Antique Gold Embossing Powder.
Because I have been wanting to try Distress Micro Glaze, I put a layer of that on top of everything which makes it waterproof. I don't feel it was nearly as effective as it is with Distress Oxide Inks, but you don't know if you don't try so I figured it wouldn't hurt anything to try it and I was right. It didn't really add anything in this case either so it was a "no harm, no foul".
After putting together my floral arrangement, I wanted to add some bling so I added a few small pearls with a few sequins. The pearls are very hard to see but if you look for them near the sequins, you'll find them. I have another project in mind using an ink blending technique that I love but haven't done for a while so I am hoping to find time to do that as I finish each of my classes.
Thank you so much for stopping by today. I always appreciate it when you and especially when you take time to comment!
 Altenew Antique Gold Crisp Embossing Powder Shop at: ALT |
 Altenew Build-A-Flower Rose Shop at: ALT |
 Altenew Crisp Ink Cool Summer Nights Collection Shop at: ALT |
 Altenew Crisp Ink Sweet Dreams Collection Shop at: ALT |
 Canson Bristol Paper Shop at: SSS |
 Carta Bella Spring Market Paper Pad Shop at: SSS |
 Cuttlebug Die Cutting Machine Shop at: SSS |
 Kokuyo Long Dot Runner Adhesive Shop at: SSS |
 Mini MISTI Stamping Tool Shop at: SSS | ALT | GKD |
 Scotch 3M Foam Tape Shop at: SSS |
 Teflon Bone Folder Shop at: SSS |
 Tim Holtz Distress Micro Glaze Shop at: SSS |
 Tim Holtz Mini Round Ink Blending Tool Shop at: SSS |
 Tsukineko Sheer Sparkle Shimmer Spritz Shop at: SSS |
 Versamark Ink Shop at: SSS |
 Wagner Heat Tool Shop at: SSS |
 WPLUS9 Gift Card Layers Designer Dies Shop at: SSS |


This card is very elegant! Love the look of the ink splatters with the ink blending (I often see one or the other, not both). Very nice design!
ReplyDeleteVicki, this card is just so amazing! LOVE the color combos you used. Thank you for submitting to the AECP gallery!
ReplyDelete